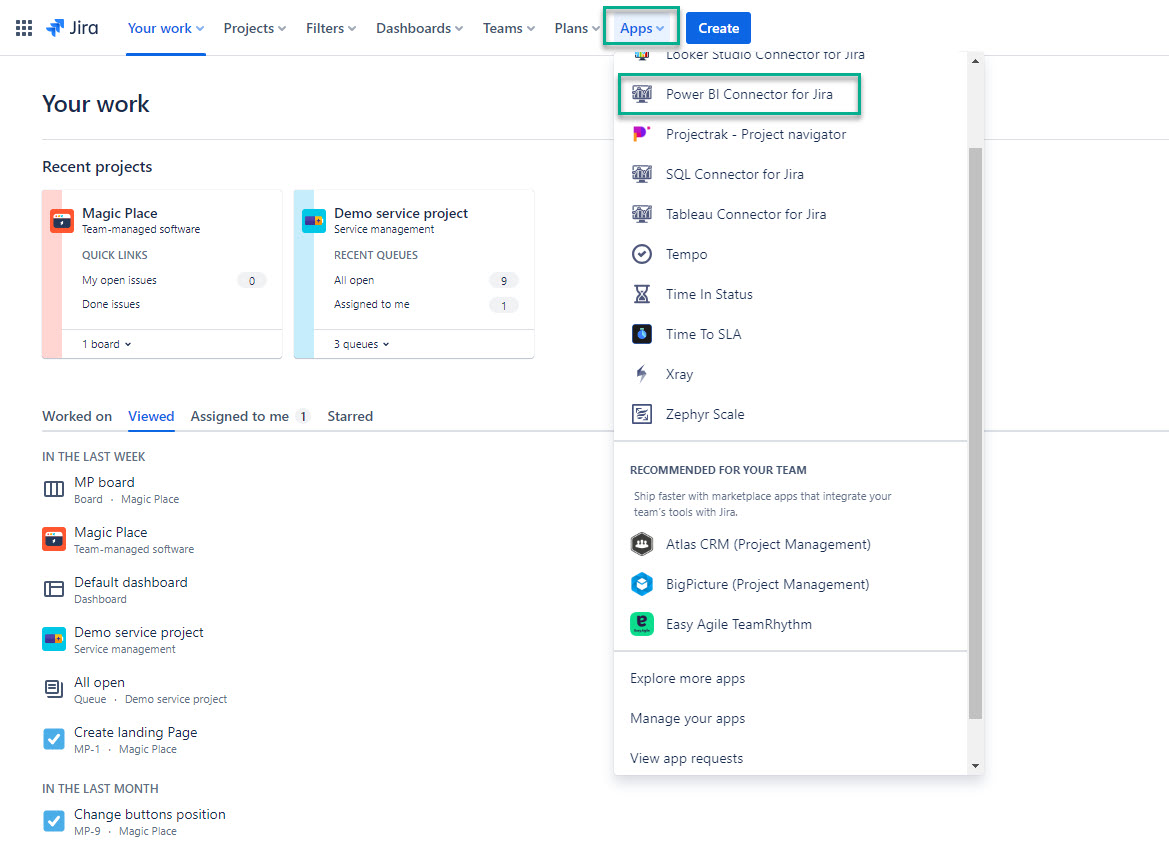
Being signed in to your Jira Cloud instance, select Apps, and then select Power BI Connector for Jira
.
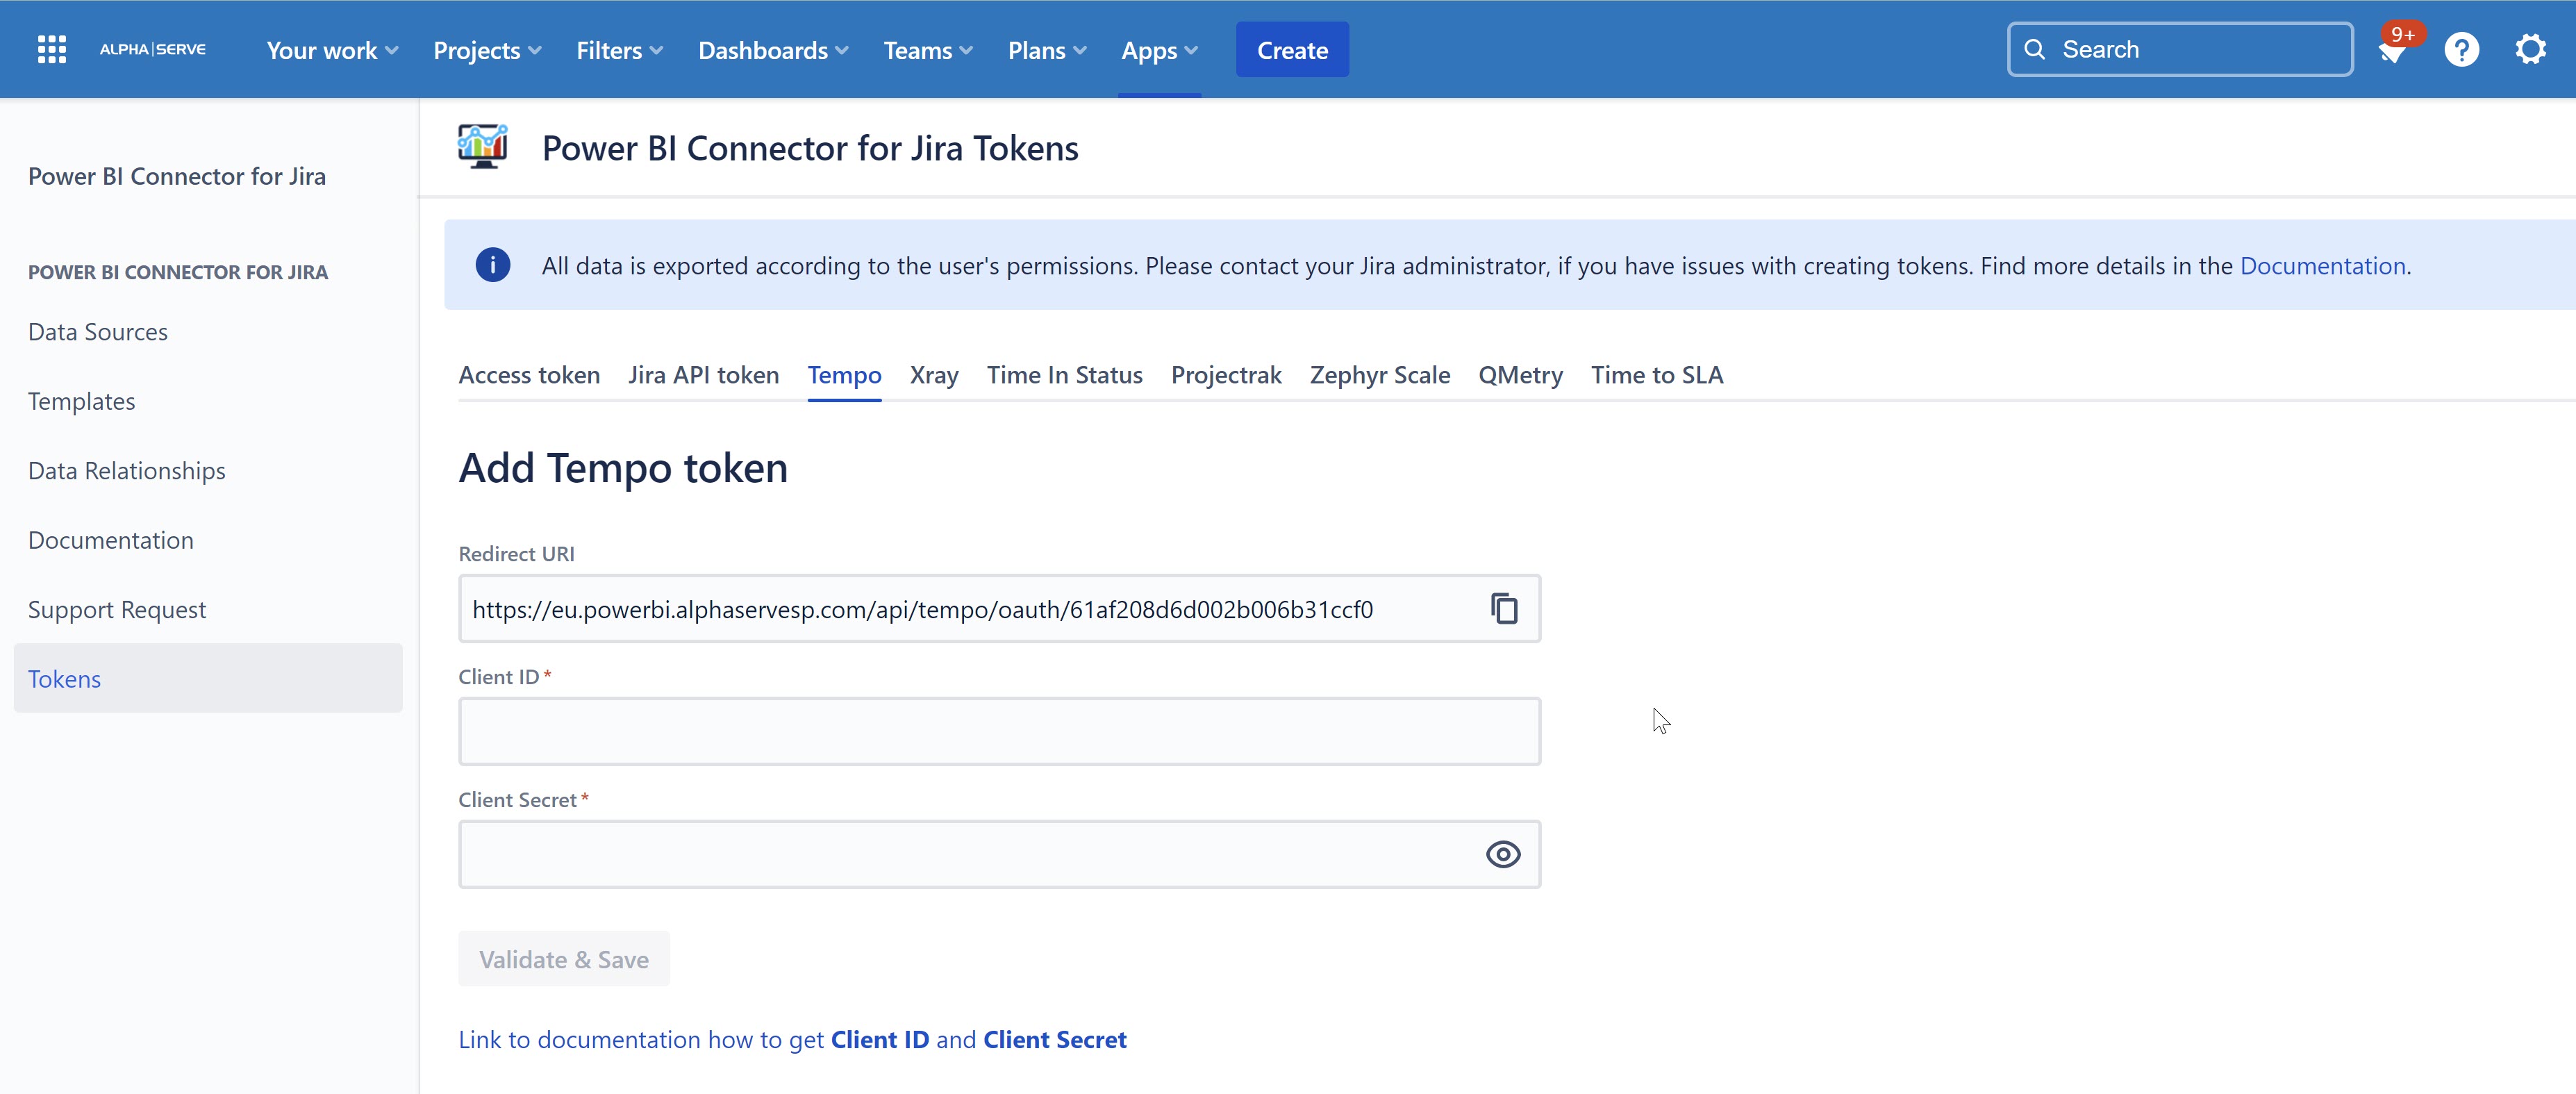
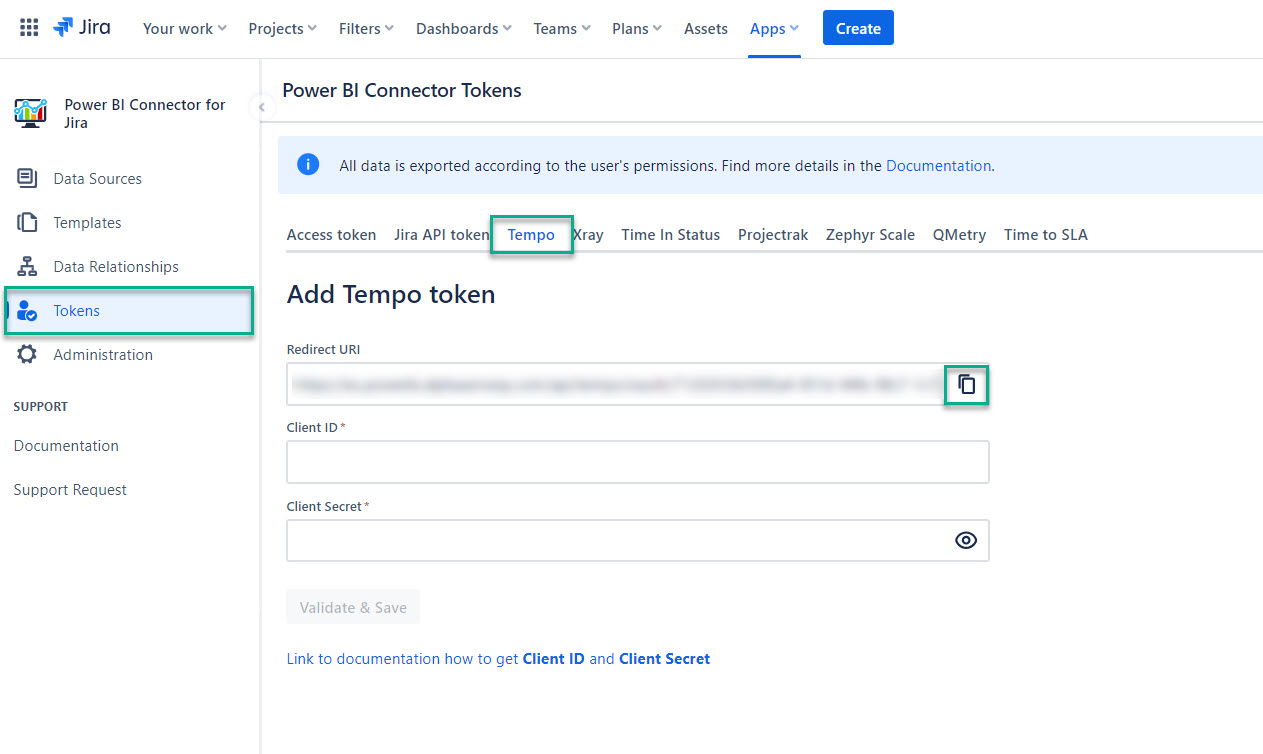
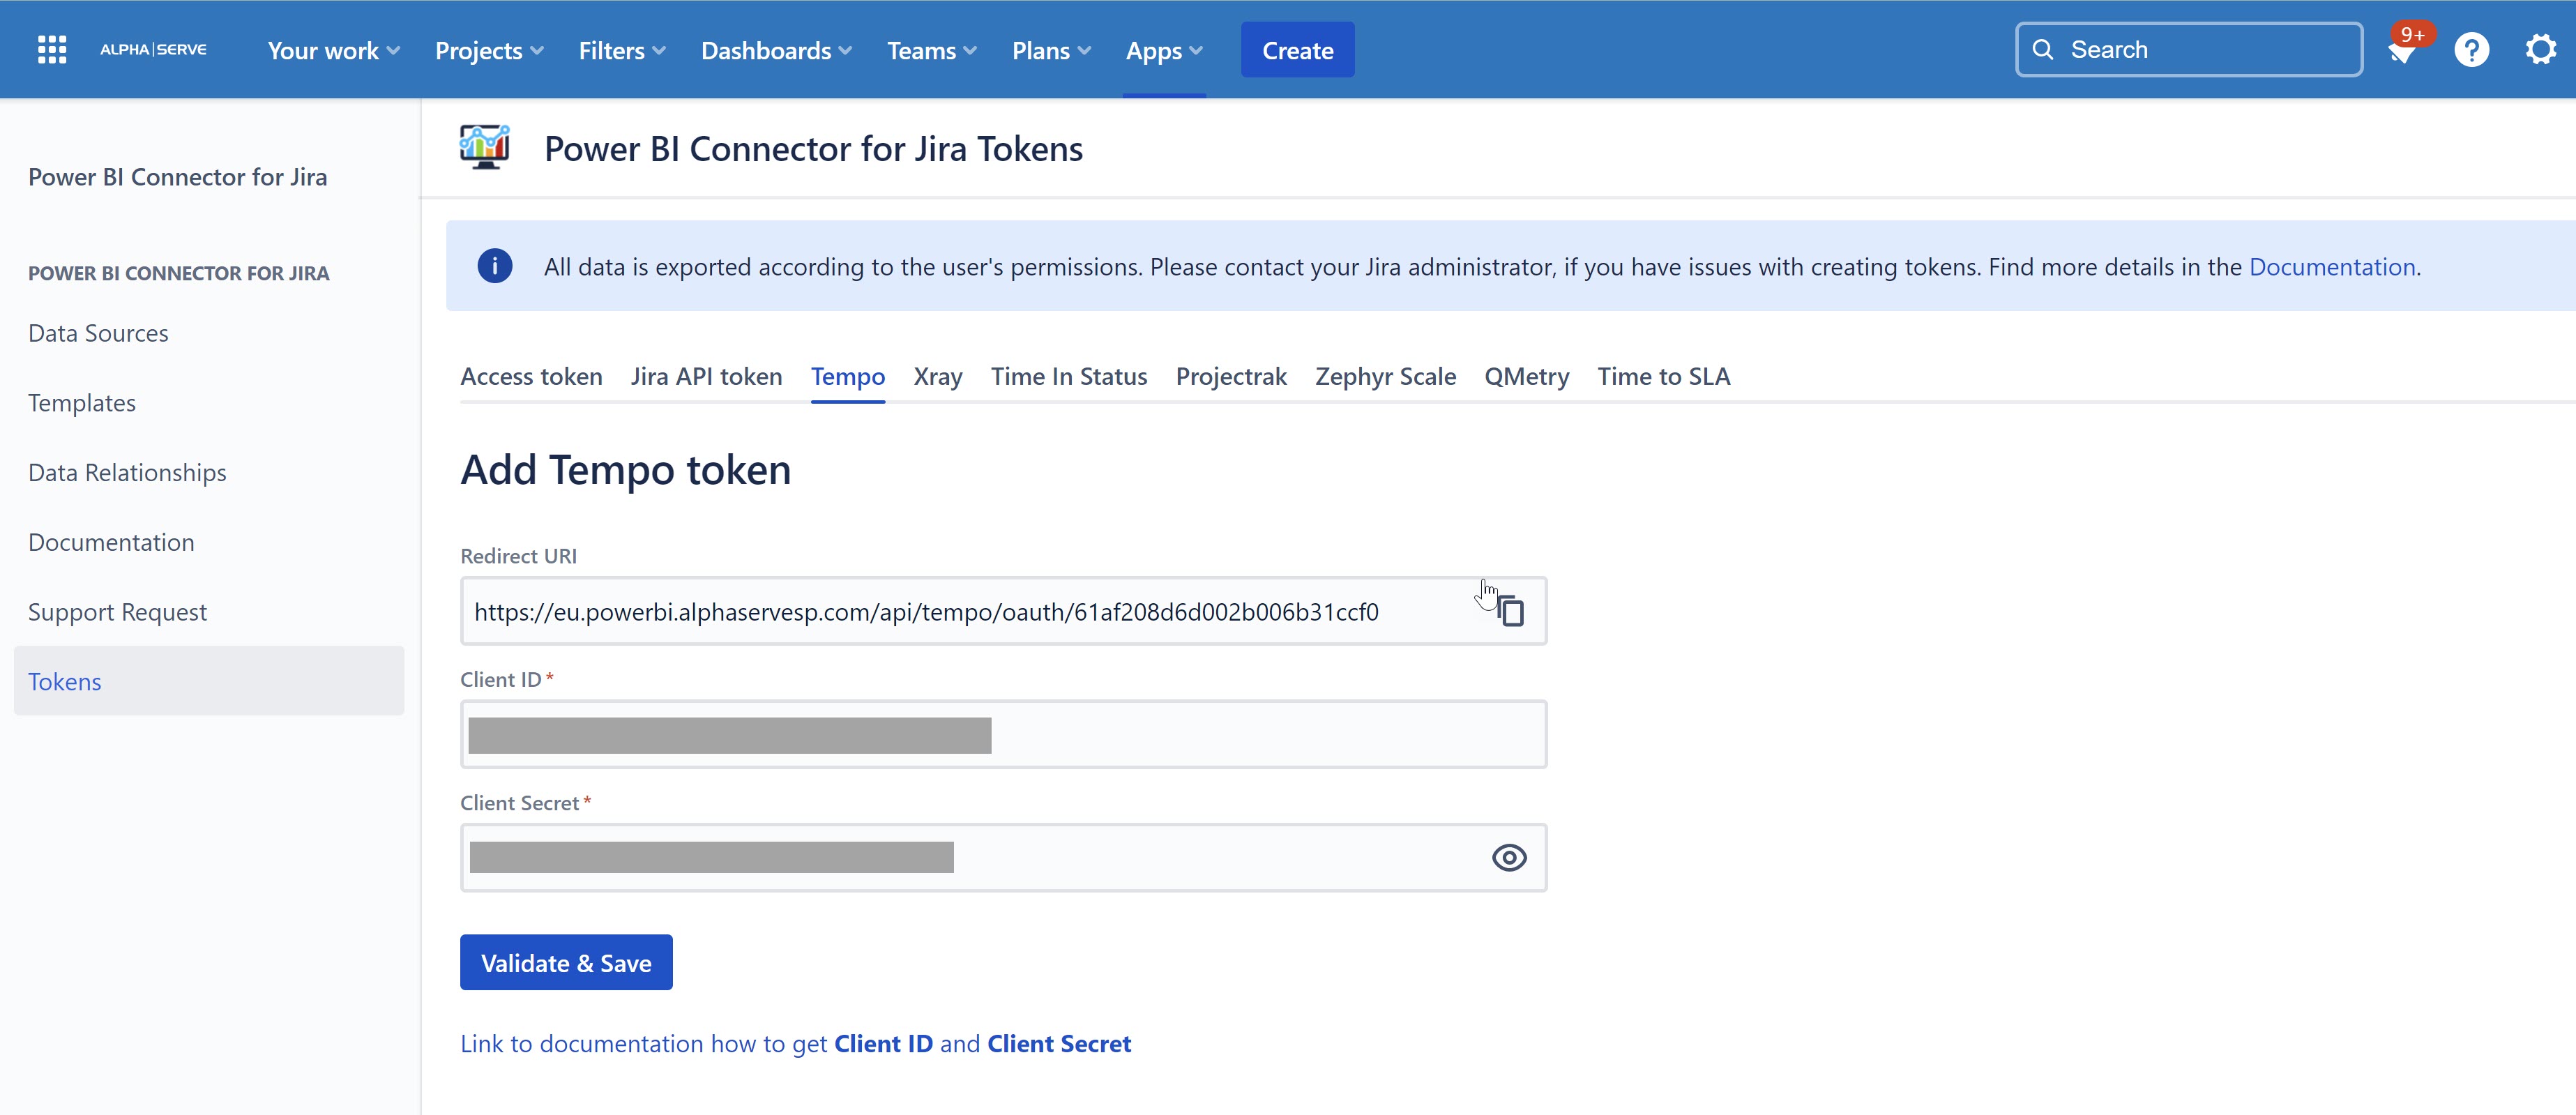
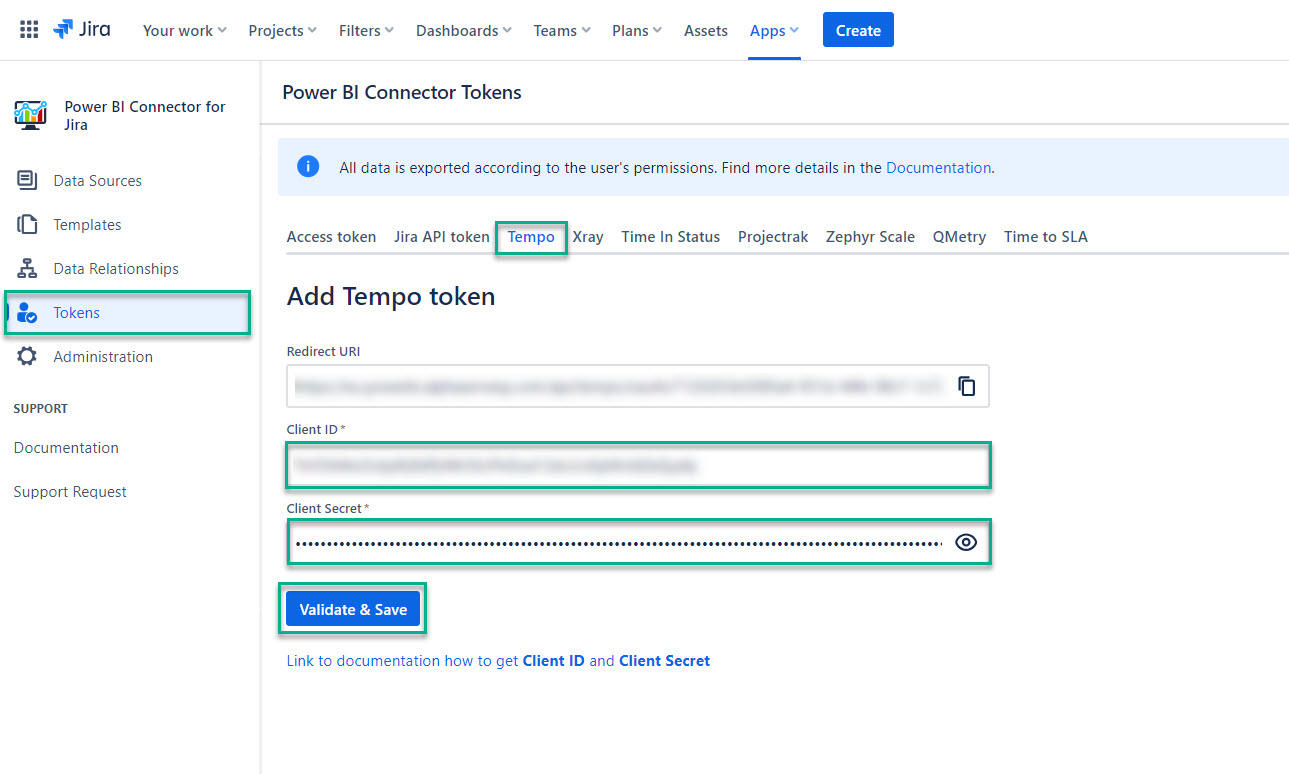
On the left-side menu, select Tokens, select Tempo, and then copy the redirect URL.
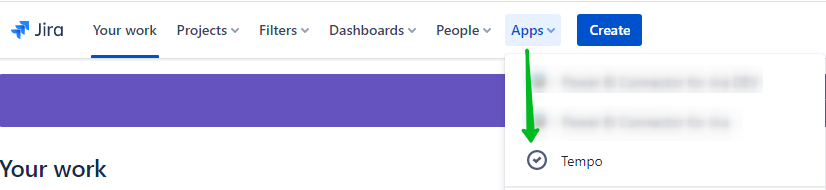
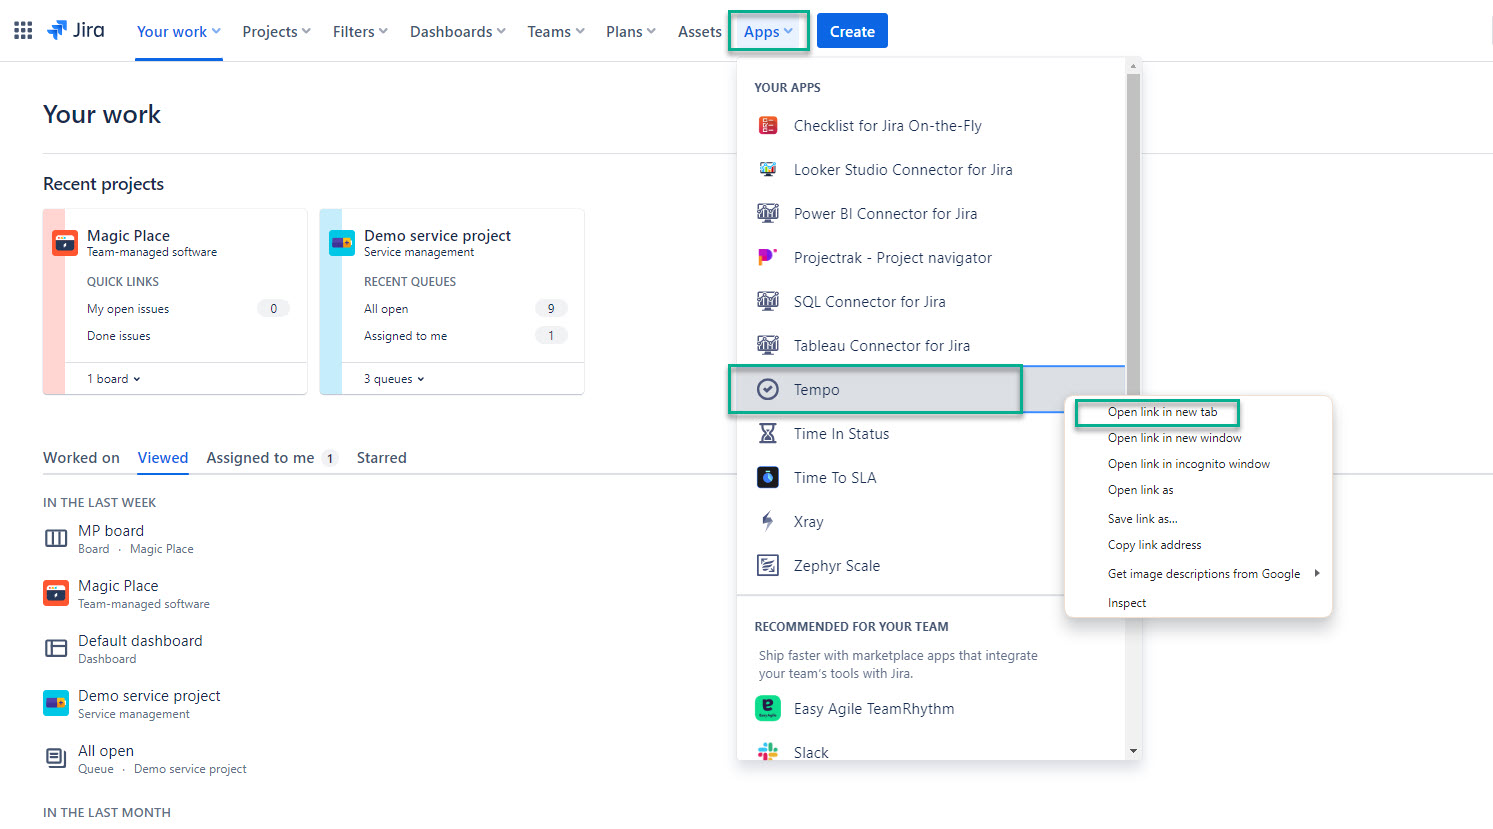
Select Apps, and then select Tempo.
| Info |
|---|
For your convenience, open |
Tempo in a new tab. To do it, right-click on Tempo, and then select Open link in new tab. |
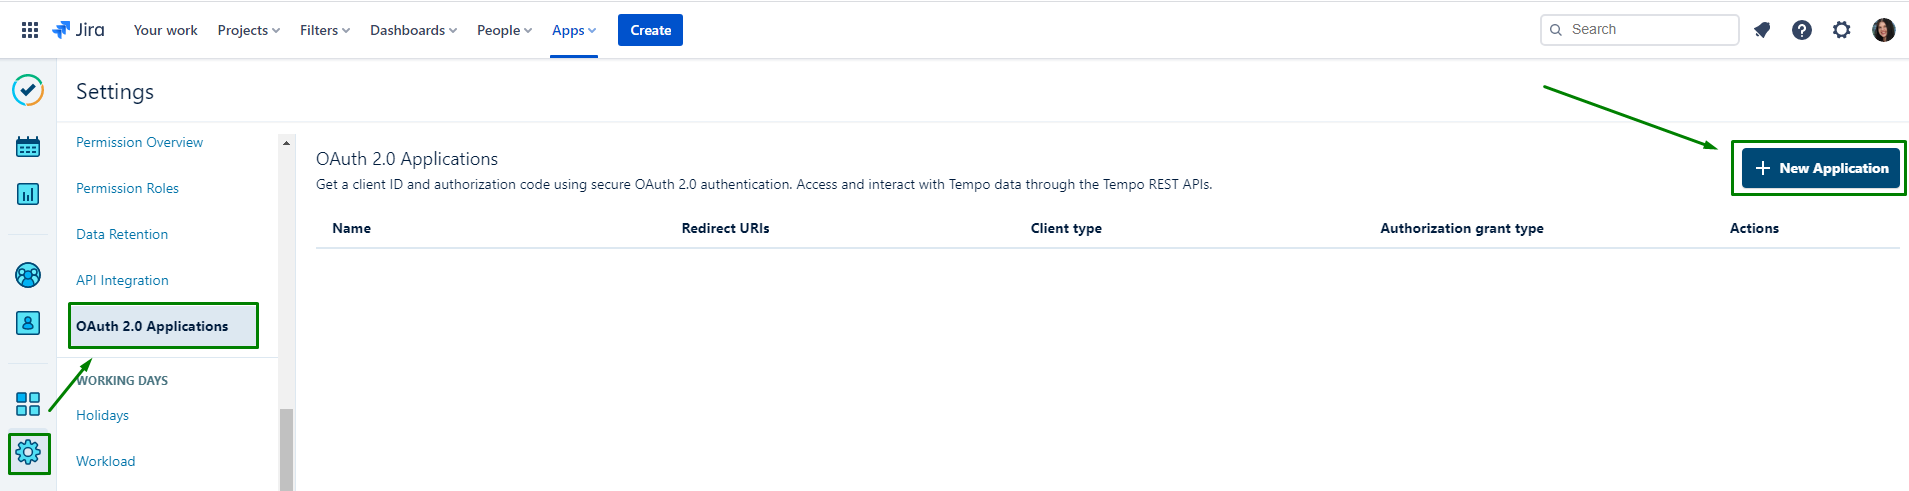
Select
⚙️.
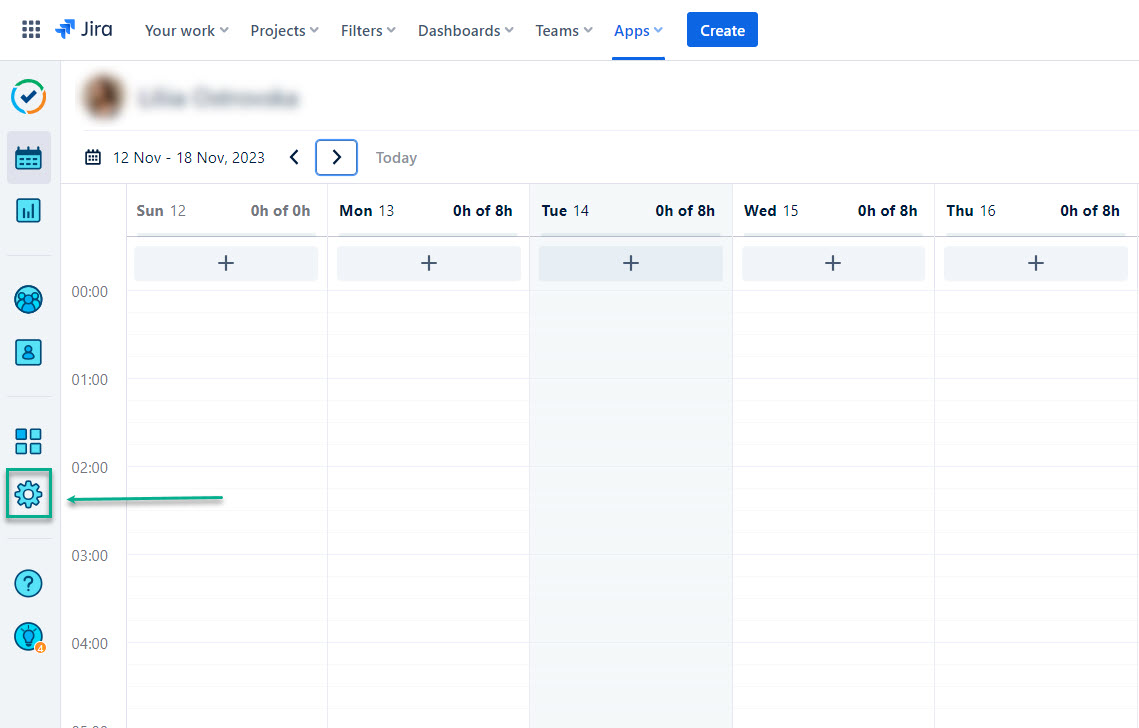
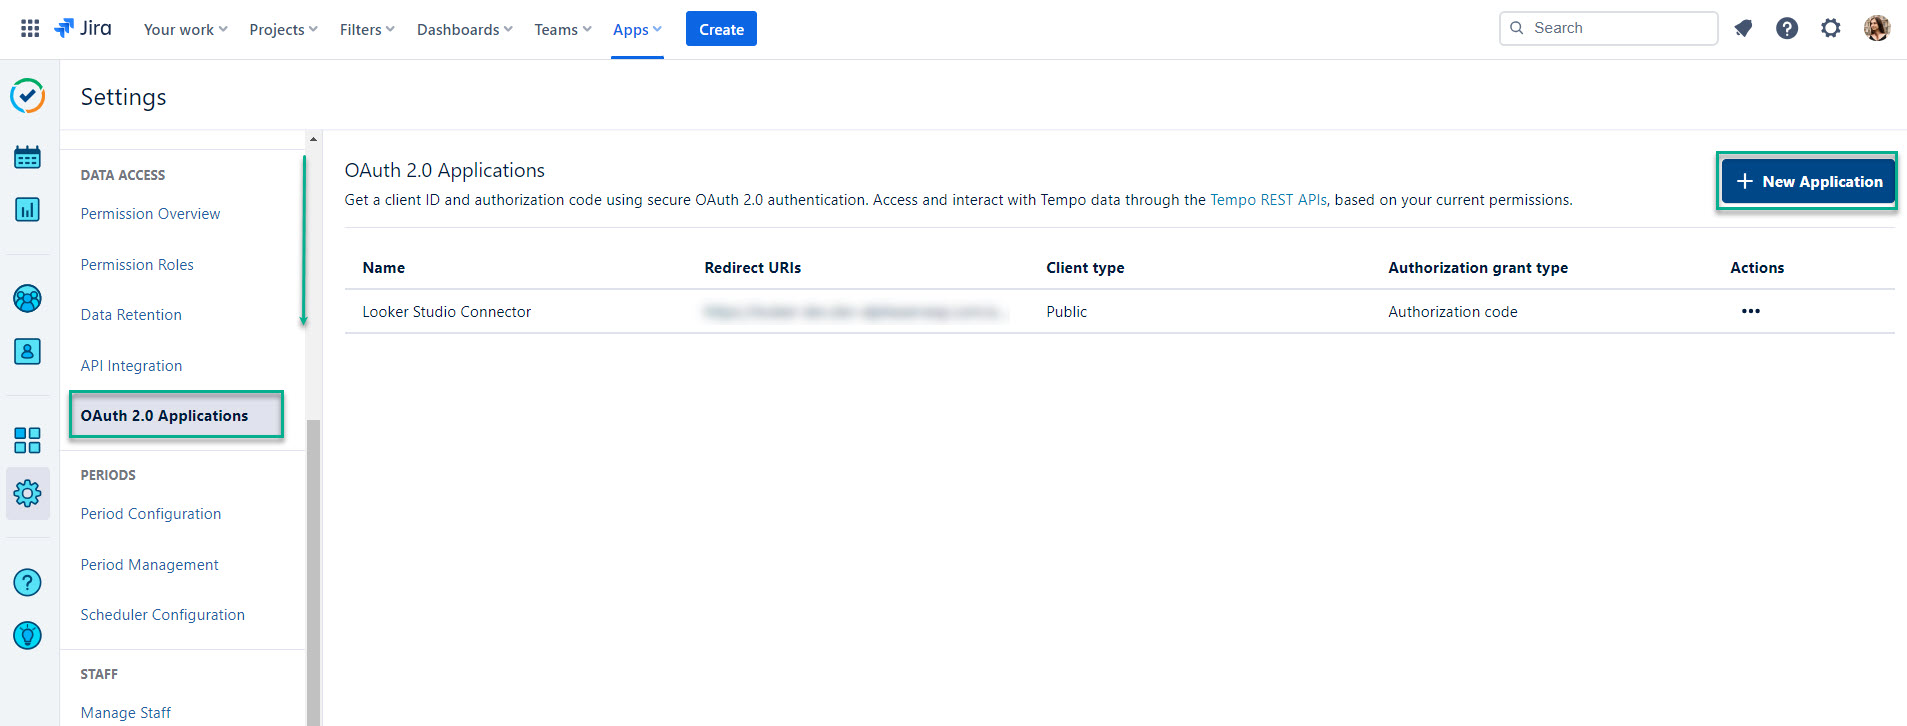
Scroll down, select OAuth 2.0 Applications
, and then select + New Application.
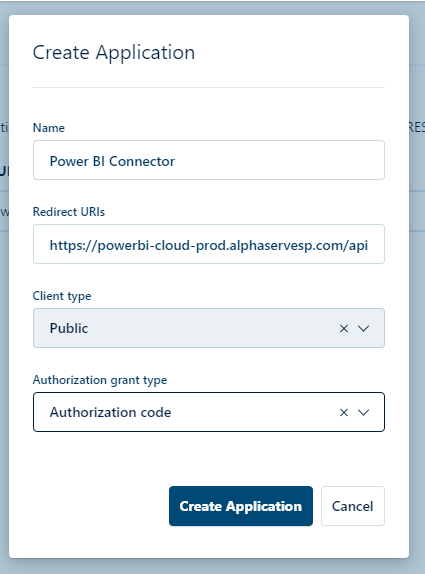
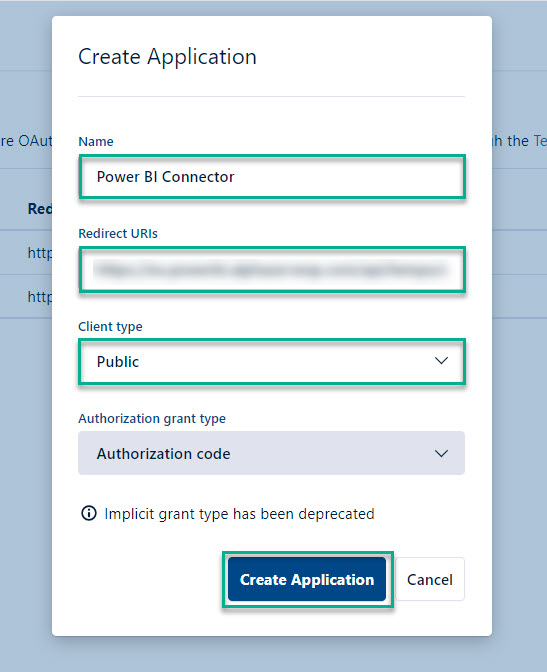
Fill
In the
Name field, enter any name you’d like
Redirect URIs: paste the URI you’ve copied earlier
Client type: Public
Authorization grant type: Authorization code
Click Create Application button.
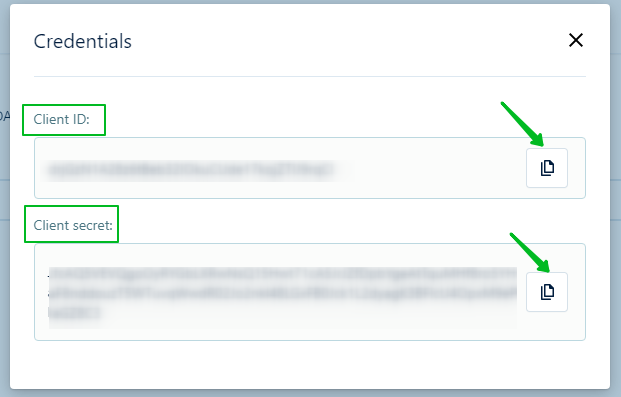
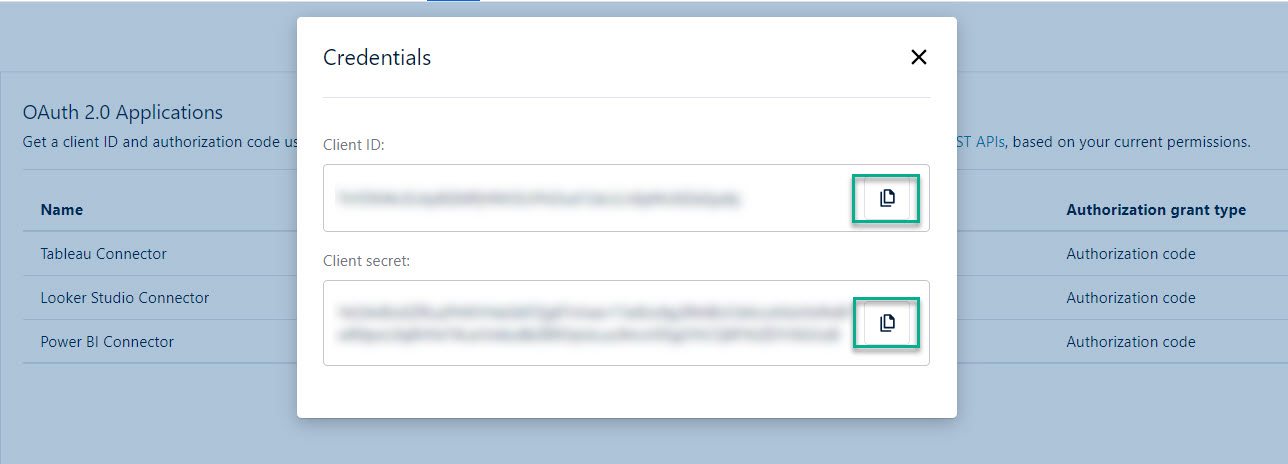
Copy the credentials: Client ID and Client secret.
Go back to the Power BI Connector plugin > Tokens > Tempo, enter Client ID and Client Secret. Click Validate & Save.
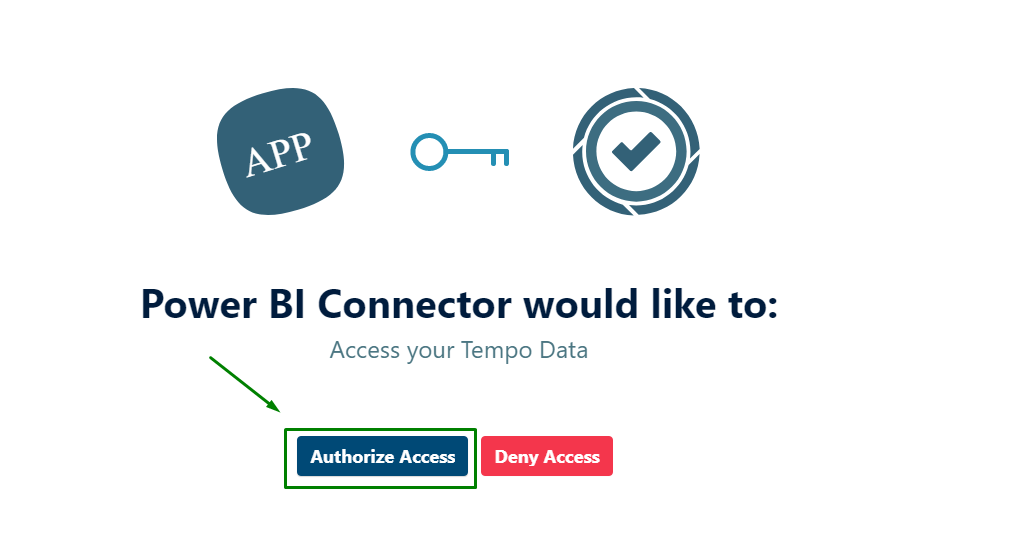
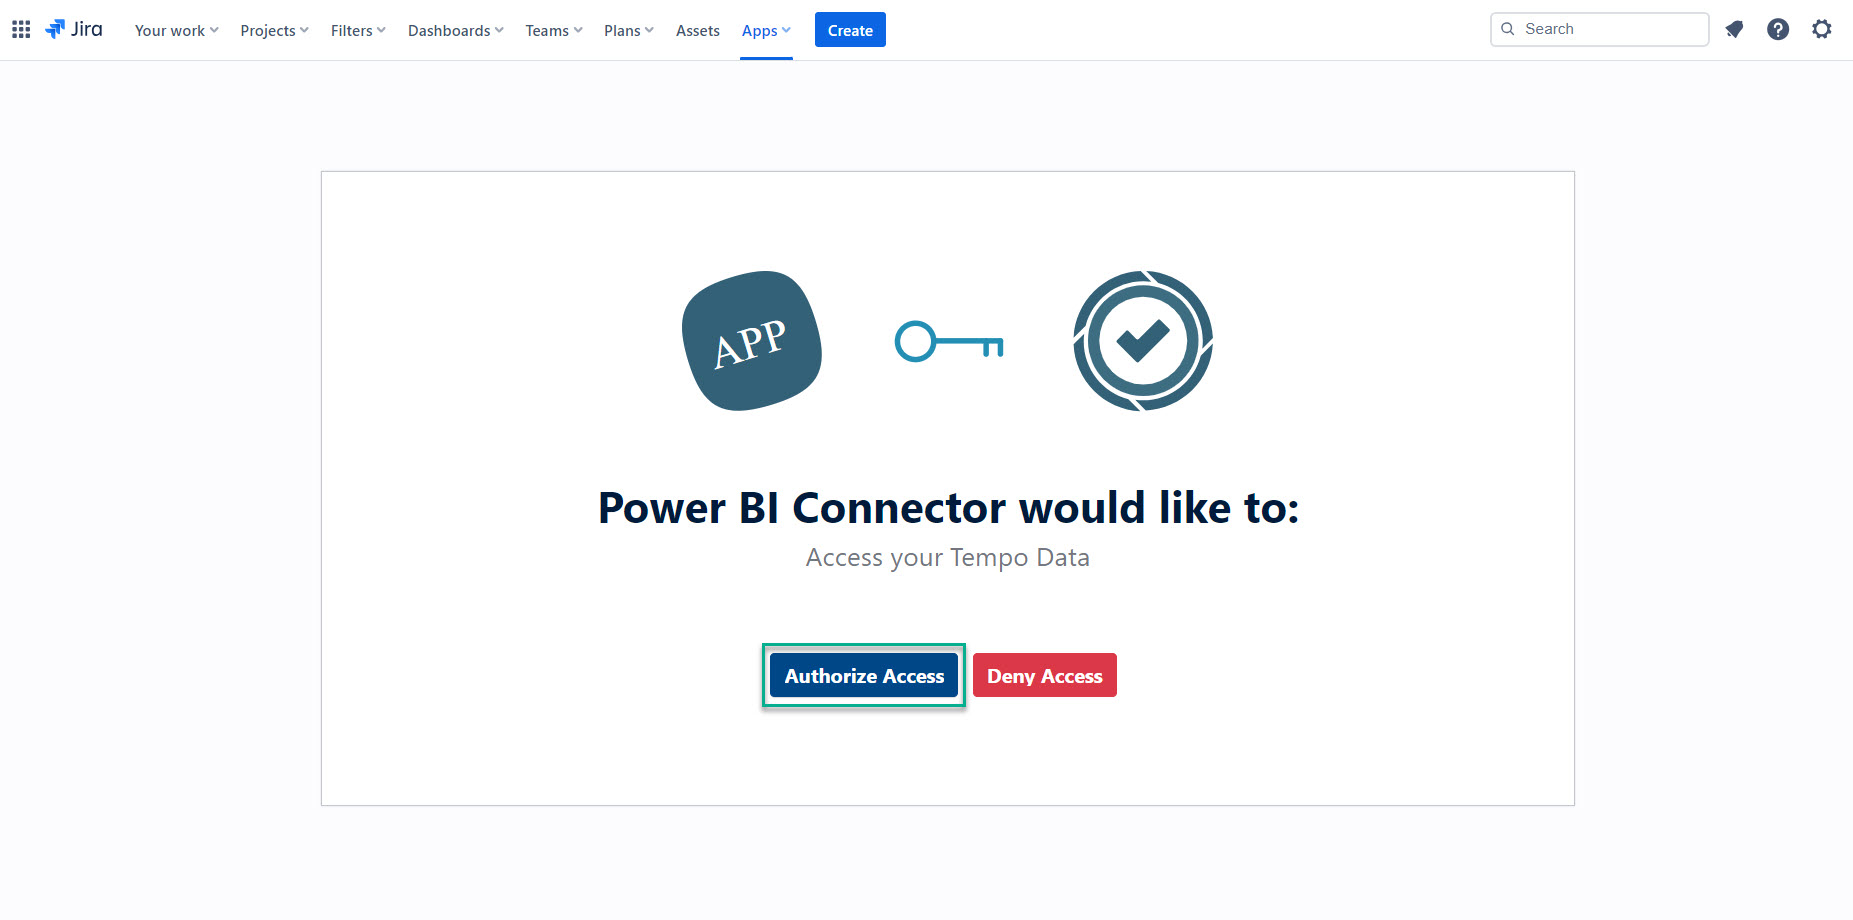
Authorize Access at the next step.
.
In our case, it’s Power BI Connector, you can select any other name.
In the Redirect URLs, field, paste the redirect URL.
| Info |
|---|
The redirect URL for this form was copied in step 2. |
In the Client type field, select Public.
In the Authorization grant type, select Authorization code.
Select Create Application.
The Credentials pop-up window will appear
Copy the client ID and client secret, and then close the window.
Go back to Tokens, the Tempo tab.
Paste your client ID and client secret to the corresponding fields, and then select Validate & Save.
Select Authorize Access.
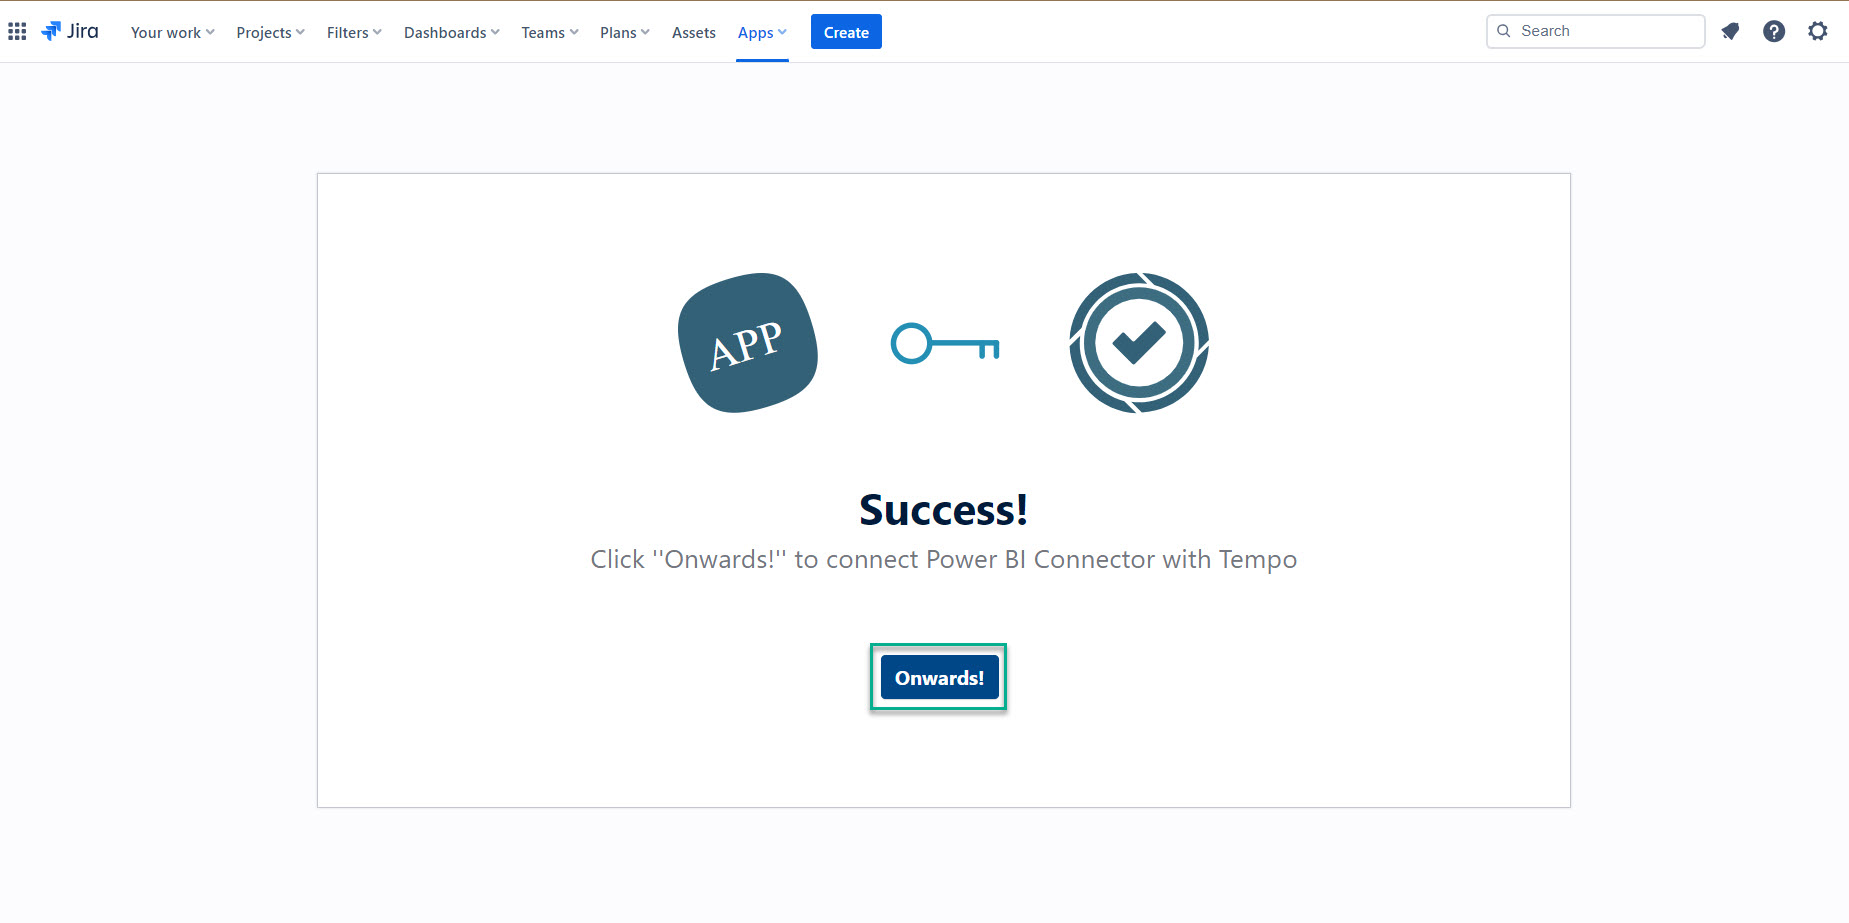
| Tip |
|---|
The Success! message will appear. Select Onwards! |
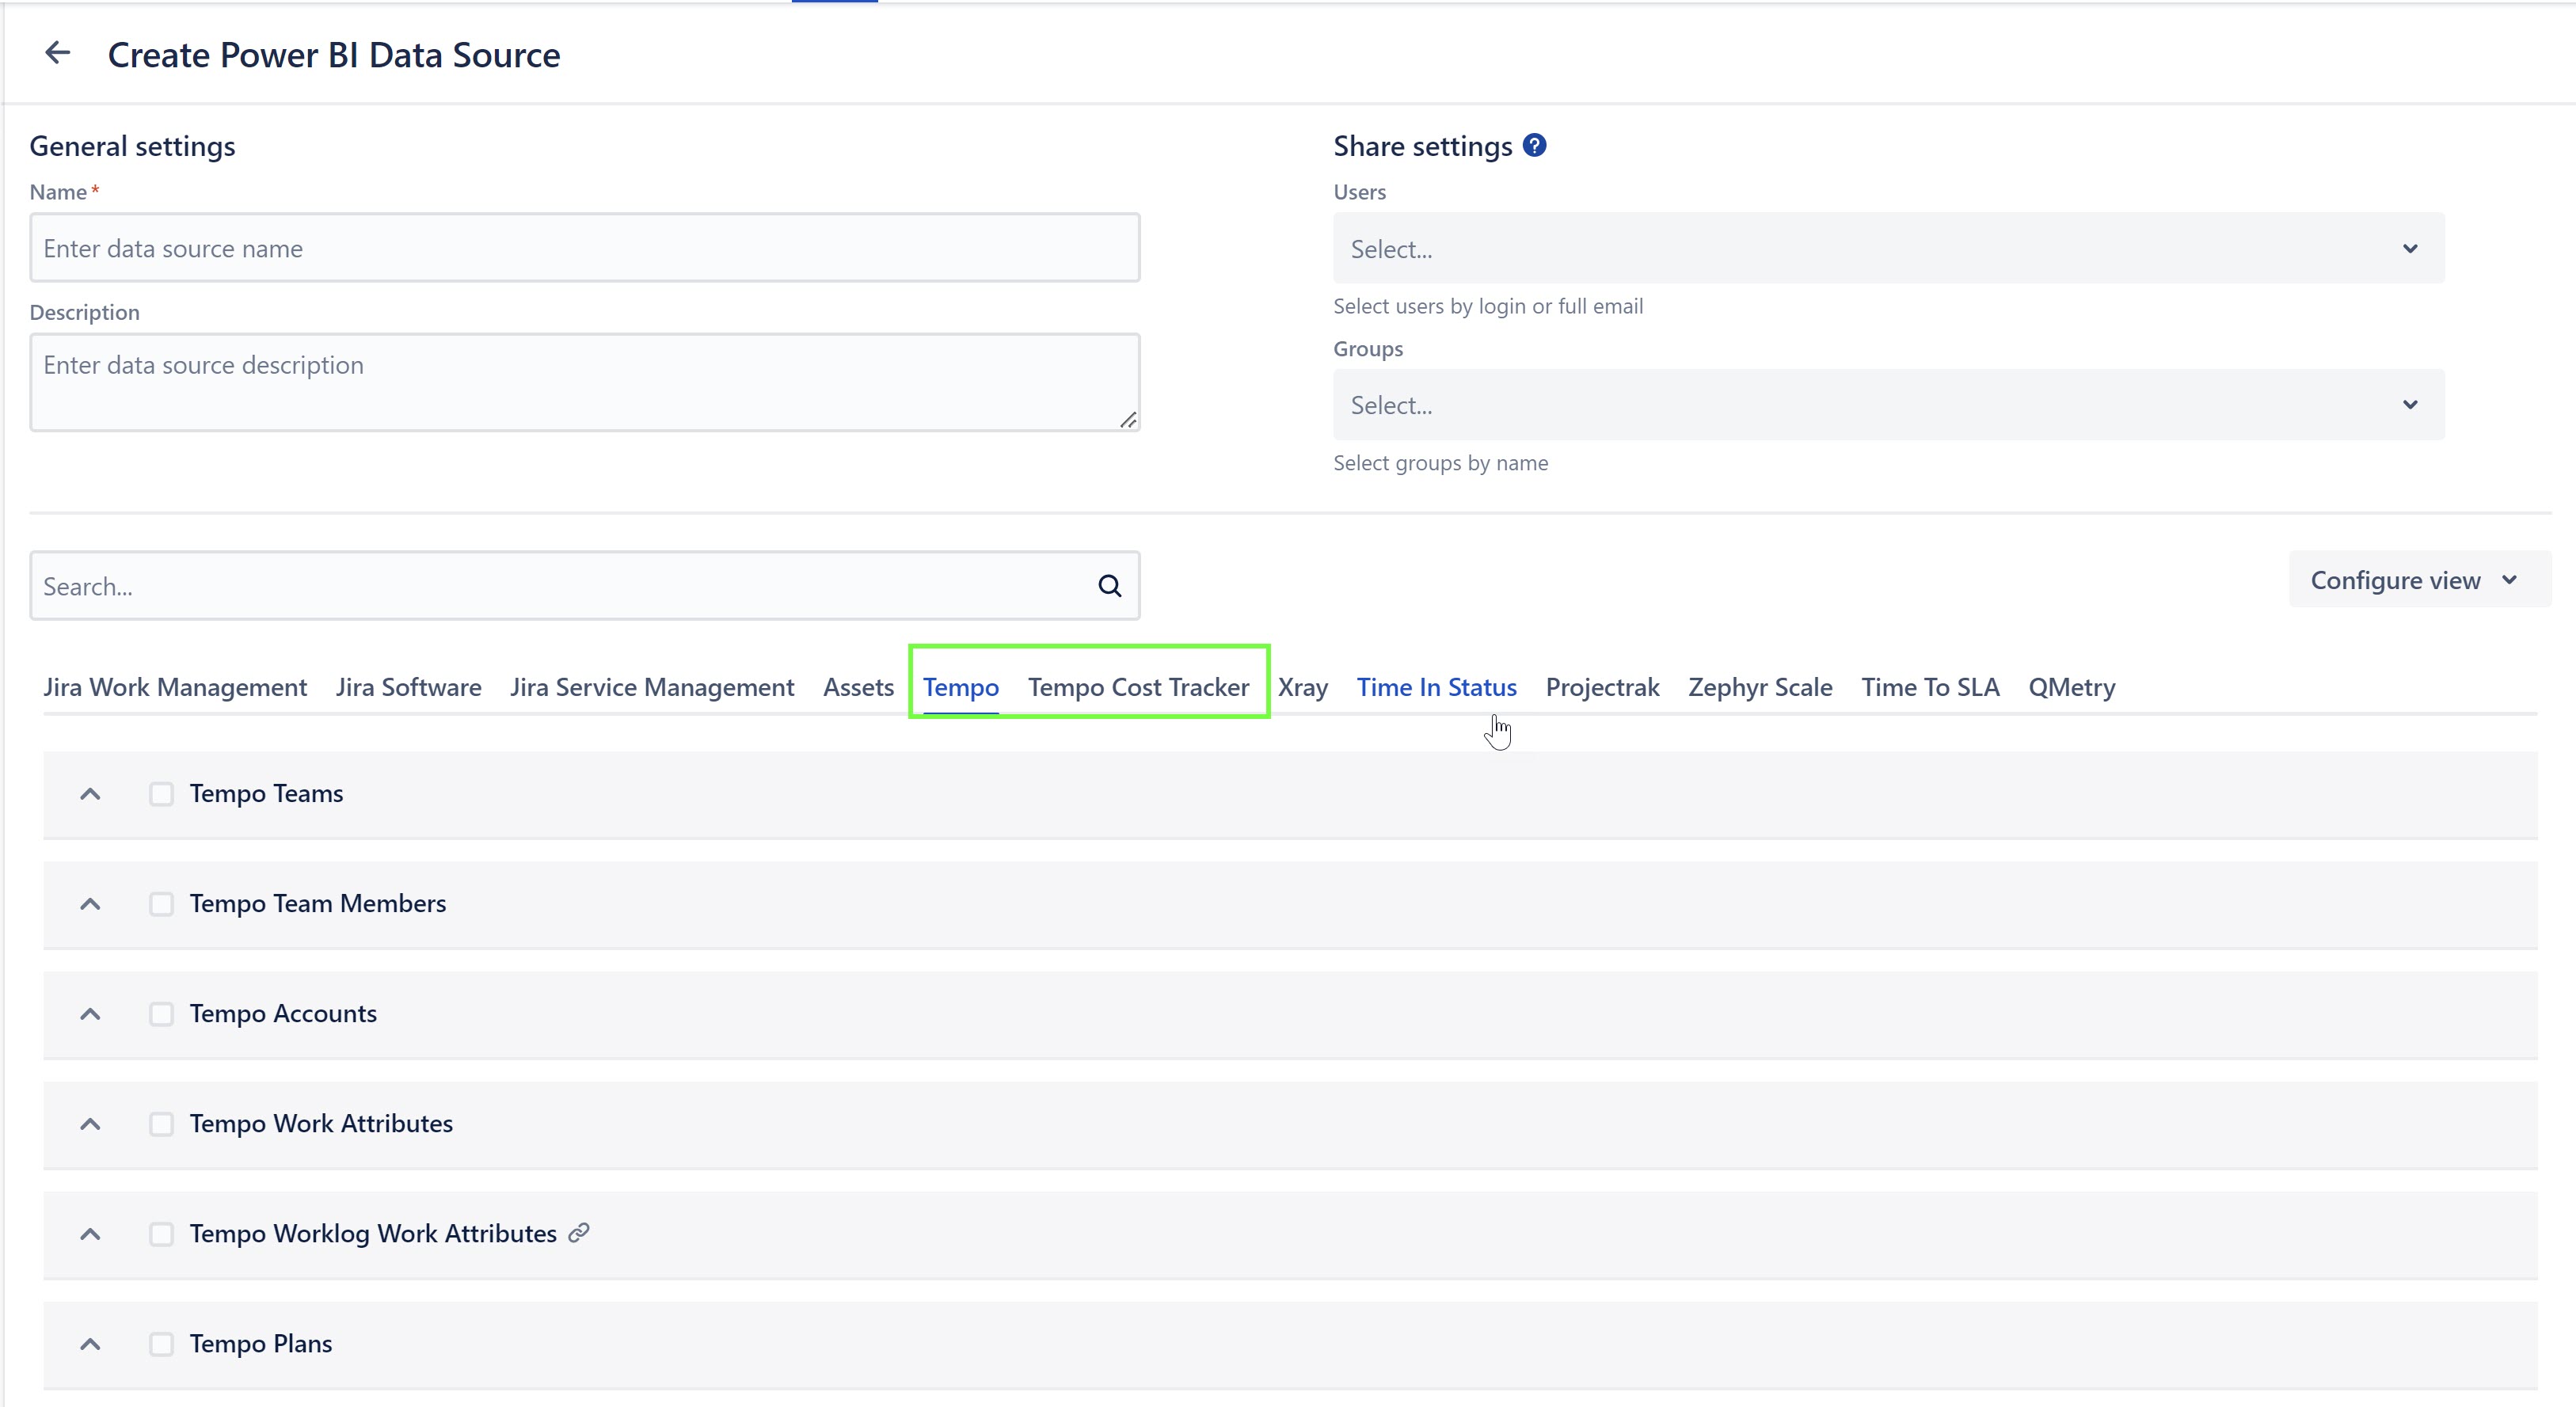
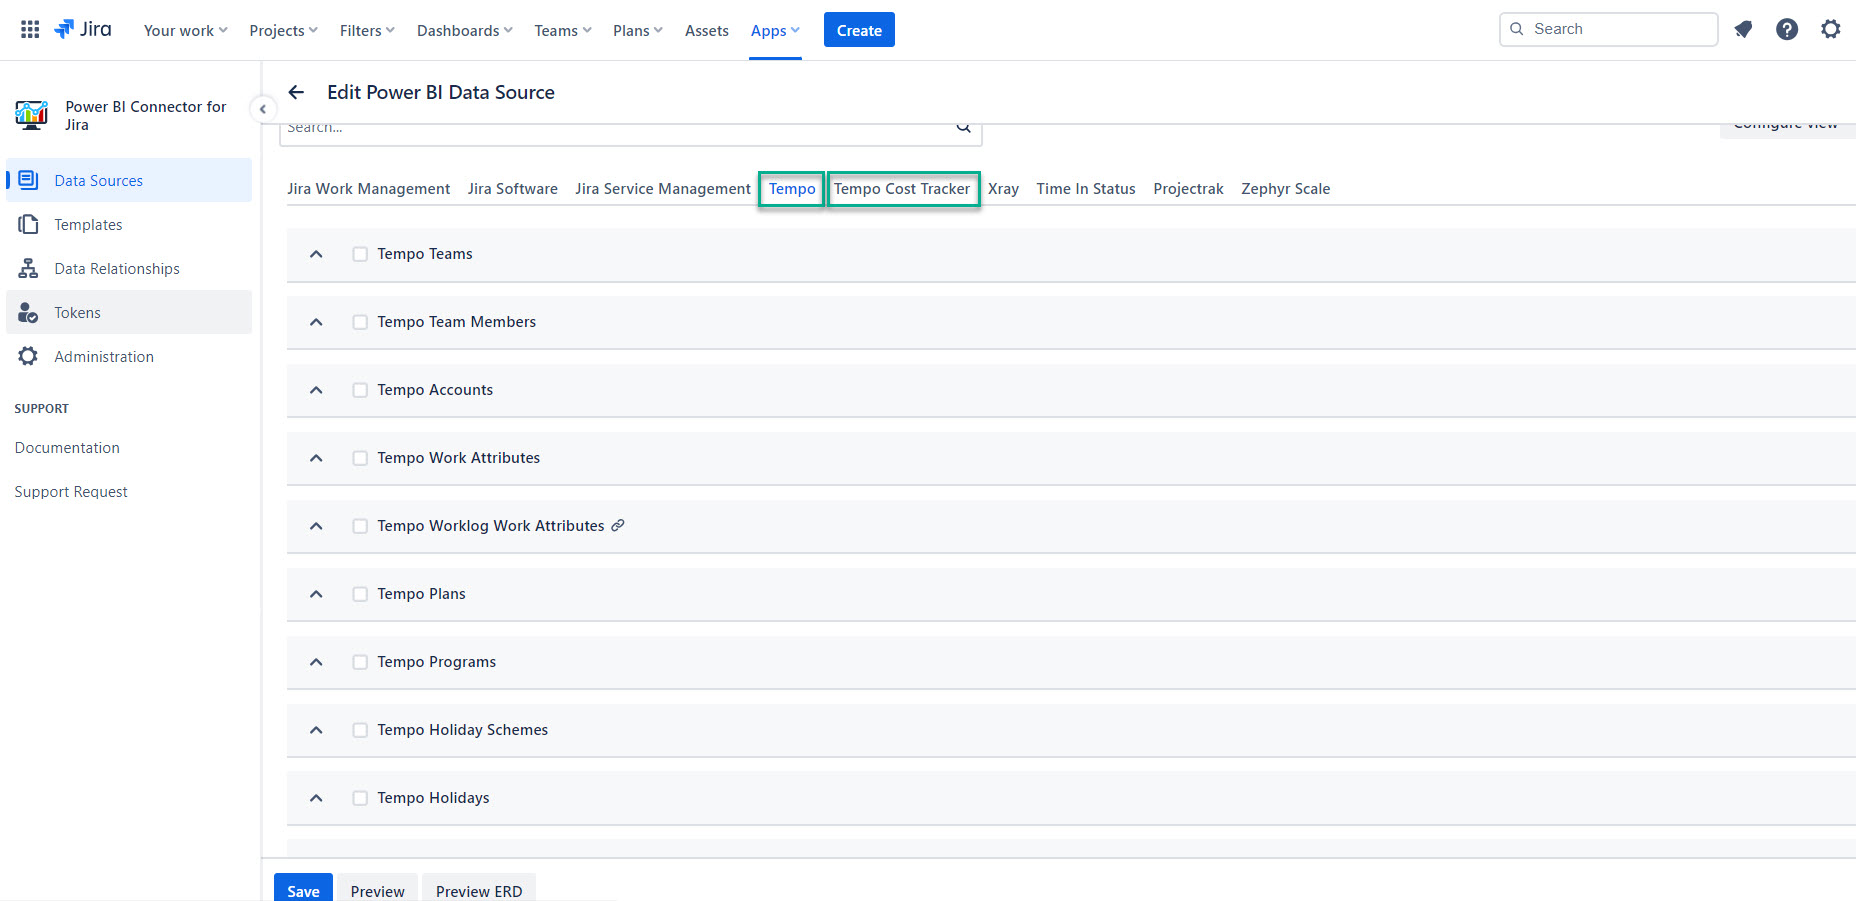
| Tip |
|---|
Starting now, all users with granted permission to work with the data |
sources can select Tempo and Tempo Cost Tracker tables and fields for export. |