Before You Start
📘 After the Zendesk Administrator installs Tableau Connector for Zendesk on the instance, each user must authorize the app with OAuth by selecting Connect Tableau Connector for Zendesk application.
📘 Connection will be completed automatically. You will be redirected to the Tableau Connector page, and after this you can start using the app.
| Info |
|---|
To view installation guide, click here ⬅️ |
How to Export Data from Zendesk to Tableau
It’s important to understand that Tableau Connector is initially installed on the Zendesk Support platform. To export data from the Zendesk SELL platform, please read this guide.
1. Create Access Token
An access token is a security credential used in web applications to authorize and authenticate a user or application’s access to specific resources or data.
We will use an access token as a password for Tableau to securely transfer data.
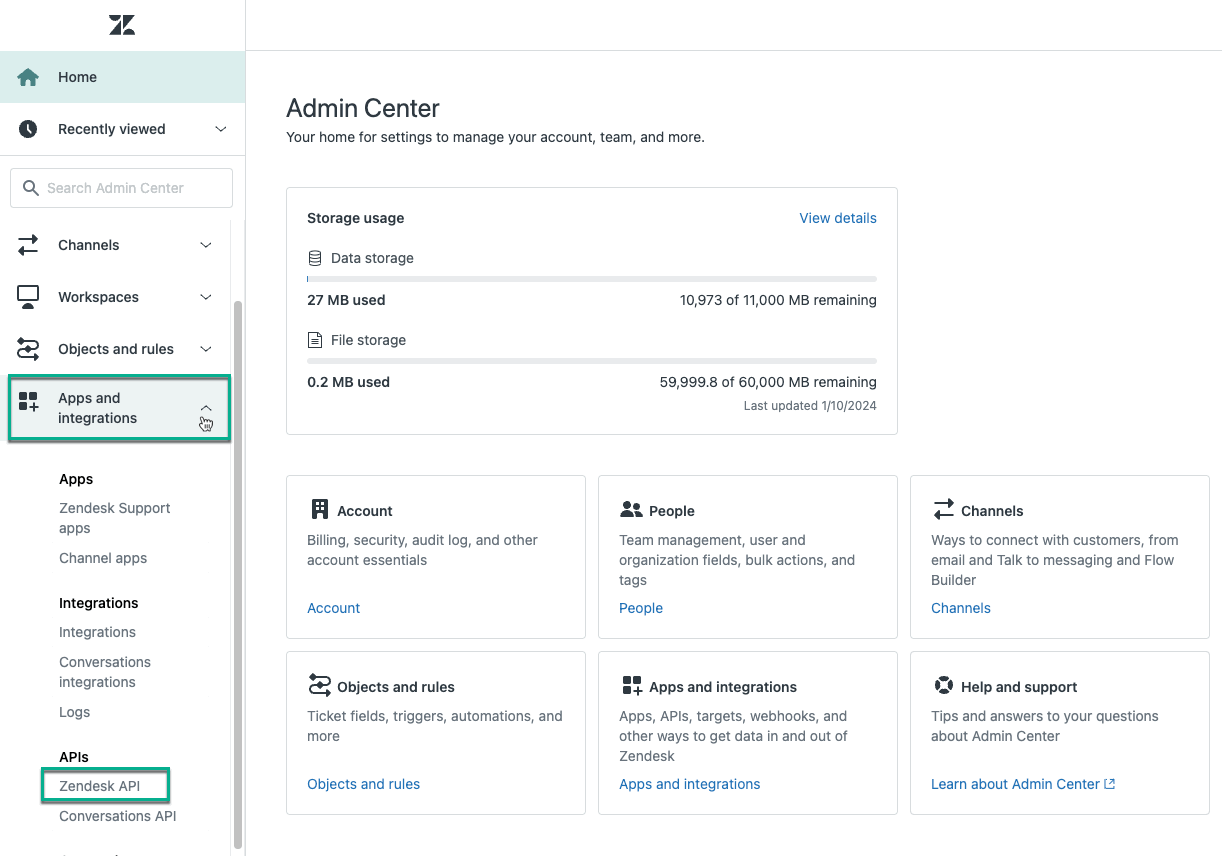
You can create your token by accessing Zendesk API sectioninside your Zendesk Support instance.
| Info |
|---|
If you need more information on how to create an access token, please refer to our step-by-step instruction. |
Zendesk Administrator role is required for this step. If you don’t have such a role, please contact your Zendesk Administrator to grant you the corresponding permission.
2. Create Data Source
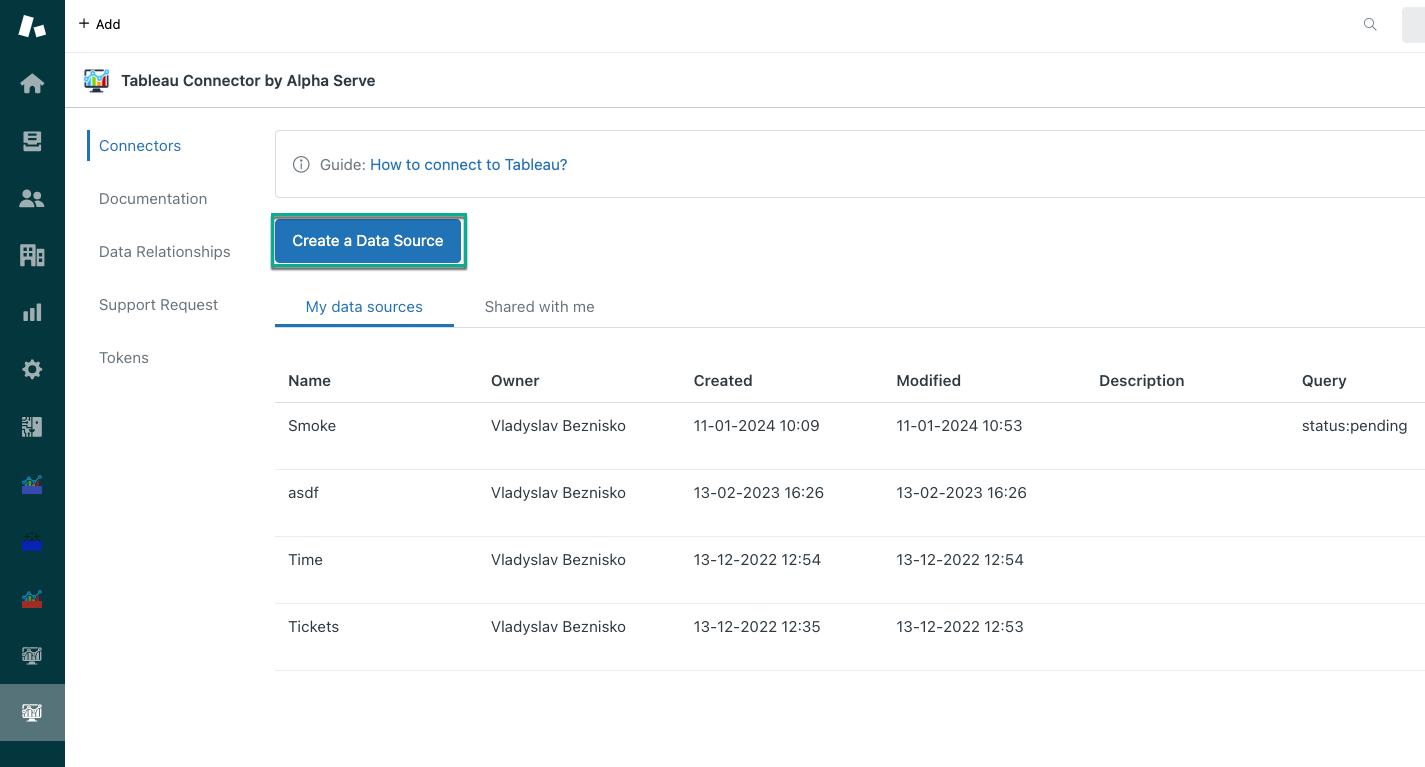
Now you need to create a data source for data you want to export from your Zendesk to your Tableau. You can do it by accessing the Connectors page inside the Tableau Connector for Zendesk.
You have to name your data source, adjust sharing settings, and filter the tables you’d like to be in your data source.
| Info |
|---|
If you need a detailed description of all fields and features of the Data Source page, please refer to this page. |
| Info |
|---|
If you need more information on how to create a data source, please refer to our step-by-step instruction. |
3. Export Data into Tableau
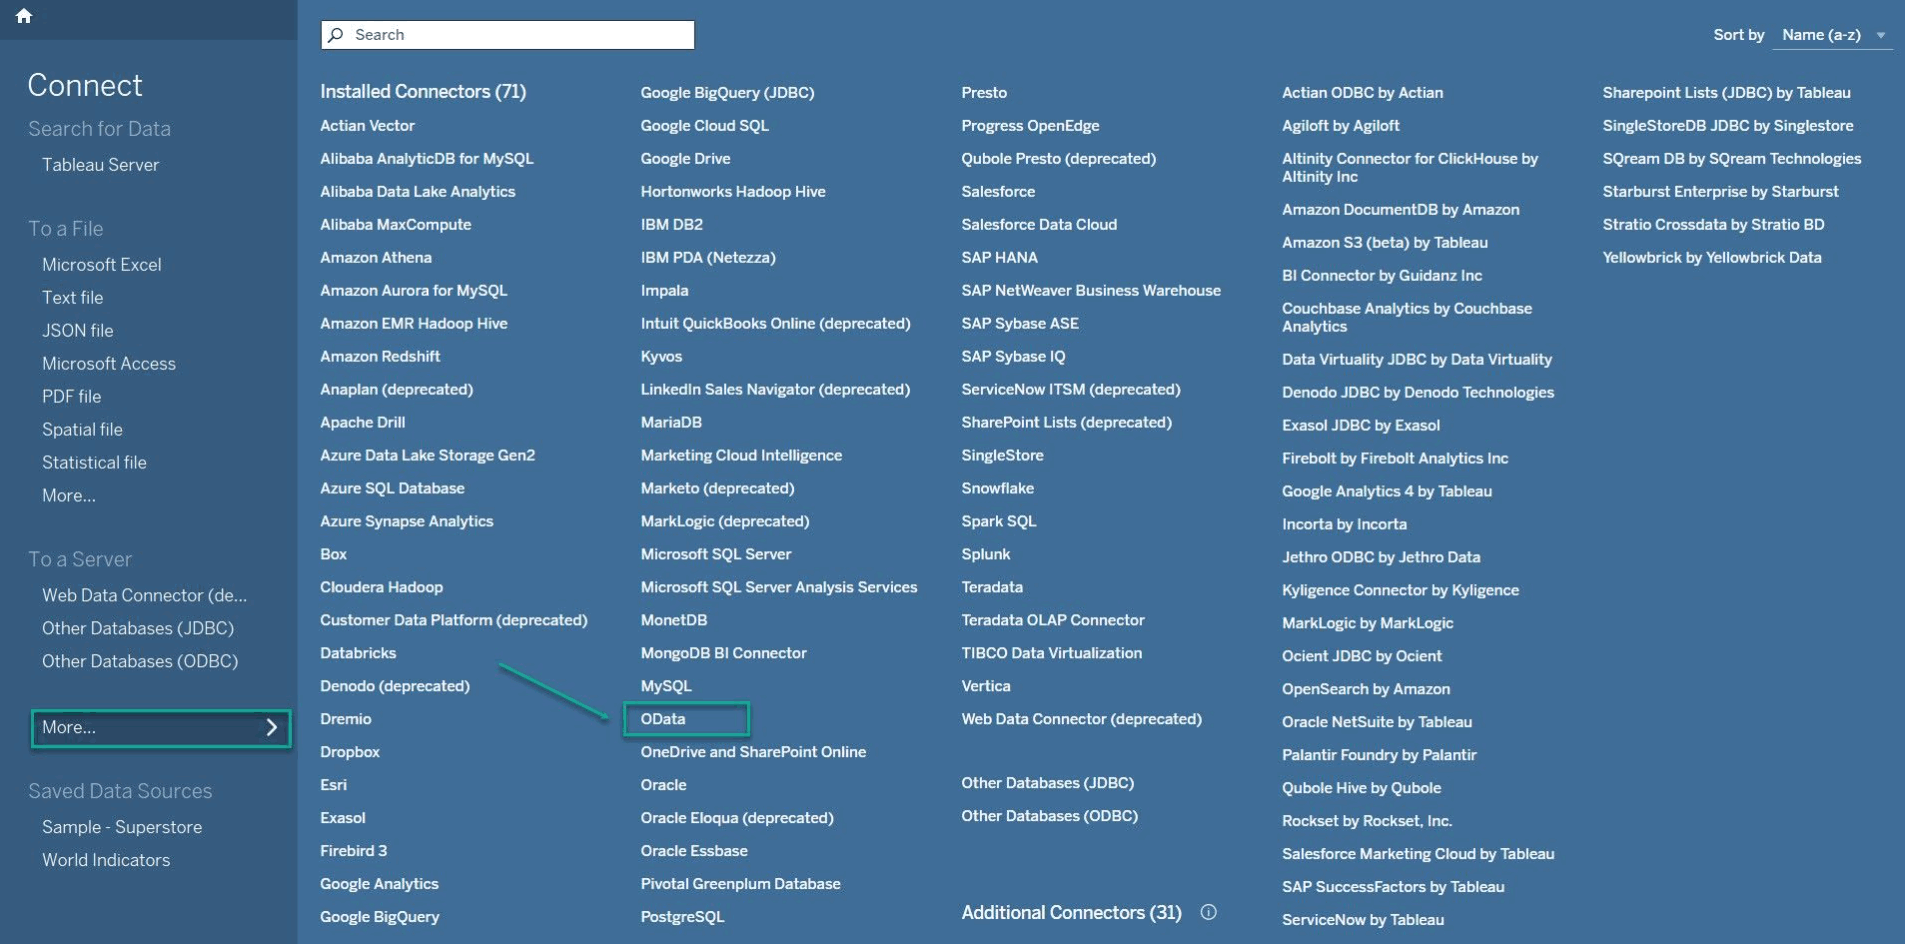
After creating an access token and creating a data source, you can easily export your data into Tableau. Being on the Connectors page, select Copy link. Launch your Tableau, authorize, connect, and start working with your data.
| Info |
|---|
If you need more information on how to export data, please refer to our step-by-step guide. |
How to Uninstall Tableau Connector for Zendesk
The Zendesk Administrator can uninstall the Tableau Connector for Zendesk from the instance. However, regular users can also uninstall the app if needed. This action will disconnect the app from your account and revoke your OAuth token. All data sources will remain intact and will not be deleted.
Being signed in to your Zendesk account, select Tableau Connector by Alpha Serve.
Select Disconnect, and then select Disconnect the Connector.
Select Disconnect.
| Info |
|---|
Explore 4 options to build Zendesk reports ⬇️ |


.png?version=1&modificationDate=1661873139610&cacheVersion=1&api=v2&width=204)