| Table of Contents |
|---|
Steps to export data from Zendesk to Tableau
Before you start
To be able to import data from Zendesk into Tableau, your Zendesk administrator should grant you permission to access Tableau Connector for Zendesk application.
If you don't have this access, please contact your Zendesk Administrator to grant Tableau Connector for Zendesk permissions first. Zendesk Administrators can always access application configurations.
Create a data source in Zendesk.
Step 1. Launch Tableau Connector for Zendesk application, by clicking on it’s icon in Navigation menu. Then choose Connectors.
Step 2. On the opened page, select Create a Data Source
Below you can find a description of the fields, buttons, and settings of data source creation page:
Title section
1. Name -Enter data source name.2. Description - Enter data source description.
3. Share settings - You may share this data source with users or groups of users who have permission to use the application.
Select users - start typing to find and add relevant users.
Submit - click to confirm changes.
Cancel - click to cancel changes.
Please note! Other users who have access to Tableau Connector for Zendesk app might not get all data from this data source due to different Zendesk permissions.
Export Zendesk Support data
Filter tickets section
1. All - choose if you want to export all existing tickets.
2. Select by query - choose if you want to use search query to create your own request and filter data.
3. Query - Zendesk search query.
Zendesk provides us with a set of keywords and common search operators, to narrow search results. More details on the syntax can be found here.
4. Filter - allows to modify our search query, using set of pre-defined filters:
Status - include only tickets, which are in one of the statuses, selected here.
Type - include only tickets of types selected.
Tag - include only tickets, which have tags specified. Start typing tag name to get autocompletion working.
Assignee - include only tickets, assigned to any of users specified. Start typing user name or email to get autocompletion working.
Updated date - limit resulting tickets to specific date ranges.
Show search tip - opens Zendesk guide to search query syntax.
Select Fields section
1. Search field -enter the required field that you want to display in the report. Only fields, matching the search, will be shown.2. Clear the search field.
3. Entity - represents one of the entities, available for export. Checkbox will toggle all/none fields in the subsection. Subsections can be expanded at will, by clicking on them
4. Field - represents specific field, available for export. Toggle checkbox, to include/exclude it from the export.
At the moment, the output of the following Zendesk Support tables is being logged:
Zendesk Support |
|---|
|
View Options section
1. Click View options to modify what field parameters will be shown
2. Click Show IDs to see the field names how they will appear in Tableau. Click again to hide IDs.
3. Click Show Types to see the field types. Click again to hide Types.
“Apply” section
1. Save - click to save a data source.
2. Preview ERD - click to open the ERD schema preview popup.
3. Close - leave data source creating page. Changes you’ve made will not be saved.
Import data into Tableau.
To work with Tableau, Tableau Connector for Zendesk generates the OData Feed URL. Use this URL to import data to your Tableau application.
Step 1. Copy the URL of your connector, generated by the app.
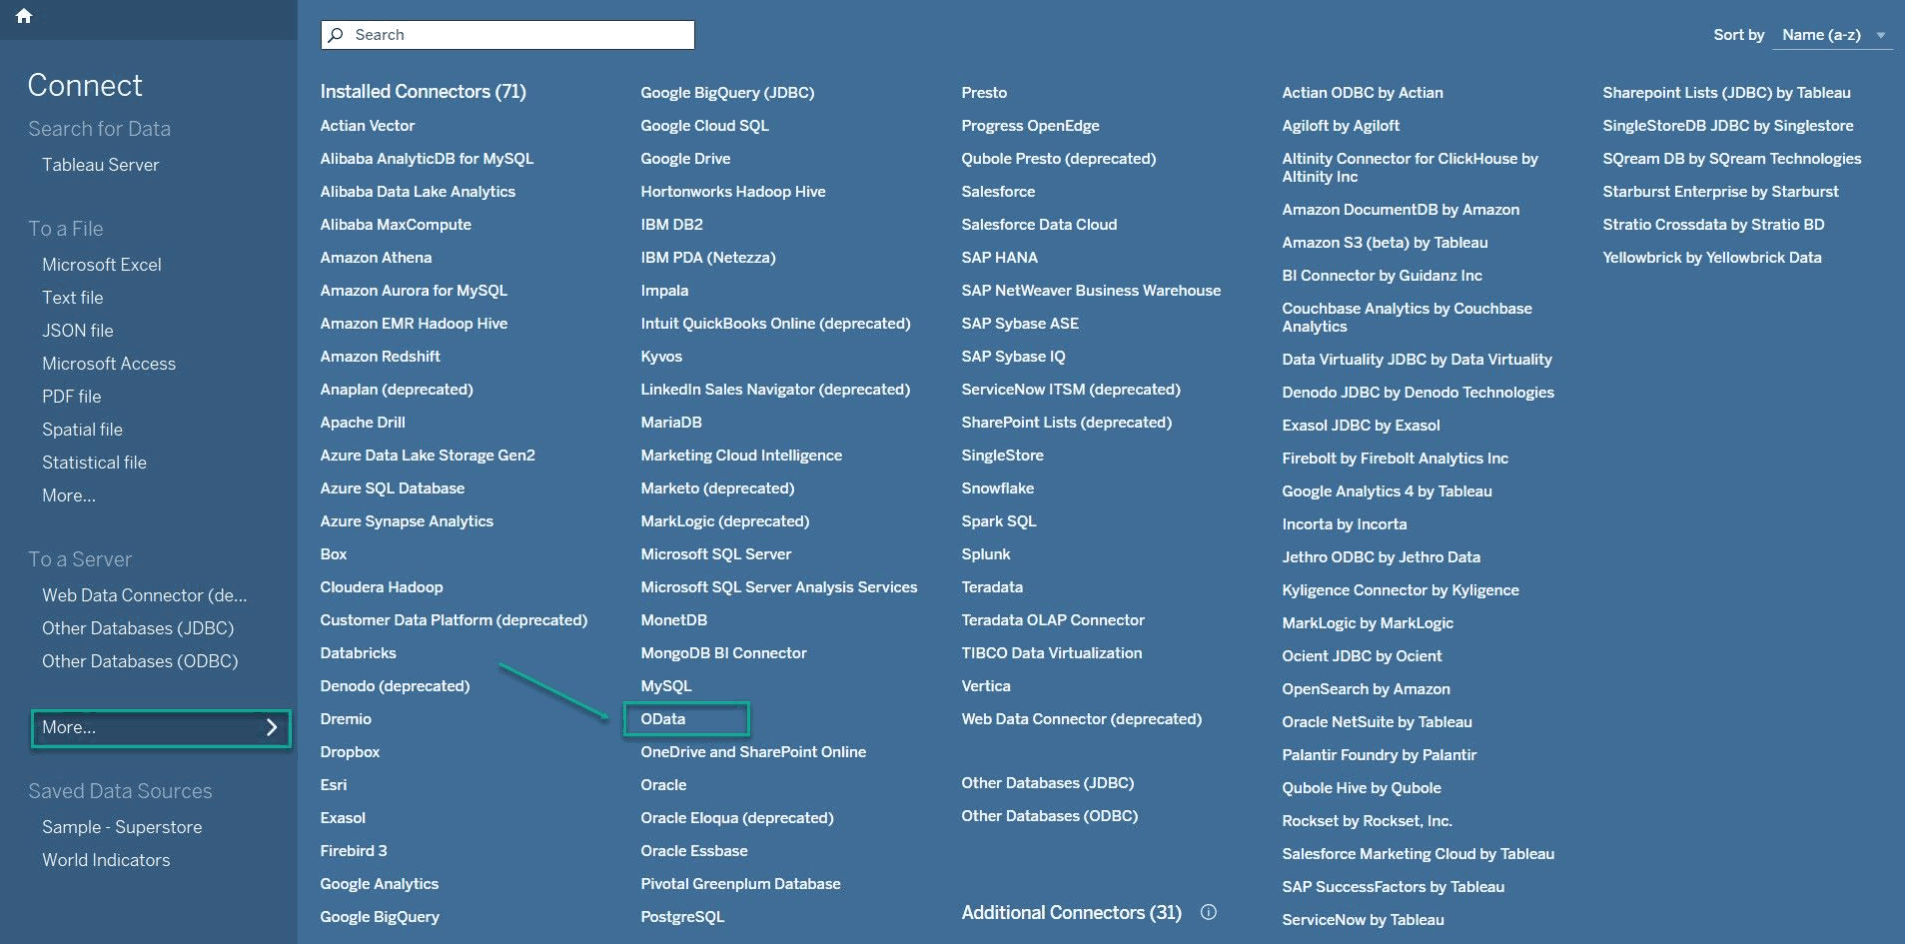
Step 2. Launch Tableau and Click on Connect > Get Data > OData and paste the URL.
Step 3. Fill the form:
Server: past your copied feed URL.
Authentication: Select Username and Password
Username: your email address
Finish authorization by pressing Sign In. Now wait for query to finish.
After step 3 data will be loaded into Tableau.
If there is a big amount of data to be imported, it can take some time.
After this, you can start building graphs and sheets based on the imported Zendesk data. To do this, switch to Sheet 1 and choose the visualization type and select the data you want to see on the graph.
How to export Zendesk SELL data
| Info |
|---|
Note! In order to use our application for Zendesk SELL data, you must install it on your Zendesk Support account. |
Follow this step-by-step instruction to export Zendesk Sell data you need to Tableau.
Additional features
(1) Click the Copy icon to copy the connector URL to the clipboard.
(2) Click the Preview ERD icon to get to the Entity Relationship Diagram for adata source.(3) Click on the More on the actions panel to select such additional Actions as:
(4) To make changes to the Connector, select Edit item.
(5) To remove Connector, press Delete option.
(6) To distribute the Data Source to users who have permissions to use this plugin, select the Share option. The users can find this data source in the Shared with me tab.
(7) To make a copy of the data source, choose Clone option. You will become an owner of the cloned datata source.
(8) To transfer the ownership of the data source, click Change owner option.
Only (1) Copy, (2) Preview ERD and (3)Clone are available for data sources in Shared tab.| Table of Contents |
|---|
Before You Start
📘 After the Zendesk Administrator installs Tableau Connector for Zendesk on the instance, each user must authorize the app with OAuth by selecting Connect Tableau Connector for Zendesk application.
📘 Connection will be completed automatically. You will be redirected to the Tableau Connector page, and after this you can start using the app.
| Info |
|---|
To view installation guide, click here ⬅️ |
How to Export Data from Zendesk to Tableau
It’s important to understand that Tableau Connector is initially installed on the Zendesk Support platform. To export data from the Zendesk SELL platform, please read this guide.
1. Create Access Token
An access token is a security credential used in web applications to authorize and authenticate a user or application’s access to specific resources or data.
We will use an access token as a password for Tableau to securely transfer data.
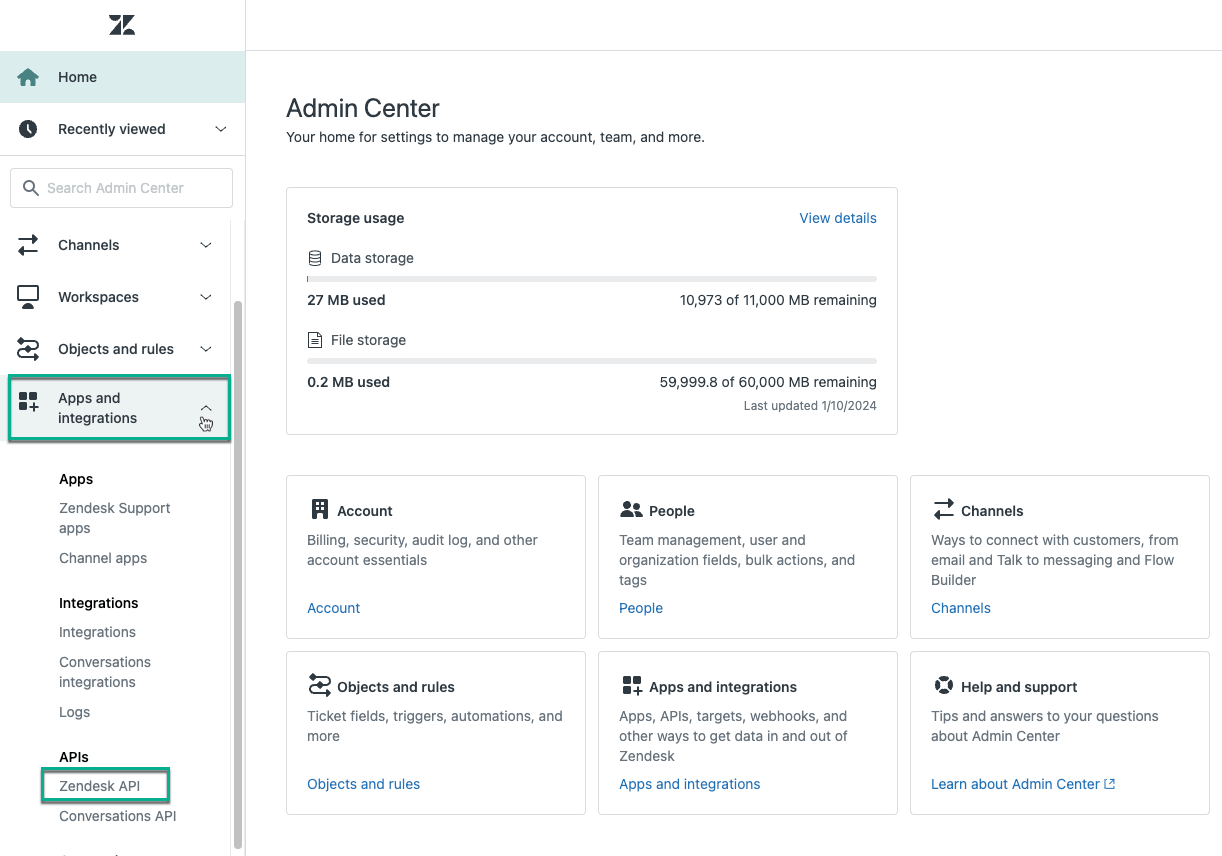
You can create your token by accessing Zendesk API sectioninside your Zendesk Support instance.
| Info |
|---|
If you need more information on how to create an access token, please refer to our step-by-step instruction. |
Zendesk Administrator role is required for this step. If you don’t have such a role, please contact your Zendesk Administrator to grant you the corresponding permission.
2. Create Data Source
Now you need to create a data source for data you want to export from your Zendesk to your Tableau. You can do it by accessing the Connectors page inside the Tableau Connector for Zendesk.
You have to name your data source, adjust sharing settings, and filter the tables you’d like to be in your data source.
| Info |
|---|
If you need a detailed description of all fields and features of the Data Source page, please refer to this page. |
| Info |
|---|
If you need more information on how to create a data source, please refer to our step-by-step instruction. |
3. Export Data into Tableau
After creating an access token and creating a data source, you can easily export your data into Tableau. Being on the Connectors page, select Copy link. Launch your Tableau, authorize, connect, and start working with your data.
| Info |
|---|
If you need more information on how to export data, please refer to our step-by-step guide. |
How to Uninstall Tableau Connector for Zendesk
The Zendesk Administrator can uninstall the Tableau Connector for Zendesk from the instance. However, regular users can also uninstall the app if needed. This action will disconnect the app from your account and revoke your OAuth token. All data sources will remain intact and will not be deleted.
Being signed in to your Zendesk account, select Tableau Connector by Alpha Serve.
Select Disconnect, and then select Disconnect the Connector.
Select Disconnect.
| Info |
|---|
Explore 4 options to build Zendesk reports ⬇️ |


.gif?version=1&modificationDate=1725368260855&cacheVersion=1&api=v2&width=673)


.png?version=1&modificationDate=1661873139610&cacheVersion=1&api=v2&width=204)