As not all users have permissions to export Jira data, Jira Cloud Administrators can grant necessary permissions to work with Power BI Connector for Jira Cloud for specific users or groups. The instructions below demonstrate how to grant these permissions, allowing users to create, edit, watch, and export connectors.
Administrators have the permission to work with the connector by default.
Read the step-by-step guide on how to use Power BI Connector for Jira in our blog:
https://www.alphaservesp.com/blog/power-bi-jira-integration/
How to Grant Permission
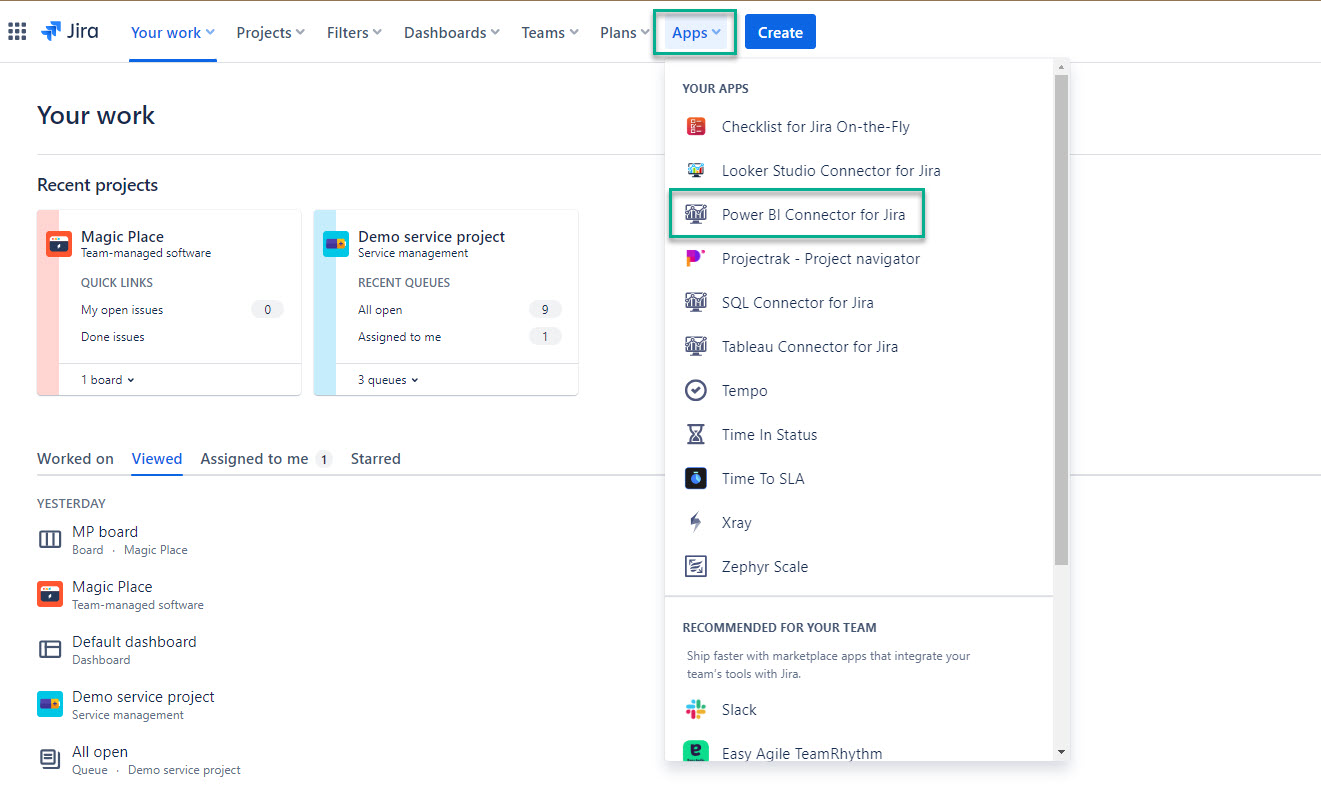
Being signed in to your Jira Cloud instance, select Apps, and then select Power BI Connector for Jira.
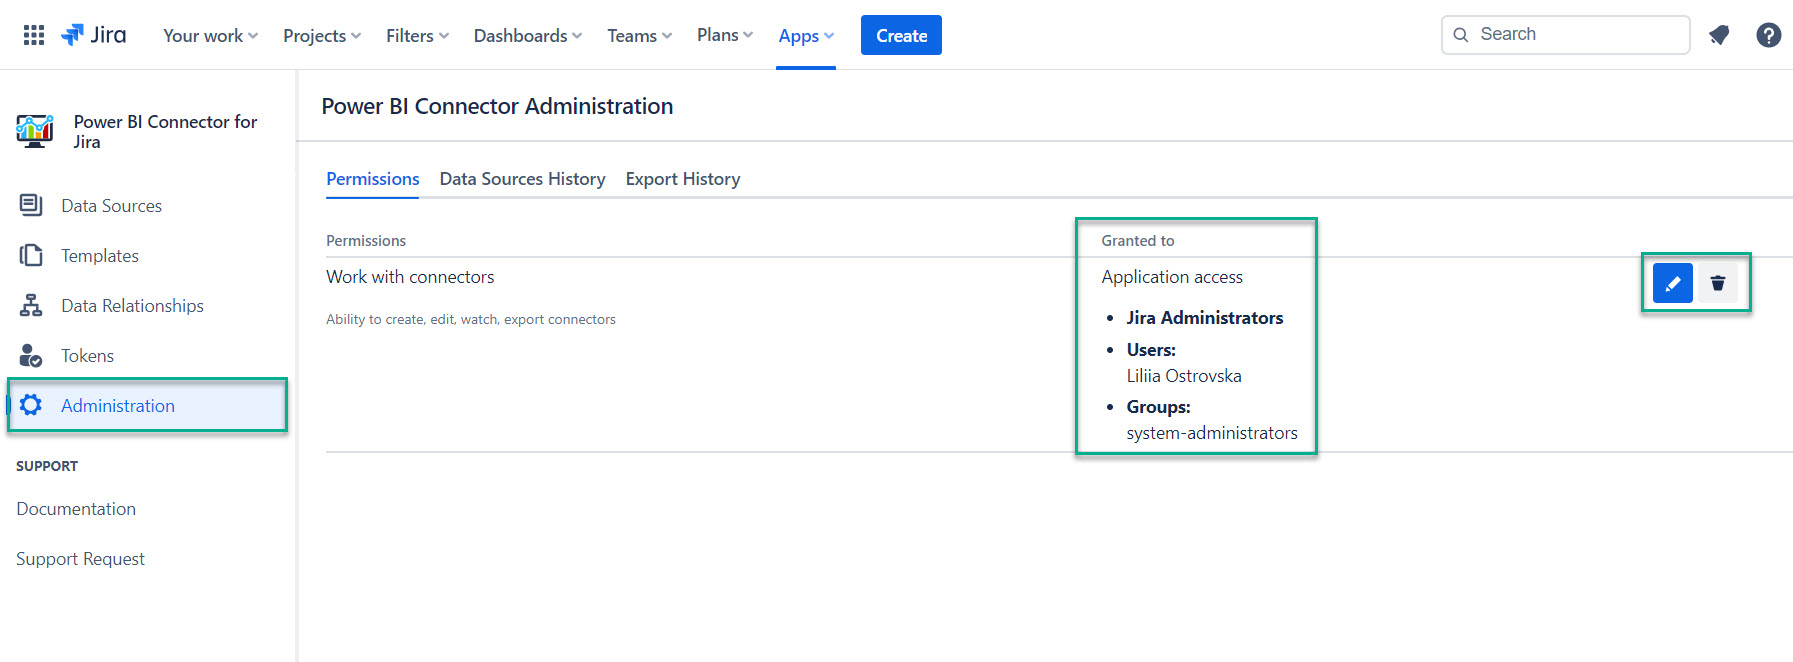
On the left-side menu, select Administration.
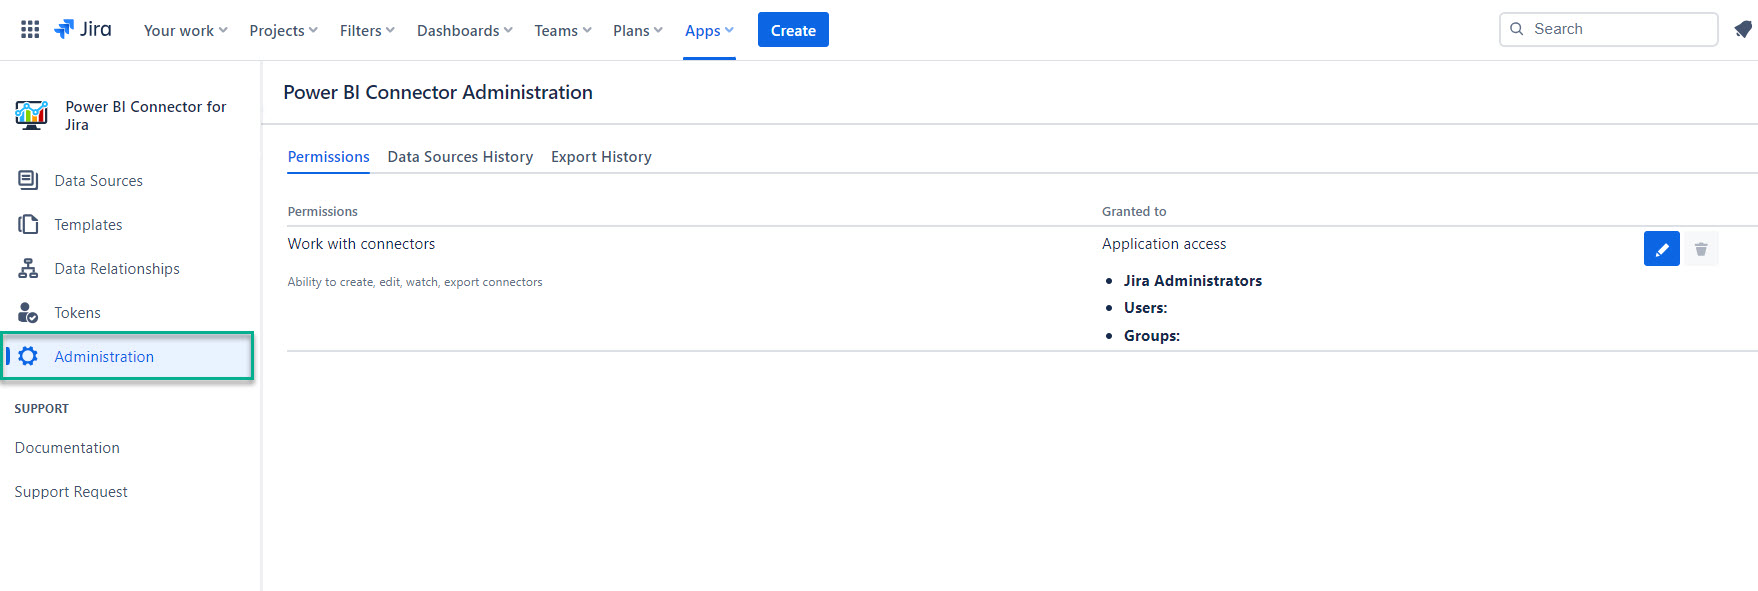
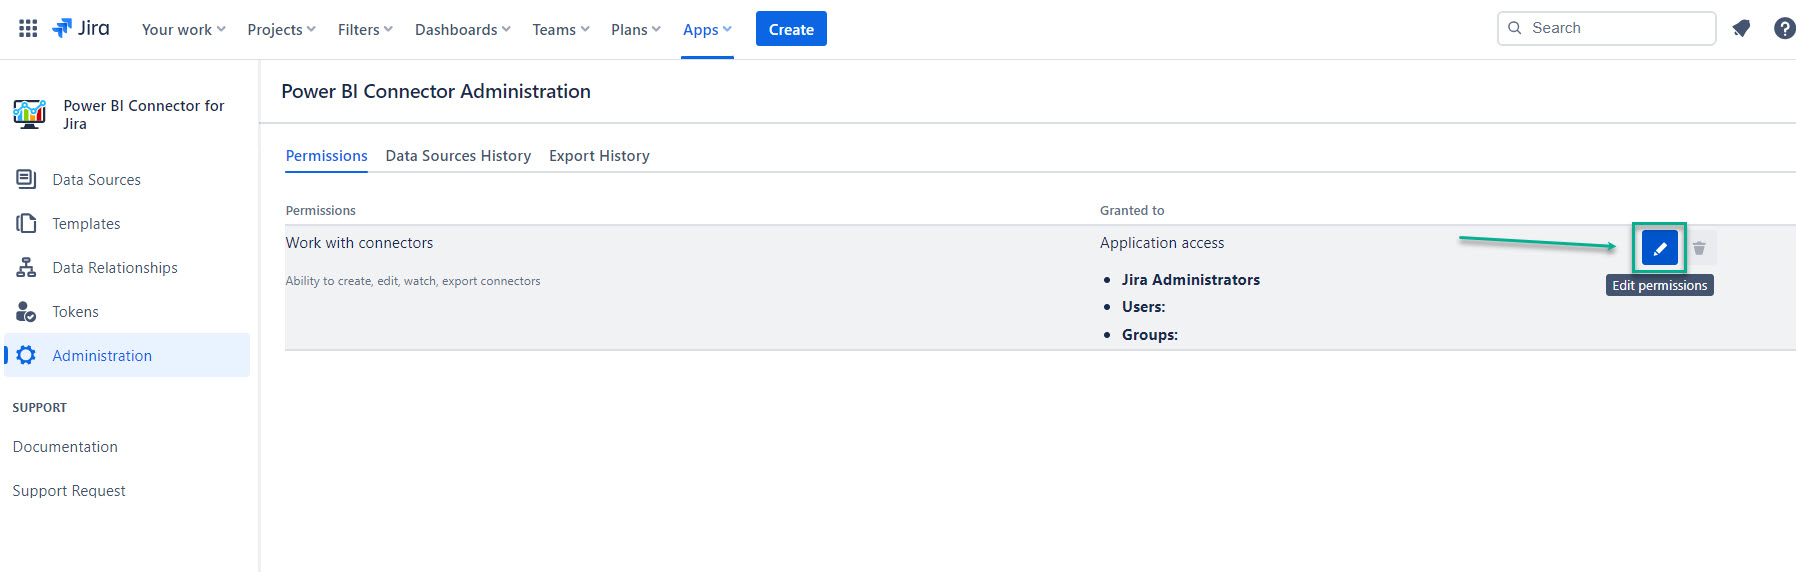
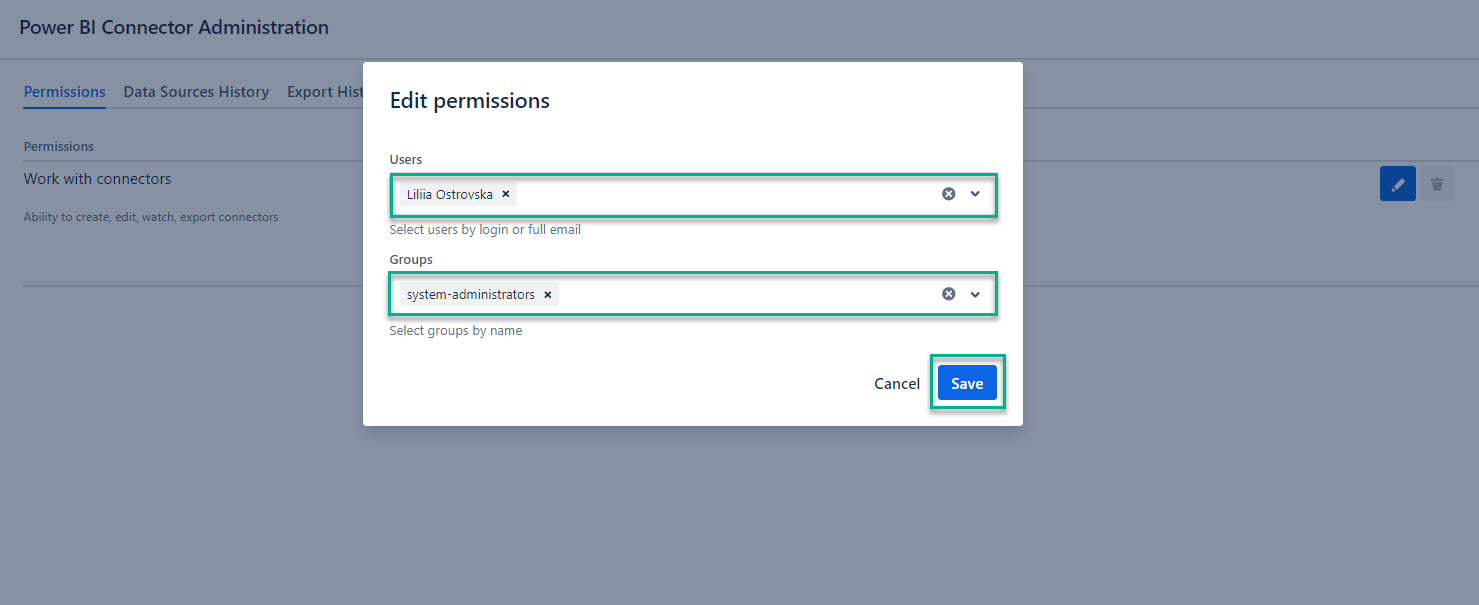
Select the Edit permissions button.
In the Users field, enter the username you want to grant permissions to.
Once you start typing, the drop-down list with username suggestions will appear. Select the user from the list.
You can select as many individual users as you need to.
In the Groups field, select the groups you want to grant permissions to.
Once you select the Group field, the drop-down list with available groups will appear. Select a group from the list.
In our case, it’s the system-administrators group, you select the one you have inside your Jira instance.
You can select as many groups as you need to.
Select Save.
Here you can also view who has permission to work with Power BI Connector for Jira, edit, and delete permissions.
How to View Data Sources History
Being signed in to your Jira Cloud instance, select Apps, and then select Power BI Connector for Jira.
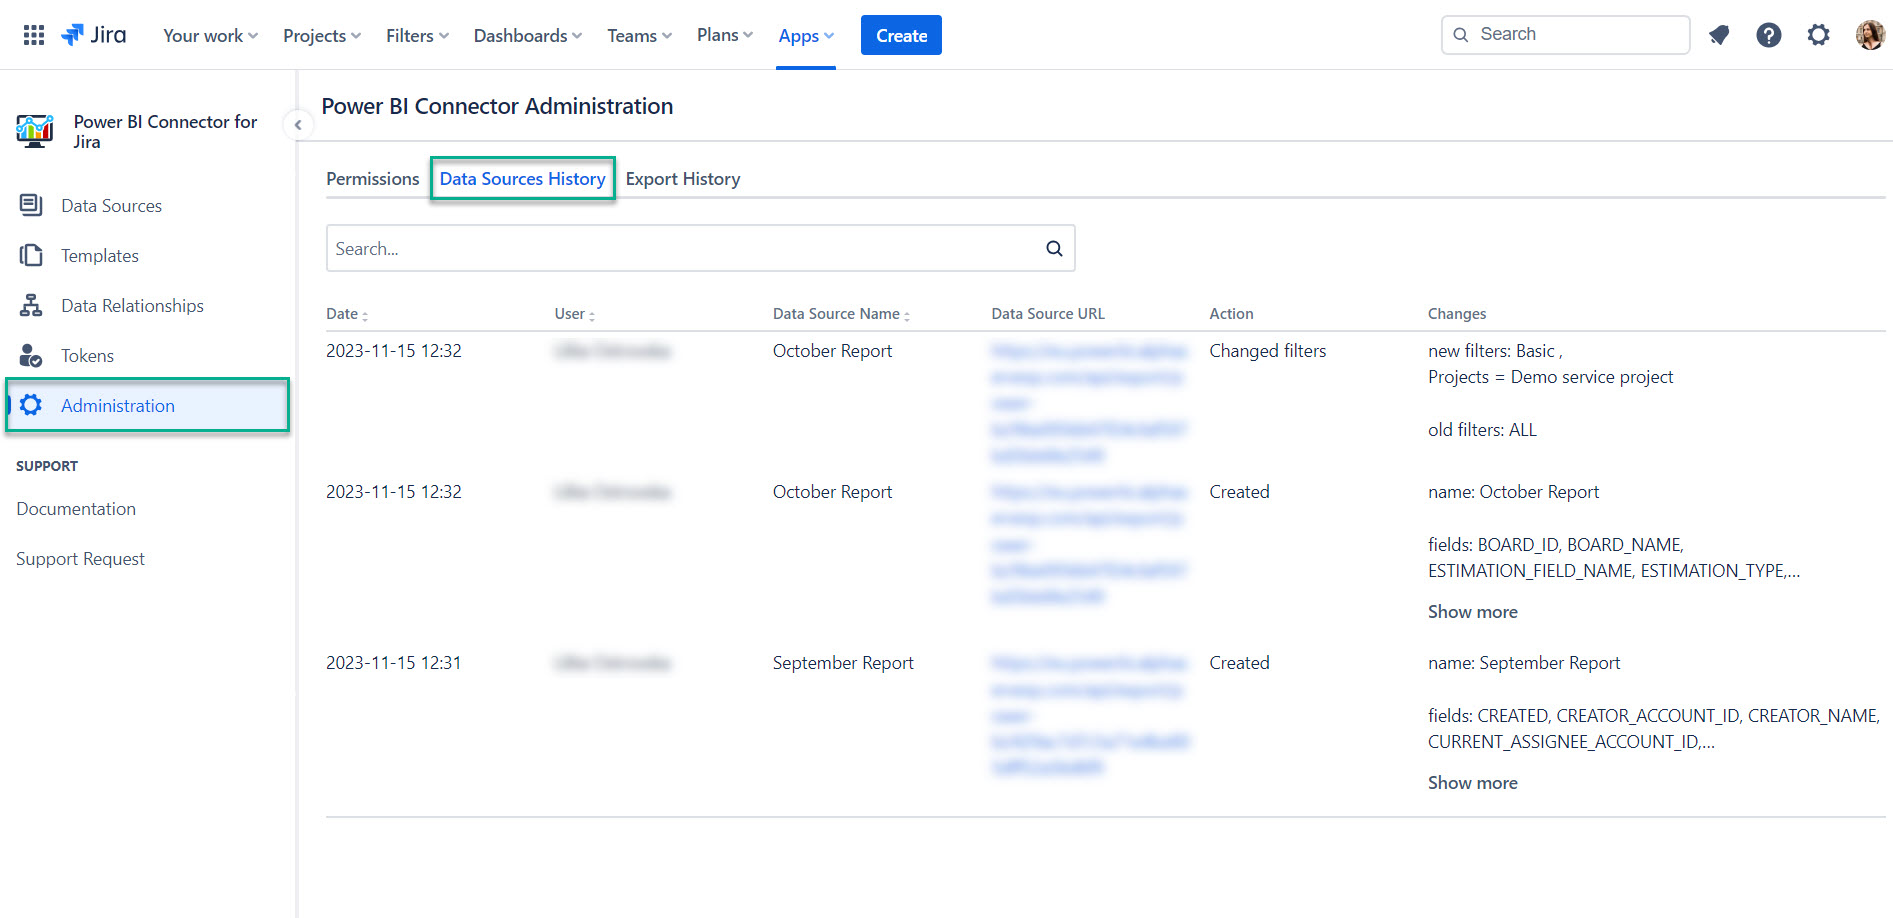
On the left-side menu, select Administration, and then select Data Source History.
The tab displays all changes performed to the data sources by all users, including creating, editing the fields or filters, sharing, changing owner, and more.
How to View Export History
Being signed in to your Jira Cloud instance, select Apps, and then select Power BI Connector for Jira.
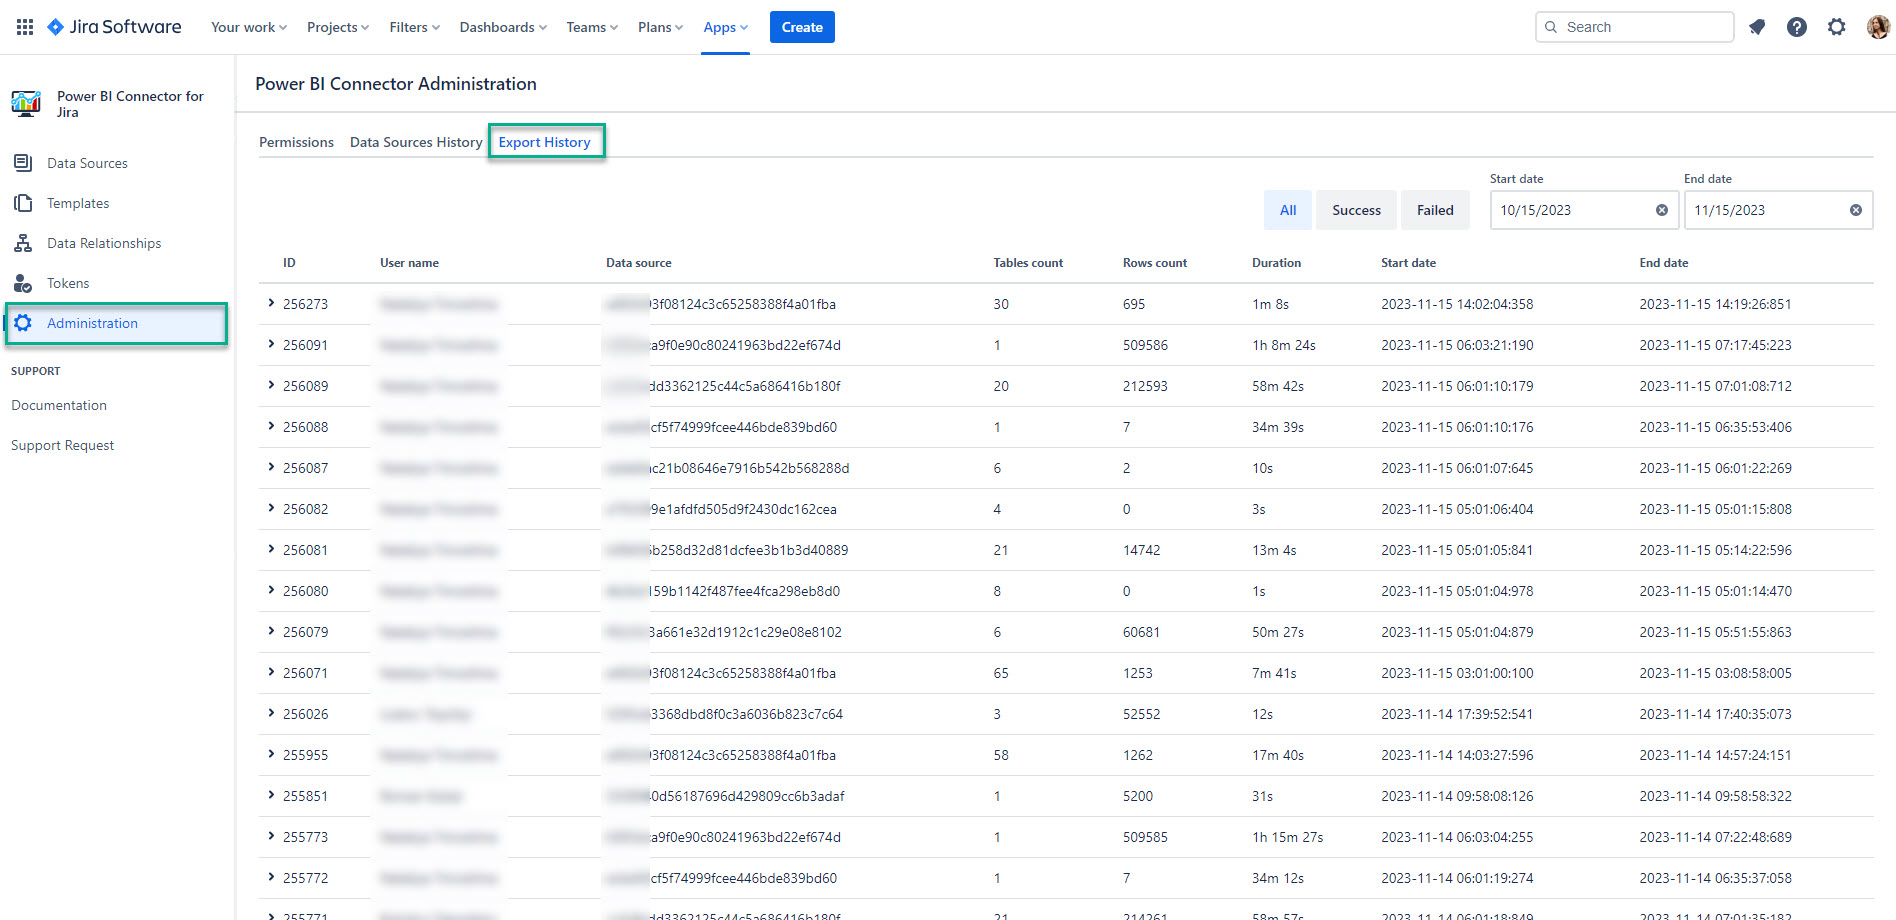
On the left-side menu, select Administration, and then select Export History.
The tab displays all data related to the export process: ID, user name, data source ID, tables count, rows count, and more. Filtering by statuses (All, Success, and Failed) and dates (Start date and End date) can help to find specific data.
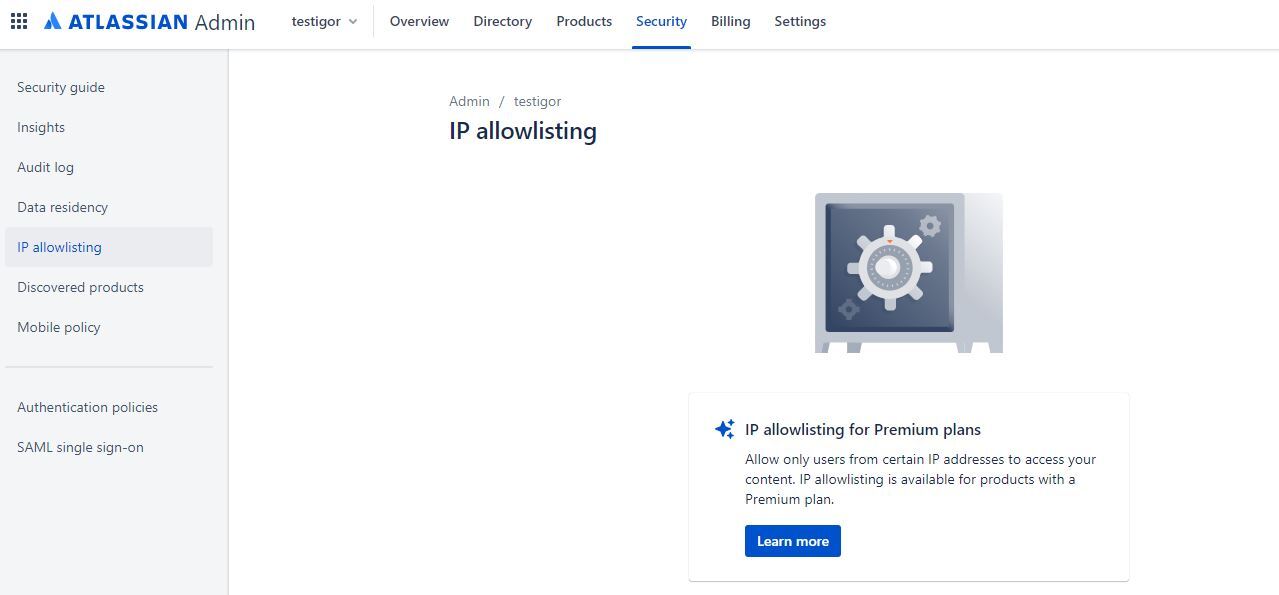
IP Whitelisting
Here are the current instances of IP addresses of Power BI Connector for Jira application. Please add these IPs to your IP allowlisting:
Default region (Oregon): 35.161.7.18, 35.85.205.110
EU: 52.211.33.183, 54.77.134.91
DE: 18.184.153.1, 54.93.142.16
AU: 52.63.173.131, 54.253.130.102
SG: 18.138.139.163, 18.139.93.202
IP allowlisting gives you an additional level of control, allowing you to specify which IP addresses users must use to access content for Jira Software, Jira Service Management, and Confluence. When you set an allowlist for Jira Software Premium, it applies to customer and agent-facing portals for your Jira Service Management on the same site.
To view your IP allowlists:
Go to admin.atlassian.com. Select your organization if you have more than one.
Select Security > IP allowlisting.
You will be able to access admin.atlassian.com even if the IP is outside the range of the allowlist.