 toc
toc

How to
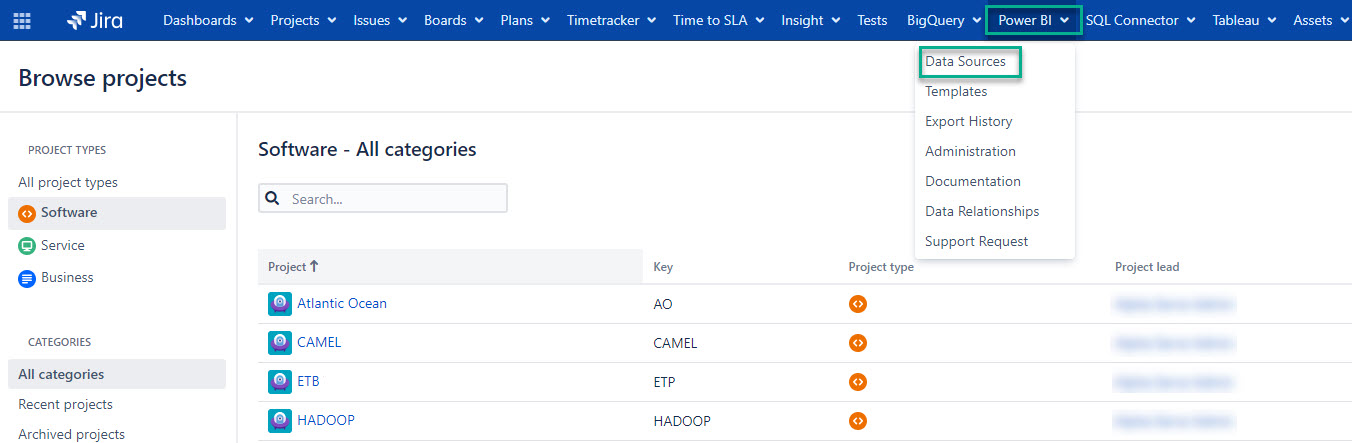
Being signed in to your Jira instance, select Power BI, and then select Data Sources.
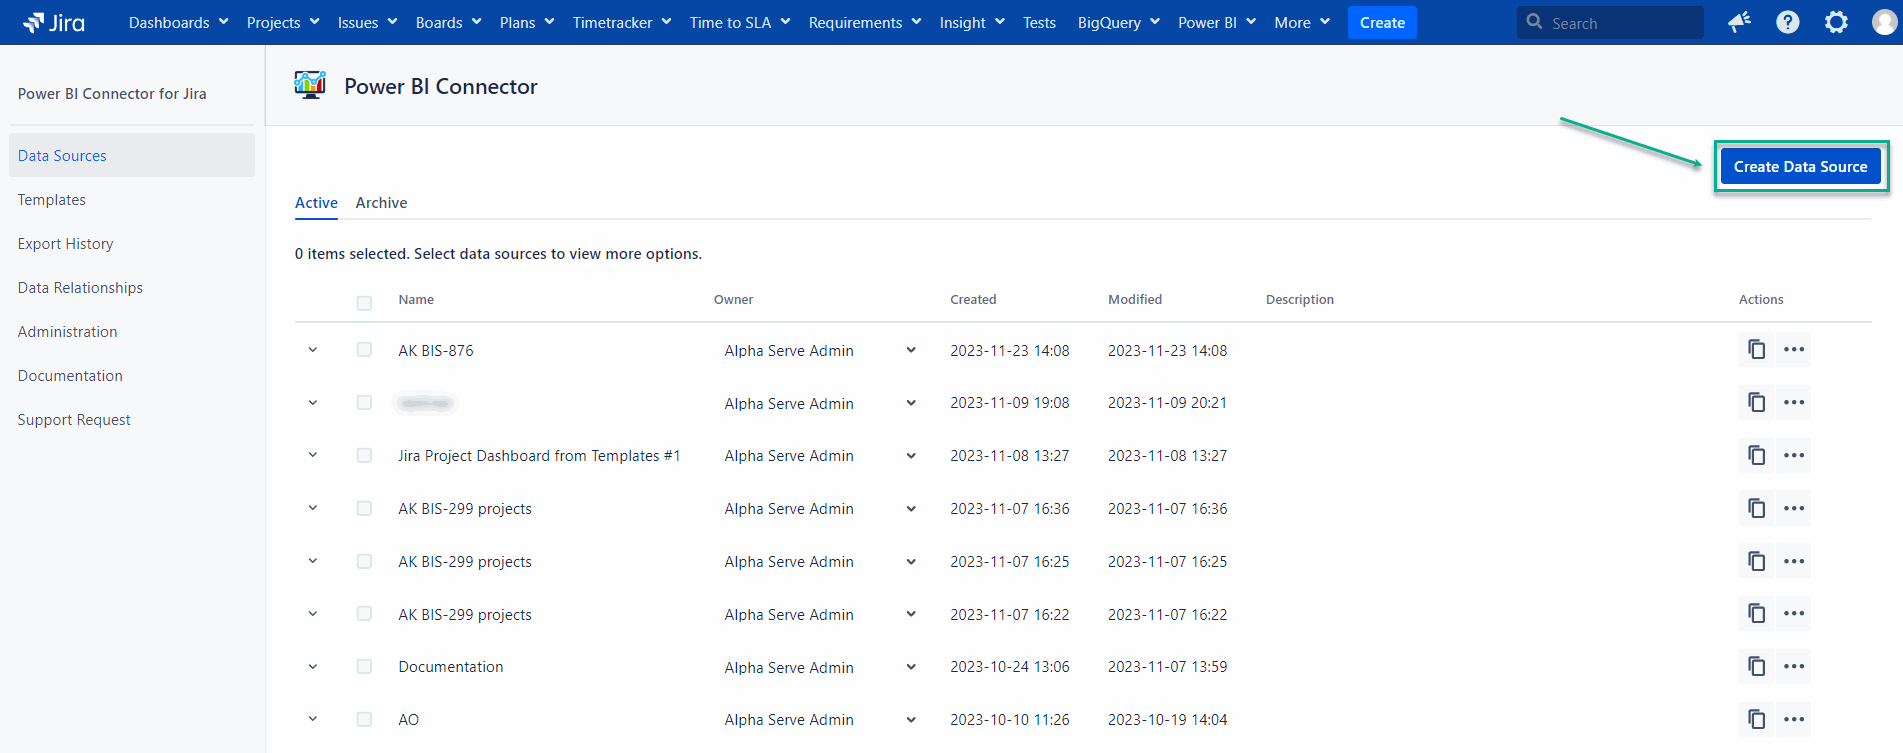
Select Create a Data Source.
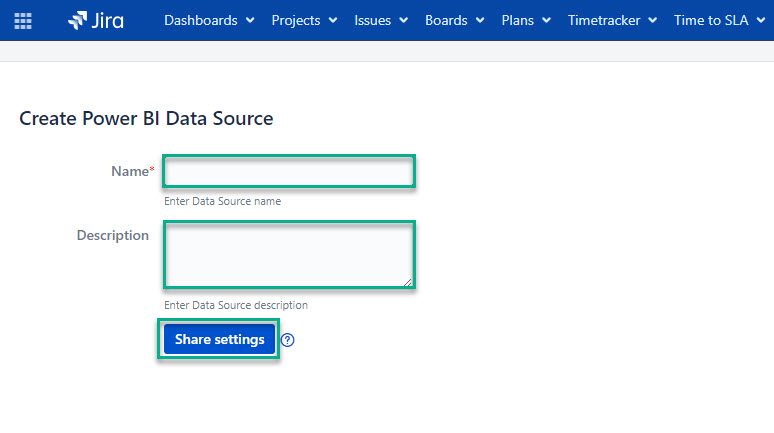
In the Name* field, enter your data source name.
| Info |
|---|
The Description field is optional. You can enter data related to your data source or some hints you might need in the future. |
| Info |
|---|
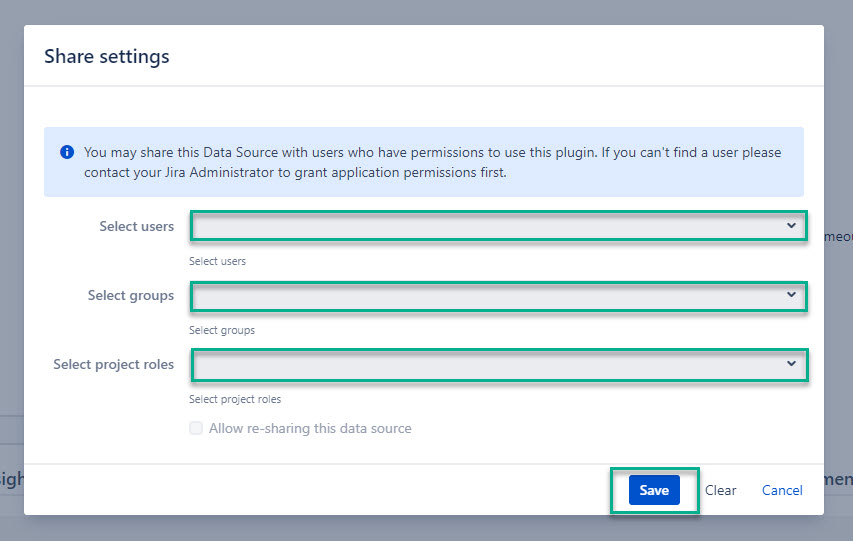
You may share this data source with users who have permissions to work with Looker Studio Connector for Jira. Therefore, the next steps are optional. |
Users with administrator permissions have access to all data sources by default.
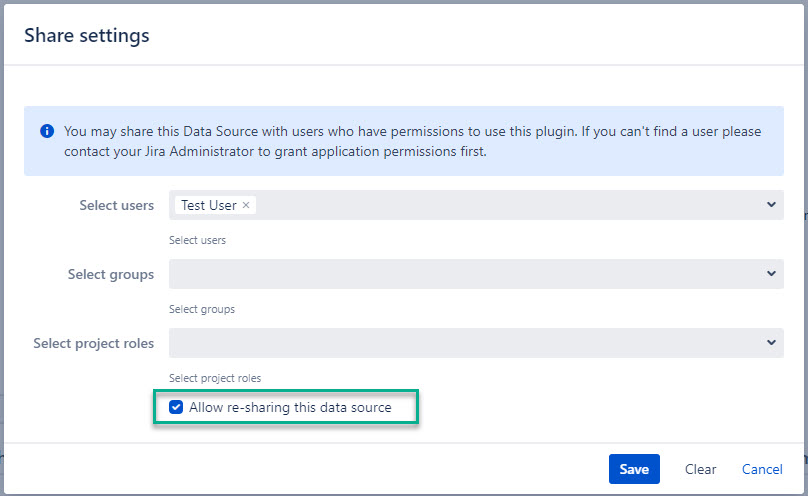
[Optional] Select Share settings.
[Optional] In the Select users field, enter the username you want to share the data source with.
| Info |
|---|
Once you start typing, the drop-down list with username suggestions will appear. Select the user from the list. |
[Optional] In the Select group field, select the group you need.
| Info |
|---|
Once you select the Select group field, the drop-down list with available groups will appear. Select a group from the list. |
[Optional] In the Select project role field, select the roles you need.
| Info |
|---|
Once you select the Select project role field, the drop-down list with available project roles will appear. Select a role from the list. |
Select Save.
| Note |
|---|
Other users who have access to Power BI Connector might not get all data from this data source due to different Jira permissions. |
You can also allow other users who have permissions to use Power BI Connector to re-share the data source.
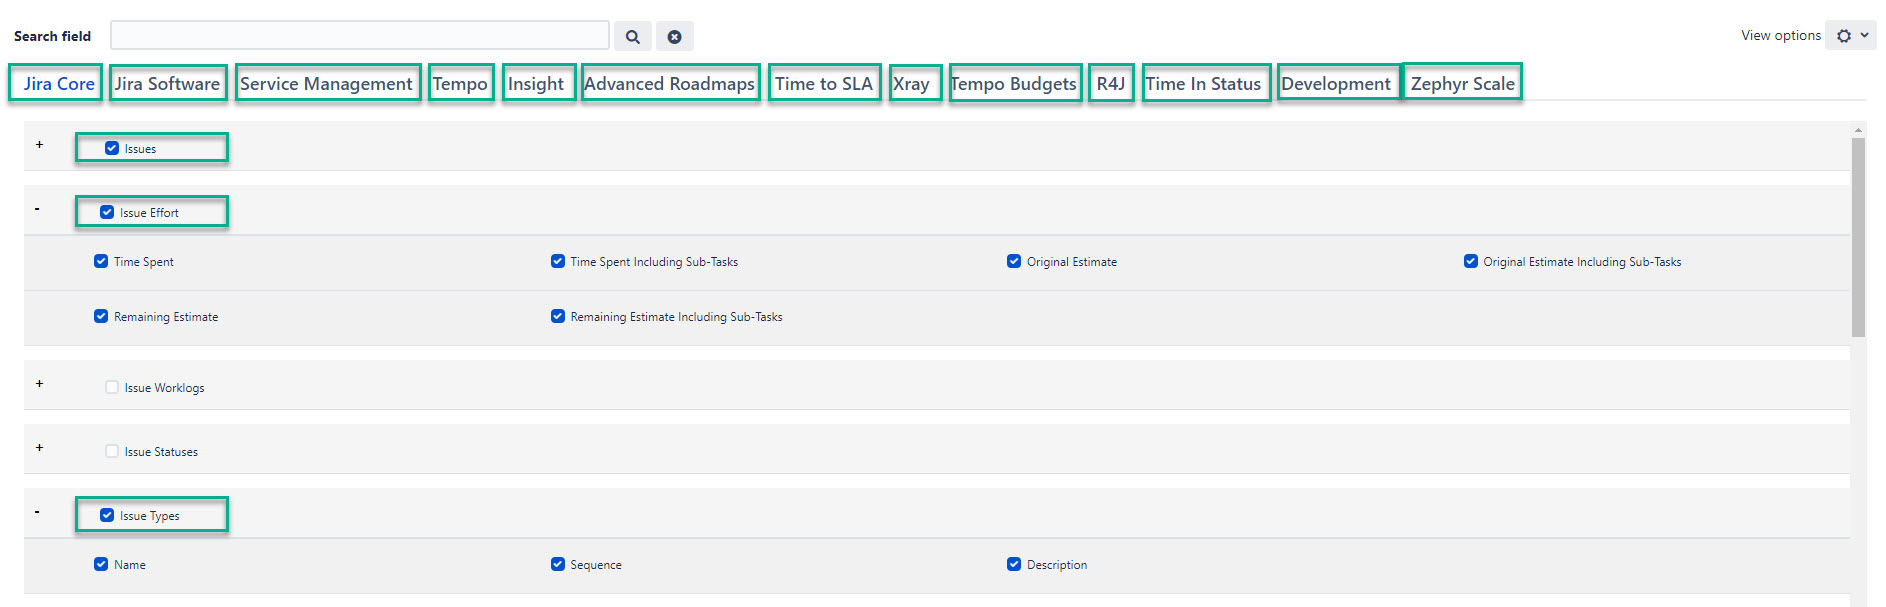
Select all filters and fields you want to be in your data source, and then select Save.
You can select different filter groups:
All (by default) - will return all data, select it, if you want to export all existing issues.
JQL - Jira Query Language, is a flexible tool that allows you to search for issues, projects, etc. in Jira and pinpoint exactly what you are looking for. Select it, if you want to use JQL to create your own request and filter data.
Basic - select it, if you want to use standard fields filters; to set up Basic filter, select the Issue filter button.
| Info |
|---|
For detailed description of all fields, filters, and buttons, refer to this article. |

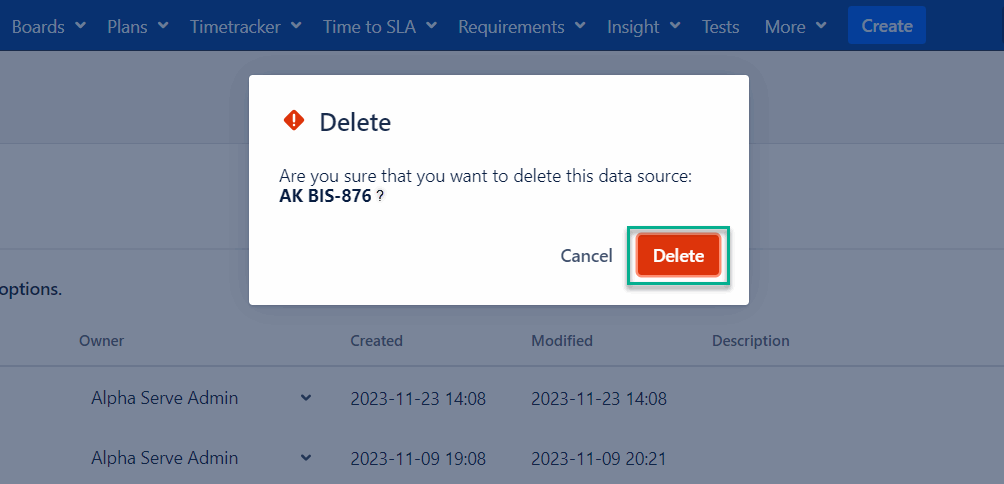
How to Delete or Archive Data Source
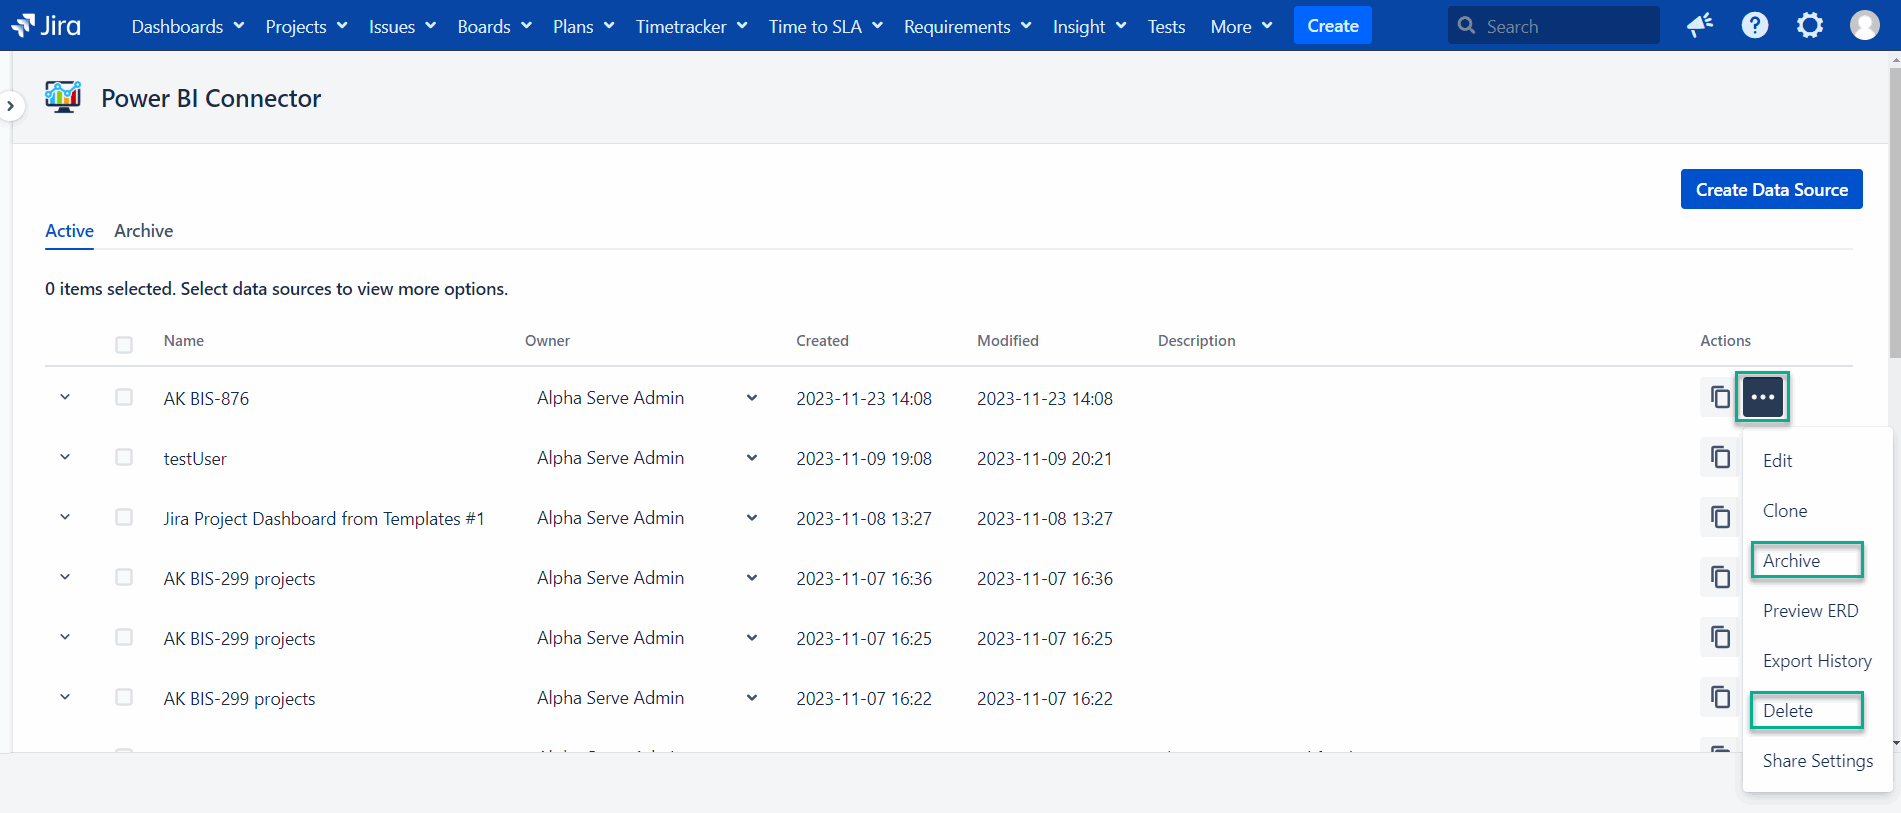
Being signed in to your Jira instance, select Power BI, and then select Data Sources.
Select the data source you need, and then:
select Archive if you want to disable data source without deleting.
select Delete if you want to permanently delete data source.
| Info |
|---|
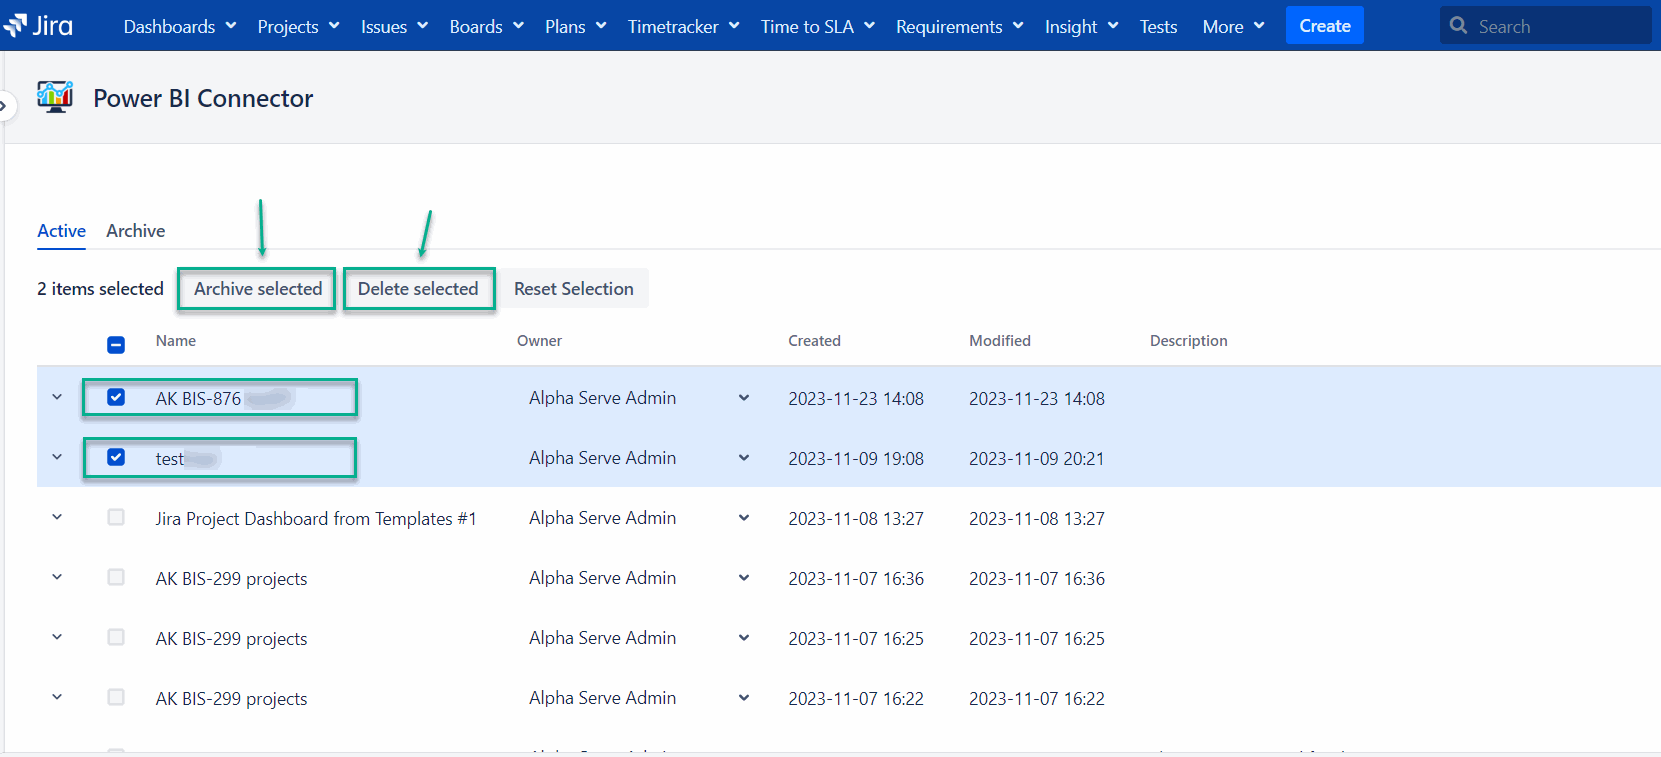
You can also Archive or Delete multiple data sources. |
Select data source you need, and then:
select Archive Selected if you want to disable data sources without deleting them.
select Delete Selected if you want to permanently delete data sources.
Select Delete.
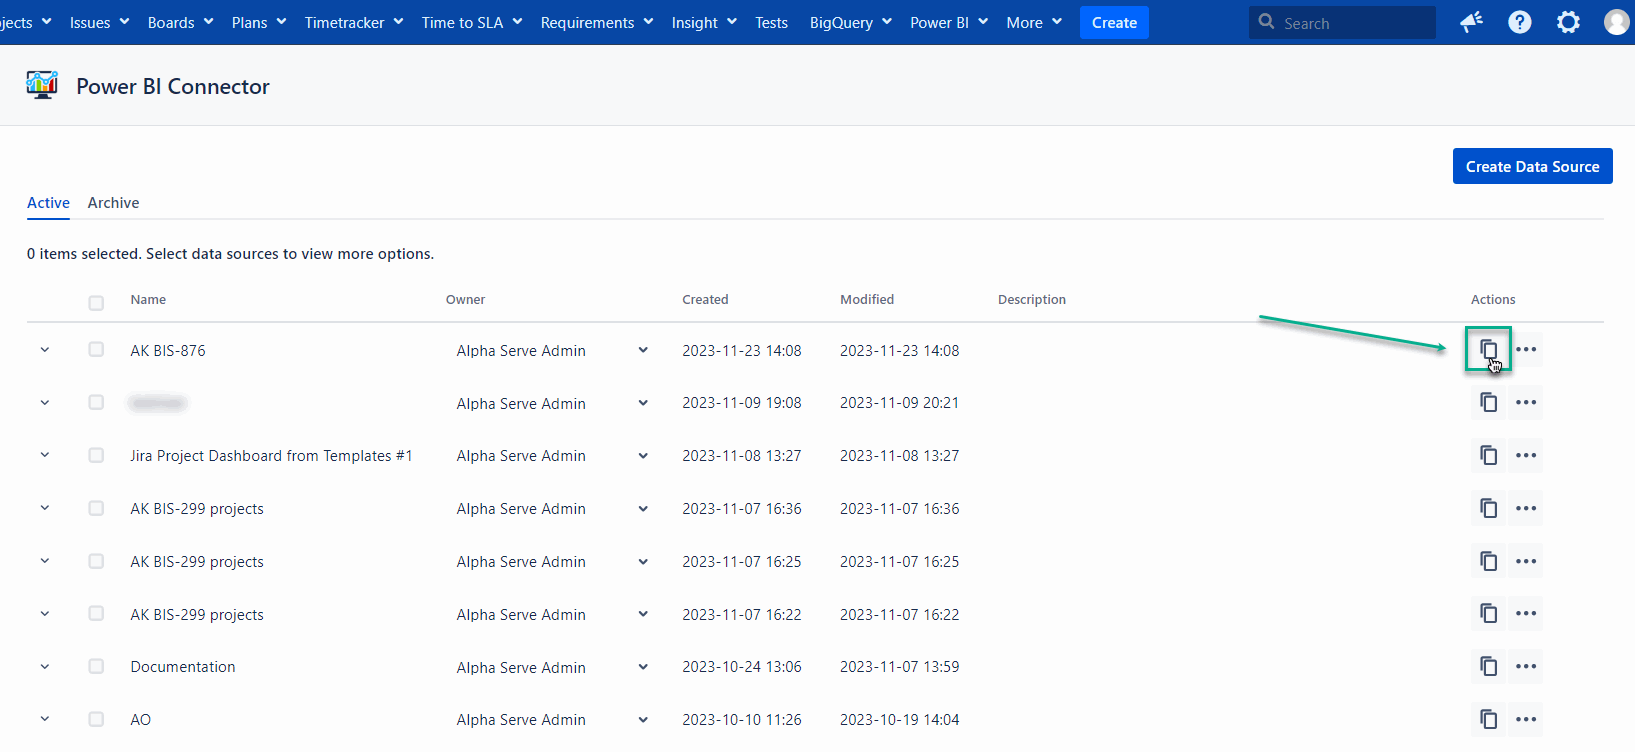
How to Export Data into Microsoft Power BI
Power BI Connector uses generated link to export your Jira data to Microsoft Power BI.
On the Data Sources page, copy the link of the data source you need.
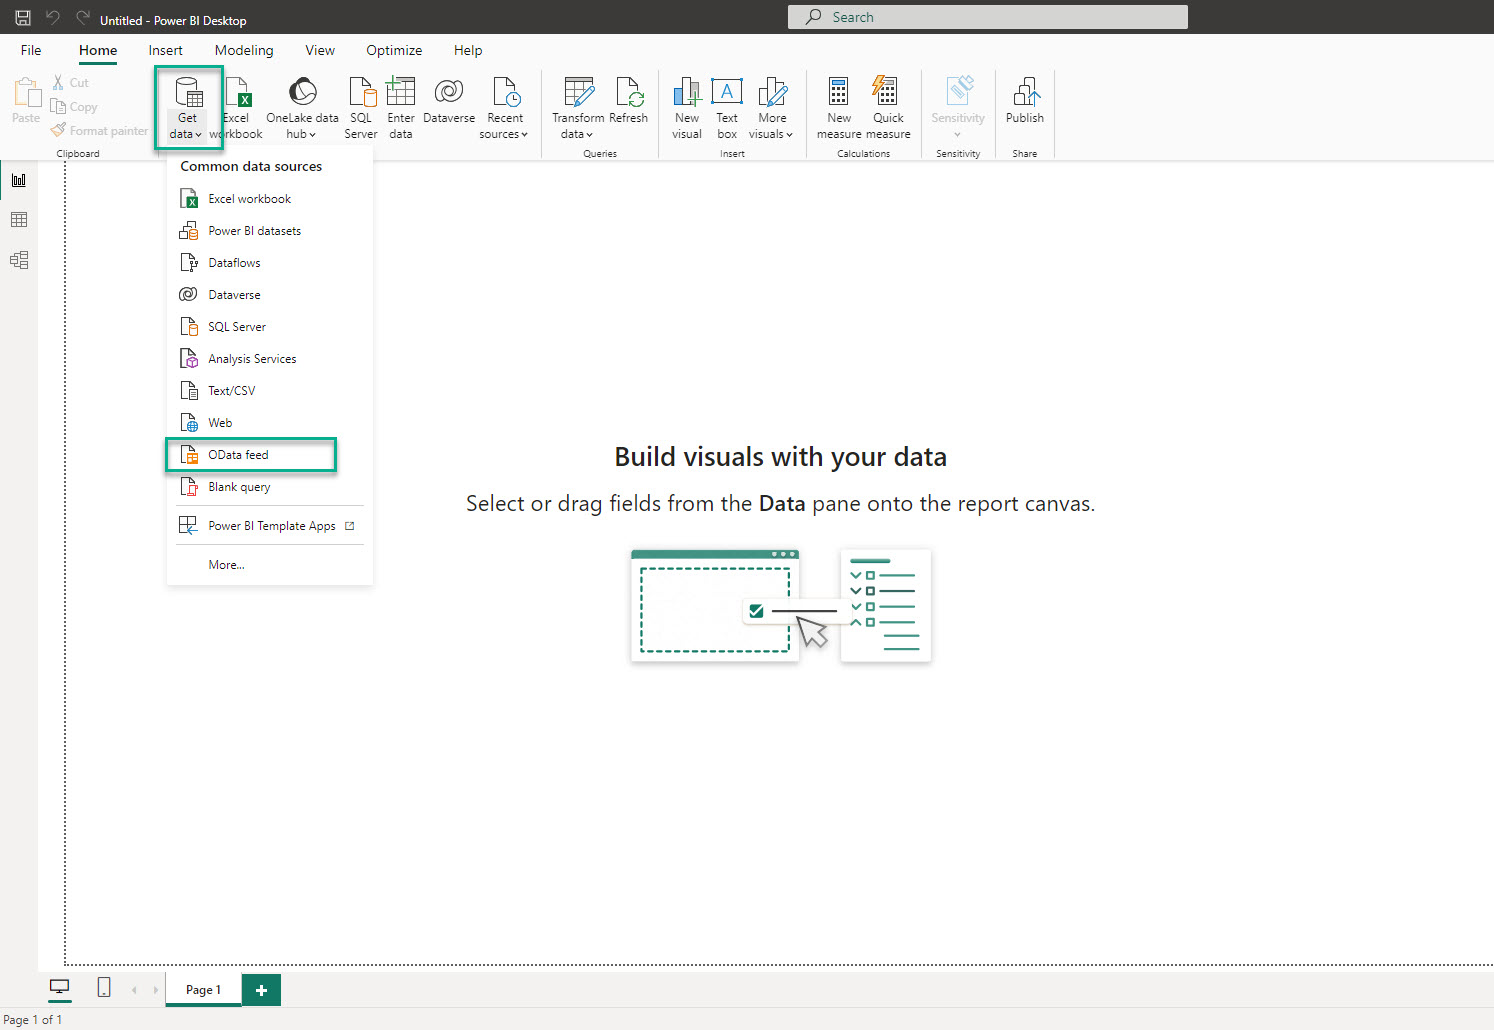
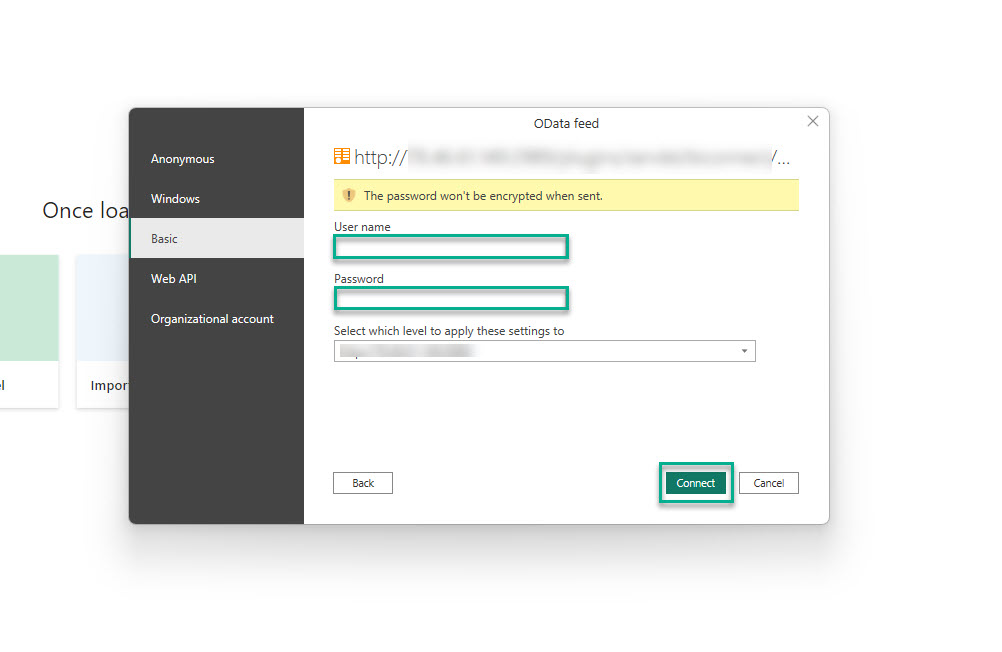
Open you Microsoft Power BI, select Get data, and then select OData feed.
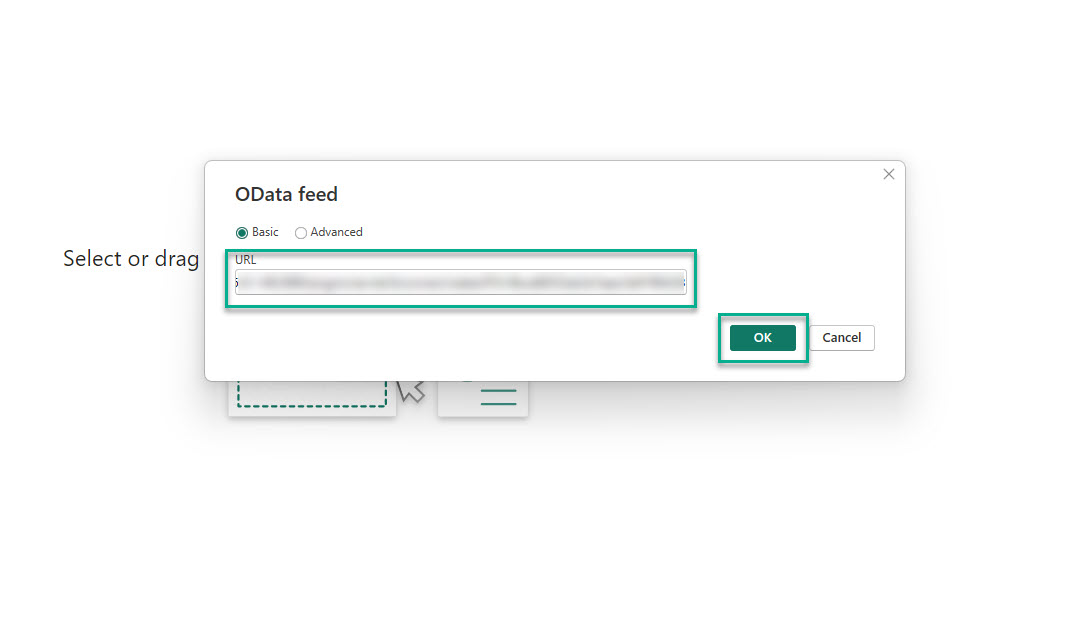
In the URL field, paste the link of your data source, and then select OK.
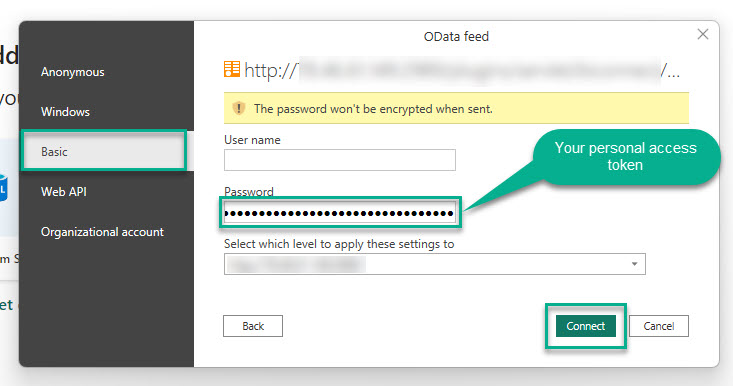
Select Basic, and then in the User name and Password fields, enter your Jira username and password respectively.
| Info |
|---|
You can also sign in with Personal Access Token. |
Select Connect.
| Note |
|---|
Personal Access Token will not work if your instance has Basic authentication disabled. |
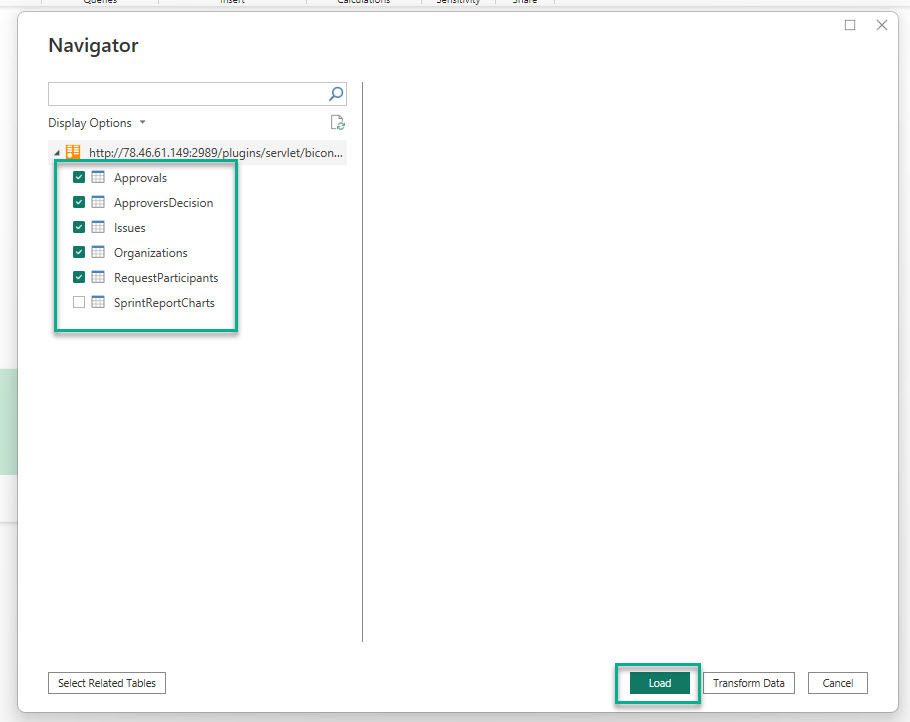
Select the tables you need, and then select Load.
| Info |
|---|
If there is a large amount of data to import, it may take some time. |
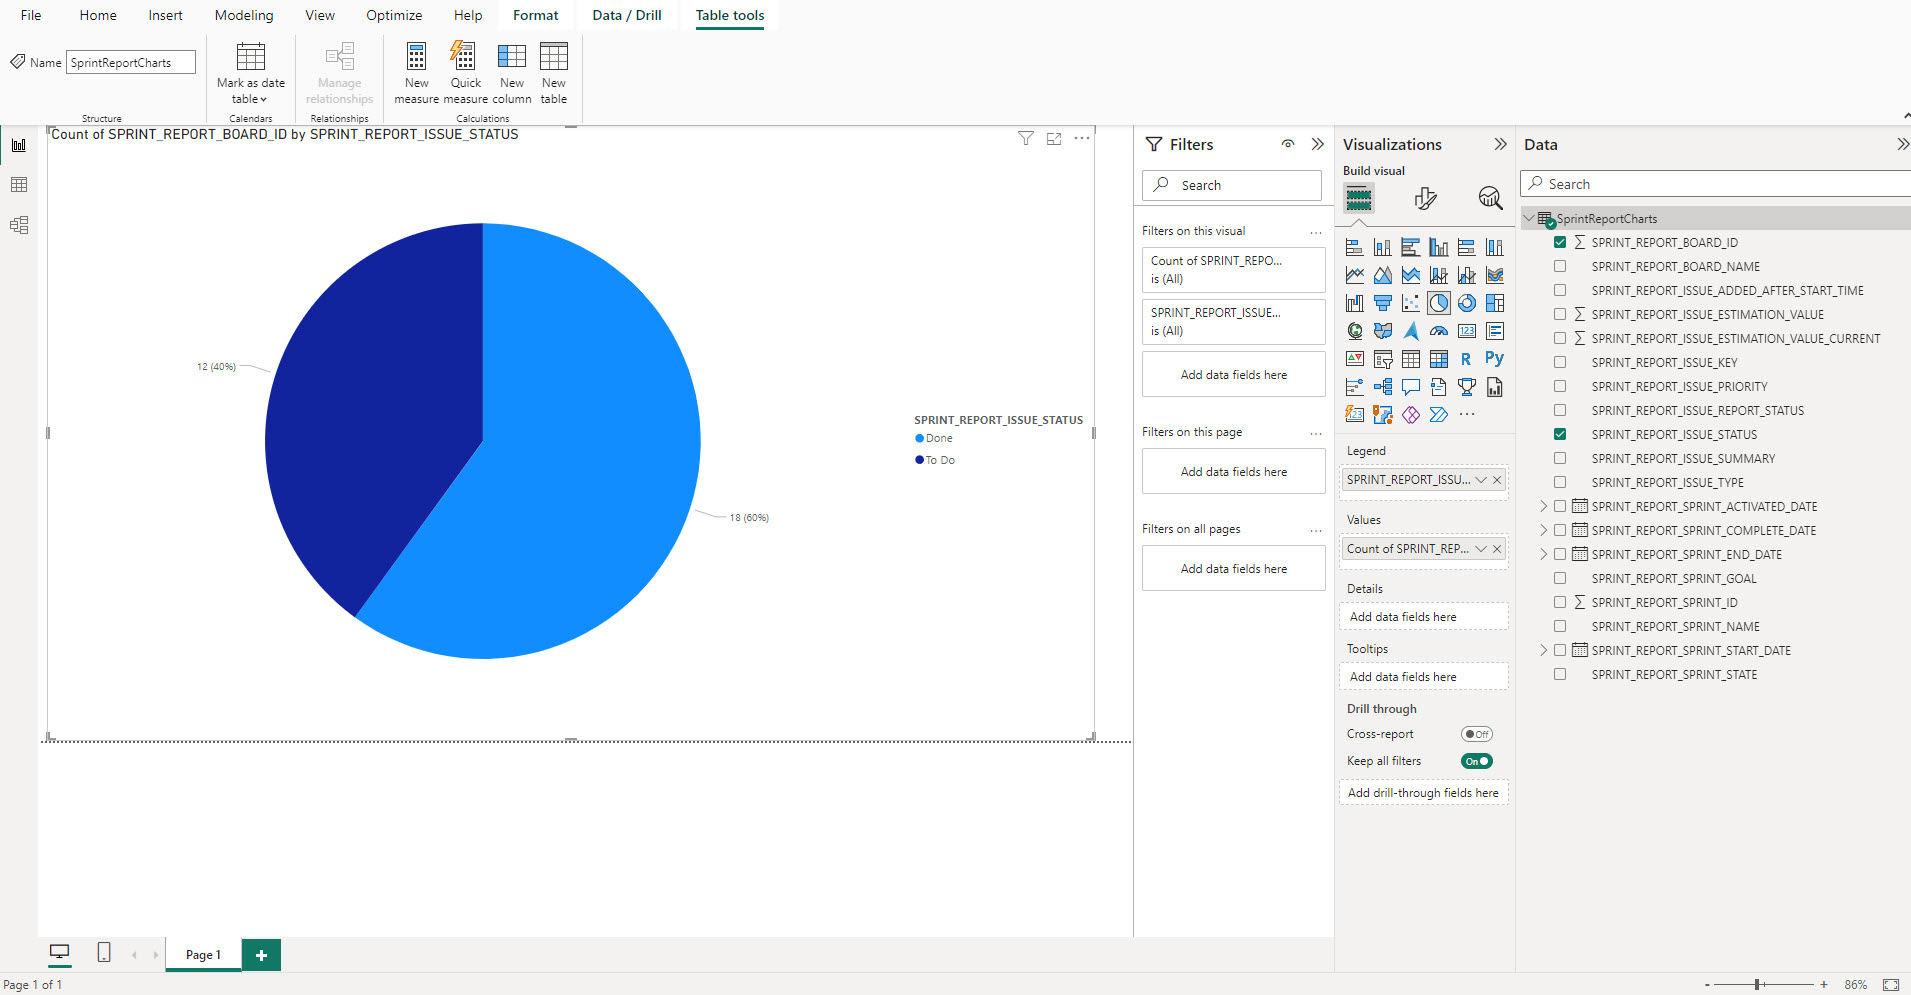
After data is loaded, you can build graphs and dashboards based on the imported Jira data.
How to Export Data Using Jira Personal Access Token
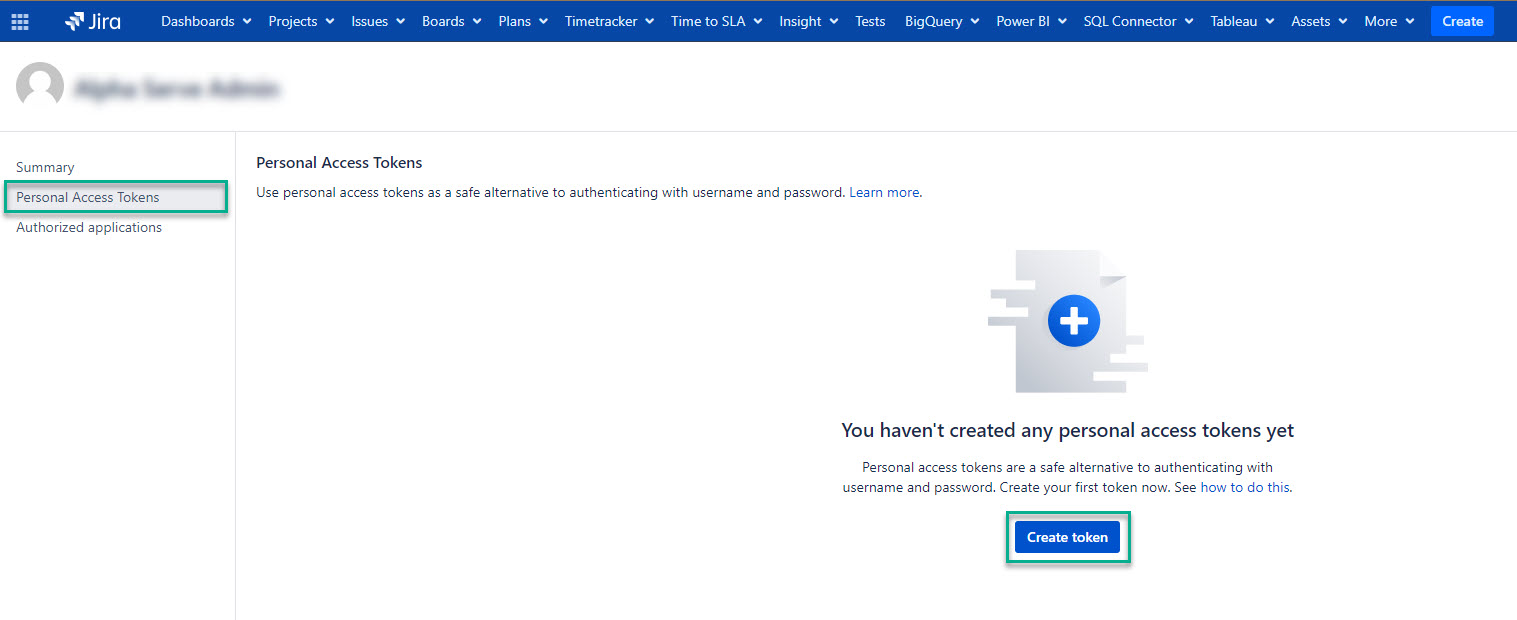
Being signed in to your Jira instance, select your profile picture, and then select Profile.
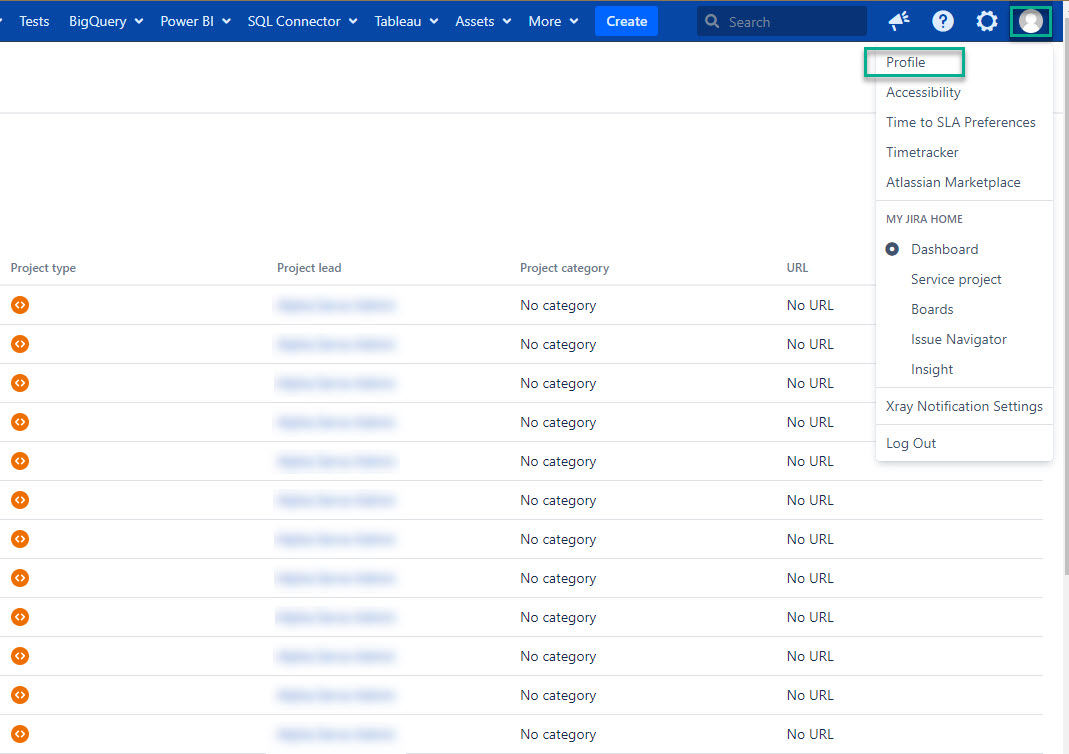
Select Personal Access Tokens, and then select Create token.
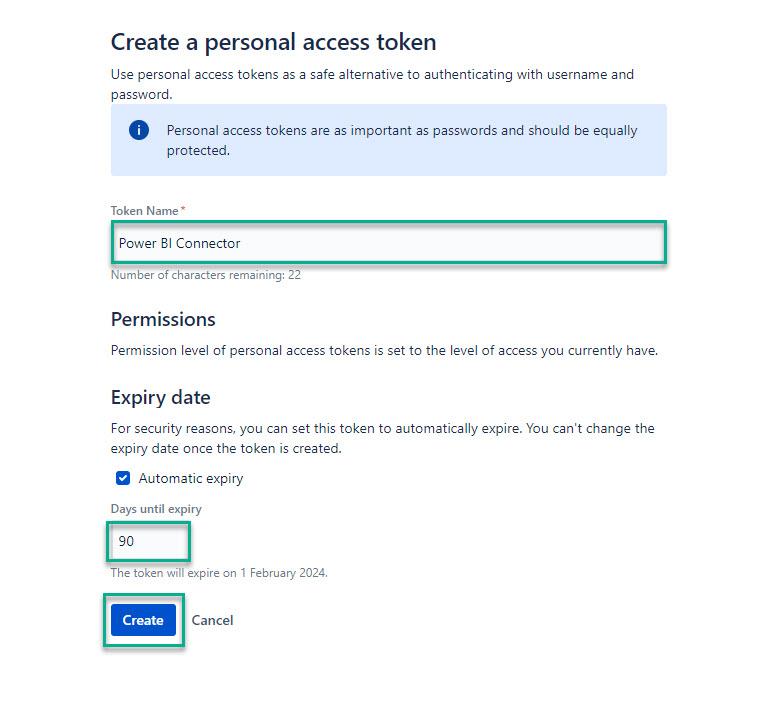
In the Token Name* field, enter name of your token.
Enter expire date for your token if needed, and then select Create.
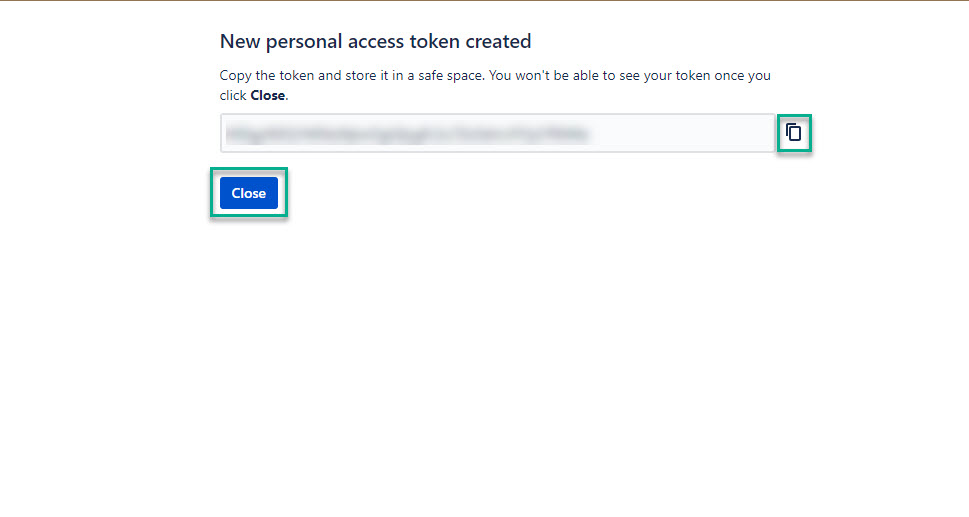
Copy your token, and then select Close.
| Note |
|---|
Before closing the window, make sure to copy your token and store it in a secure place. You won’t be able to see your token once you select Close. |
Select Basic, and then paste your personal access token into the Password field.
The User name field should be left blank.
Select Connect.

Dashboard Templates

Scheduled Refresh
.gif?version=1&modificationDate=1710166236178&cacheVersion=1&api=v2&width=98)
Data Schema