


How to Export Data from Jira to SQL Database
.gif?version=1&modificationDate=1709622015965&cacheVersion=1&api=v2&width=98)
Data Schema
How to Add Database Configuration
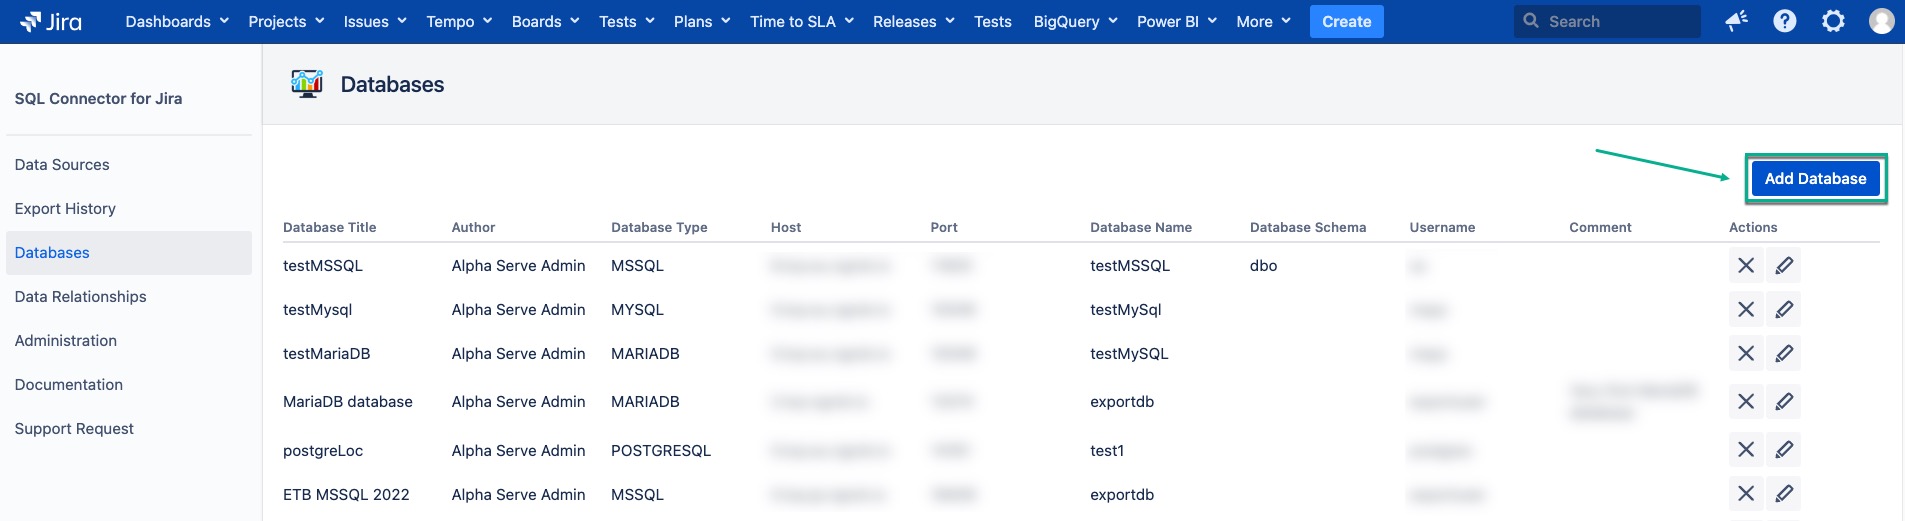
Being signed in to your Jira instance, select SQL Connector, and then select Databases.
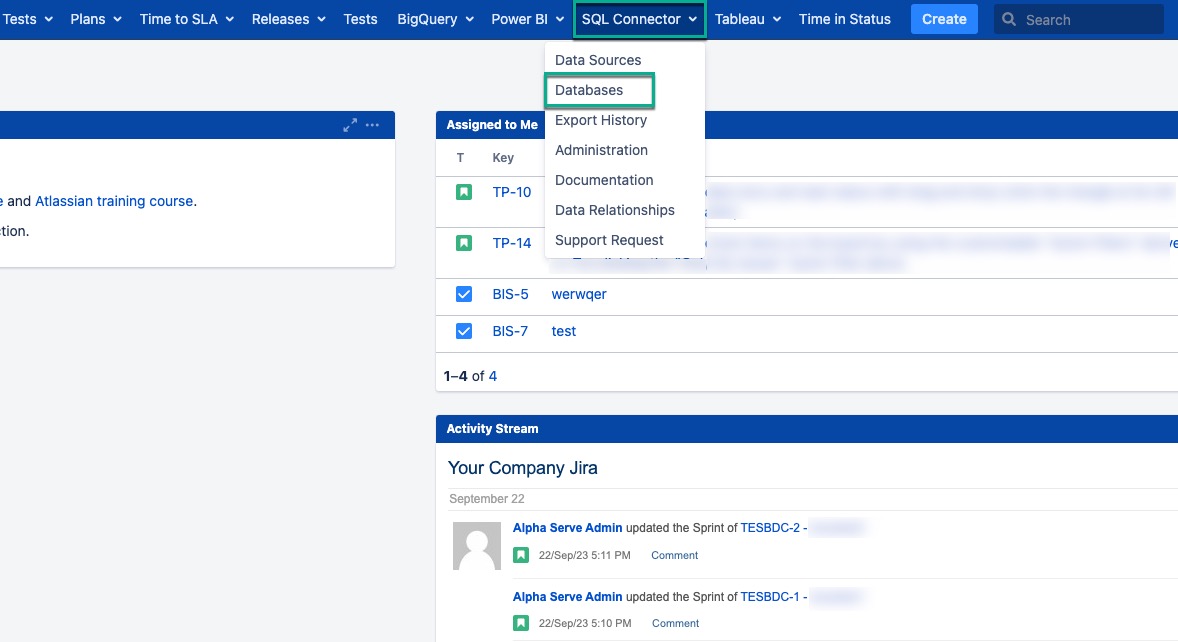
Select Add Database.
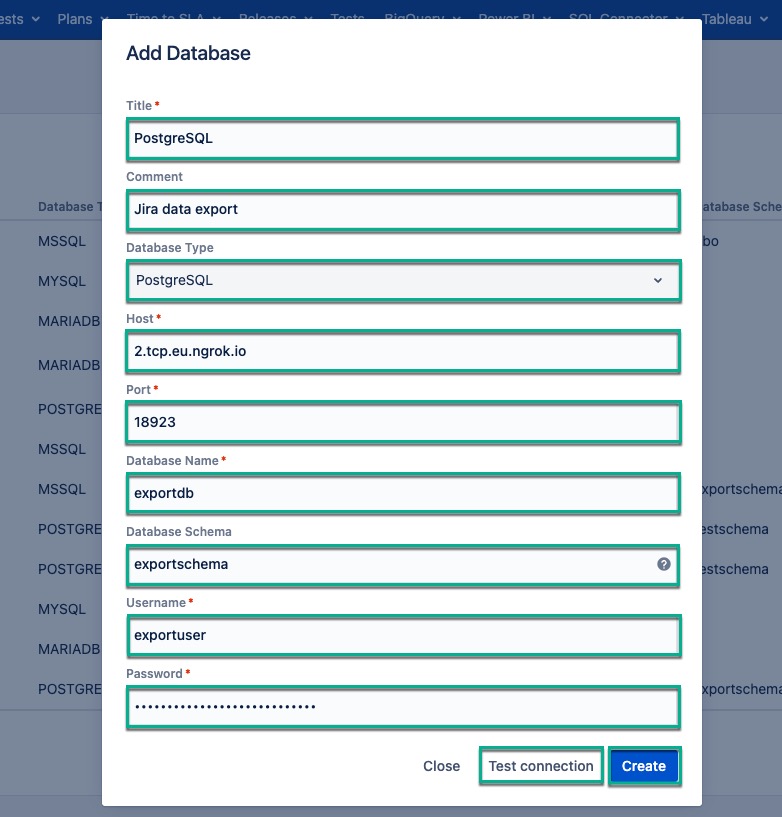
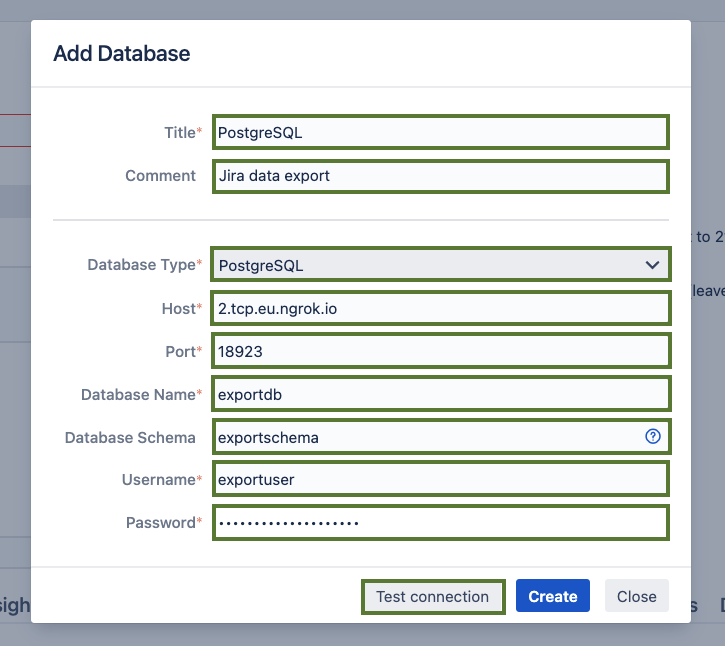
In the Title* section, enter the title for your database.
[Optional] In the Comment field, enter any useful information.
In the Database Type* field, select the type of your database.
In the Host* field, enter the host of your database.
In the Port* field, enter the host of your database.
In the Database Name*, enter the name of your database.
[Optional] In the Database Schema*, enter the data schema.
| Info |
|---|
By leave the Database Schema* field empty, the default data schema will be applied. |
In the Username* field, enter your username.
In the Password* field, enter your password.
Select Test connection to check if everything is correct, and then select Create.
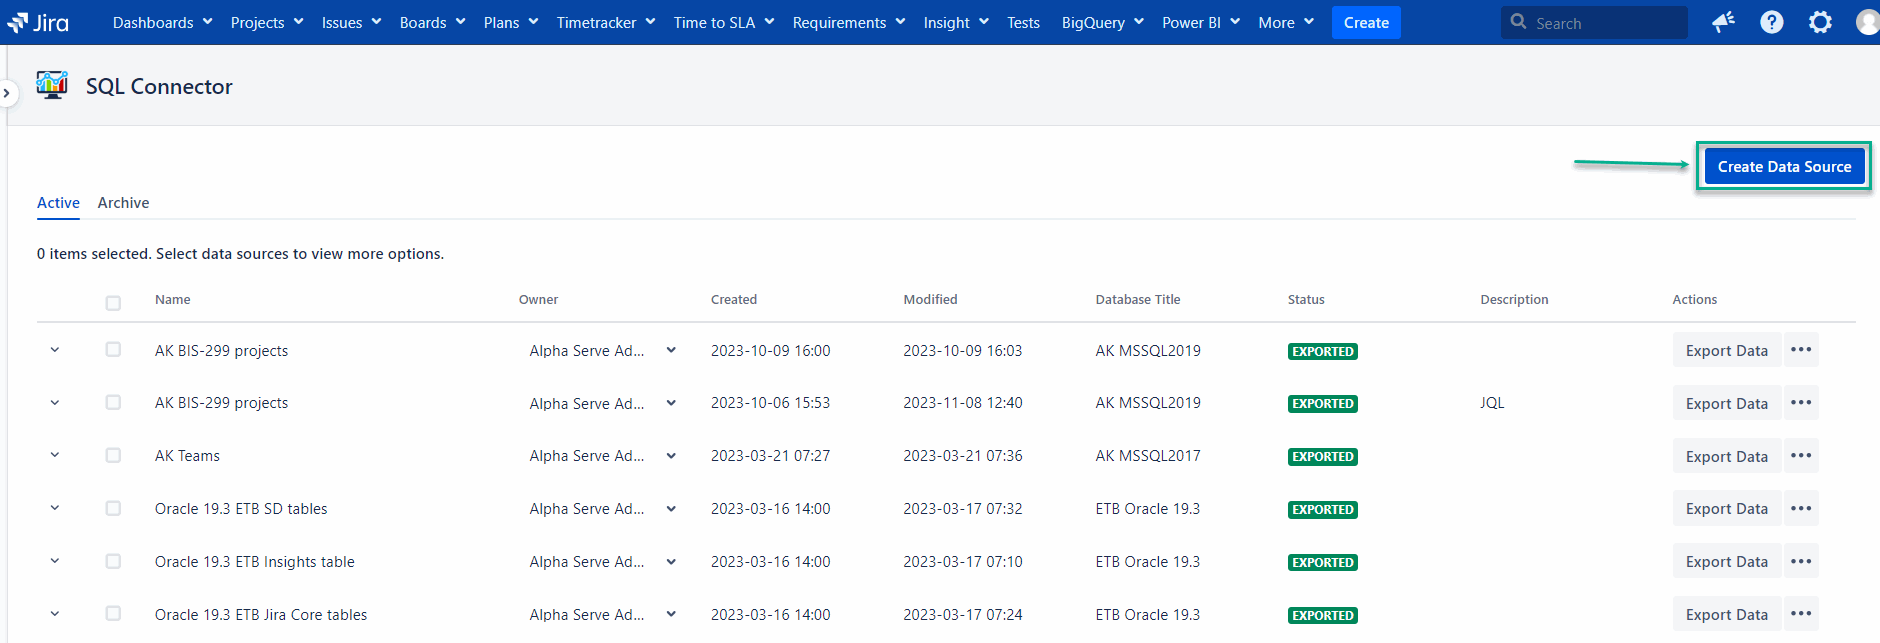
How to Create Data Source
Being signed in to your Jira instance, select SQL Connector, and then select Data Sources.
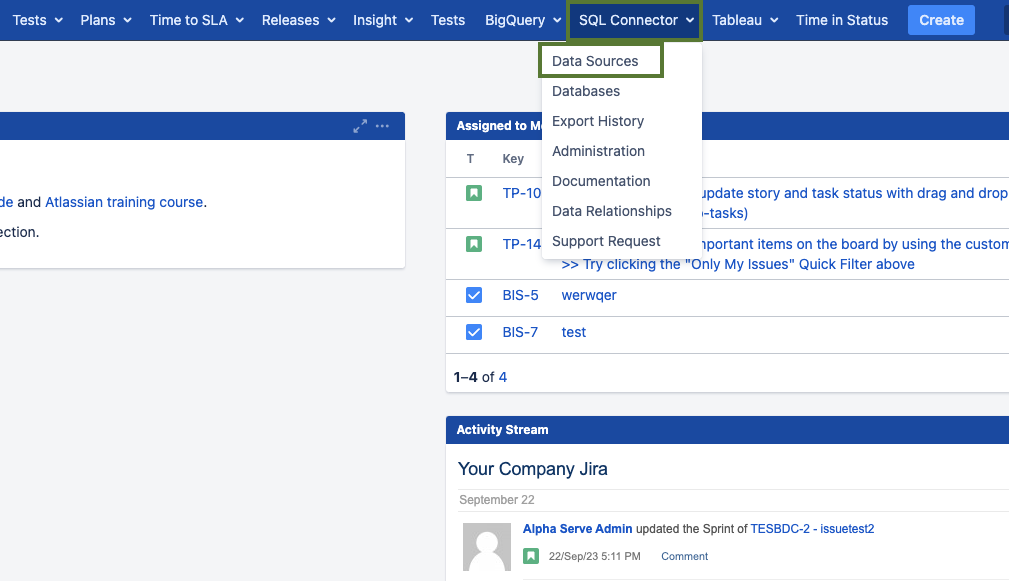
Select Create Data Source.
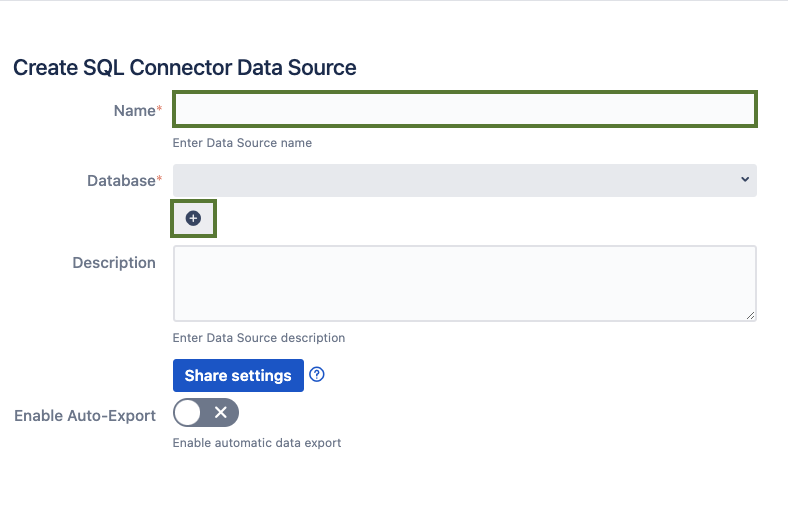
In the Name* field, enter your data source name.
Select + to add database.
| Info |
|---|
If you have already created the database where you’d like to export your Jira data, simply select it from the drop-down list. |
In the Title* section, enter the title for your database.
[Optional] In the Comment field, enter any useful information.
In the Database Type* field, select the type of your database.
In the Host* field, enter the host of your database.
In the Port* field, enter the host of your database.
In the Database Name*, enter the name of your database.
[Optional] In the Database Schema*, enter the data schema.
| Info |
|---|
By leaving the Database Schema* field empty, the default data schema will be applied. |
In the Username* field, enter your username.
In the Password* field, enter your password.
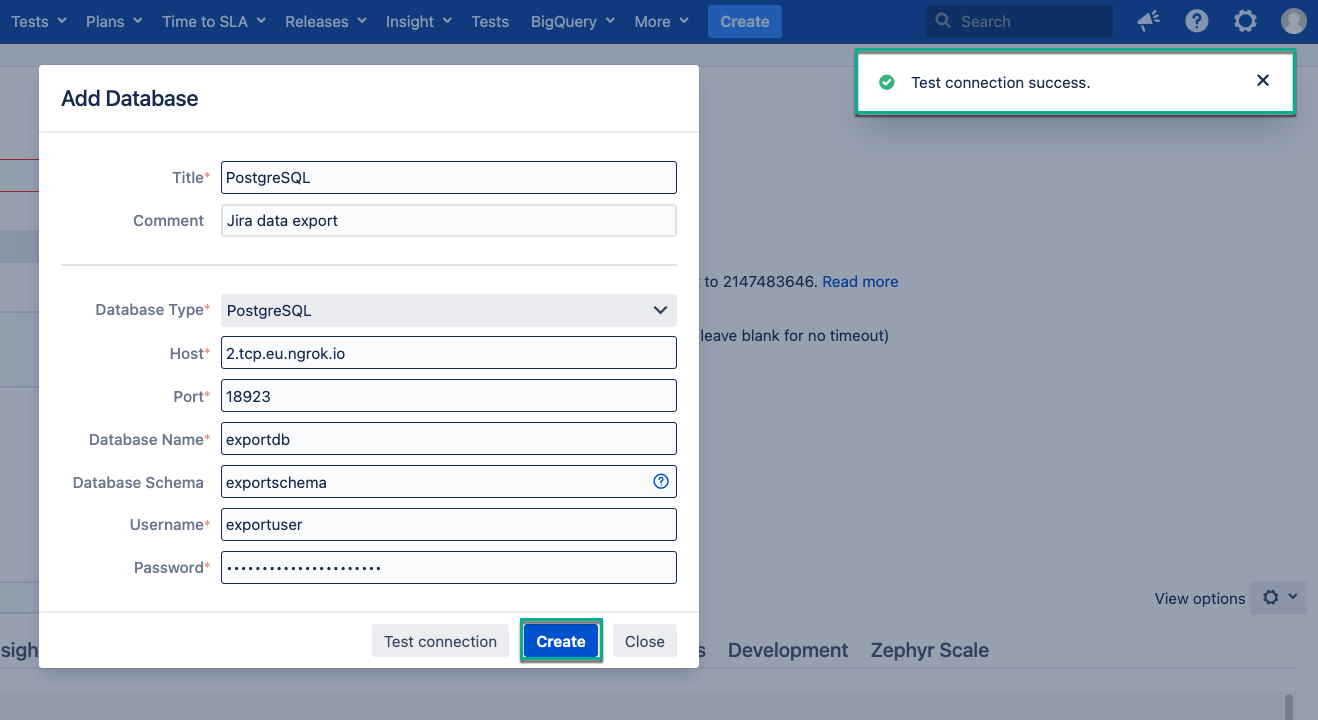
Select Test connection to check if everything is correct.
If everything is correct, you will get the corresponding message.
| Tip |
|---|
Test connection success. |
Select Create.
[Optional] In the Description field, enter the description for your data source.
| Info |
|---|
Enable auto-export to have your data source exported at the set time interval. |
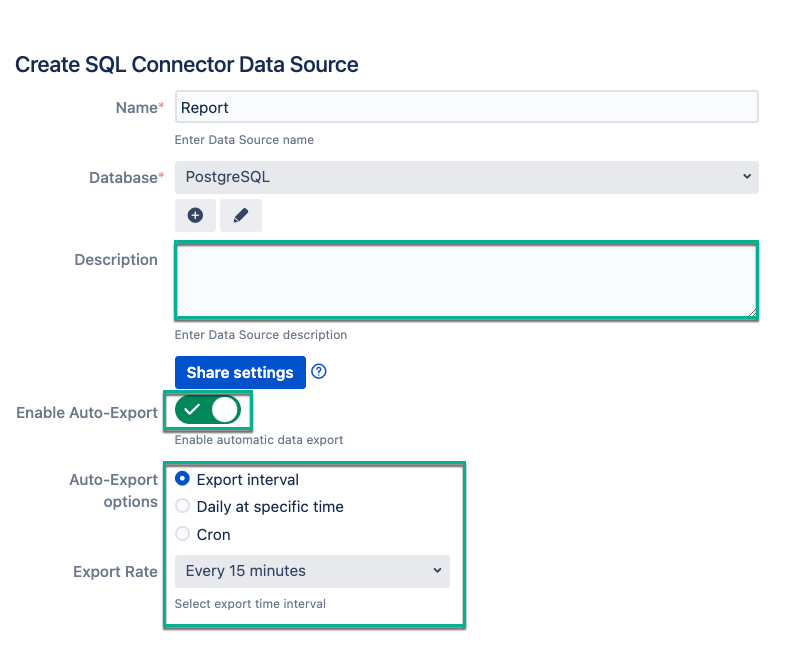
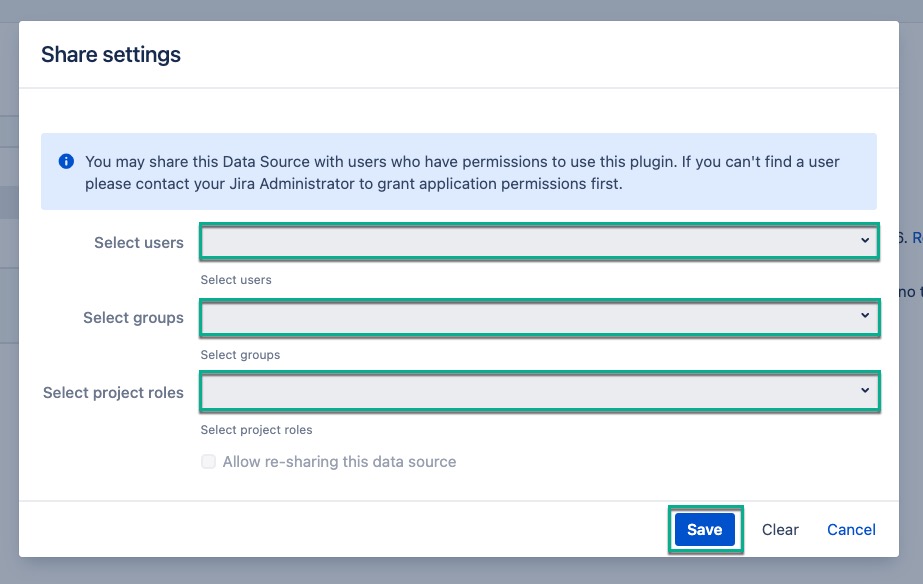
Optional] Select Share settings.
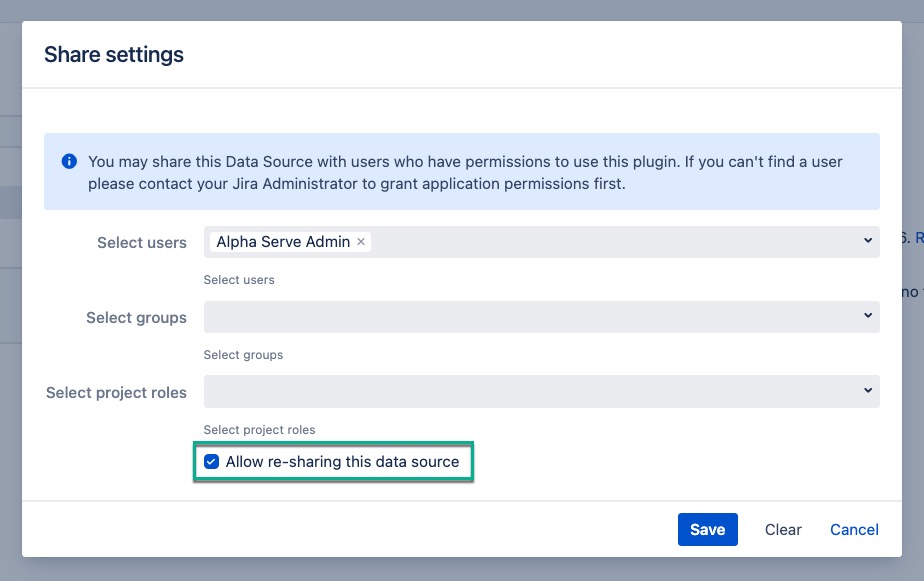
[Optional] In the Select users field, enter the username you want to share the data source with.
| Info |
|---|
Once you start typing, the drop-down list with username suggestions will appear. Select the user from the list. |
[Optional] In the Select group field, select the group you need.
| Info |
|---|
Once you select the Select group field, the drop-down list with available groups will appear. Select a group from the list. |
[Optional] In the Select project role field, select the roles you need.
| Info |
|---|
Once you select the Select project role field, the drop-down list with available project roles will appear. Select a role from the list. |
Select Save.
Other users who have access to SQL Connector might not get all the data from this data source due to different Jira permissions.
You can also allow other users who have permissions to use SQL Connector to re-share the data source.
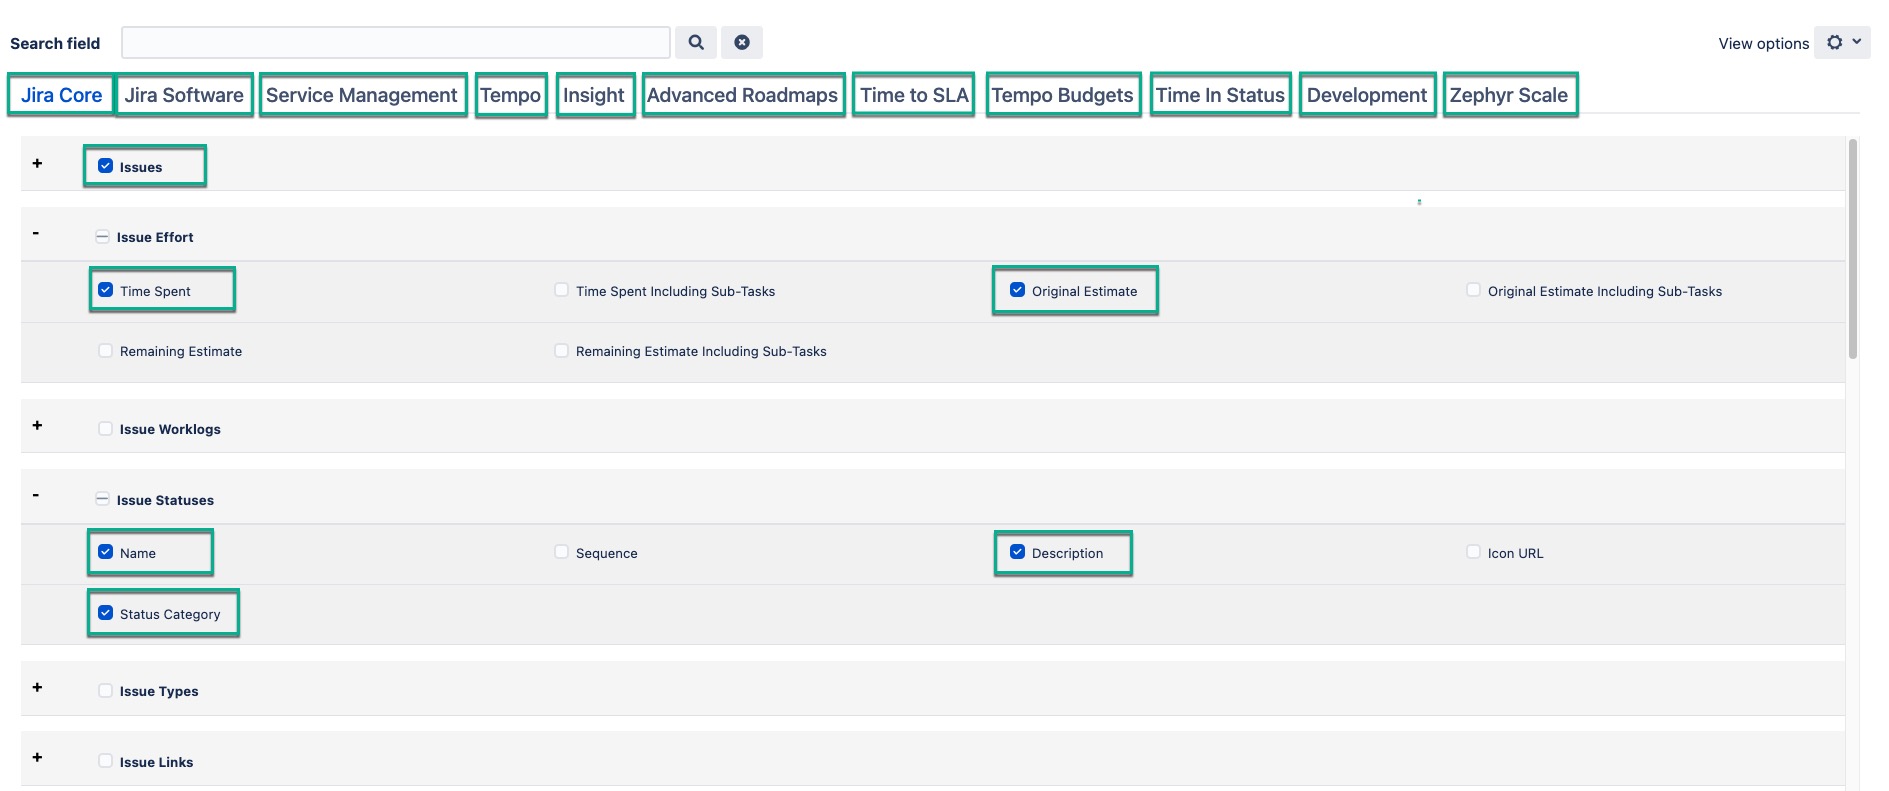
Select all filters and fields you want to be in your data source, and then select Save.
You can select different filter groups:
All (by default) - will return all data, select it, if you want to export all existing issues.
JQL - Jira Query Language, is a flexible tool that allows you to search for issues, projects, etc. in Jira and pinpoint exactly what you are looking for. Select it, if you want to use JQL to create your own request and filter data.
Basic - select it, if you want to use standard fields filters; to set up Basic filter, select the Issue filter button.
| Info |
|---|
For a detailed description of all fields, filters, and buttons, refer to this article. |

How to Export Data into SQL Database
| Info |
|---|
The newly-created data source has the NOT EXPORTED status. |
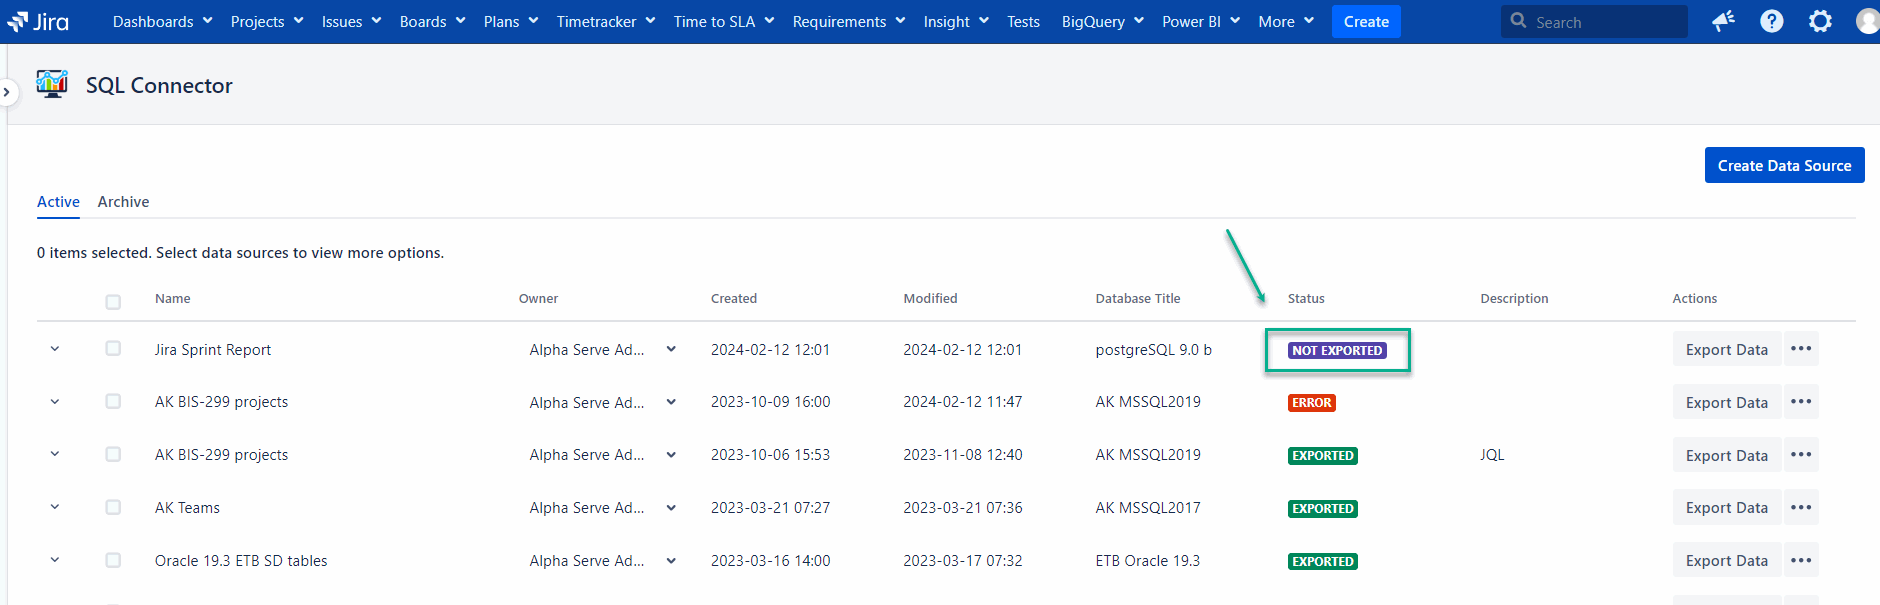
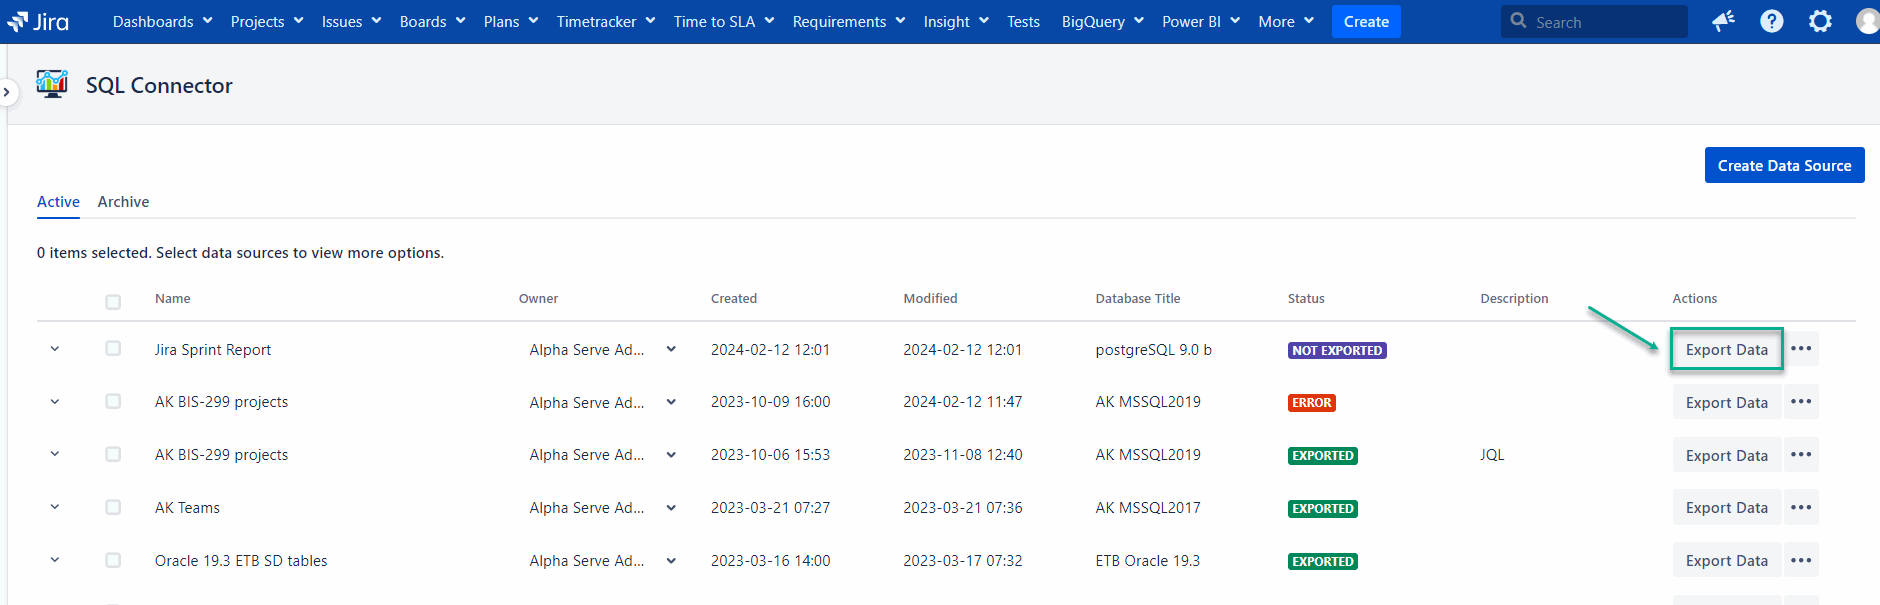
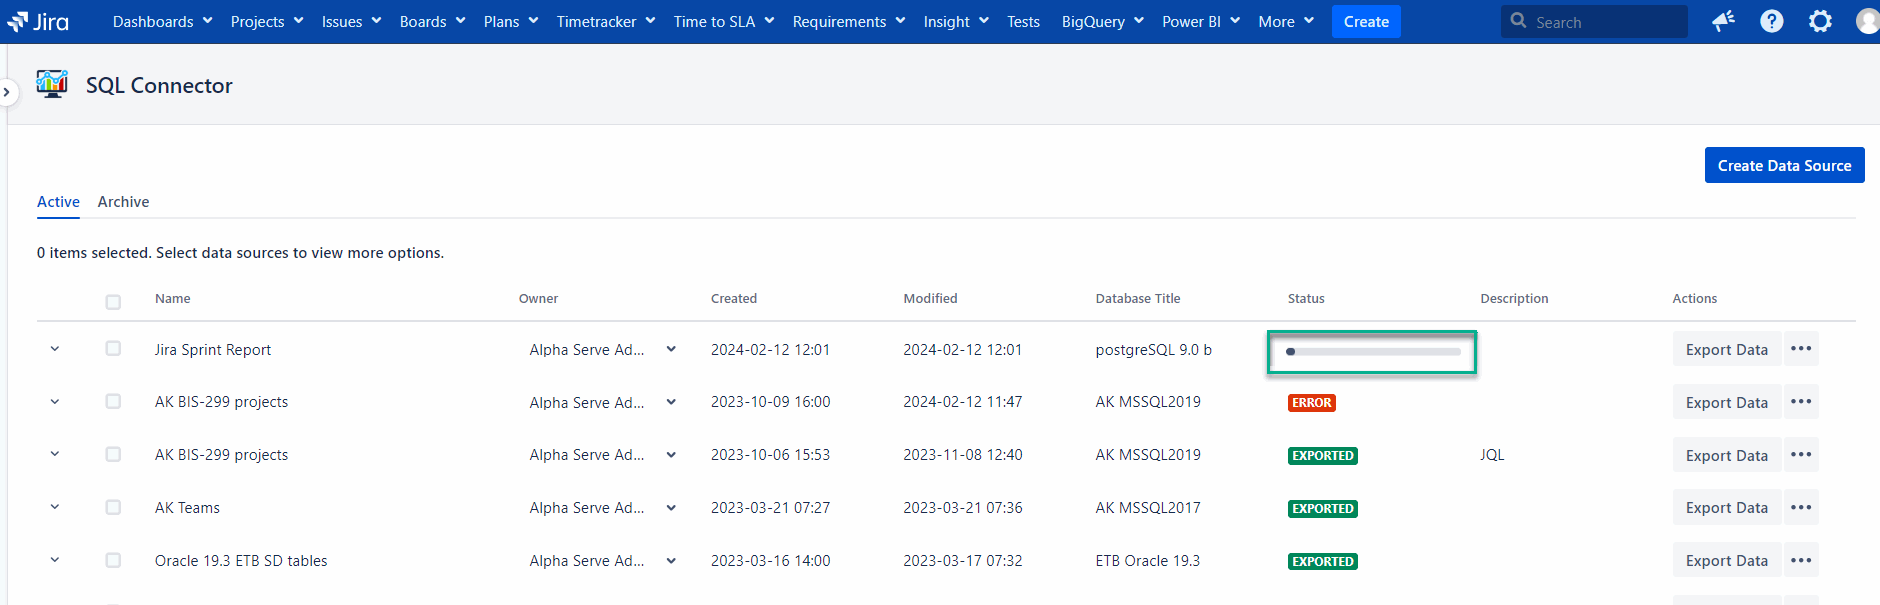
Select Export data.
| Info |
|---|
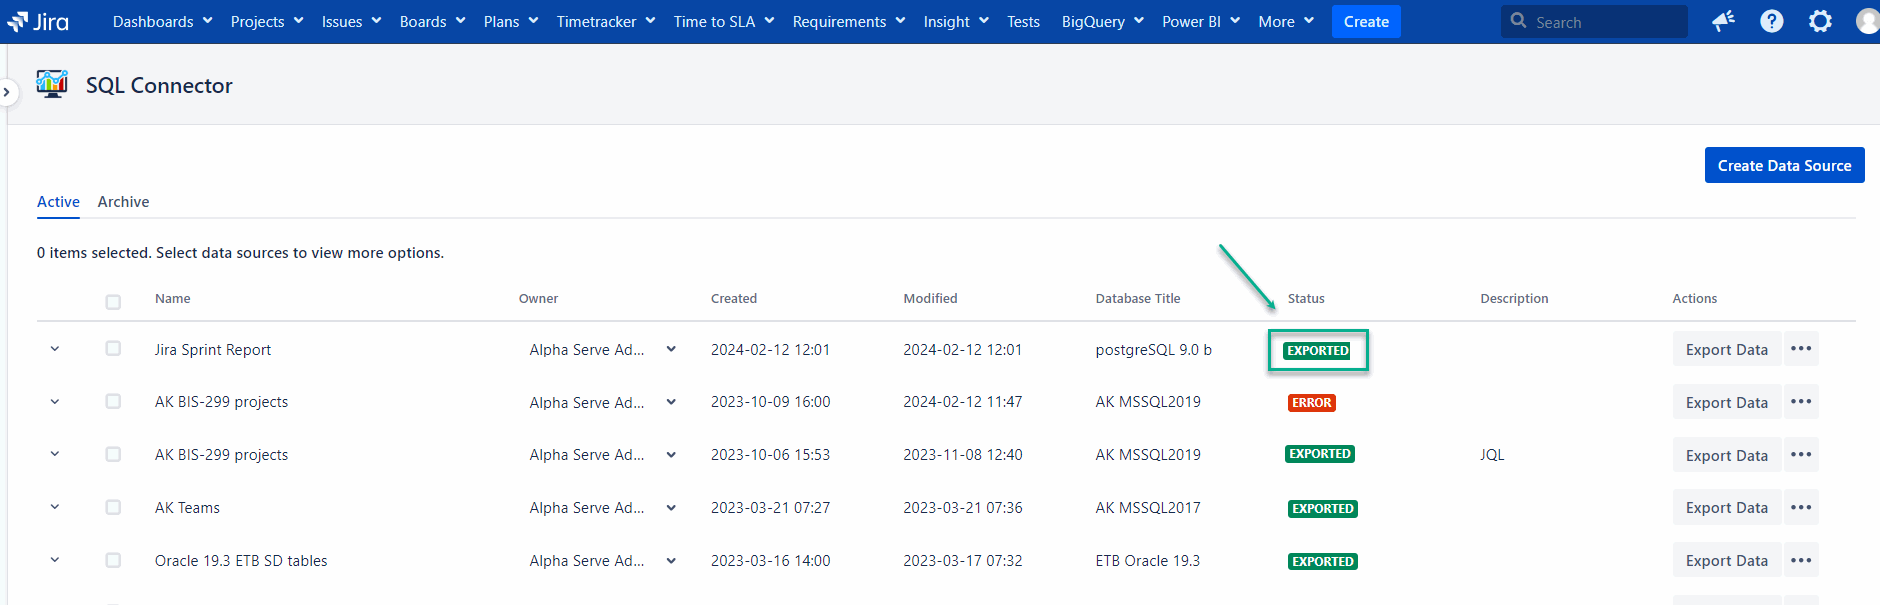
After the export is finished, the data source status will be set to EXPORTED. |
| Tip |
|---|
Now you can check that data was successfully exported to the database. |
.png?version=1&modificationDate=1681224932507&cacheVersion=1&api=v2)


| Info |
|---|
To learn how to set up Jira integration with your specific database, read our detailed how-to guides ⬇️ |