To import Jira Cloud data into Power BI Desktop you need the following:
| Info |
|---|
Before you start: Jira Cloud administrator should grant you permission to create, edit, watch and export connectors. If you don't have access to these actions, please contact your Jira Cloud Administrator to grant Power BI Connector for Jira permissions first. Jira Administrators can always access application configurations. |
| Table of Contents |
|---|
3 steps to export data from Jira to Microsoft Power BI
How to create an Account in Power BI Connector
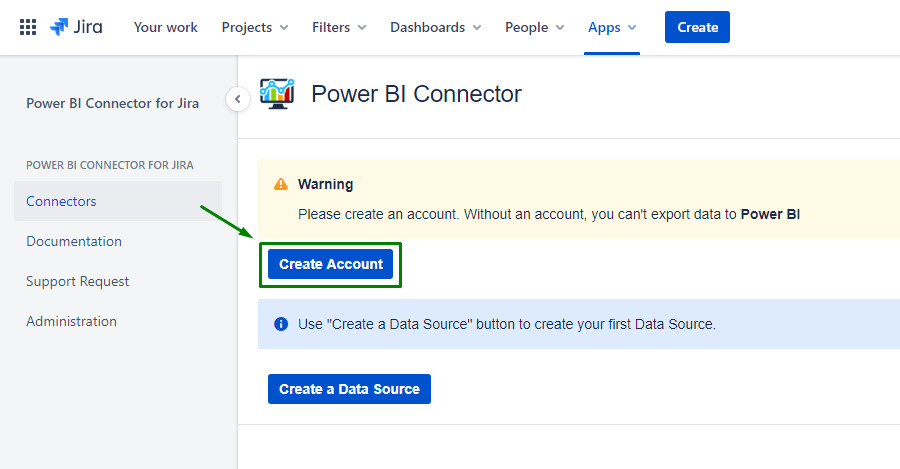
Click Apps Tab on the Jira’s main menu. Then find from the list and choose Power BI Connector.

On the opened page click Create Account button.
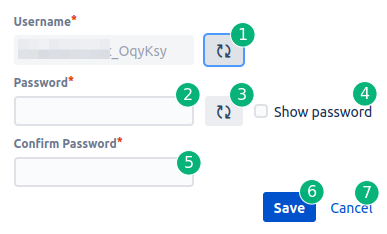
In the "Create Account" window:
Generate icon: in case you’d like to change generated part of Username, press the Generate icon to change the combination of generated letters (optionally)
Password: type a password. Password must contain more than 8 characters at least one upper case letter, lower case letter, number and special character #@$!%*?&/+,-.:<=>?^_`~
Generate Password: create a strong unique password using the auto-generator
Show Password: reveal what’s typed in the Password field
Confirm Password: confirm the password
Save: click the Save button to save the User account for exporting Jira Cloud data
Cancel: click Cancel to cancel creating a user account
After User Account has been successfully created, users are provided with the User Account details.
Here users can:
Review Username or Copy username for saving it in Password manager
Review Password by clicking eye icon or Copy password for saving it in Password manager
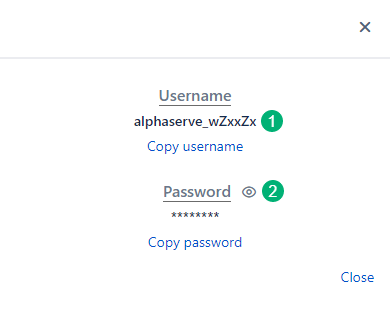
You always will be able to edit your User account (generate a new username and reset password) by clicking the Edit Account button.
1. Create a Jira API Token
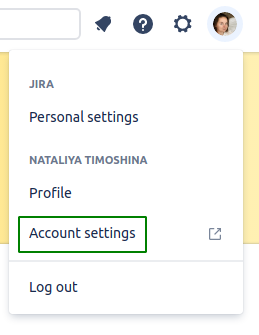
Go to Account settings
2. Click a Create and manage API tokens link in the Security tab
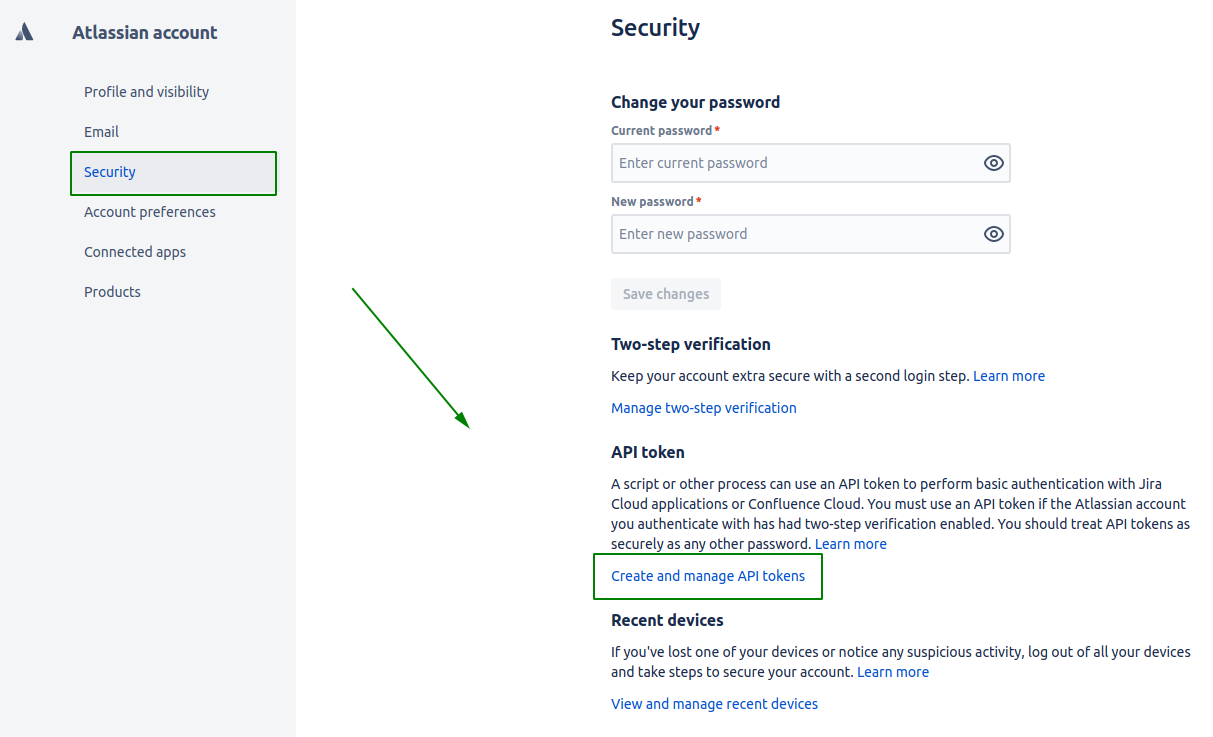
3. Click the Create API token button
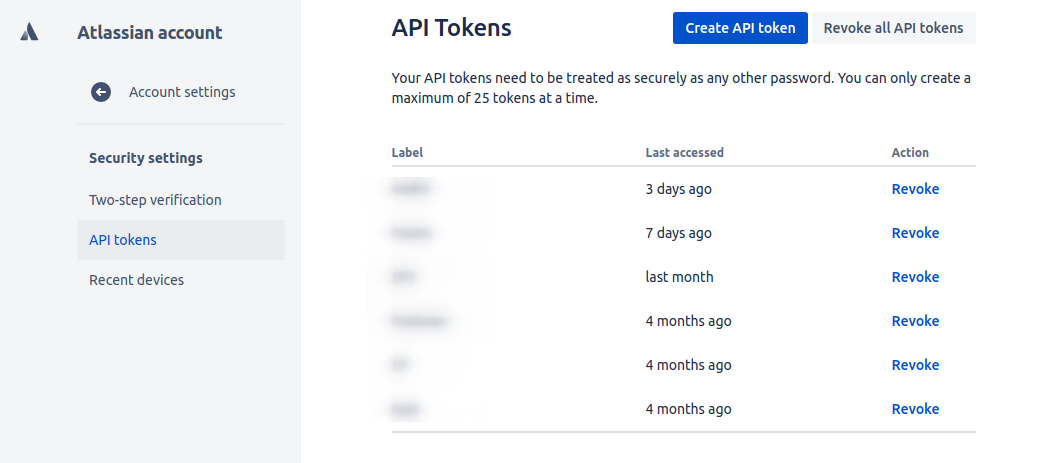
4. Enter an API token name and click Create
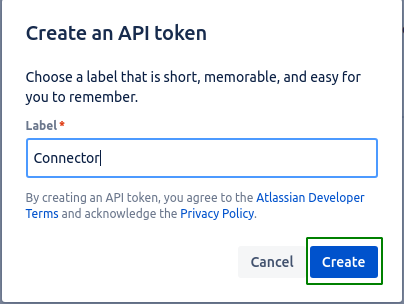
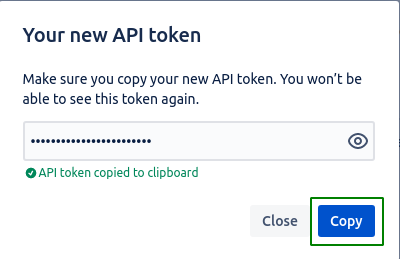
5. Make sure you copy your new API token. You won’t be able to see the token again.
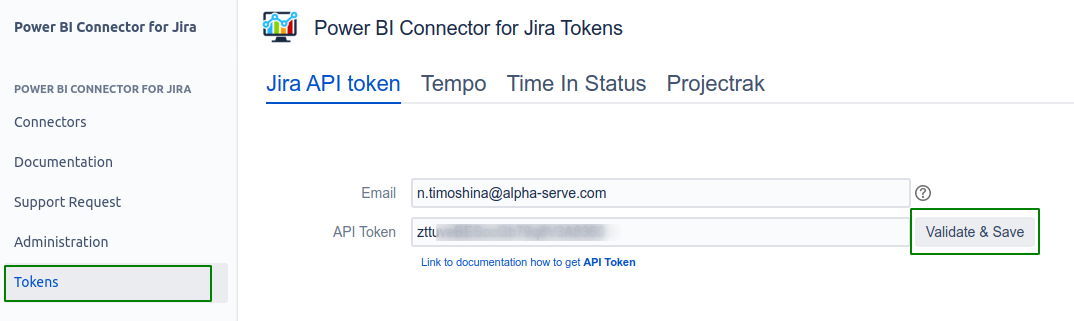
6. Enter the token into Power BI Connector for Jira > Tokens > Jira API token, click Validate & Save.
2. Create a Connector in Power BI Connector for Jira
Below you can find a description of the fields, buttons, and settings of data source creating page:
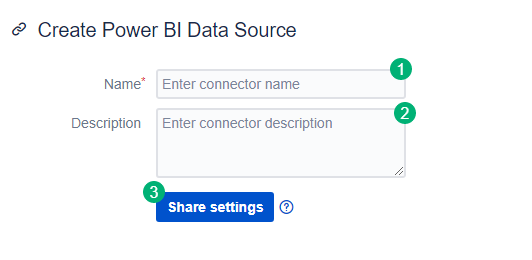
Title section
Allows you to do operations with creating such fields as:
1. Name -Enter data source name
2. Description - Enter data source description
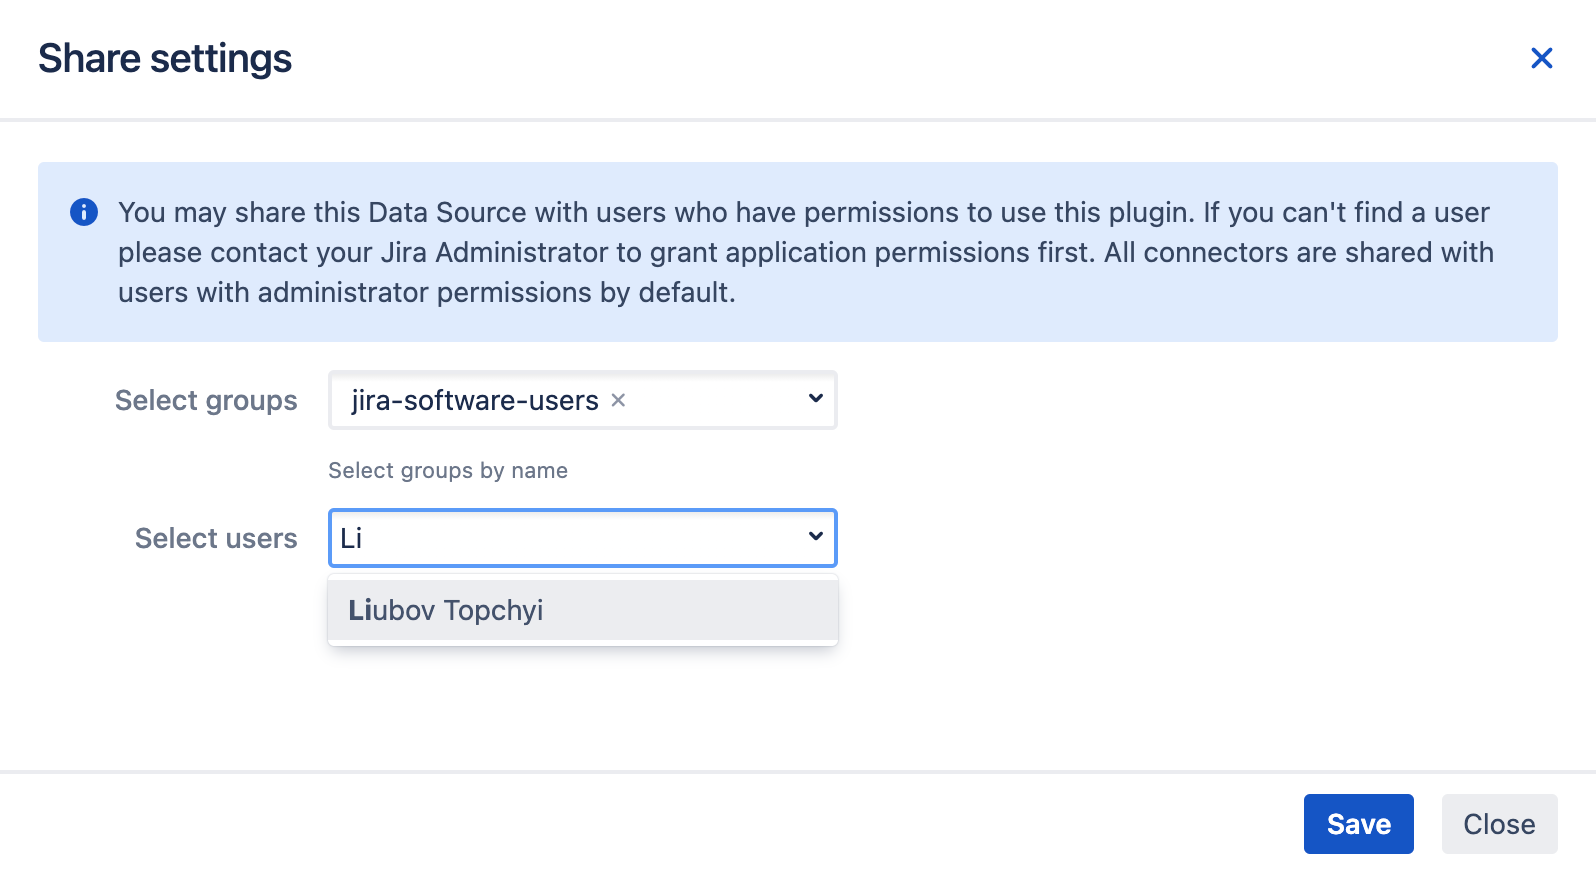
3. Share settings - You may share this data source with users or groups of users who have permission to use the application. To share the data souce click Share settings button.
Select groups -select and add relevant users group
Select users - select and add relevant users
Save - click to apply changes.
Please note! Other users who have access to Power BI Connector for Jira app might not get all data from this data source due to different Jira permissions.

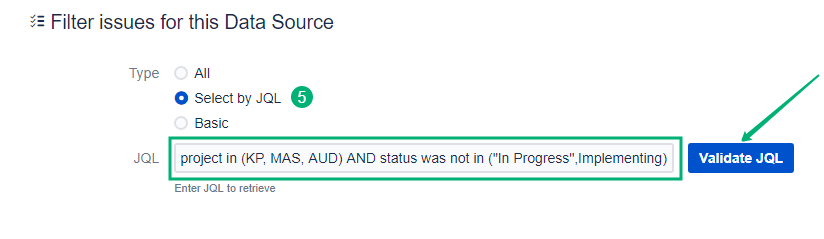
Filter issues section
This section is suitable for applying the filter groups which are presented in the screenshot:
4. All - choose if you want to export all existing issues.
5. Select by JQL - choose if you want to use JQL to create your own request and filter data.
JQL, or Jira Query Language, is a flexible tool that allows you to search for issues, projects, etc in Jira and pinpoint exactly what you are looking for.
Enter the JQL expression and click Validate JQL button to validate it.
Please note! Without JQL validation you won’t be able to create data source (button Save will be disabled).
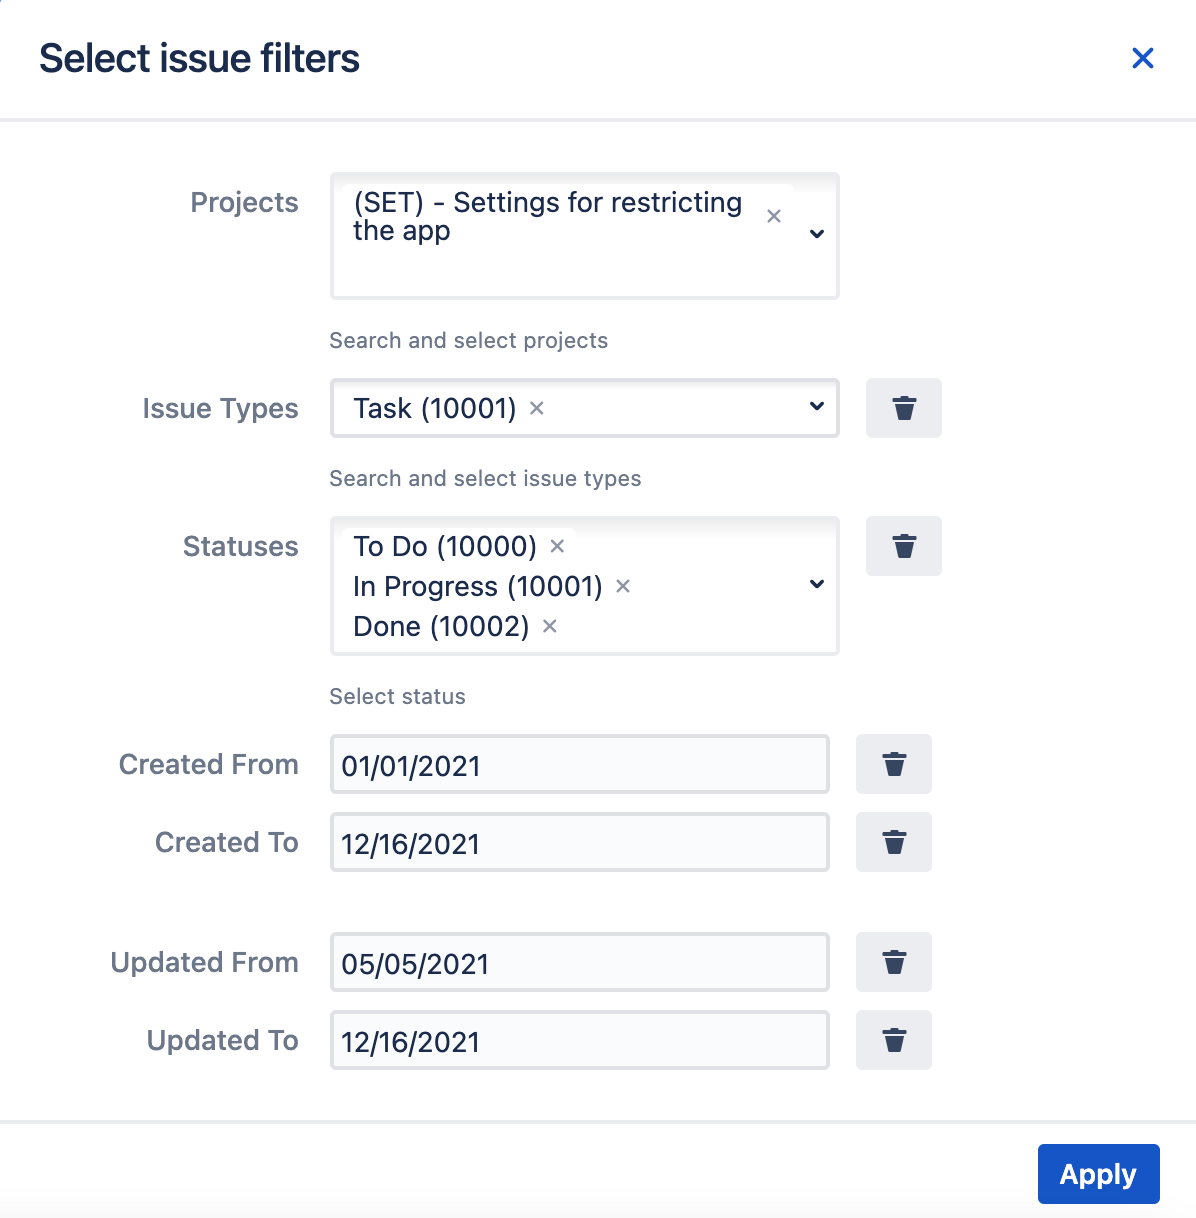
6. Basic - choose if you want to use standard fields filters. To set up Basic filter click Issue filter button.


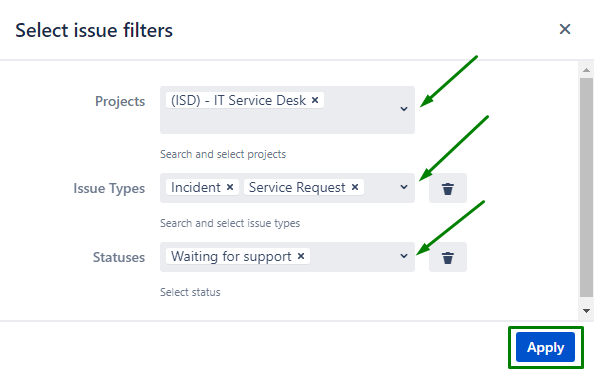
Select issue filters from the list of available:
Projects
Issue Types
Statuses
Also you are able to select from the list the time intervals in which the issue was created or updated:
Created from
Created to
Updated from
Updated to
Click Apply to apply the filter.
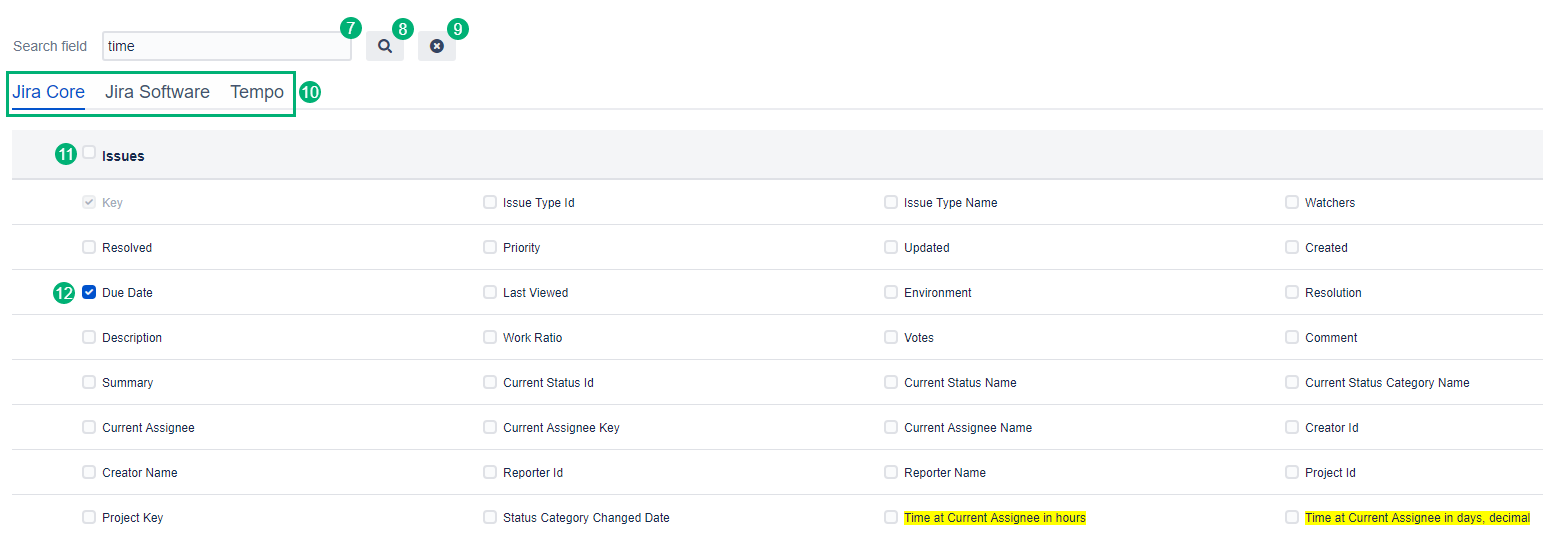
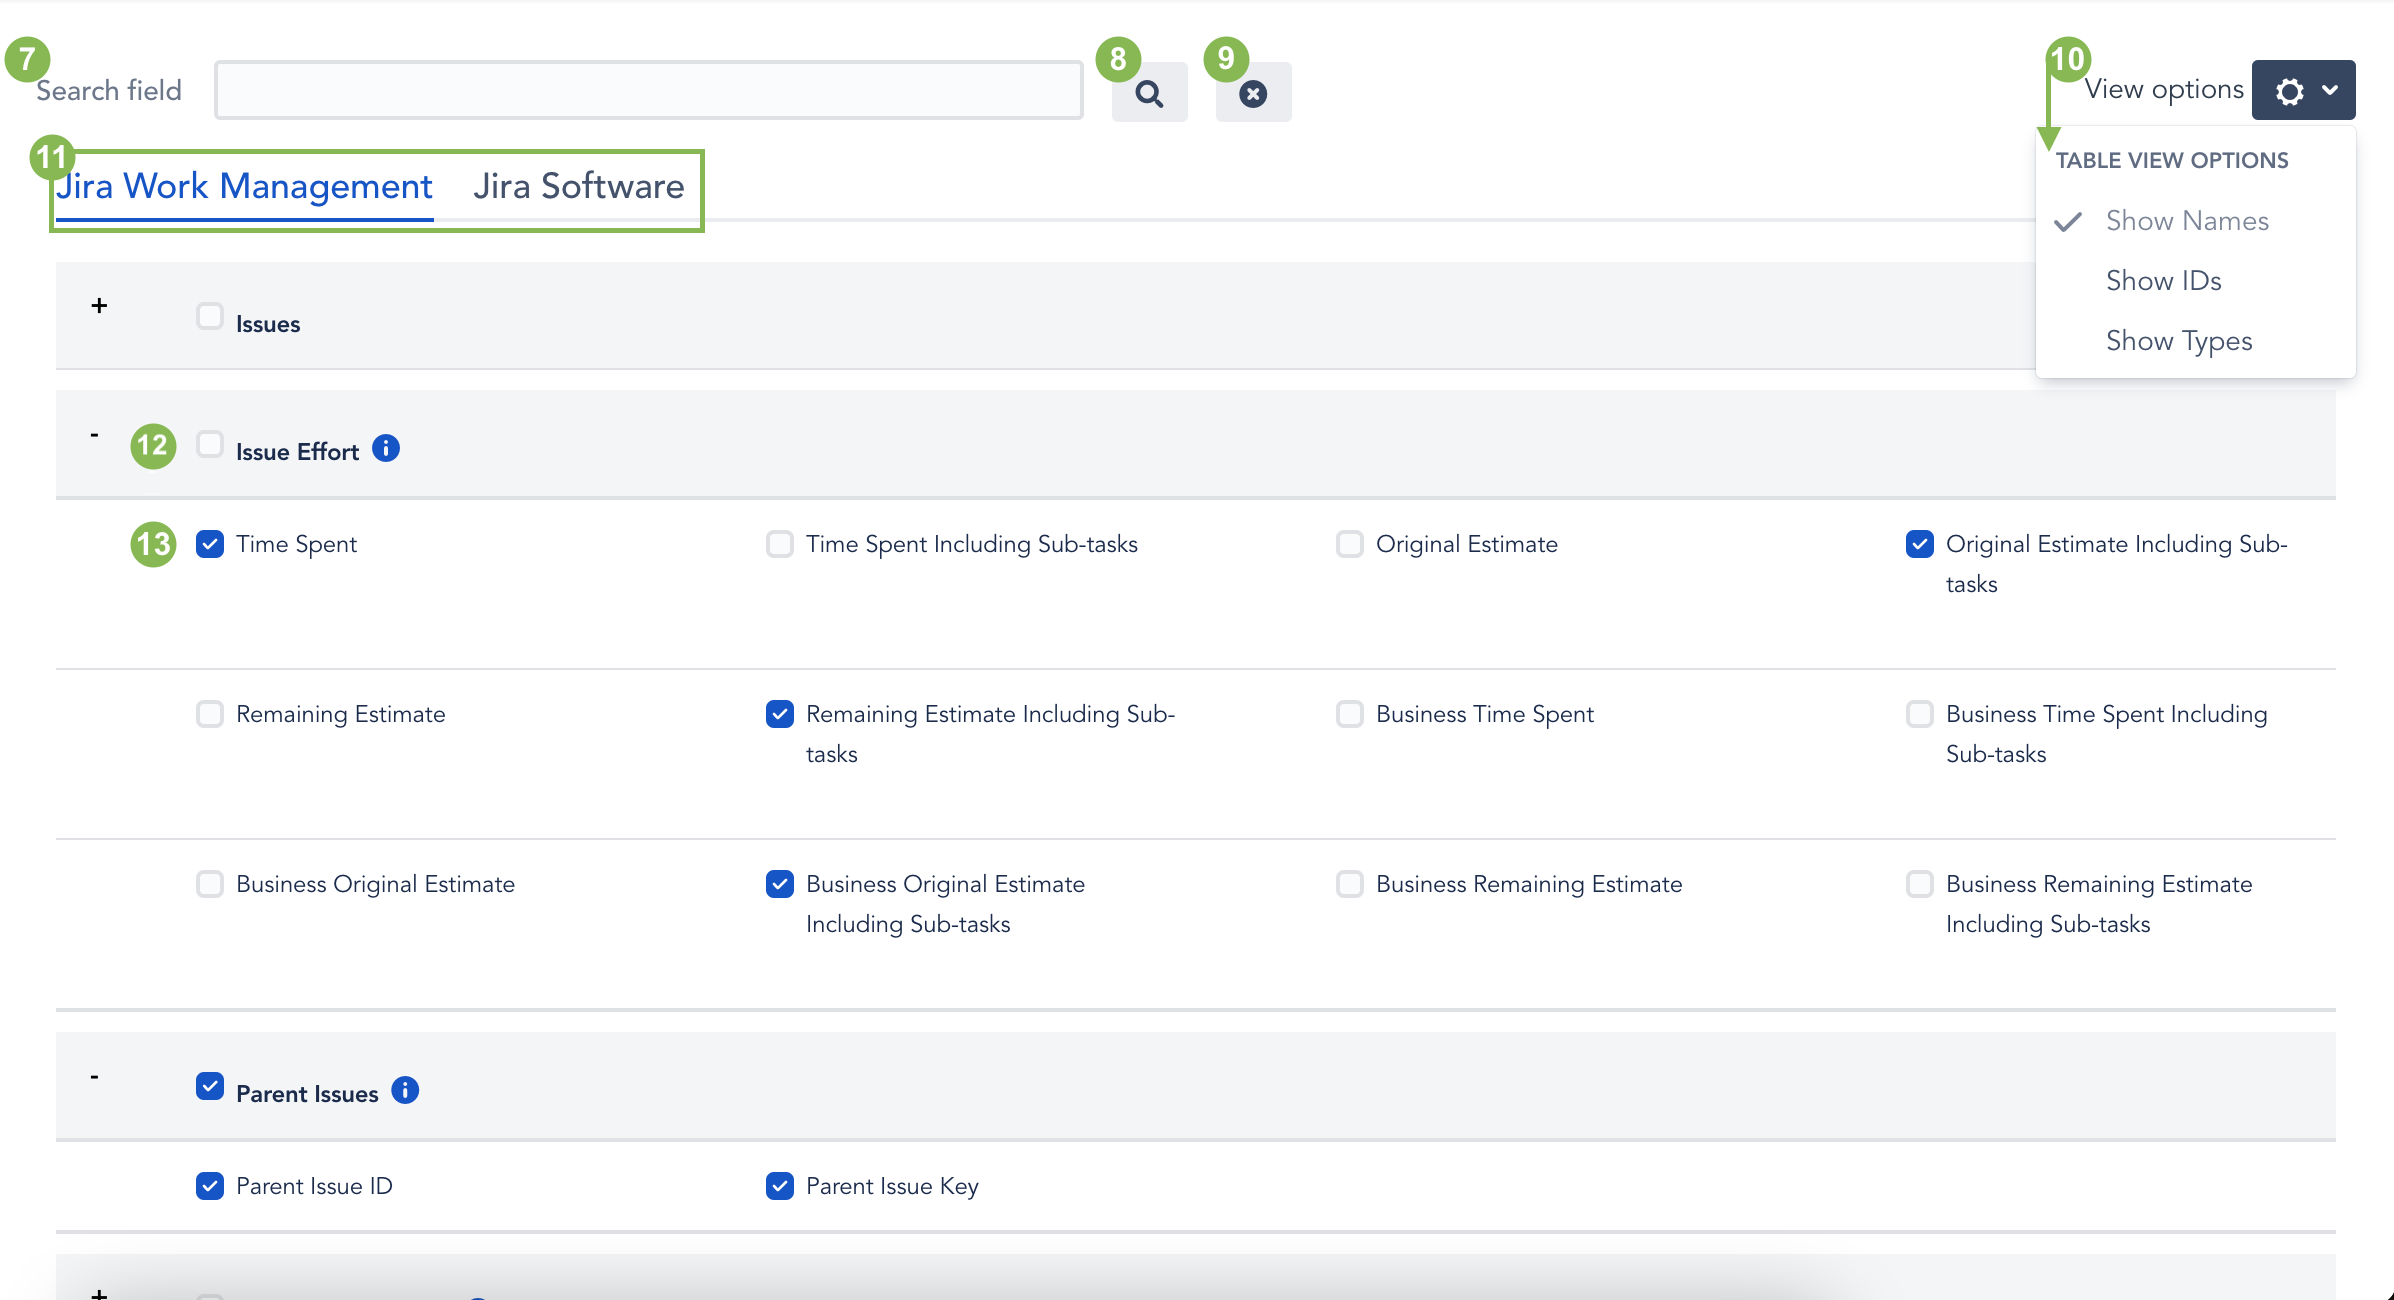
Select Fields section
Provides you to to apply such a possibilities:
7. Search field -enter the field name that you want to find and add for exporting
8. Magnifier - click to search the required item you want to add to your data source.
9. Clear the search field
10. View options — tap to sort issues by their Names/IDs/Types.
11. Tabs with Jira Fields - displays a list of all Jira fields and tables you can export.
Note! The list of fields and items you can export is determined by your current Jira edition and add-ons.
1112. Issues - one of the issue files subsection. Choose if you want to add all fields in a certain subsection.
1213. Checkbox - check the box with the required field.
“Apply” section 13
After editing a Connector you can choose one of the options, what to do with it:
14. Save- click to create a data source.
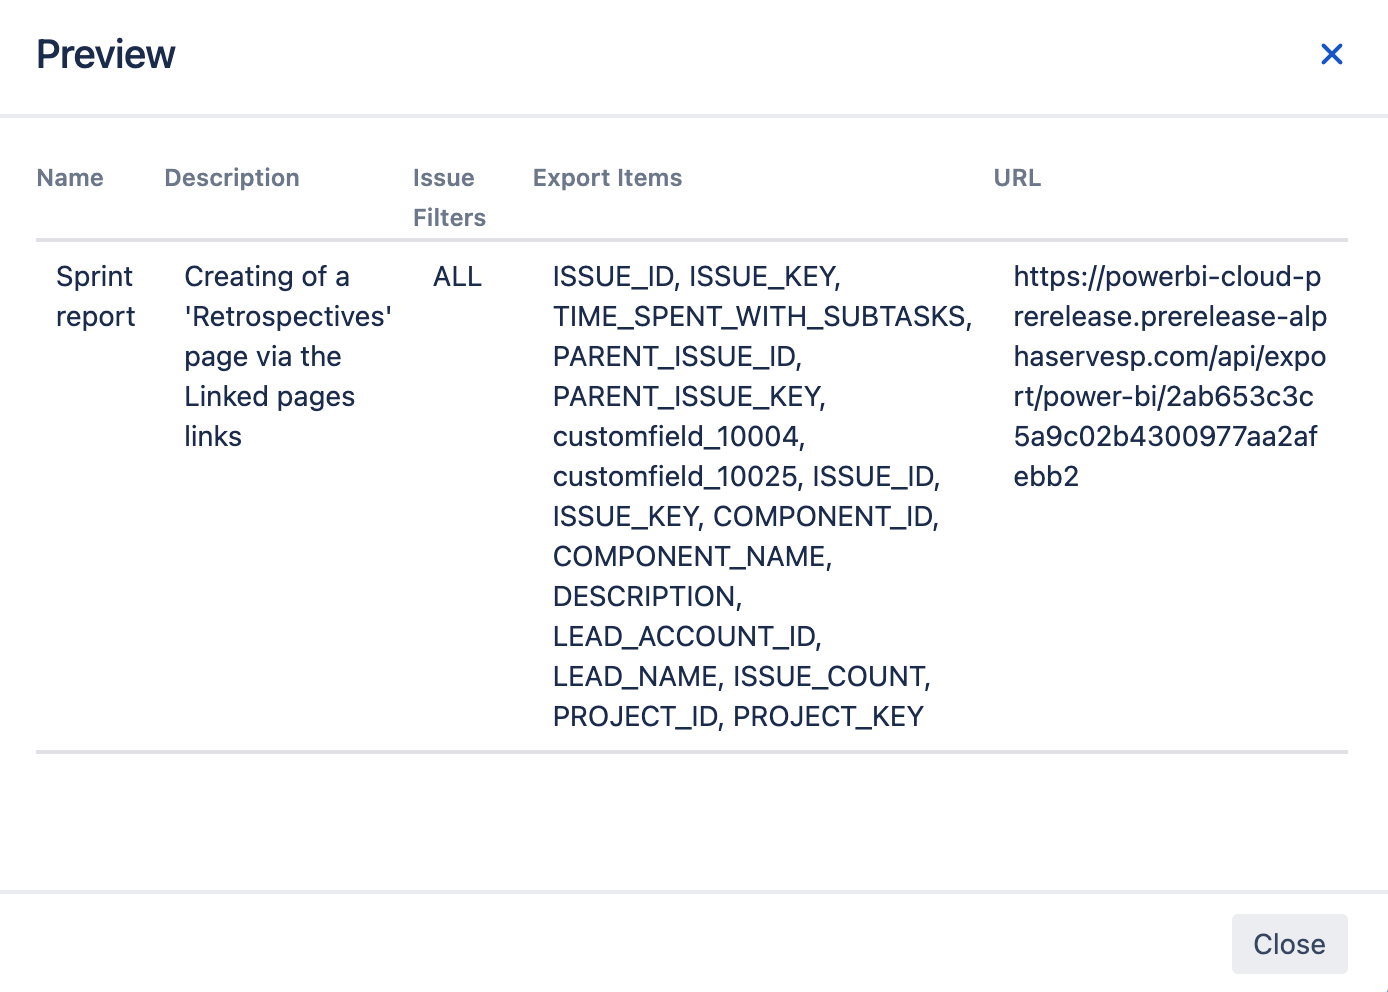
1415. Preview - Click to check the source name/description/issue filters/export items.15.
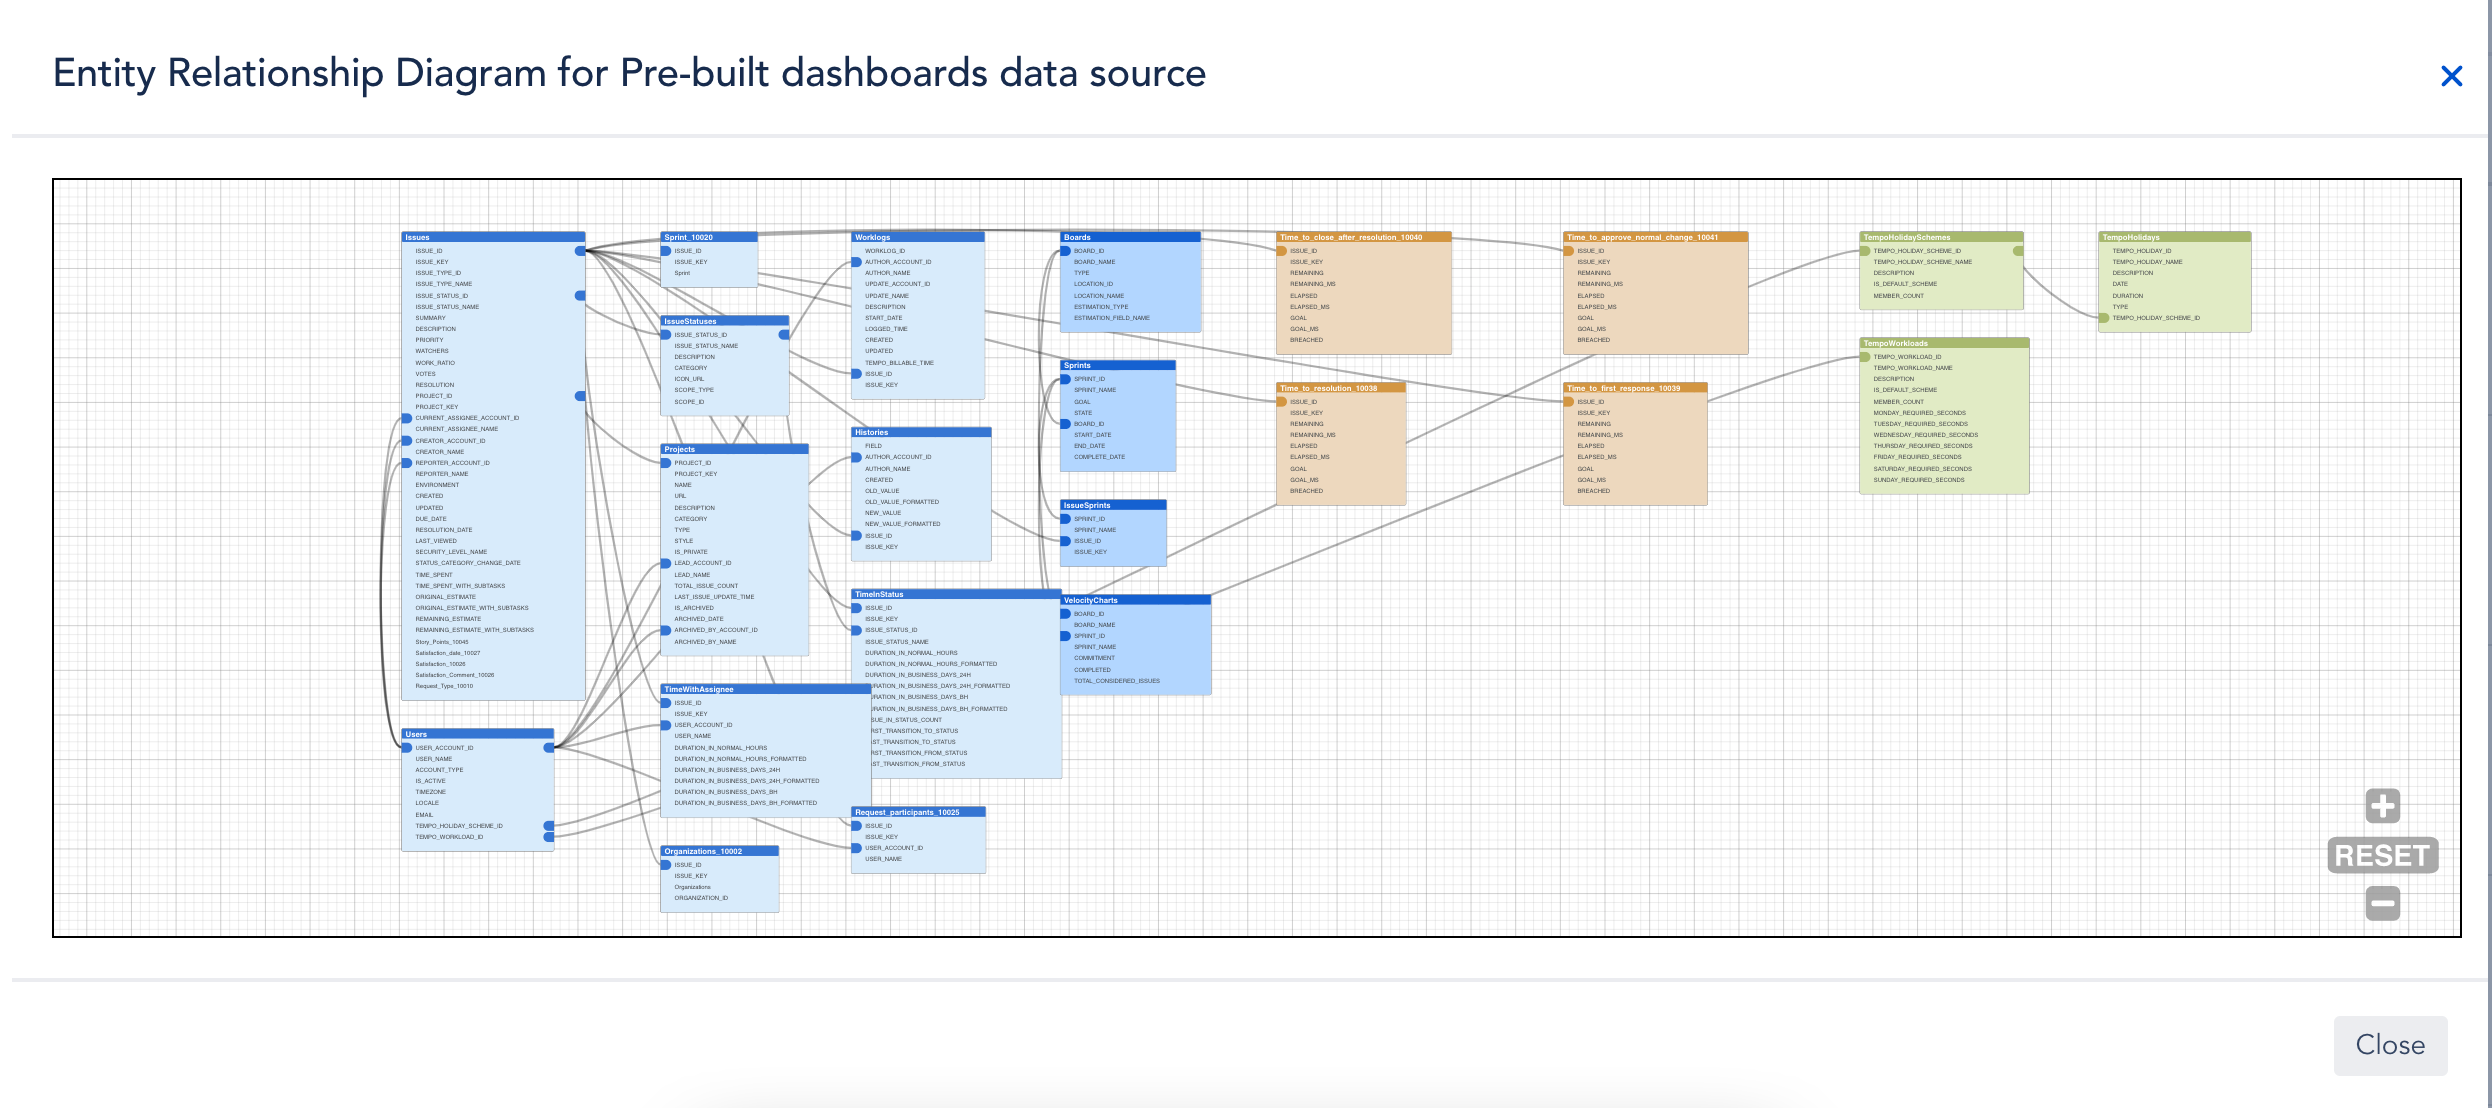
16. Preview ERD - Click to see the Entity Relationship Diagram for your Connector for support data sourcewhich forms from the checkboxes you have chosen before.
17. Close - leave data source creating page. Changes you’ve made will not be saved.

How to import data into your Microsoft Power BI Desktop
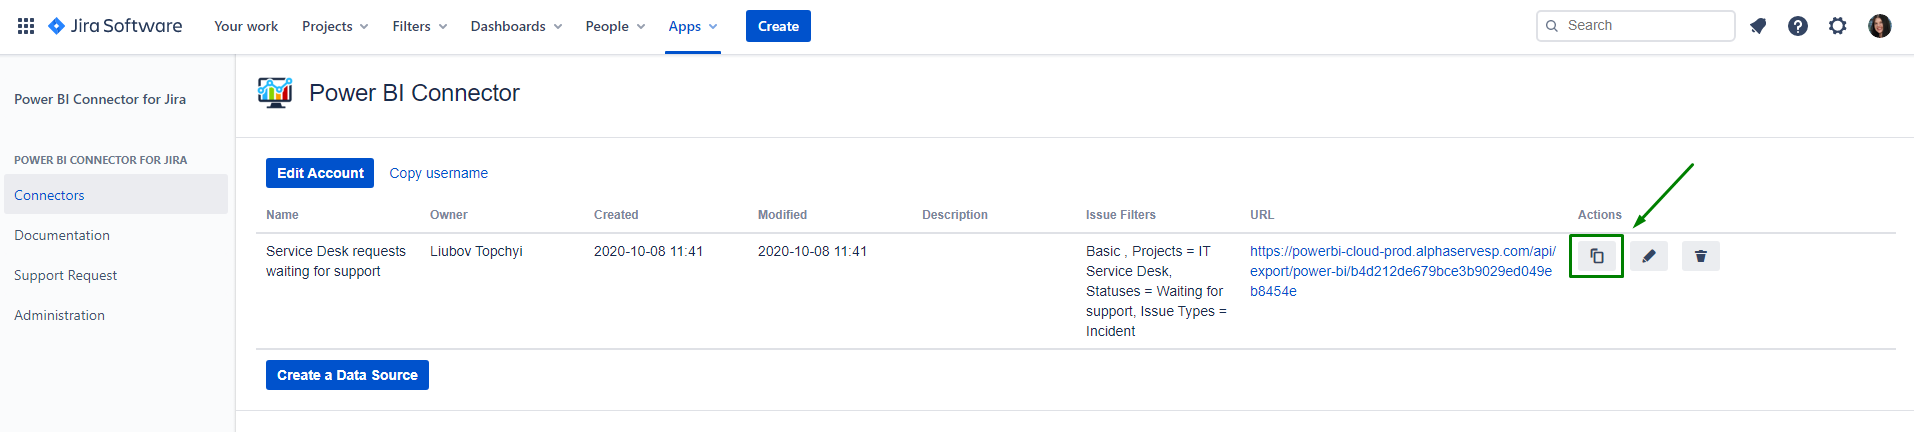
To work with Power BI, Power BI Connector for Jira generates the Data Source URL. Use this URL to import data to your Power BI Desktop.
Step 1. Copy the URL of your connector by clicking Copy icon
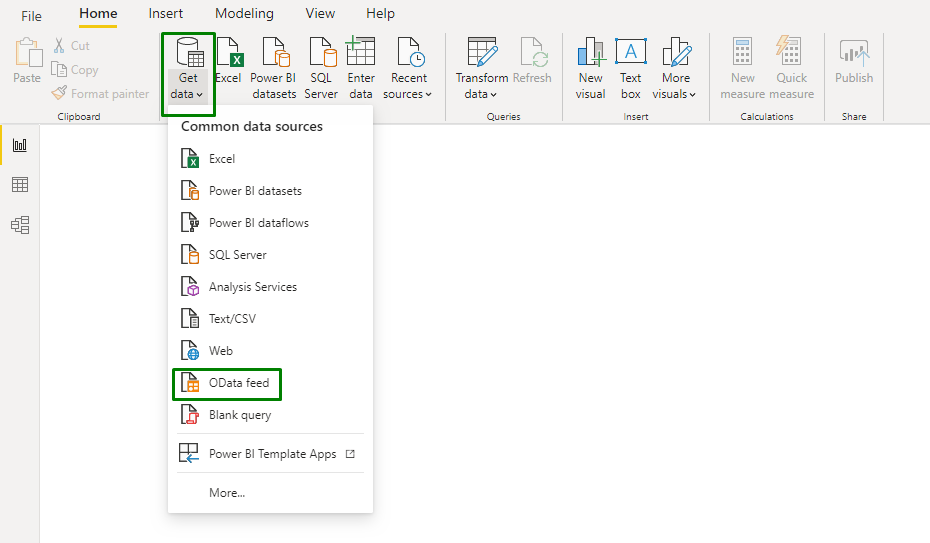
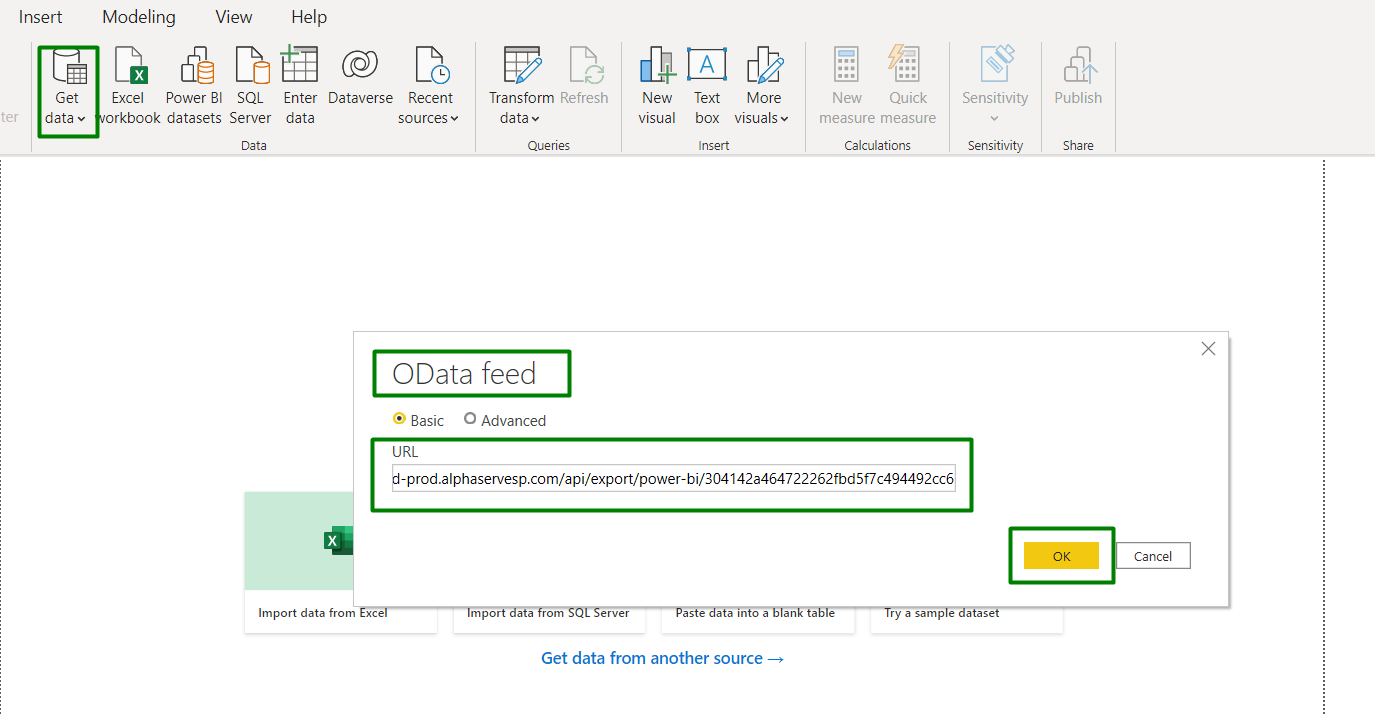
Step 2. Launch Power BI Desktop and Click Get Data > OData feed and paste the URL.

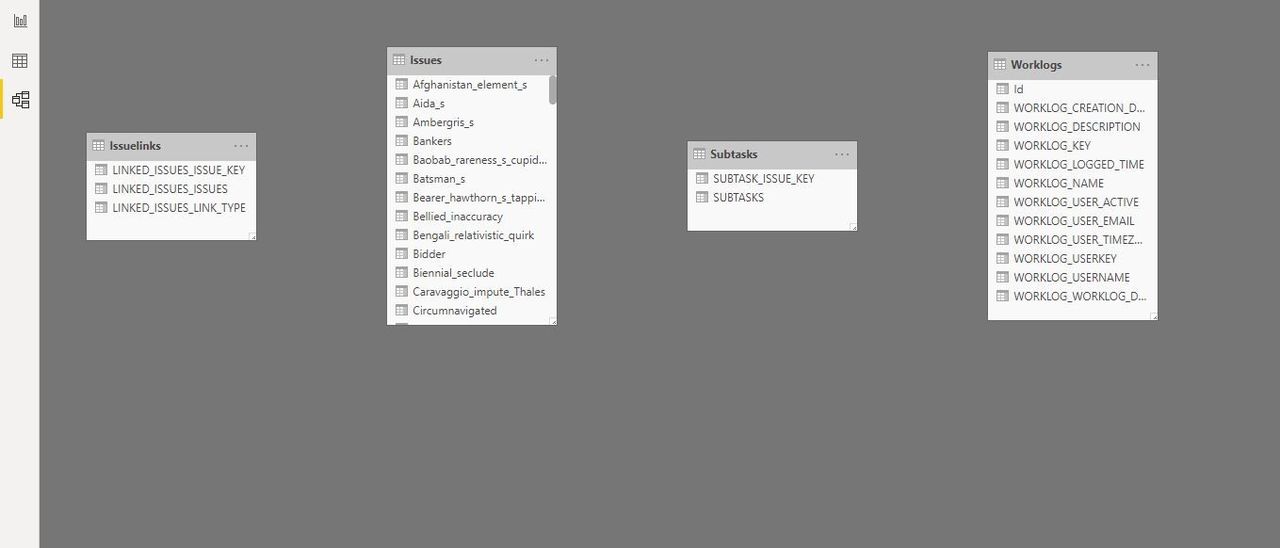
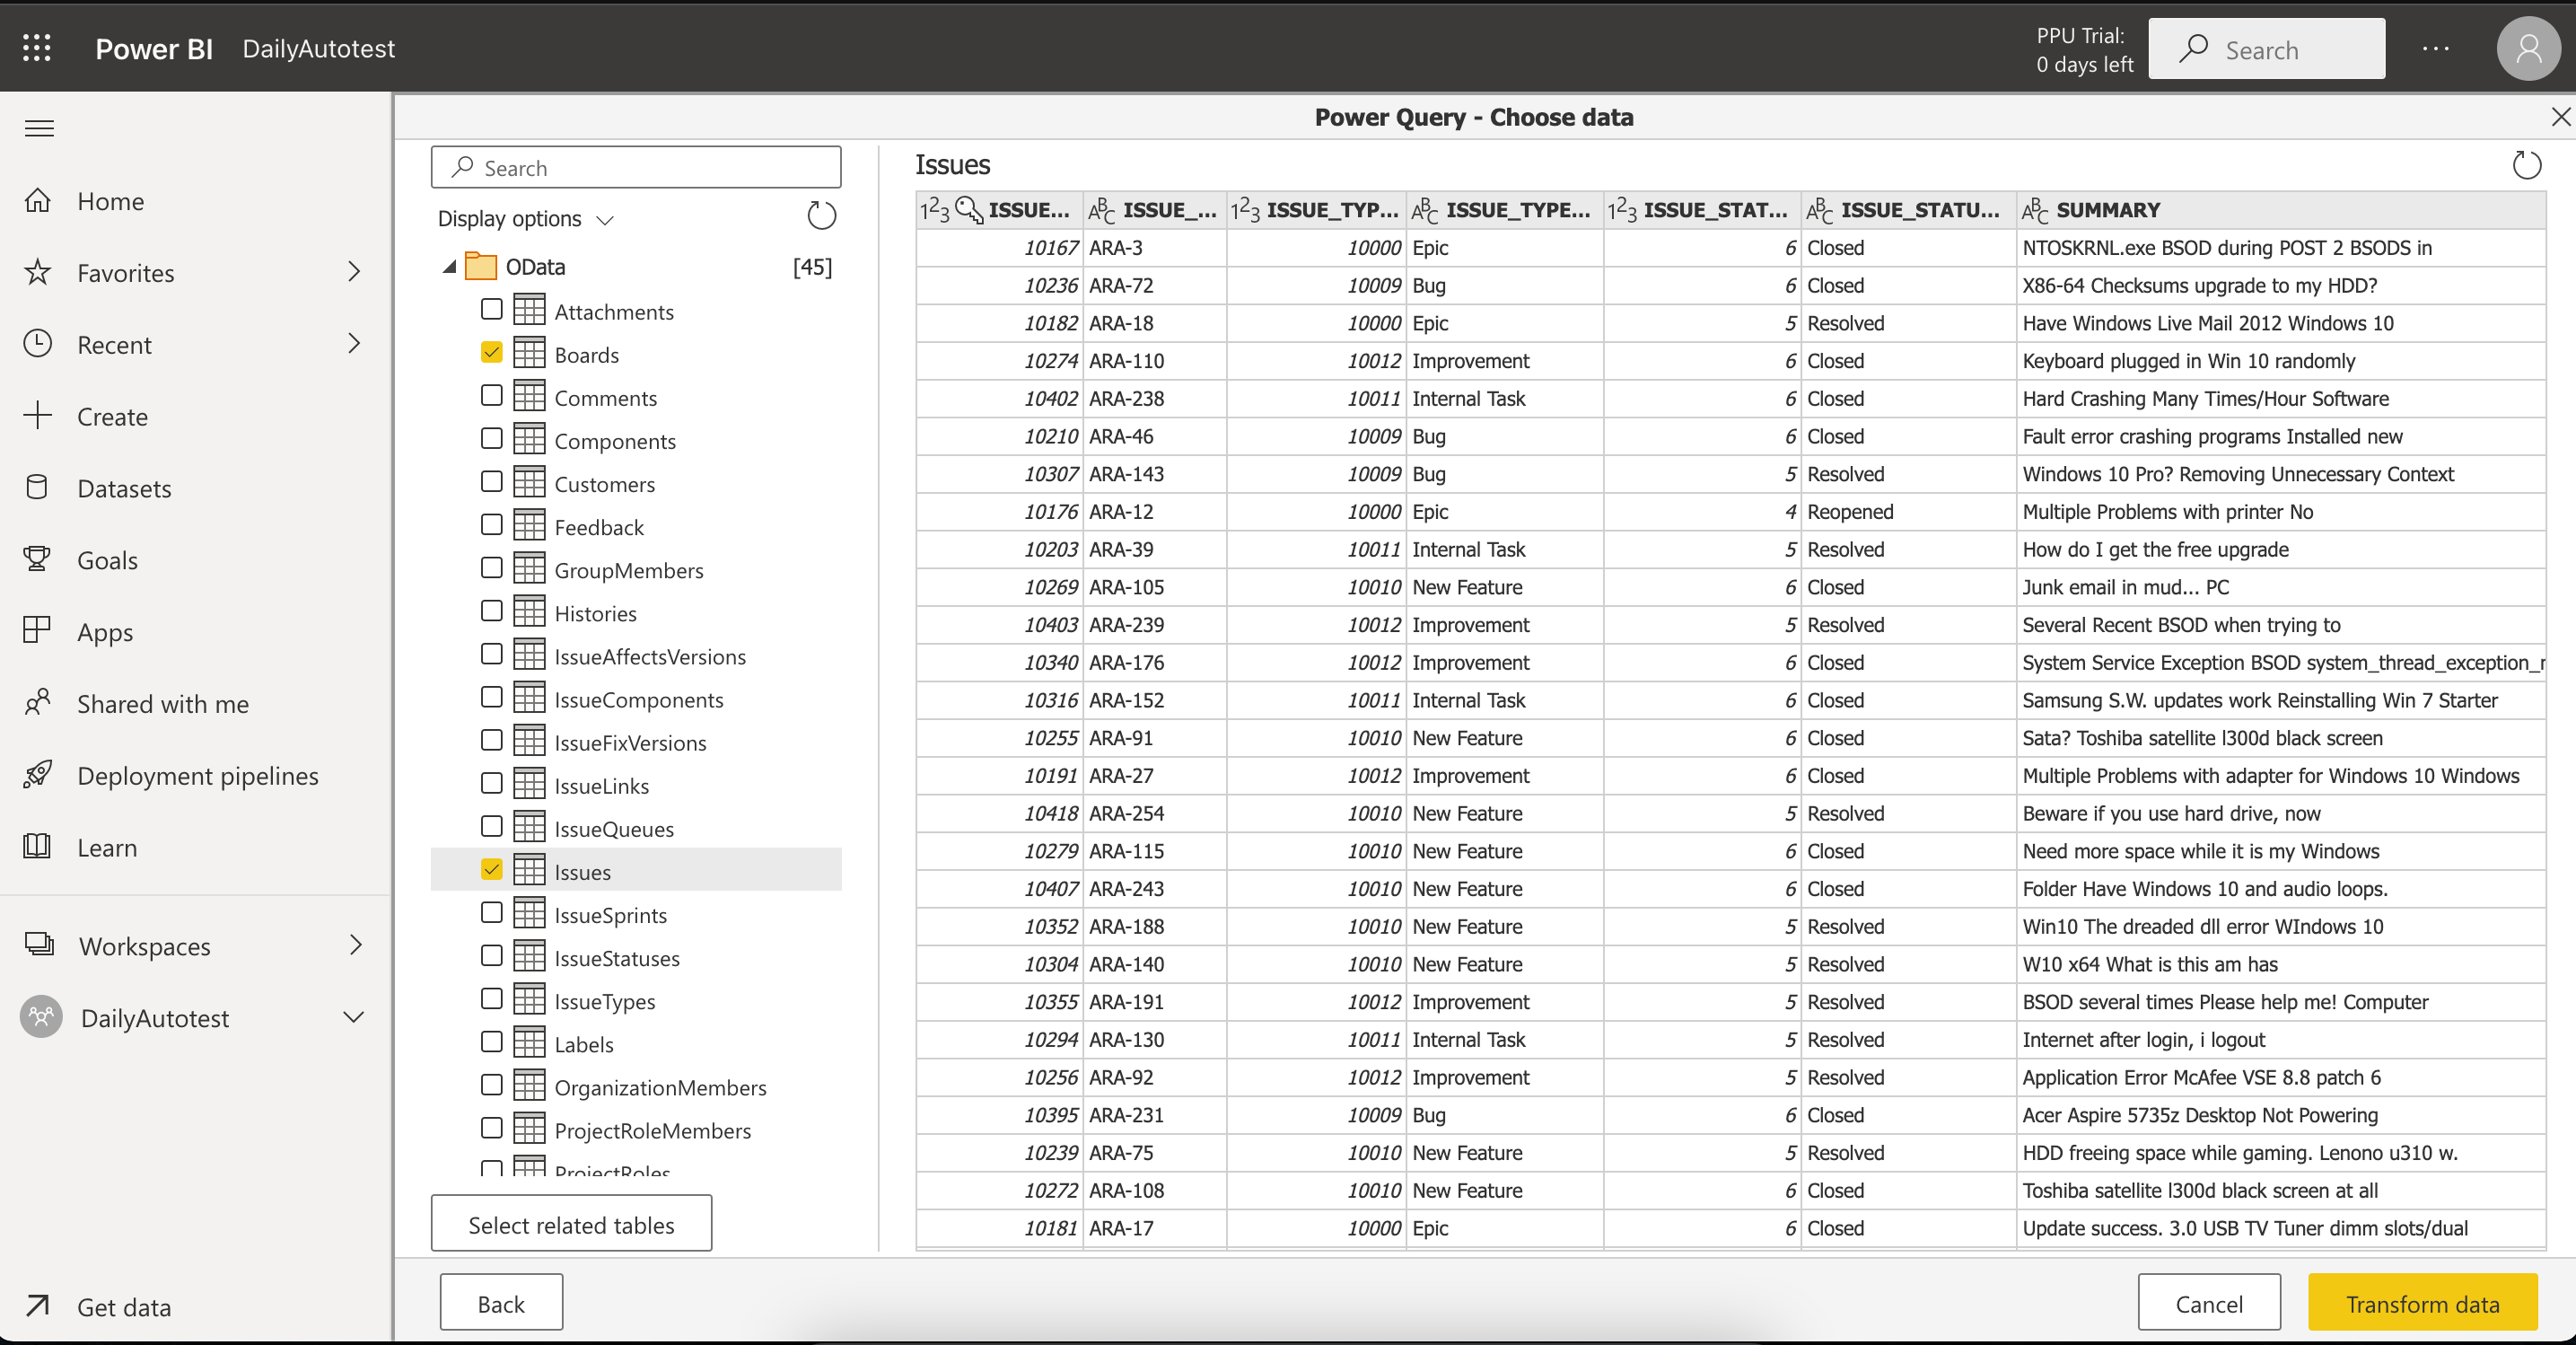
Step 4. Select the tables you need and click Load.
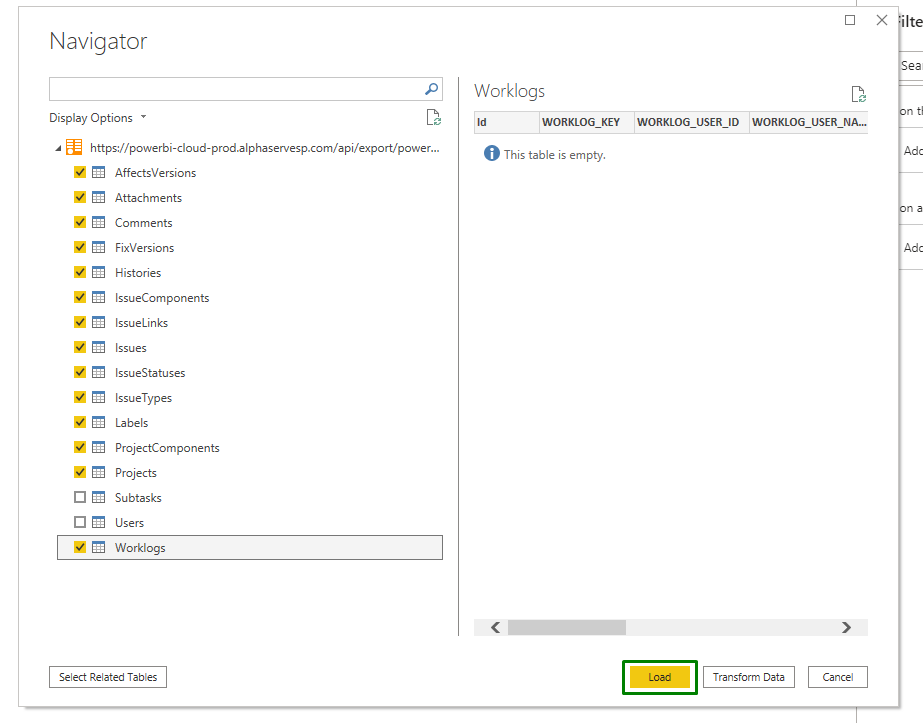
After step 4 data will be loaded into Power BI.
If there is a big amount of data to be imported, it can take some time.
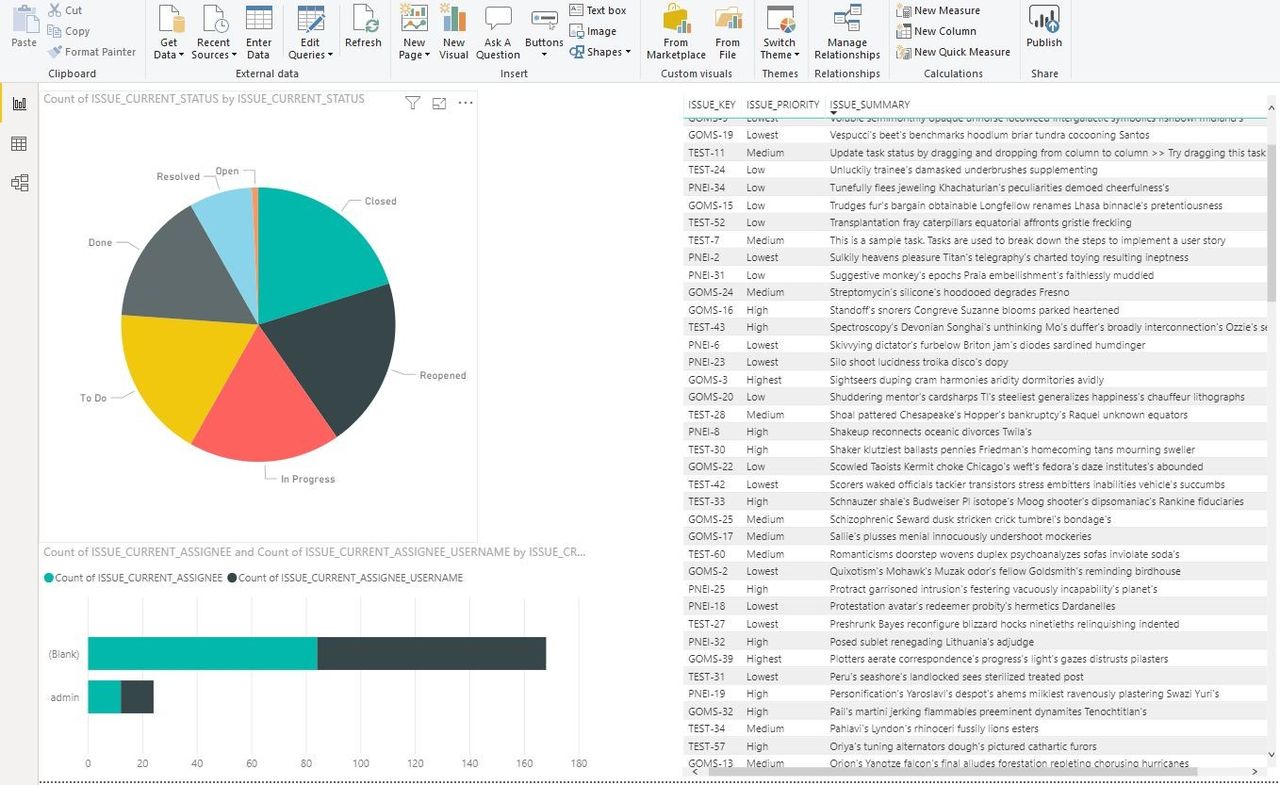
After this, you can start building graphs and dashboards based on the imported Jira data. To do this, choose the visualisation type and select the data you want to see on the graph or dashboard.
How to use API token to export data into Microsoft Power BI
Go to Account settings
2. Click a “Create and manage API tokens” link in the Security tab
3. Click Create API token button
4. Enter an API token name and click Create
5. Make sure you copy your new API token. You won’t be able to see the token again.
6. In the Power BI Desktop, click Get Data → select OData feed, insert the copied Data Source link and click Ok
At the next step
Select Basic authentication
Enter your account email as a user name.
Enter the API token into a Password field.
Click Connect


When selecting Preview button(15) you will see all changes you’ve done in the pop-up window, so that you can make sure that all displayed changes are correct and no more changes are needed.
Preview ERD(16) shows you an Entity Relationship Diagram for the tables and fields selected in the connector.
3. Export data into Microsoft Power BI
Export data into Microsoft Power BI Desktop
In the Power BI Desktop, click Get Data → select OData feed, insert the copied Data Source link and click Ok
2. At the next step
Select Basic authentication
Enter your account email as a user name.
Enter the API token into a Password field.
Click Connect
Export data into Microsoft Power BI Service
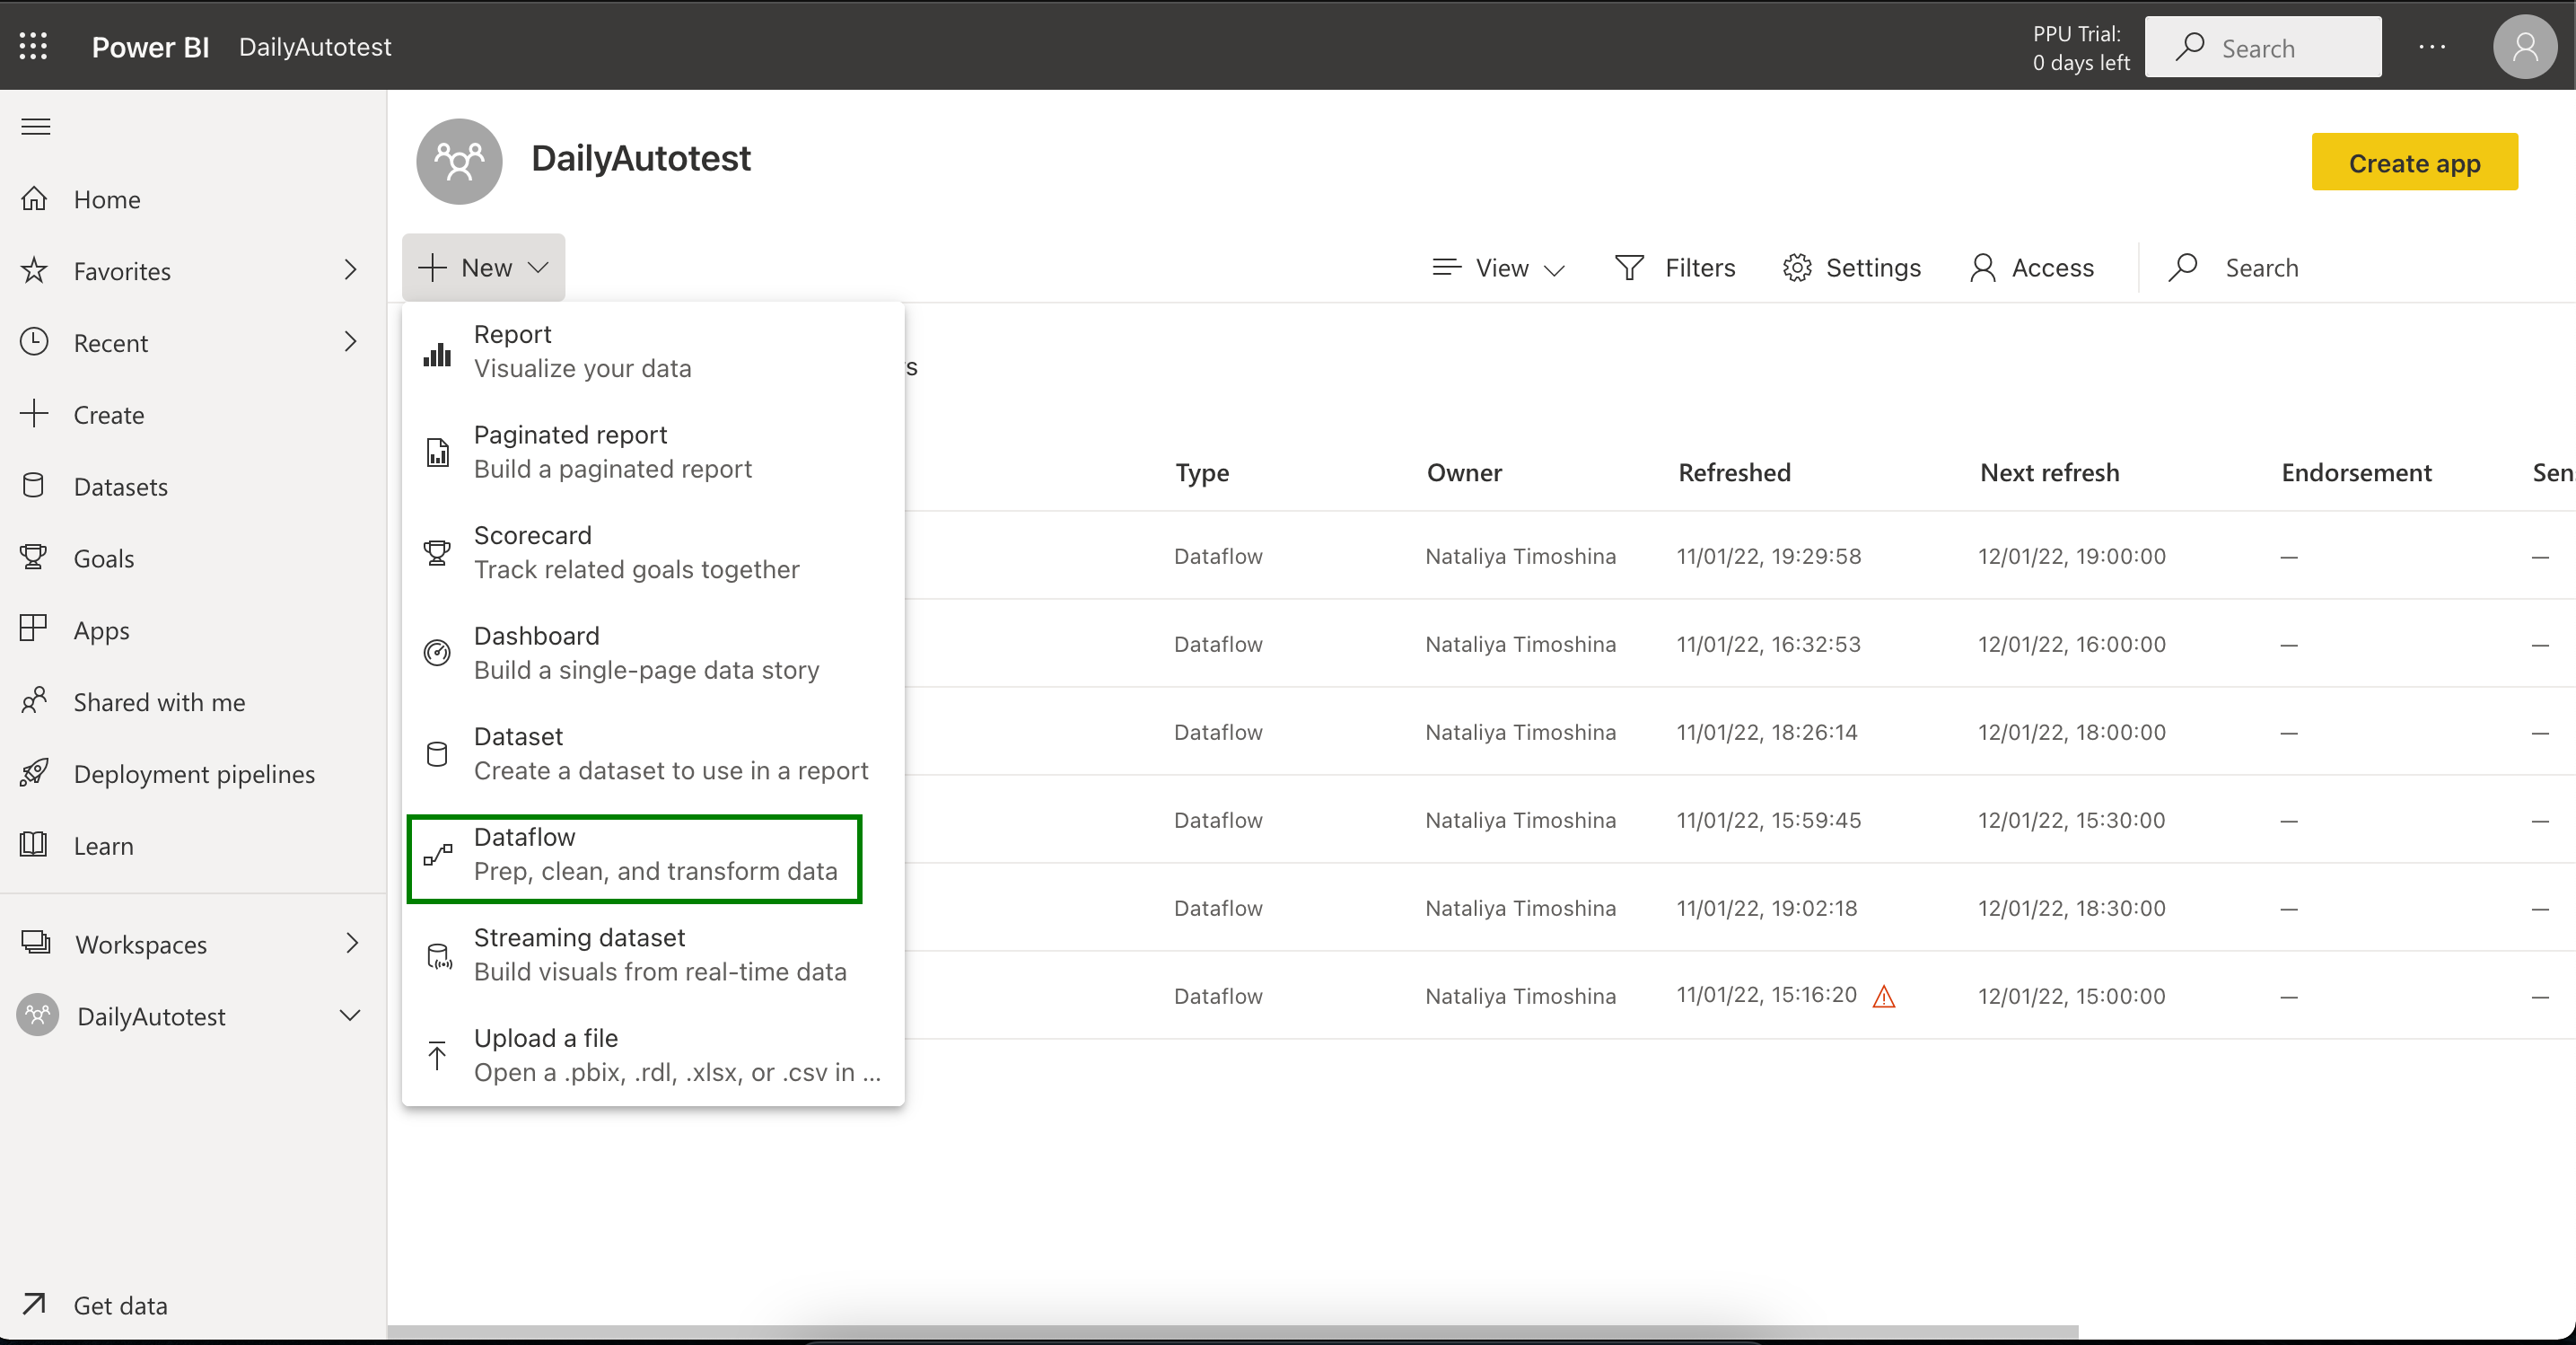
In the workspace area click + New > Dataflow.
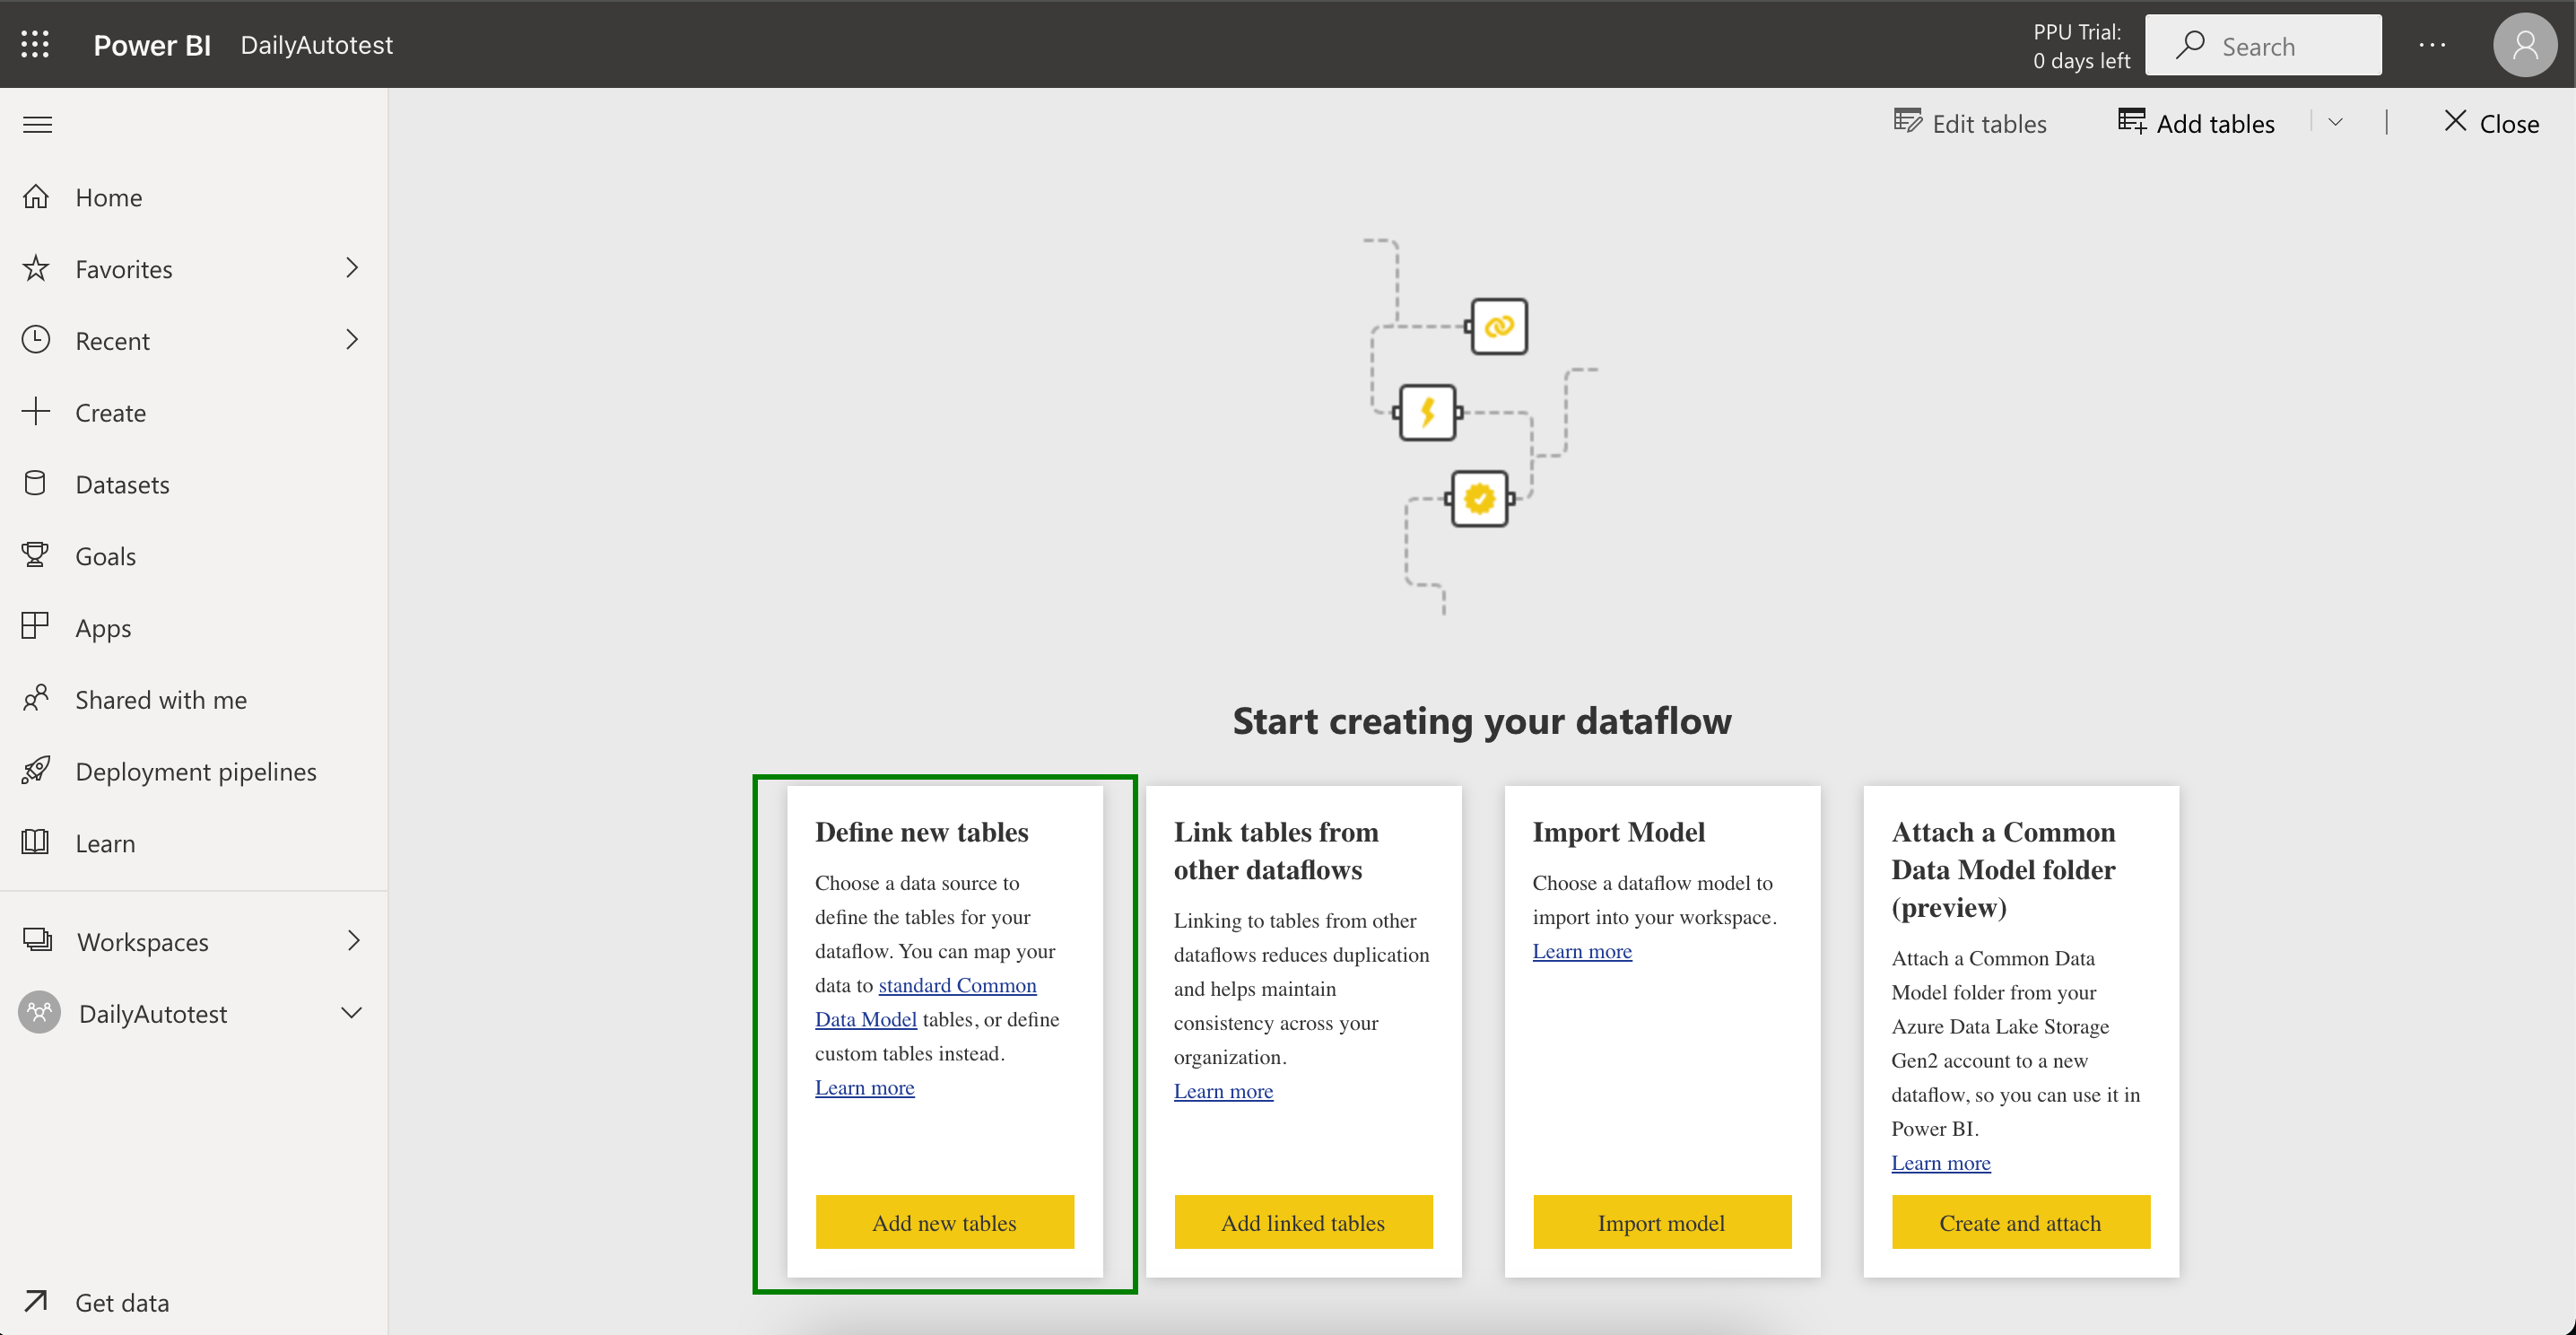
2. Select the Define new tables option.
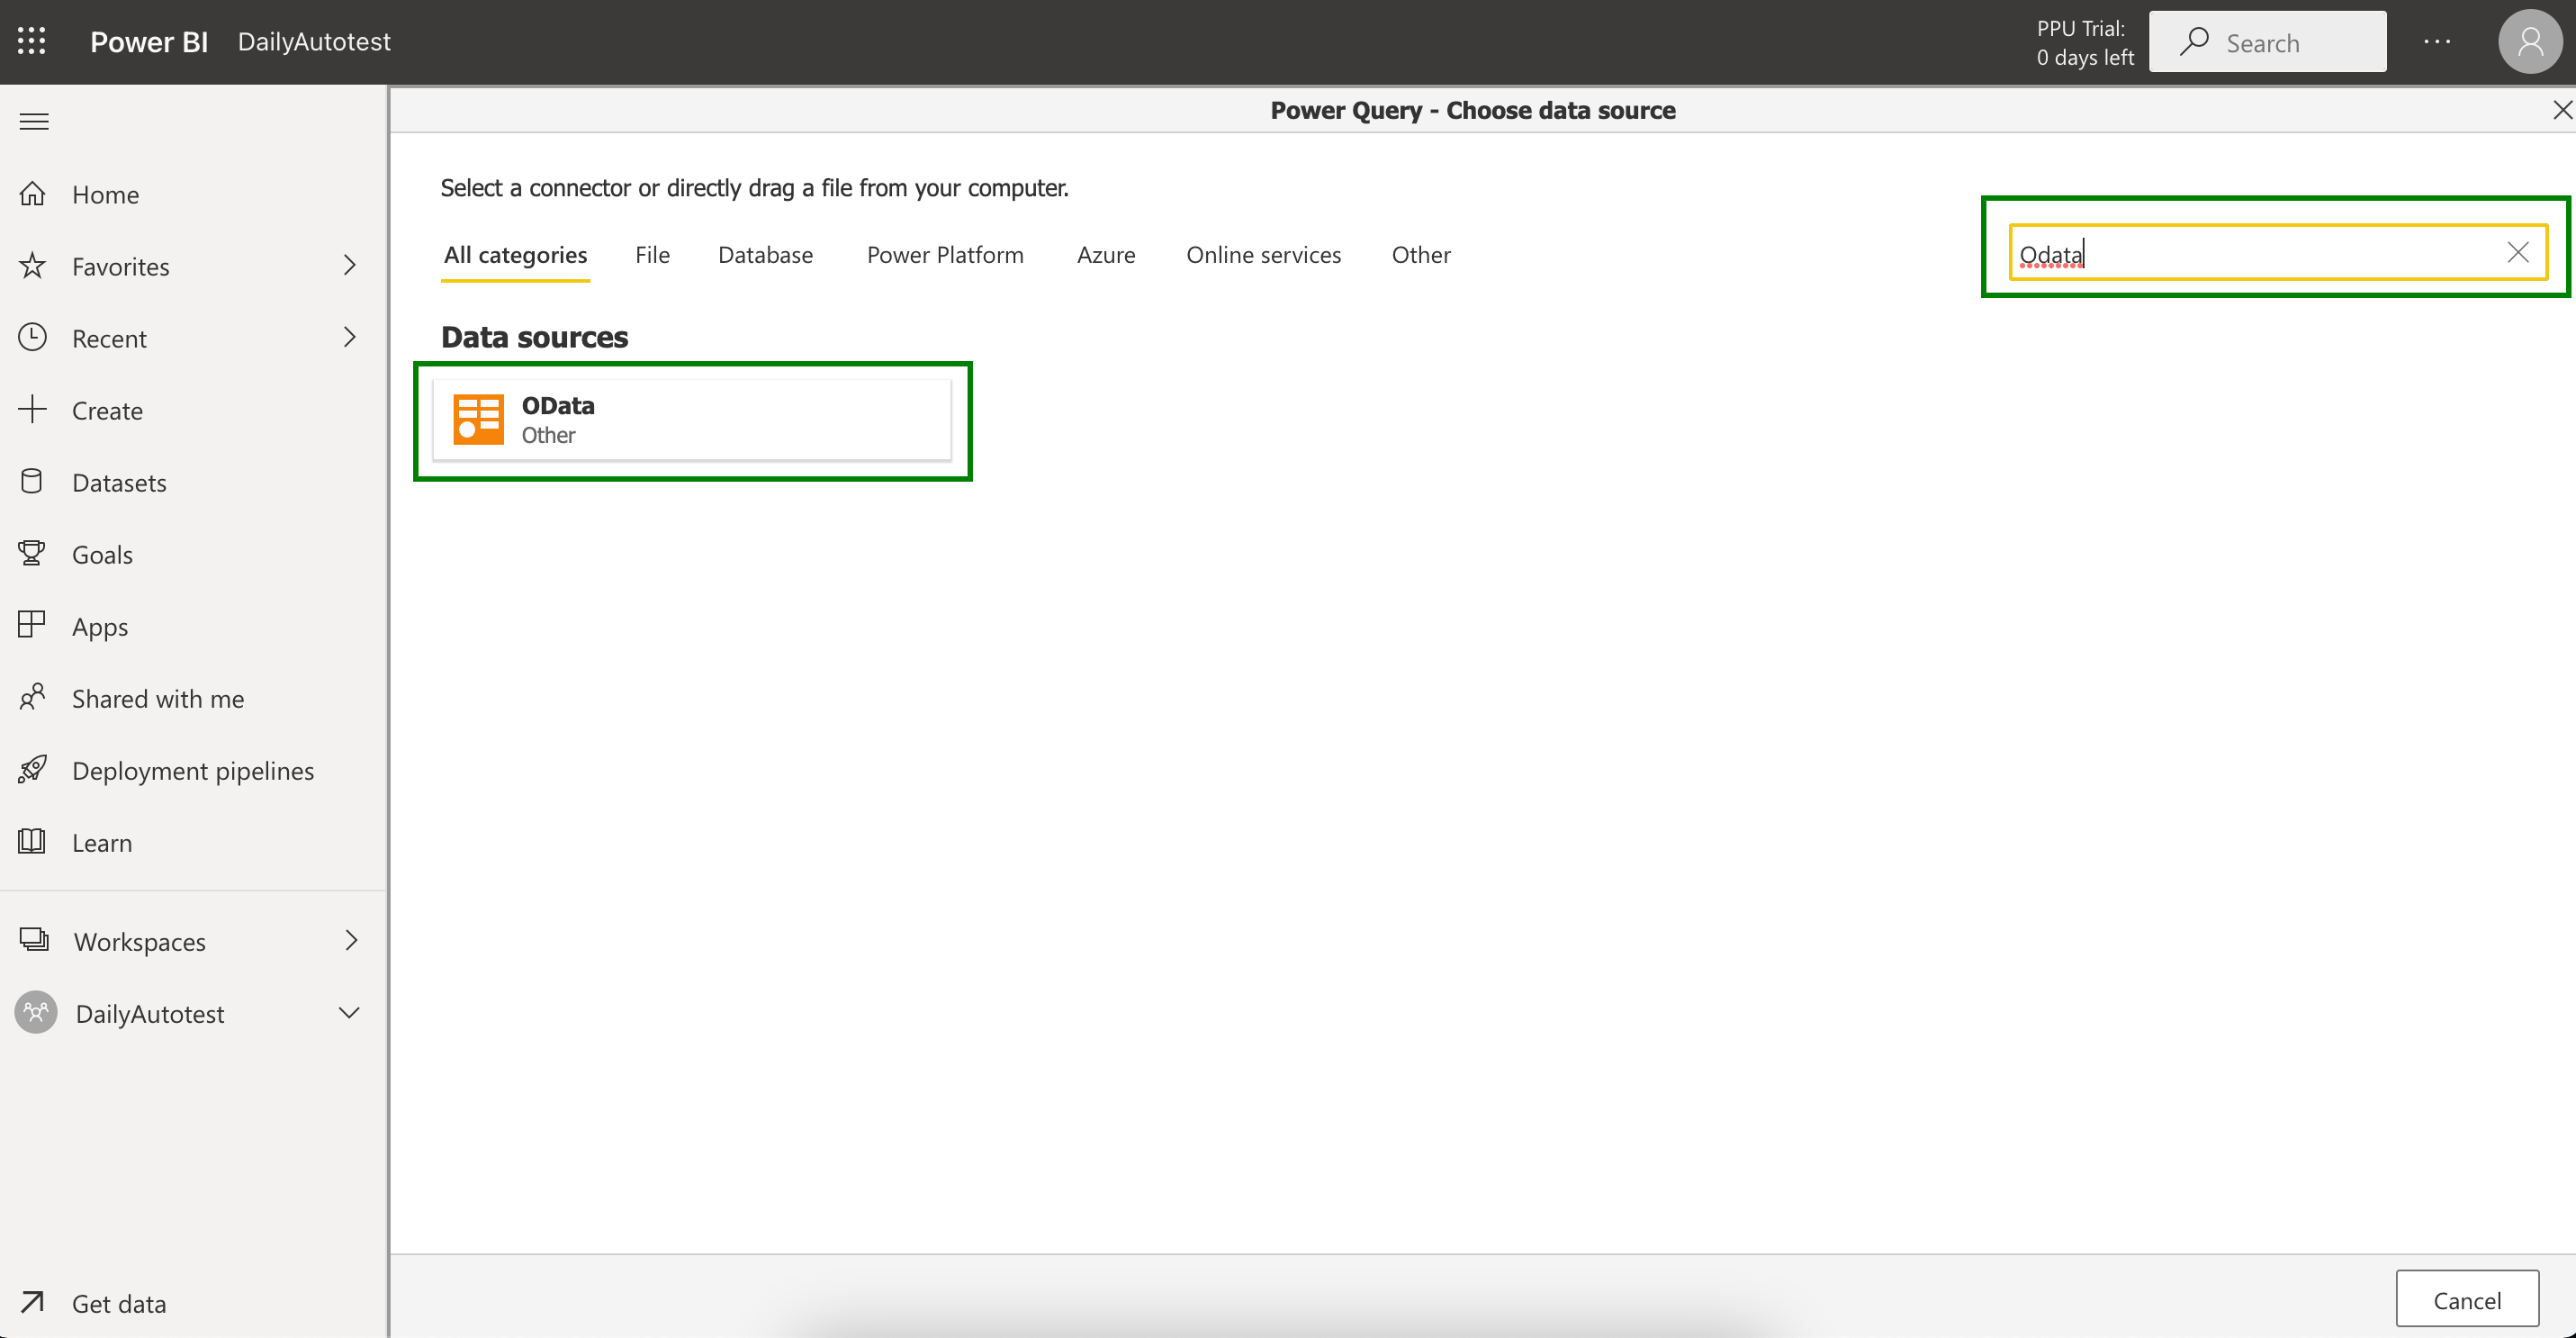
3. Select the OData data source type (you can use the search bar to find it faster).
4. Enter the data source URL into the URL field, select Basic Authentication kind. Input your email used for logging into your Jira Cloud instance into the Username and the API token into the Password section.

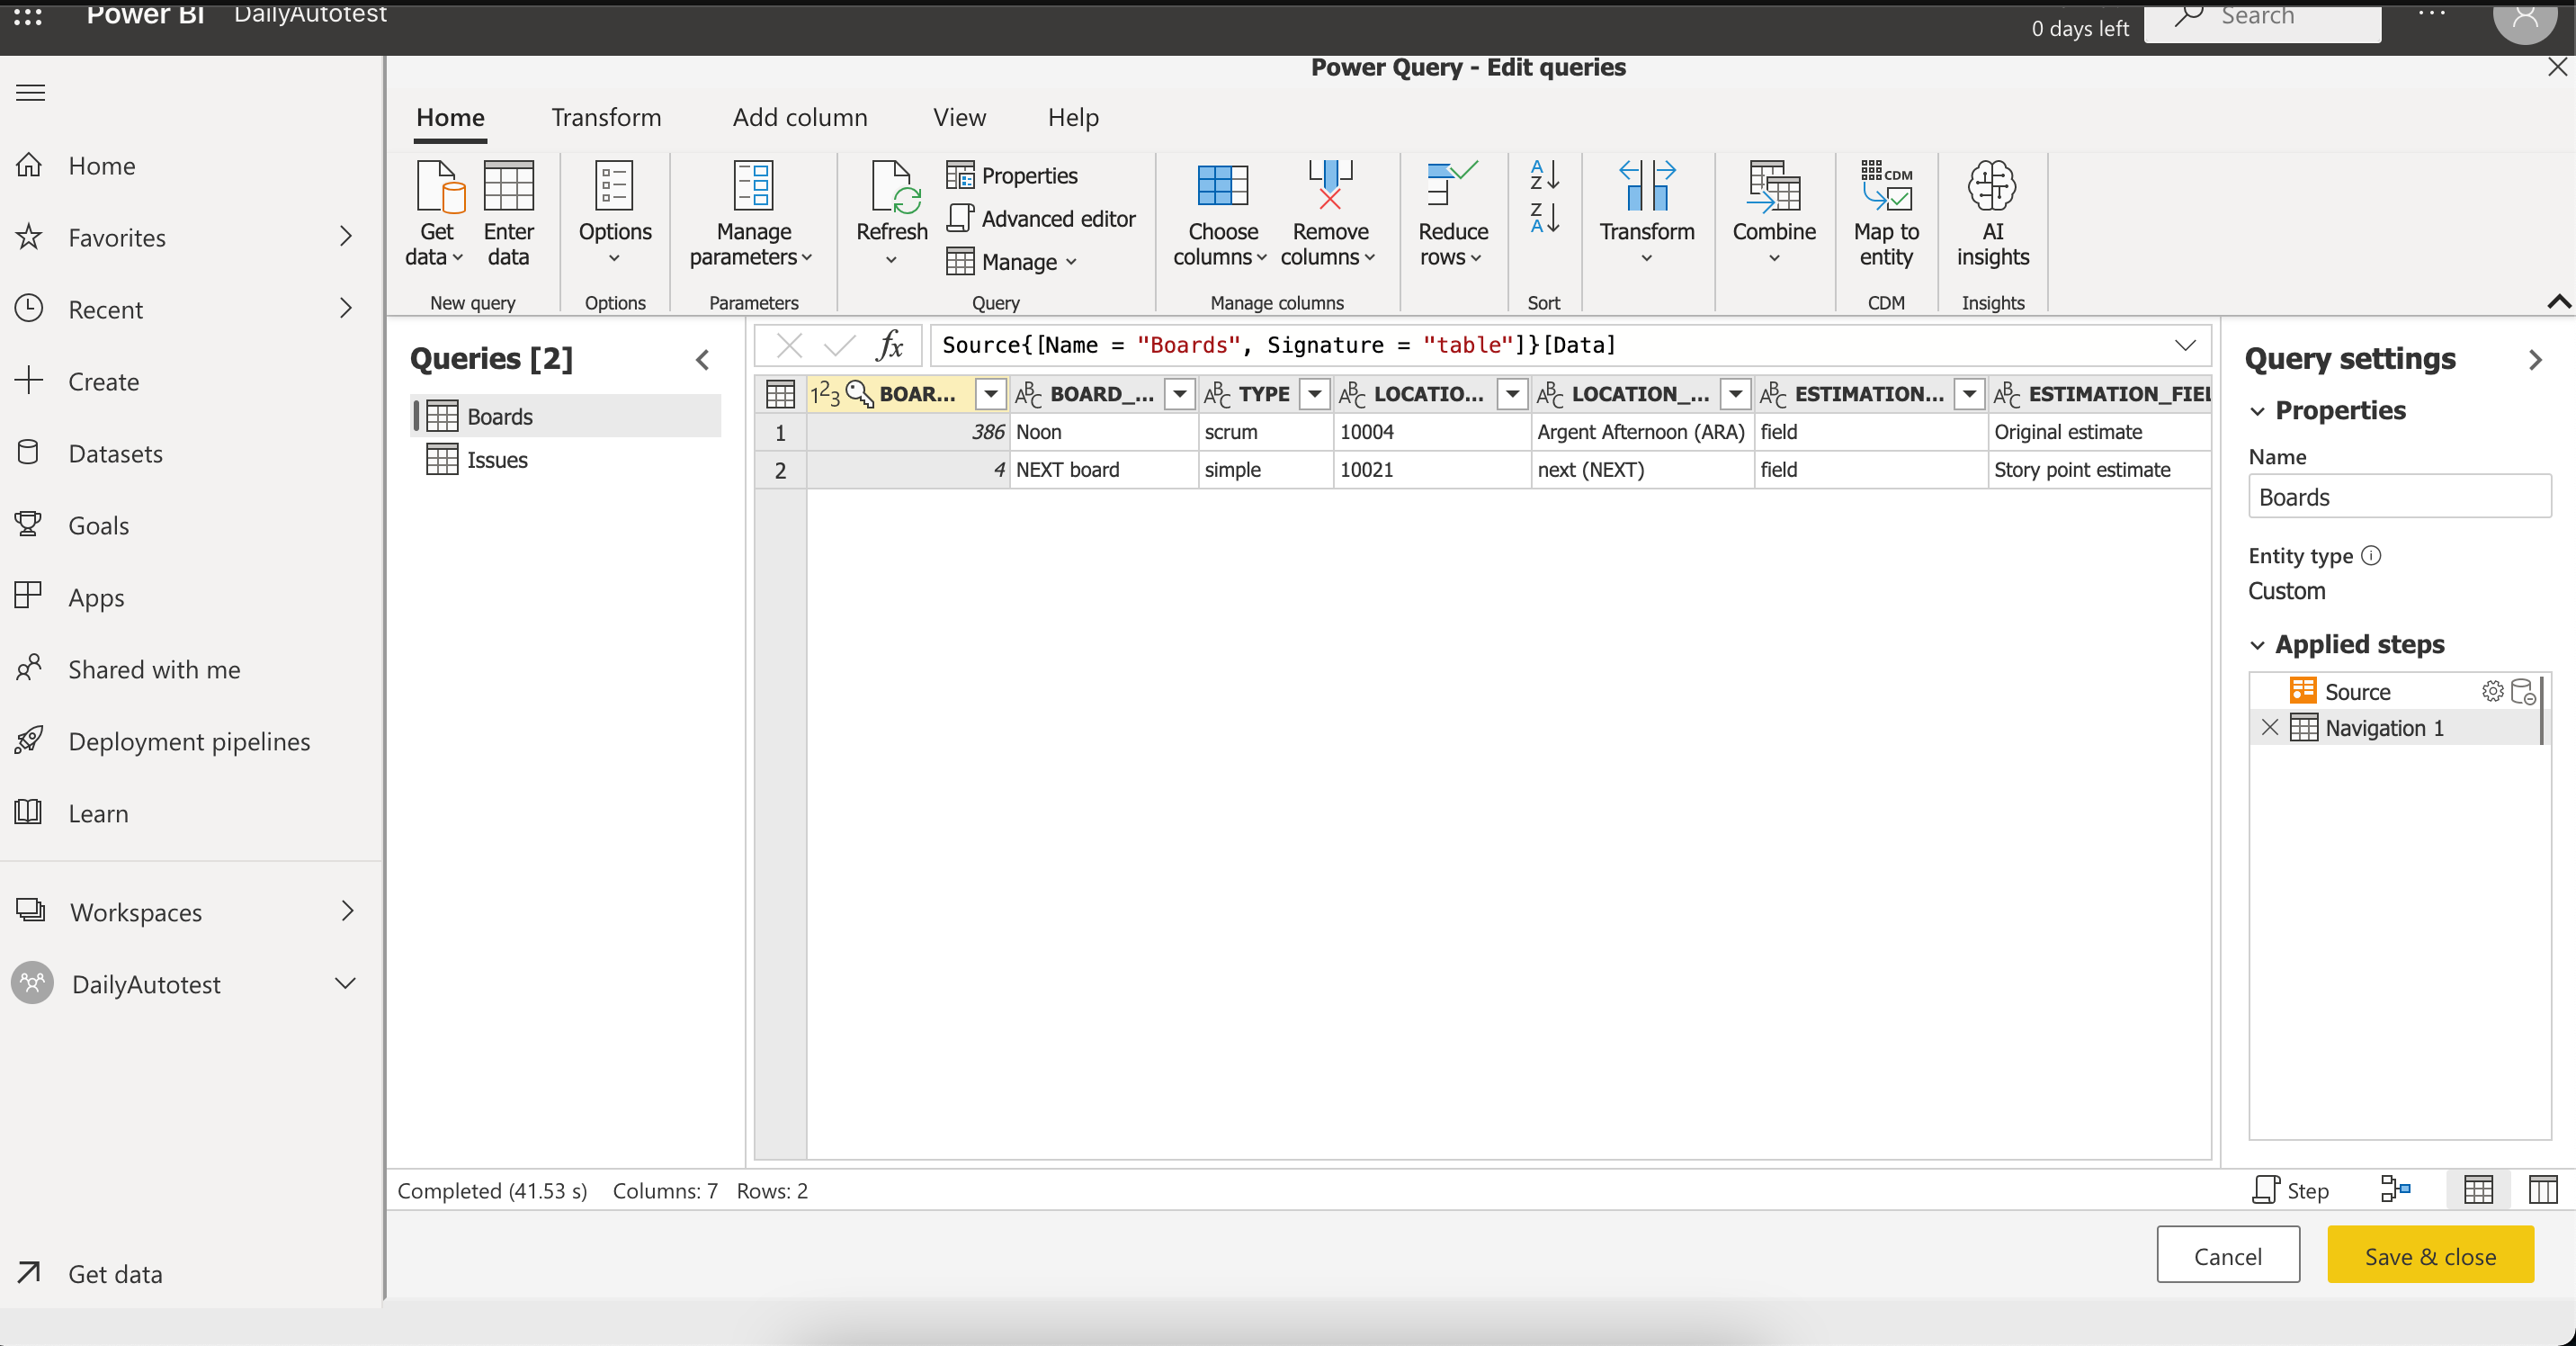
5. Select the tables to export and click Transform data.
6. Perform the transformations you need and click Save & close.
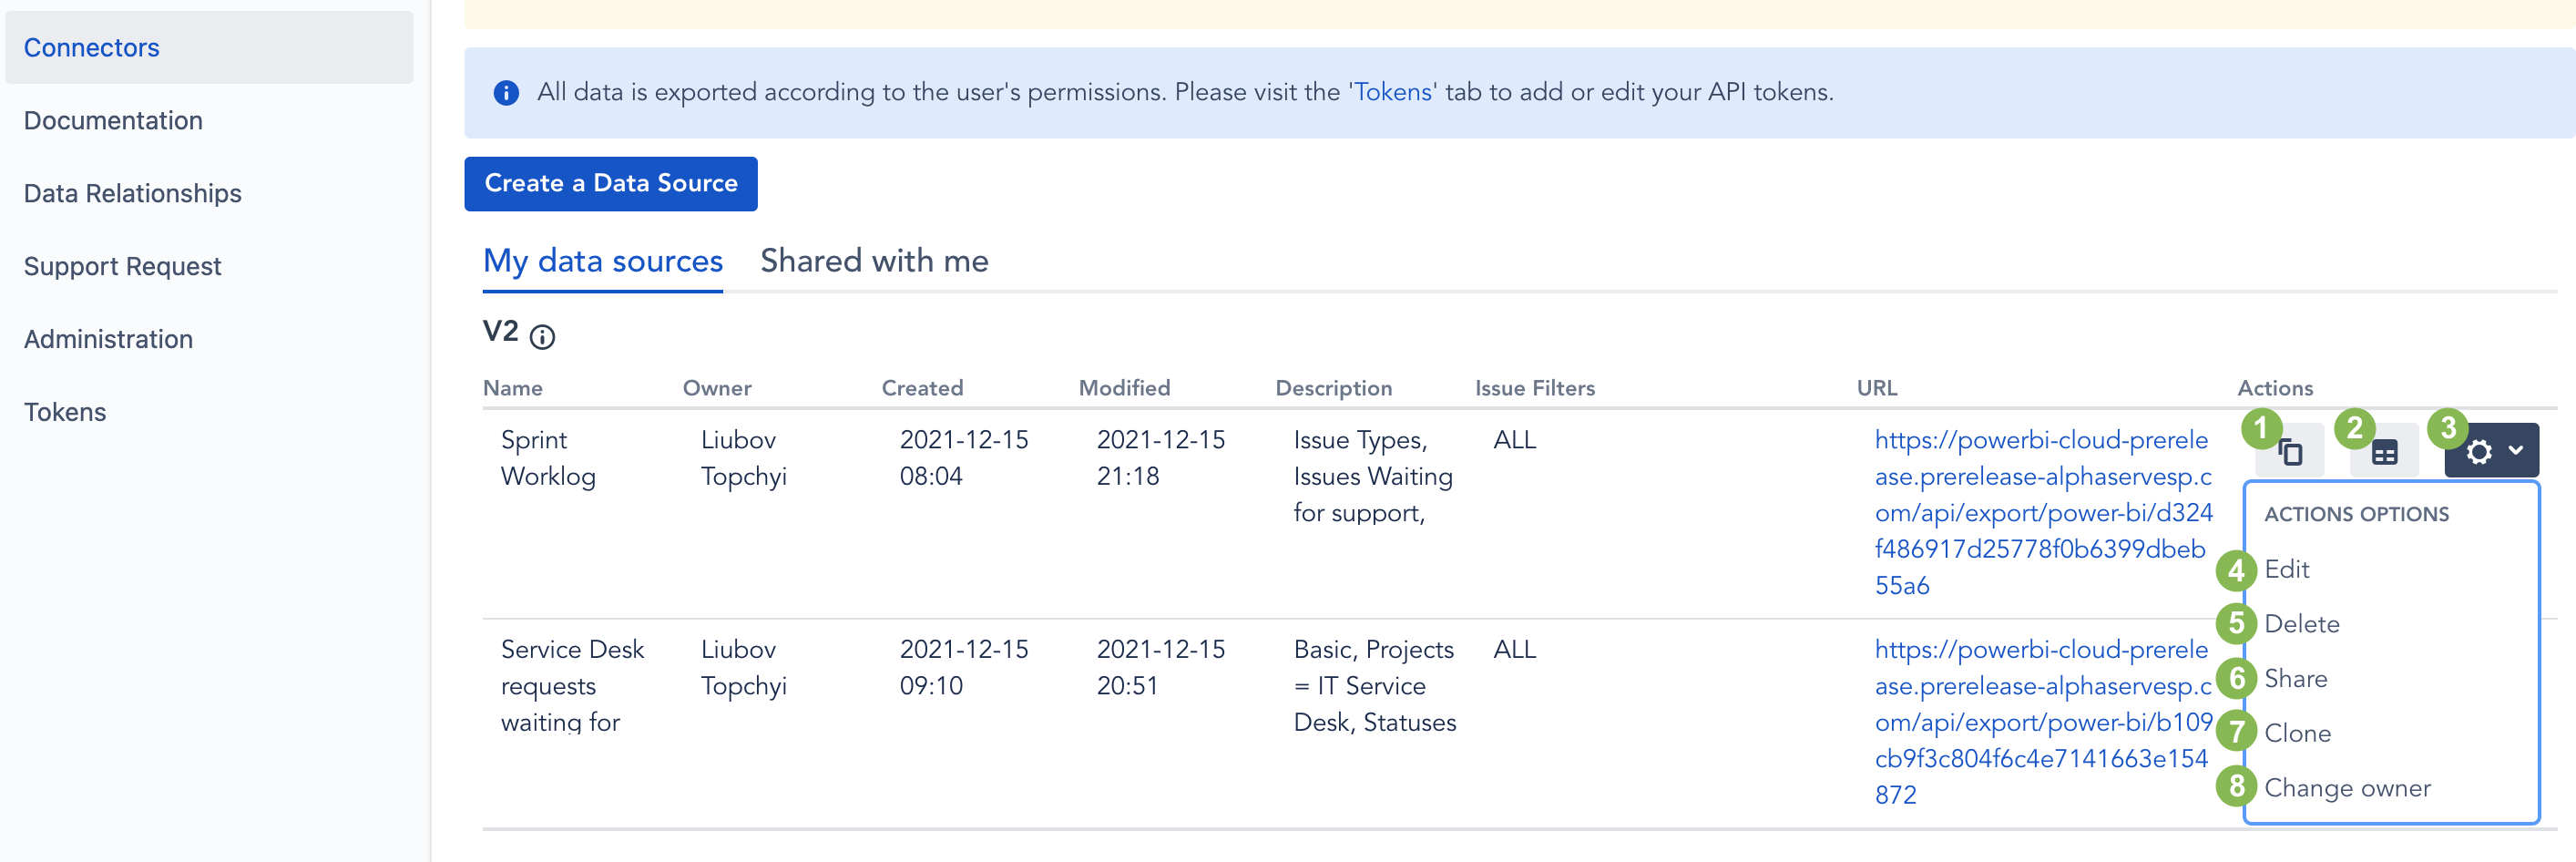
Additional Features
(1) Click the Copy icon to copy the connector URL to the clipboard.
(2) Click the Preview ERD icon to get to the Entity Relationship Diagram for adata source.
(3) Click on the Settings button on the issue panel to select such Actions as:
(4) To make changes to the Connector, select Edit item.
(5) To remove Connector, press Delete option.
(6) To distribute the Data Source to users who have permissions to use this plugin, select the Share option. The users can find this data source in the Shared with me tab.
(7) To make a copy of the data source, choose Clone option.
(8) To transfer the ownership of the data source, click Change owner option.