Export data into Power BI Service, create the reports or dashboards you need, and save your file.
Click Select Publish,and then select Sign in with your Power BI Service account (if you are not signed in).

3. Select a workspace where you’d like to publish your report or dashboard, and then select Select.
| Info |
|---|
Power BI will start publishing your report or dashboard to your Power BI Service workspace. |

| Info |
|---|
After successful publishing, you may review your report by selecting the link or by going directly to your Power BI Service. |

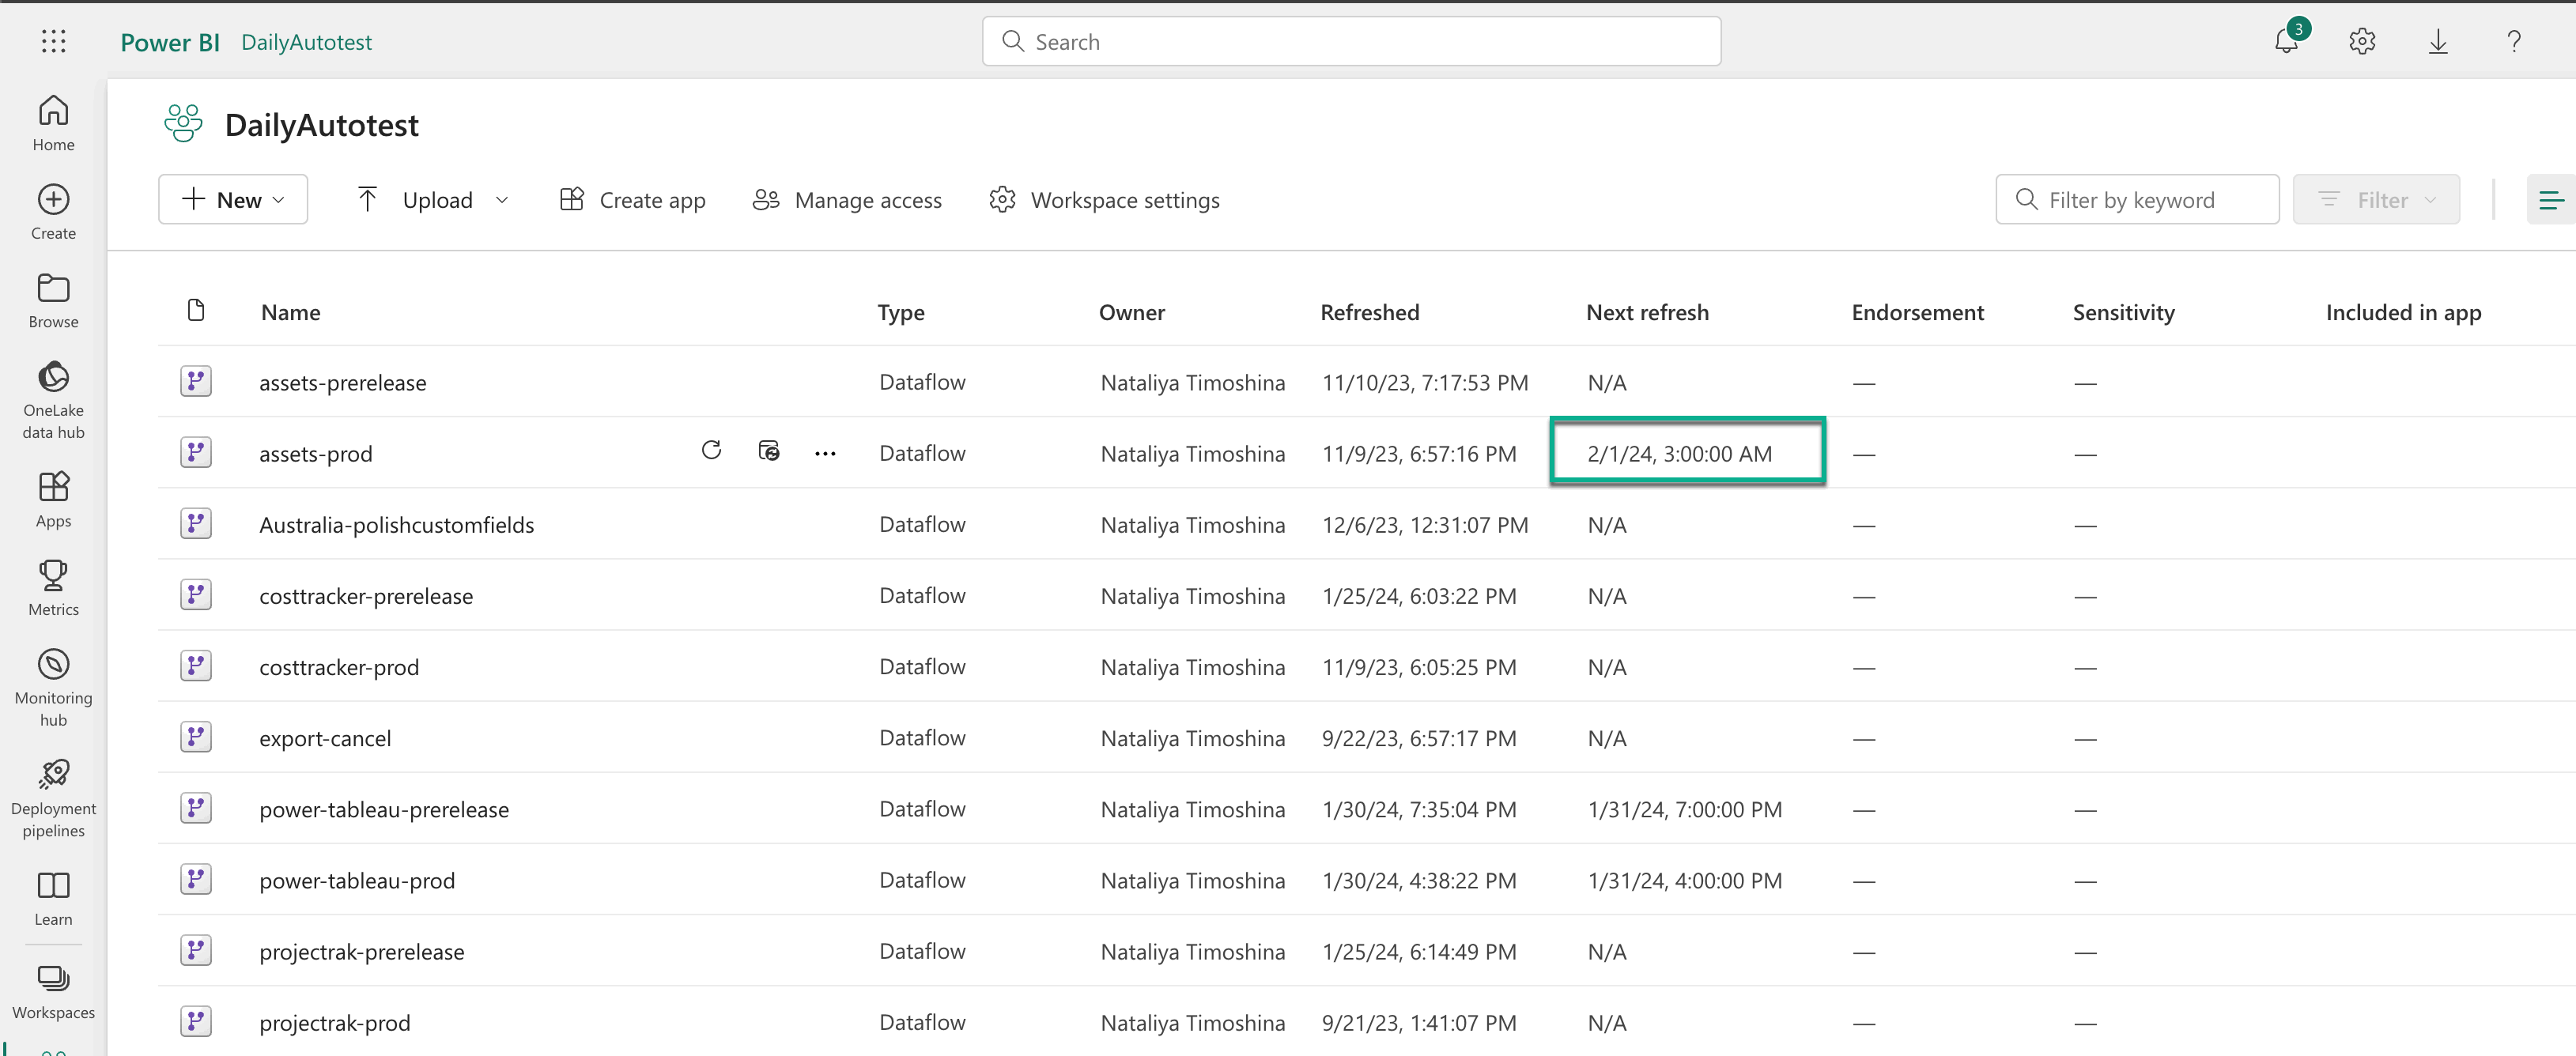
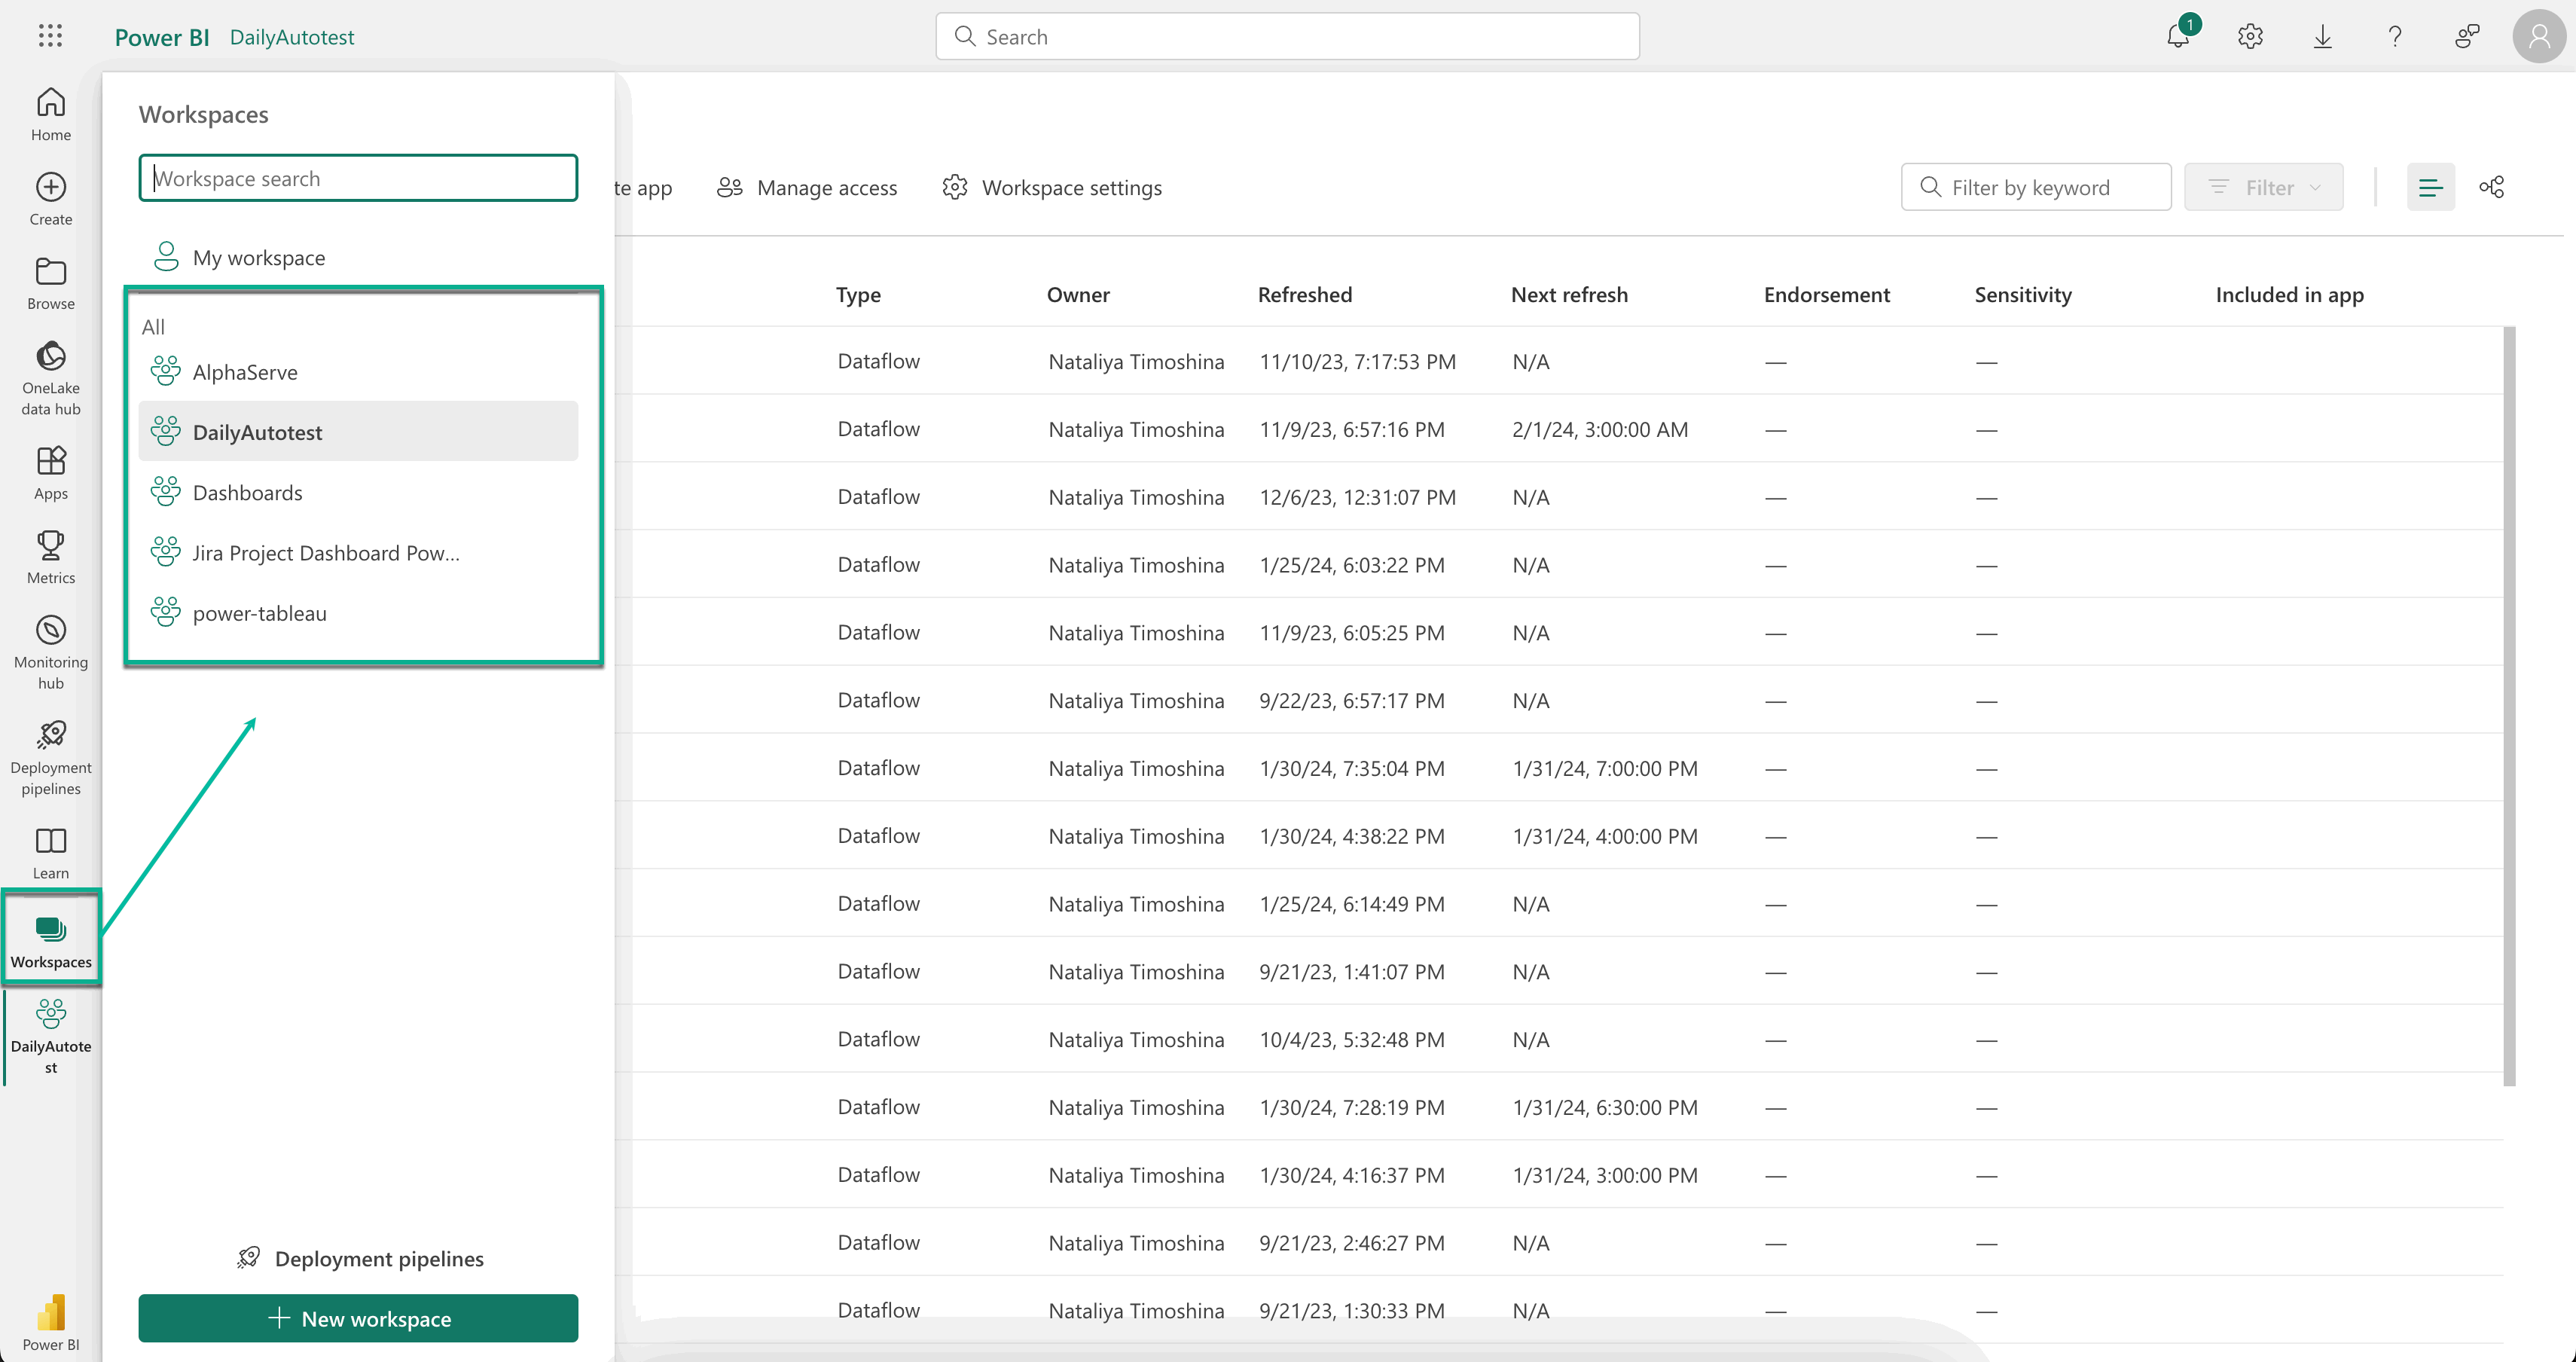
Select Workspaces, and then select the workspace where you published your report or dashboard.
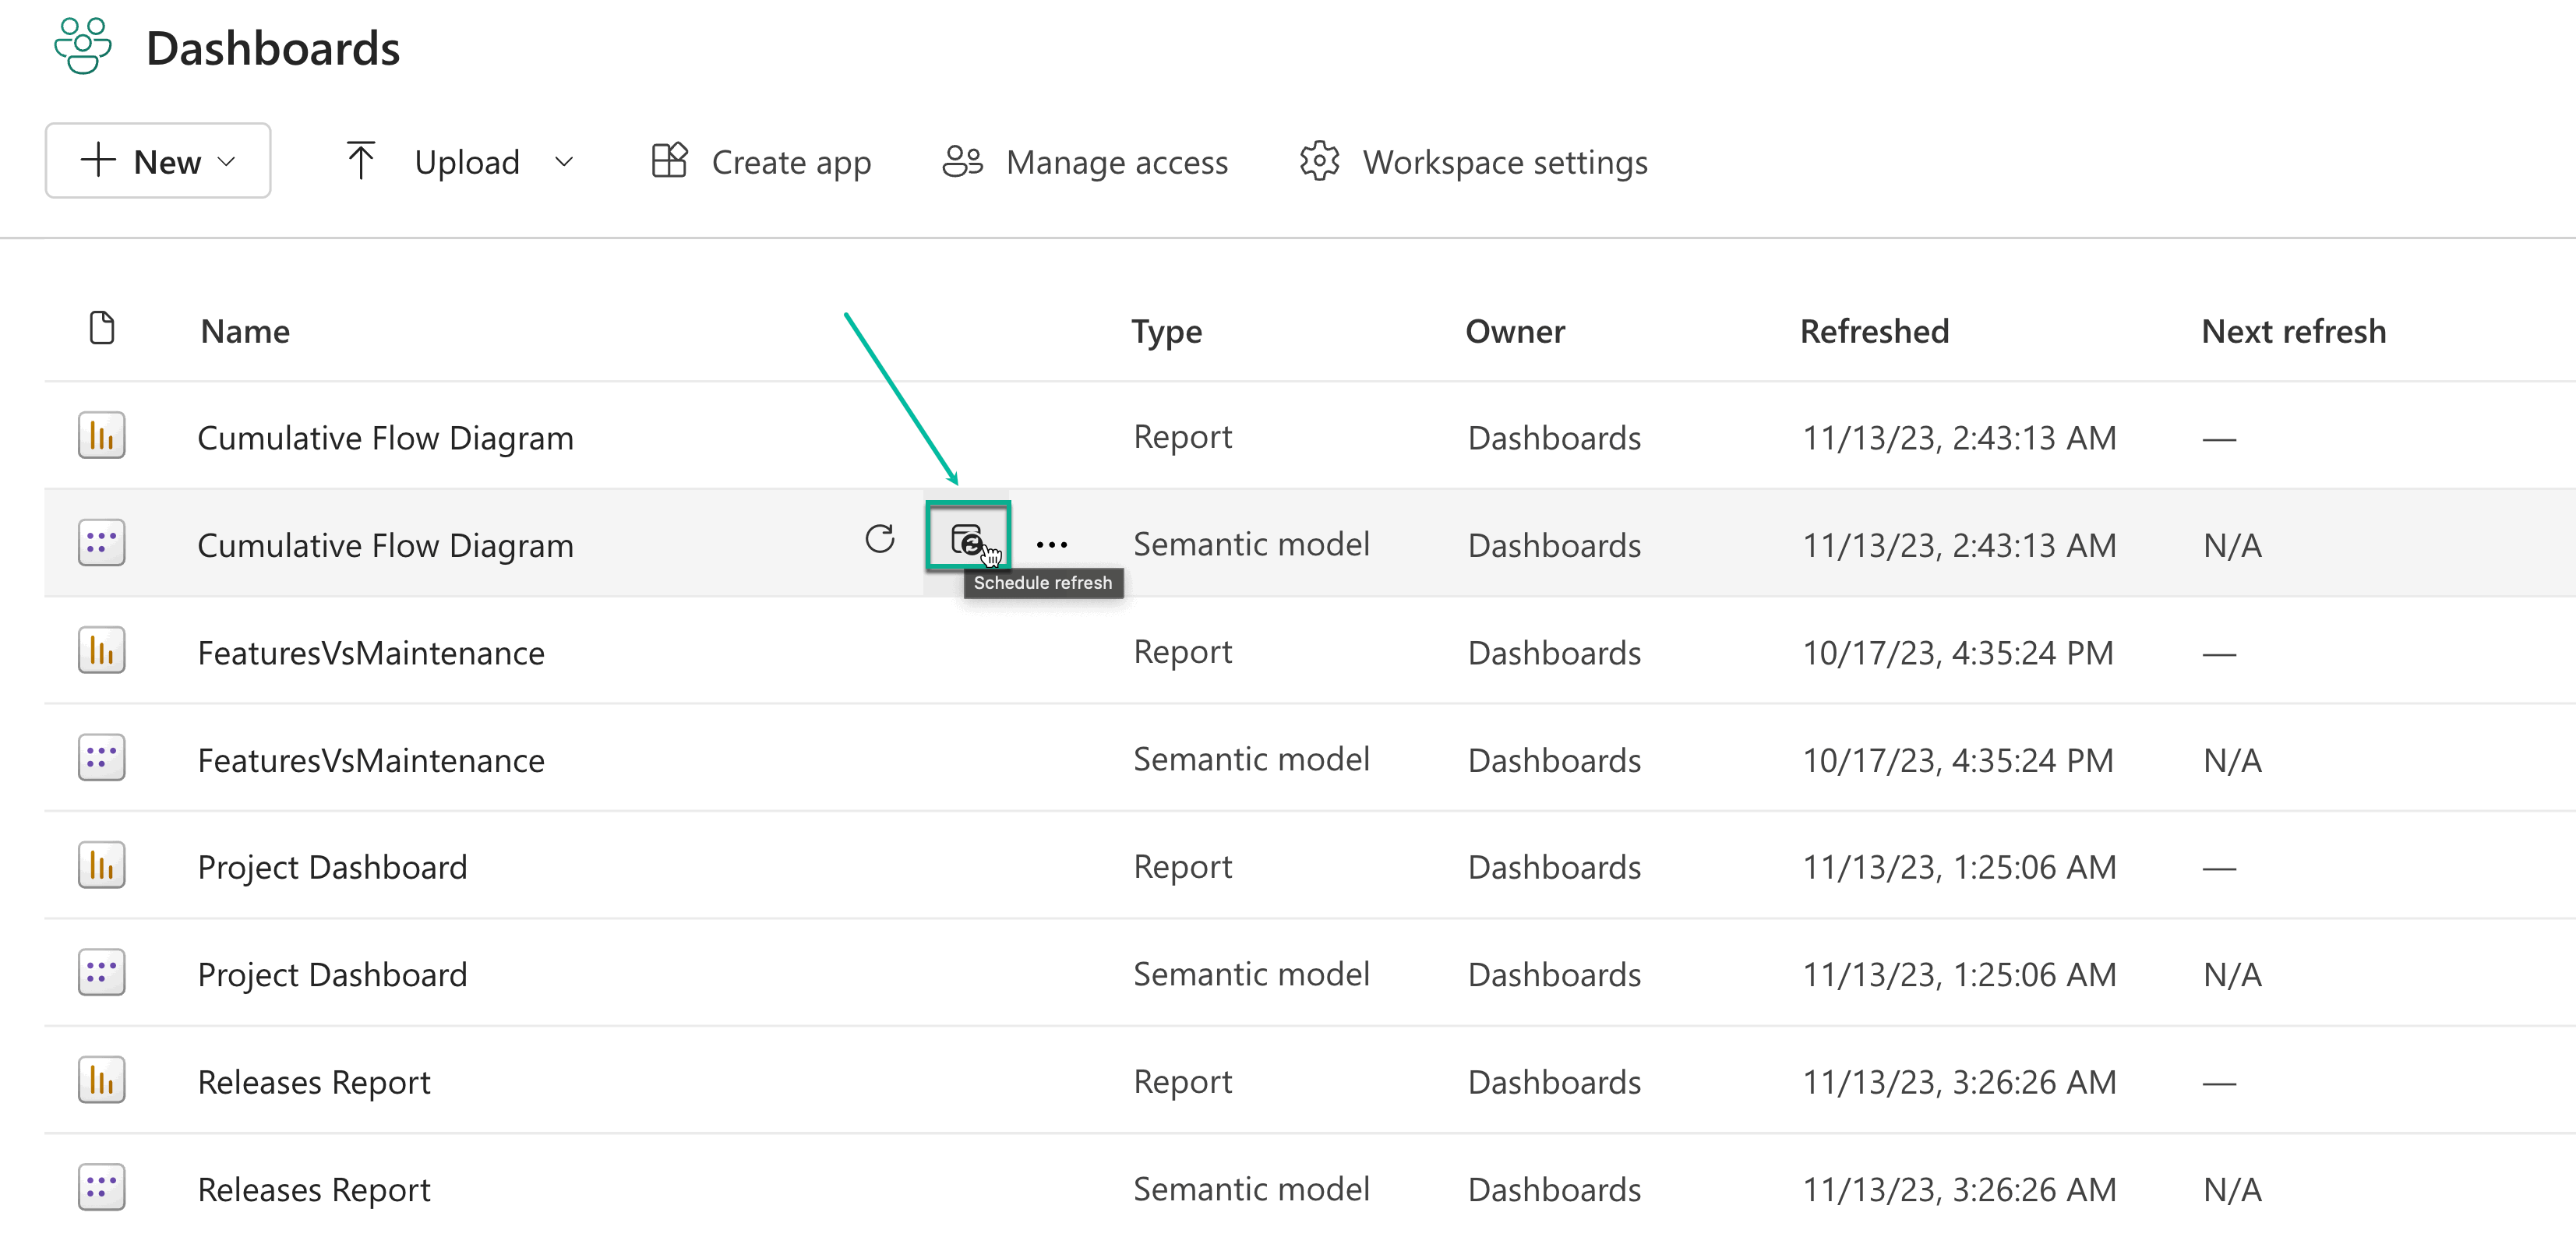
In front of your published report or dashboard, select Schedule refresh.
[Optional] Select Edit credentials.
| Info |
|---|
If you experience one of the errors: Failed to test the connection to your data source. Please retry your credentials or Data source can’t be refreshed because the credentials are invalid. Please update your credentials and try again, follow the steps below. If you don’t face an error, please proceed to step 12. |
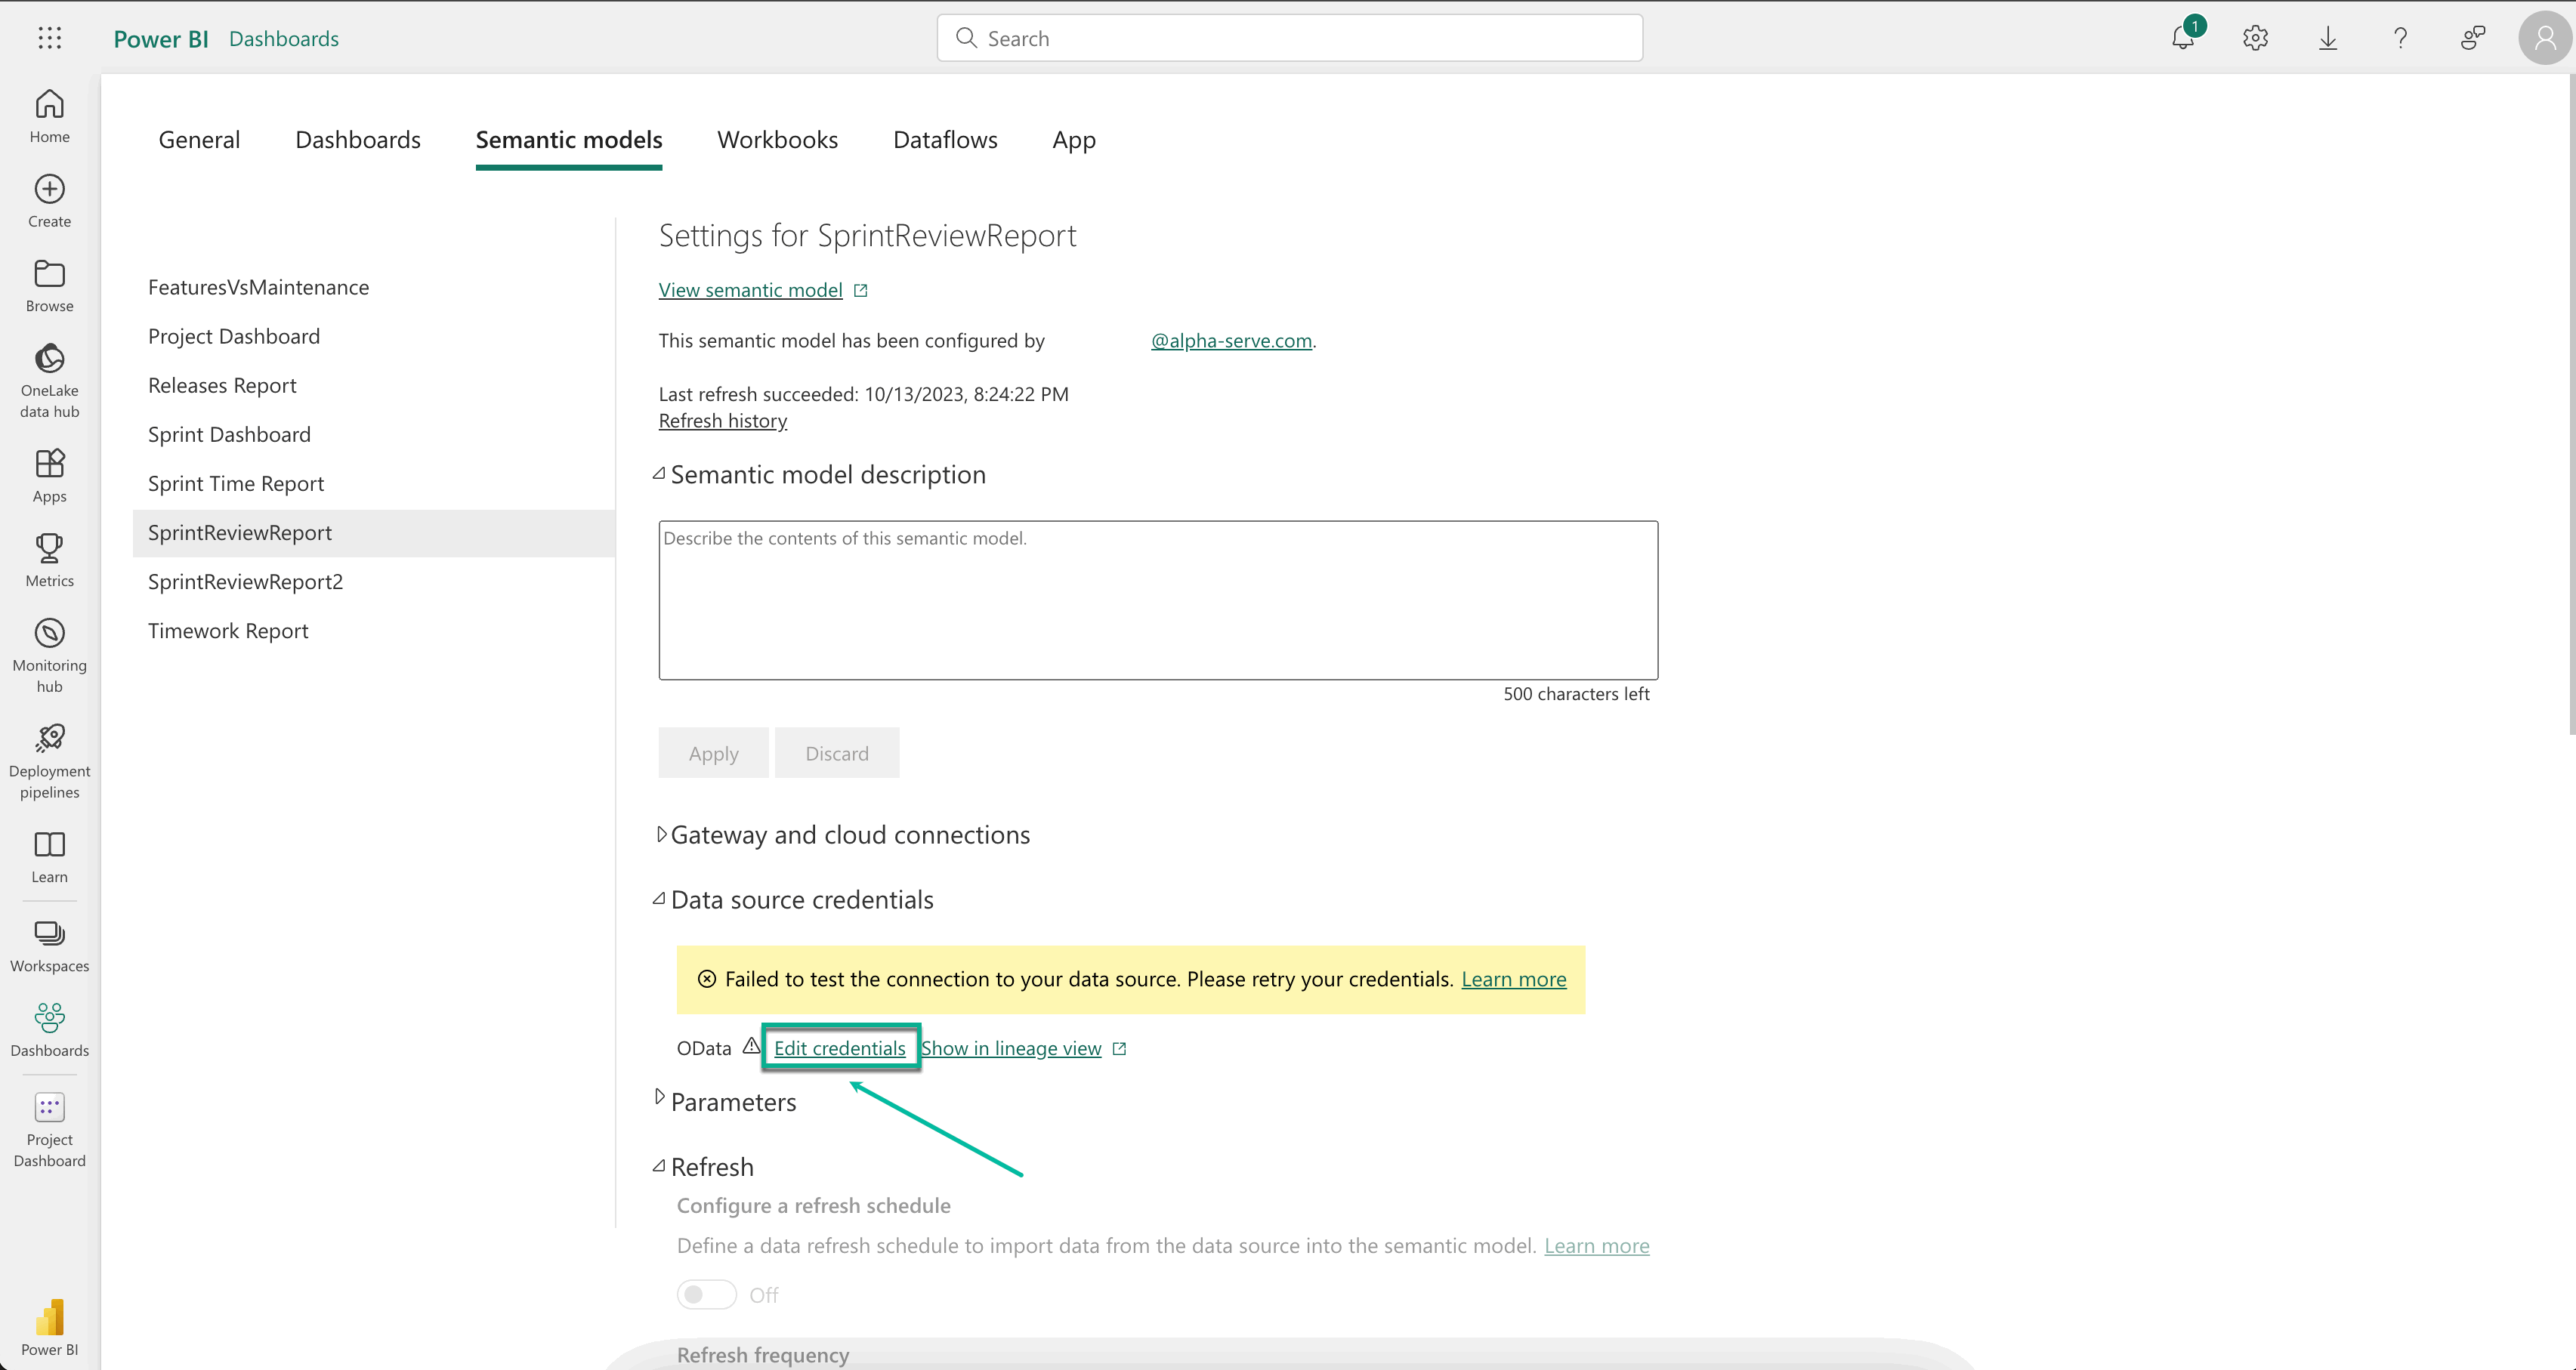
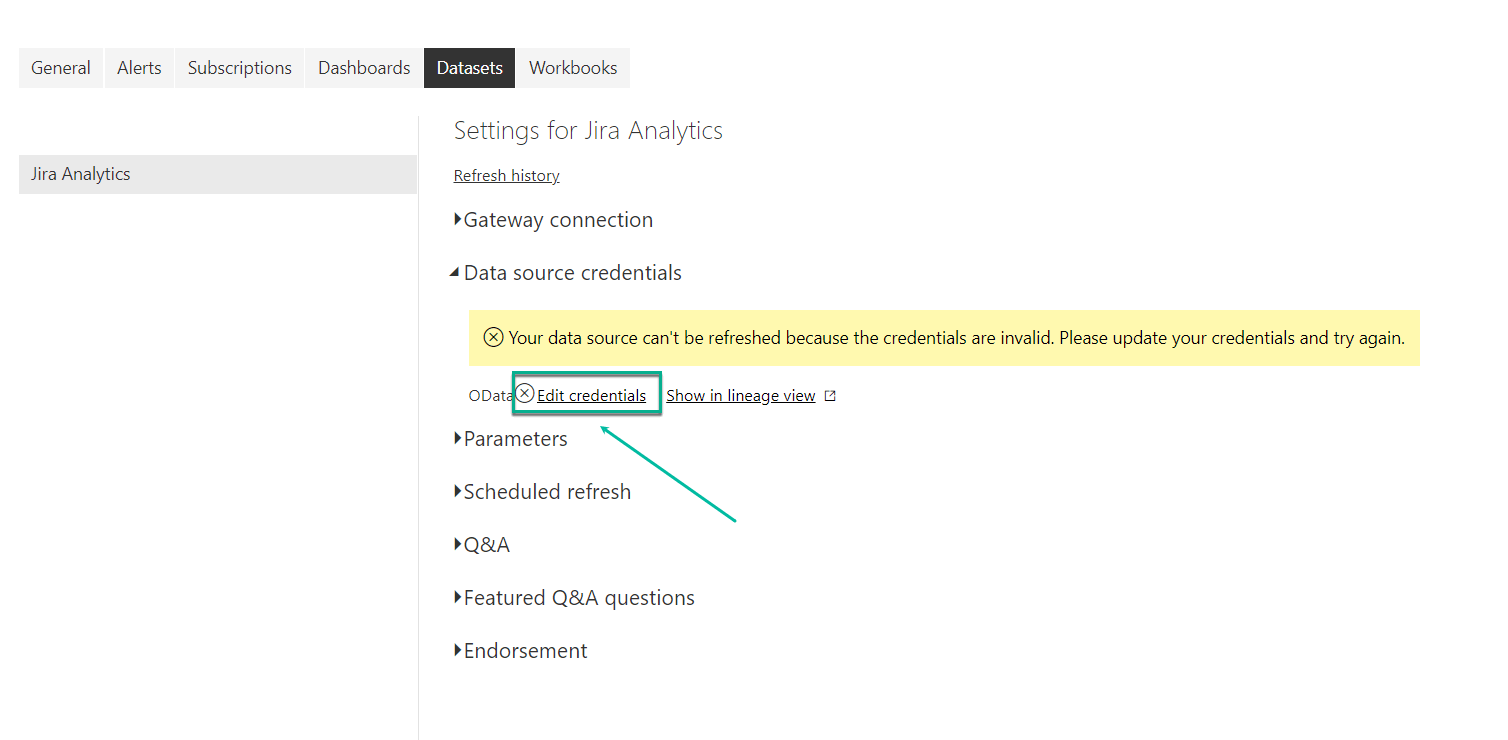
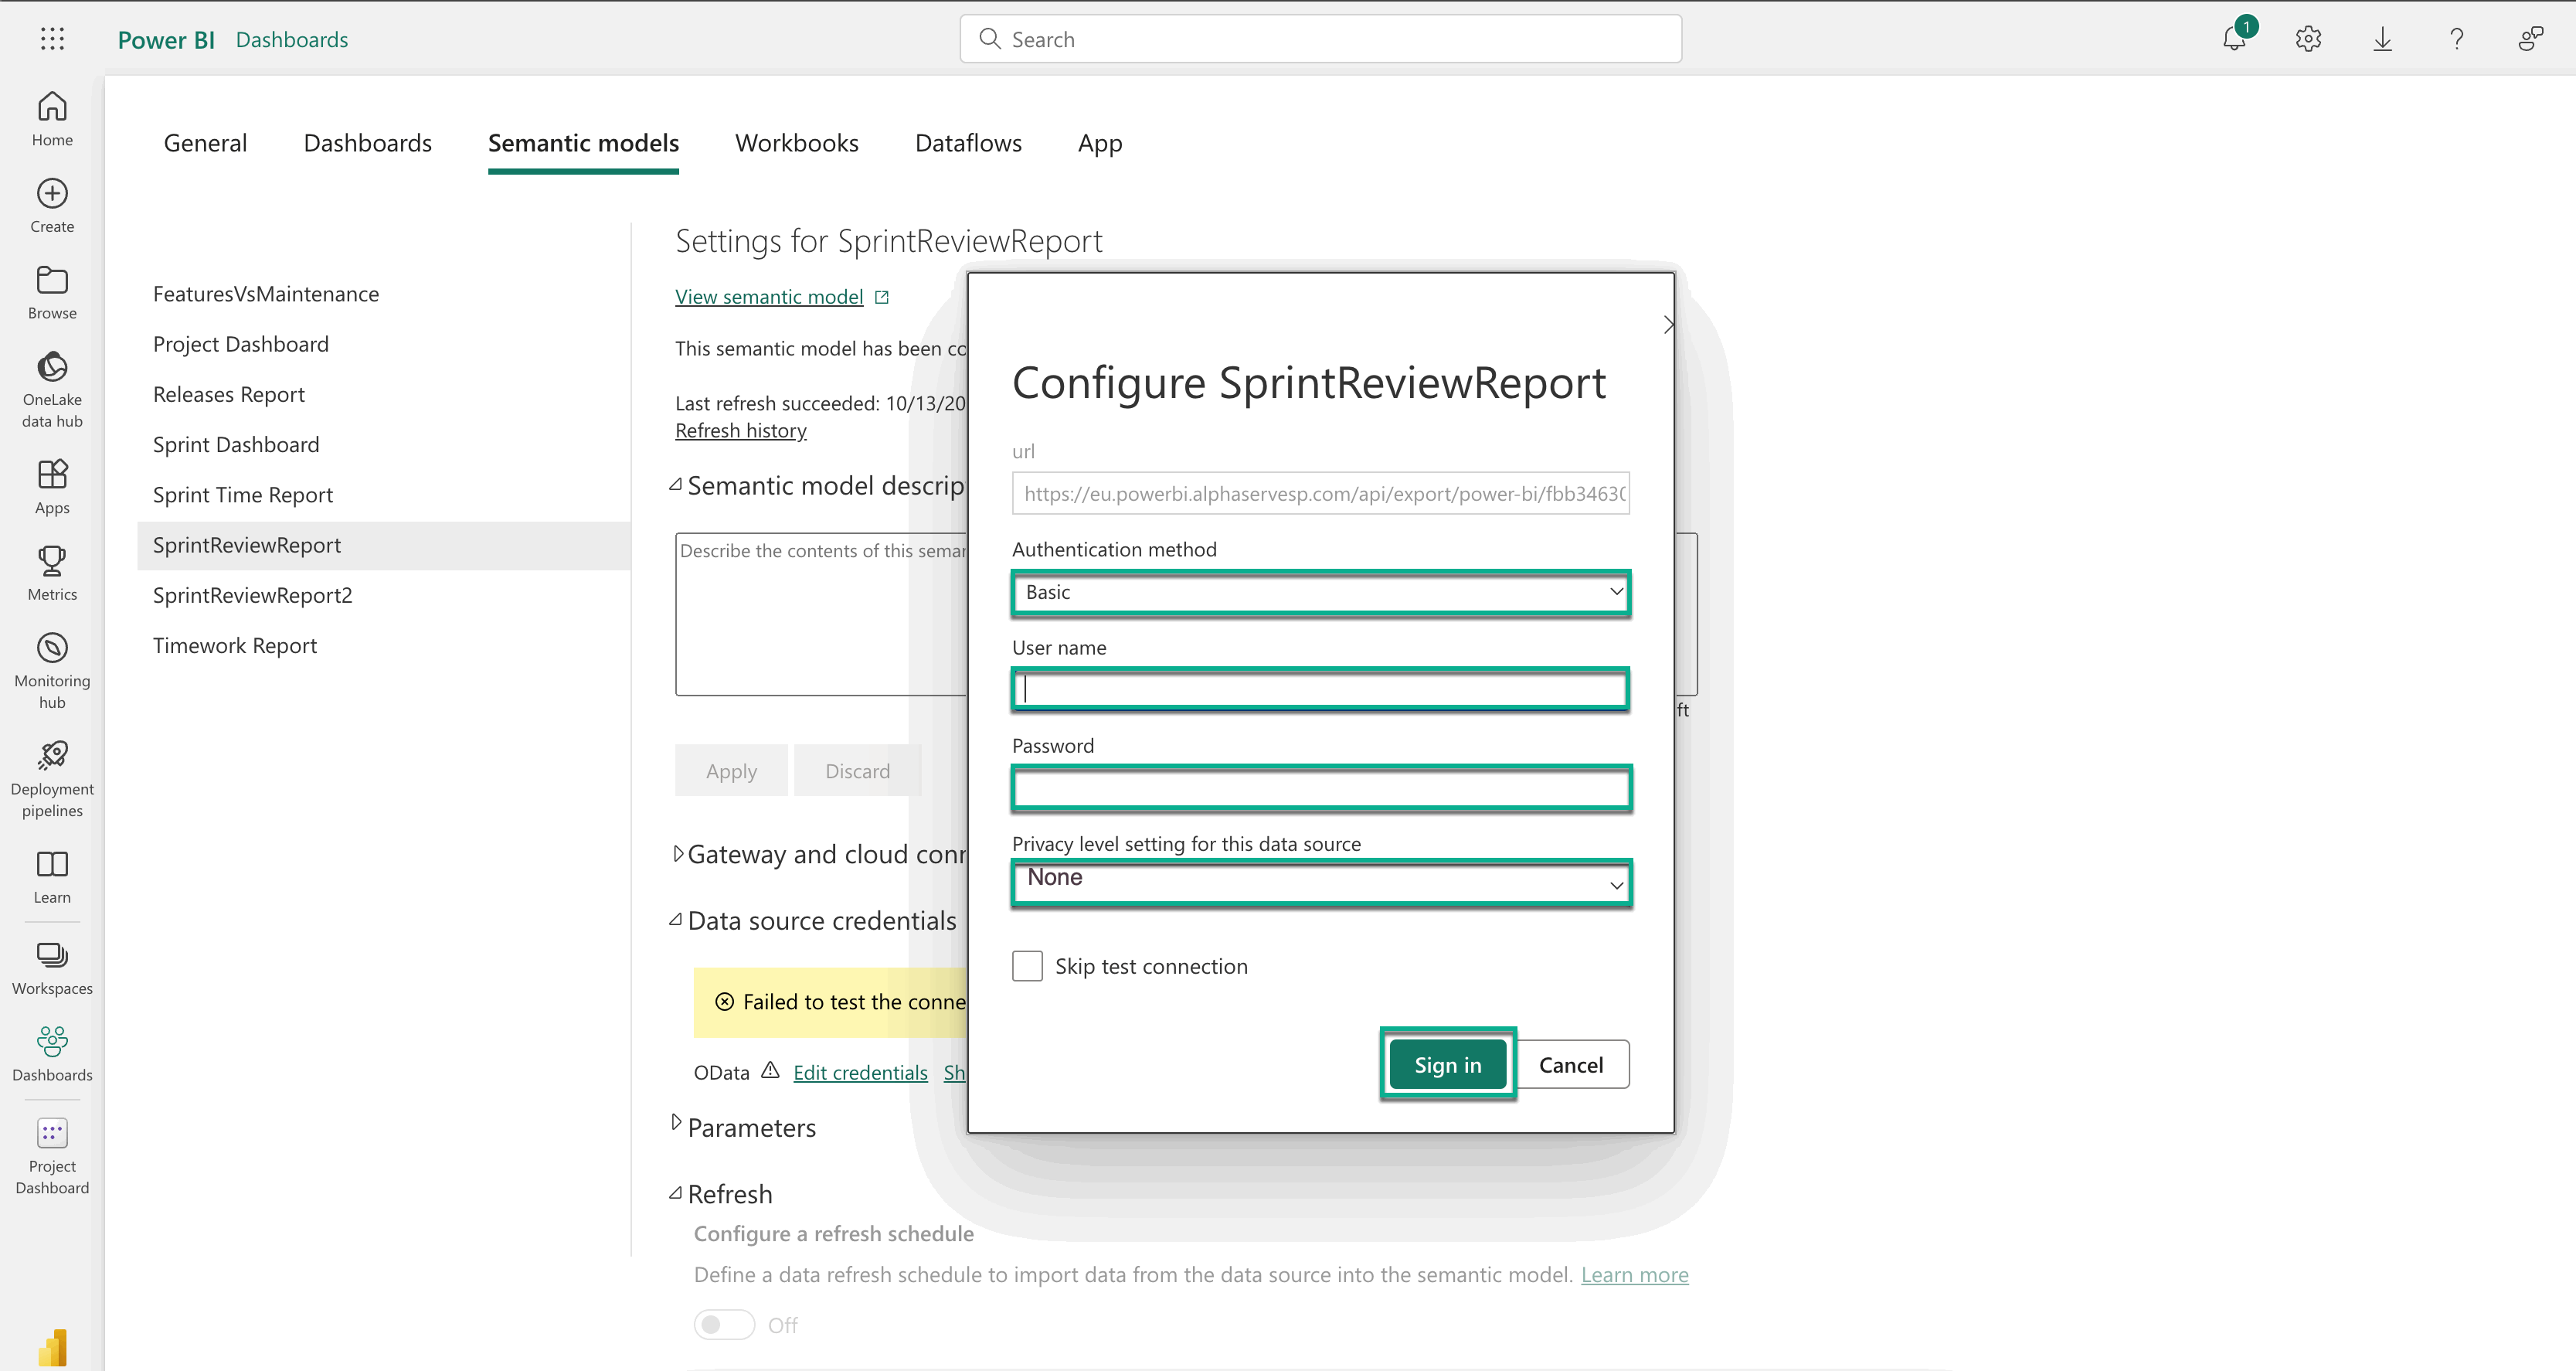
In the Authentication method field, select Basic.
In the User name, enter your Jira username.
In the Password field, enter your access token.
In the Privacy level setting for this data source field, select None, and then select Sign in.
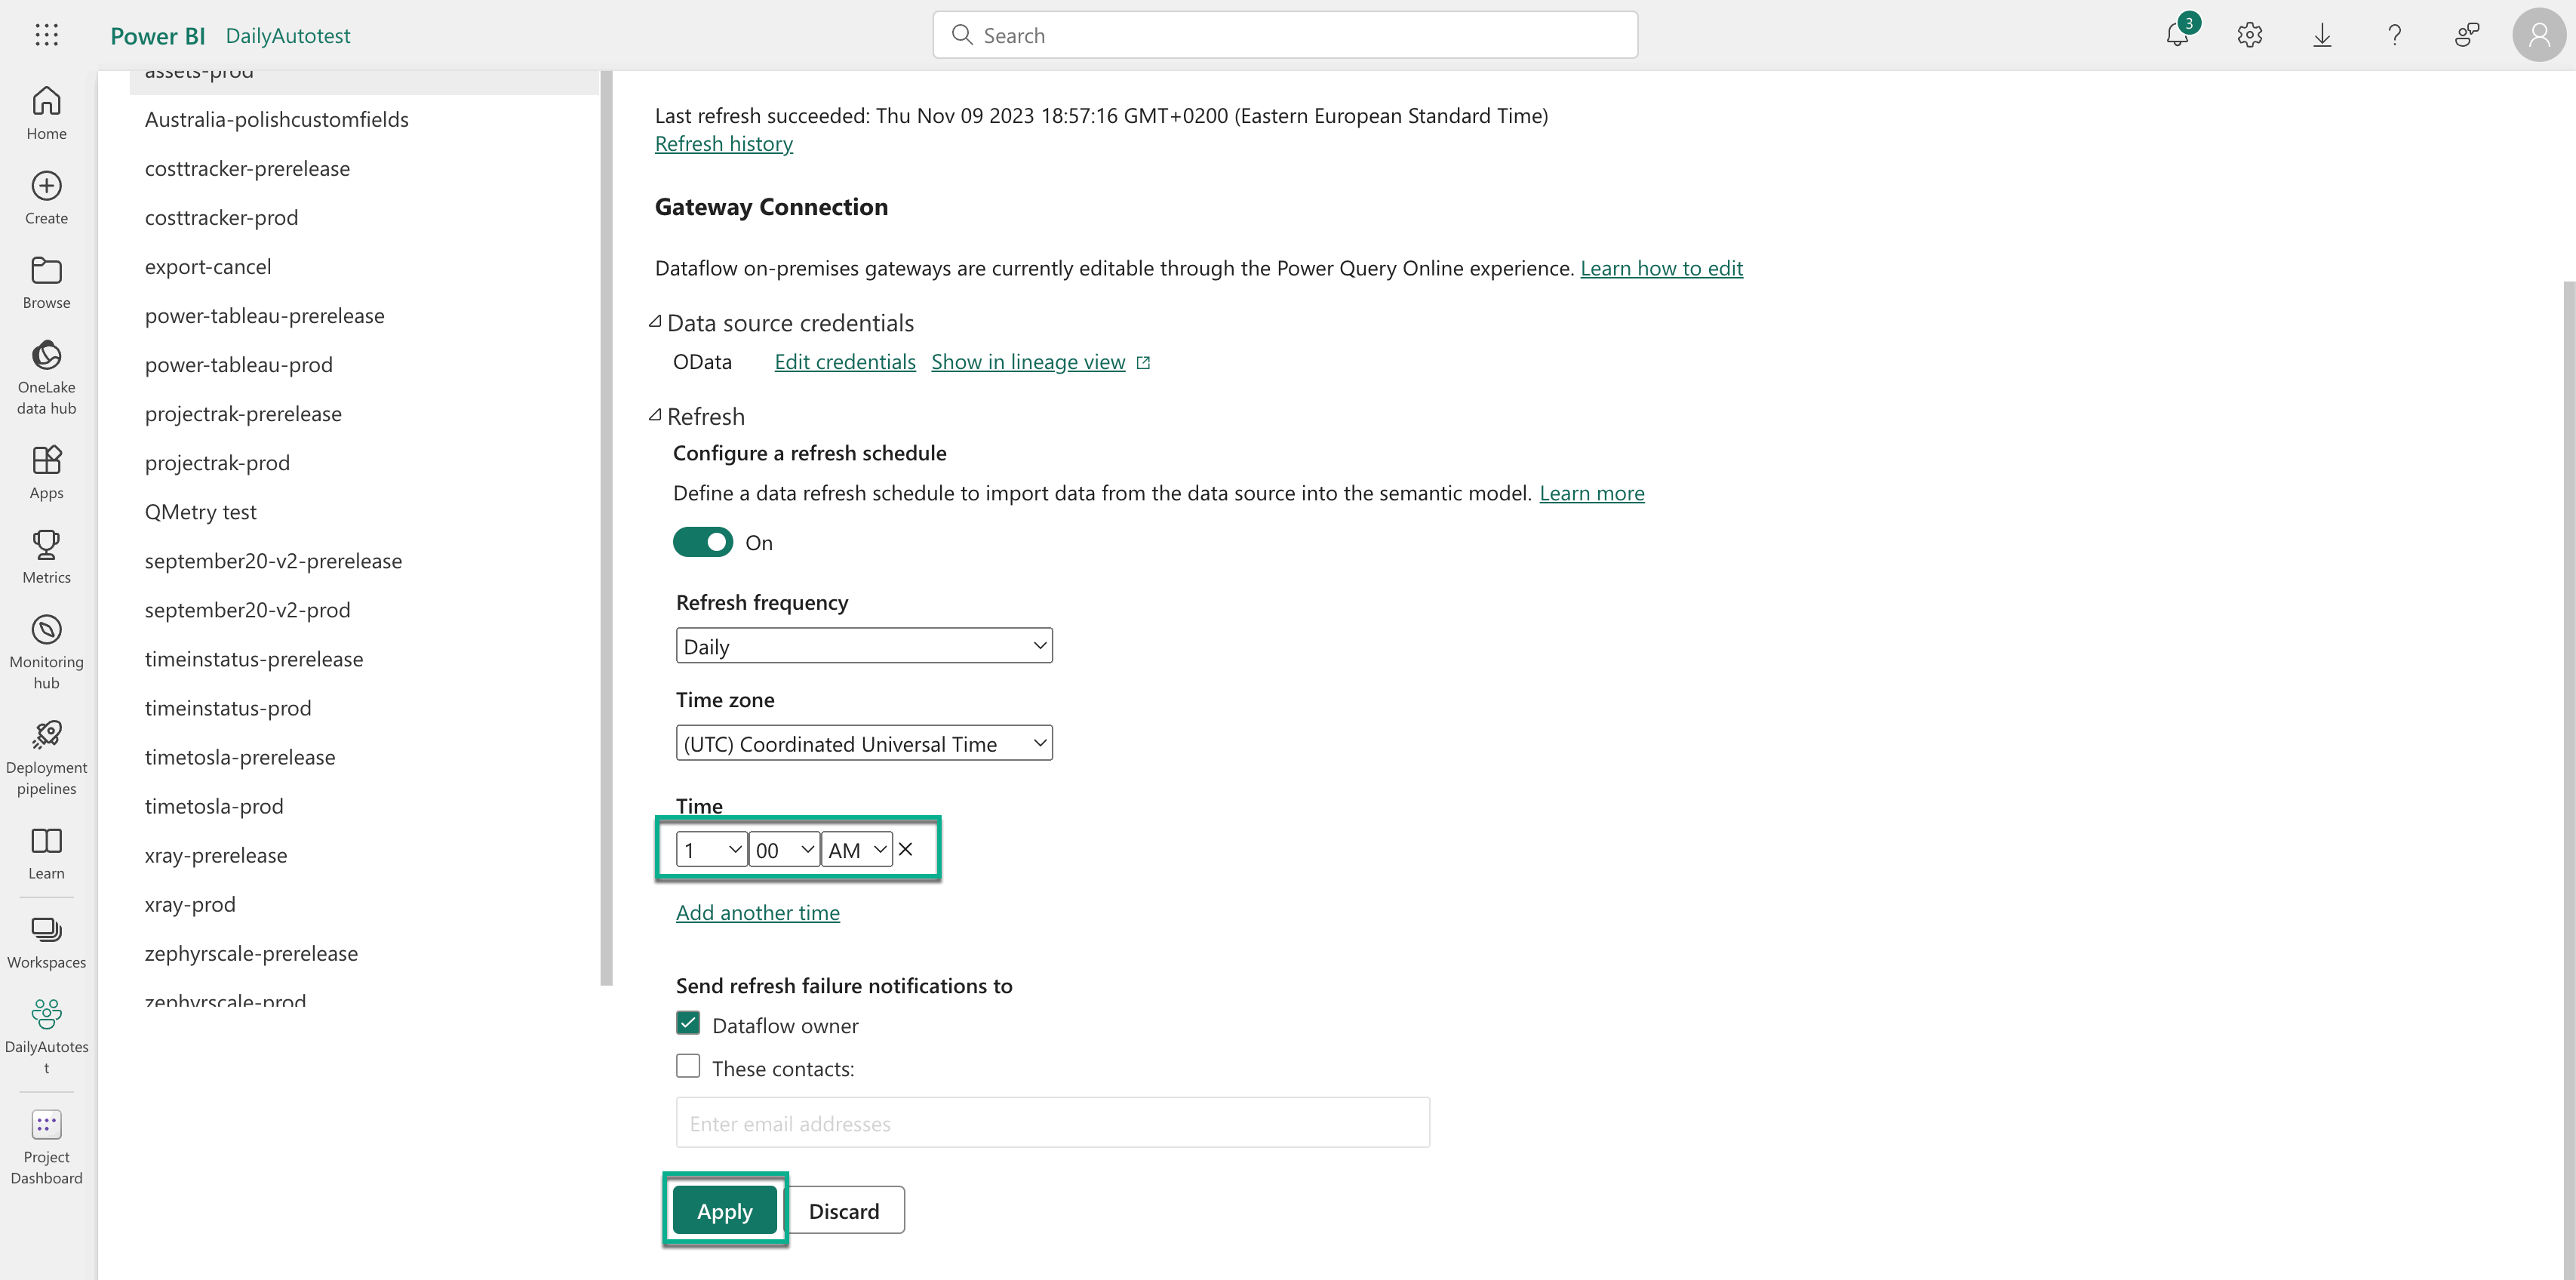
Expand the Refresh section, and then turn it on.
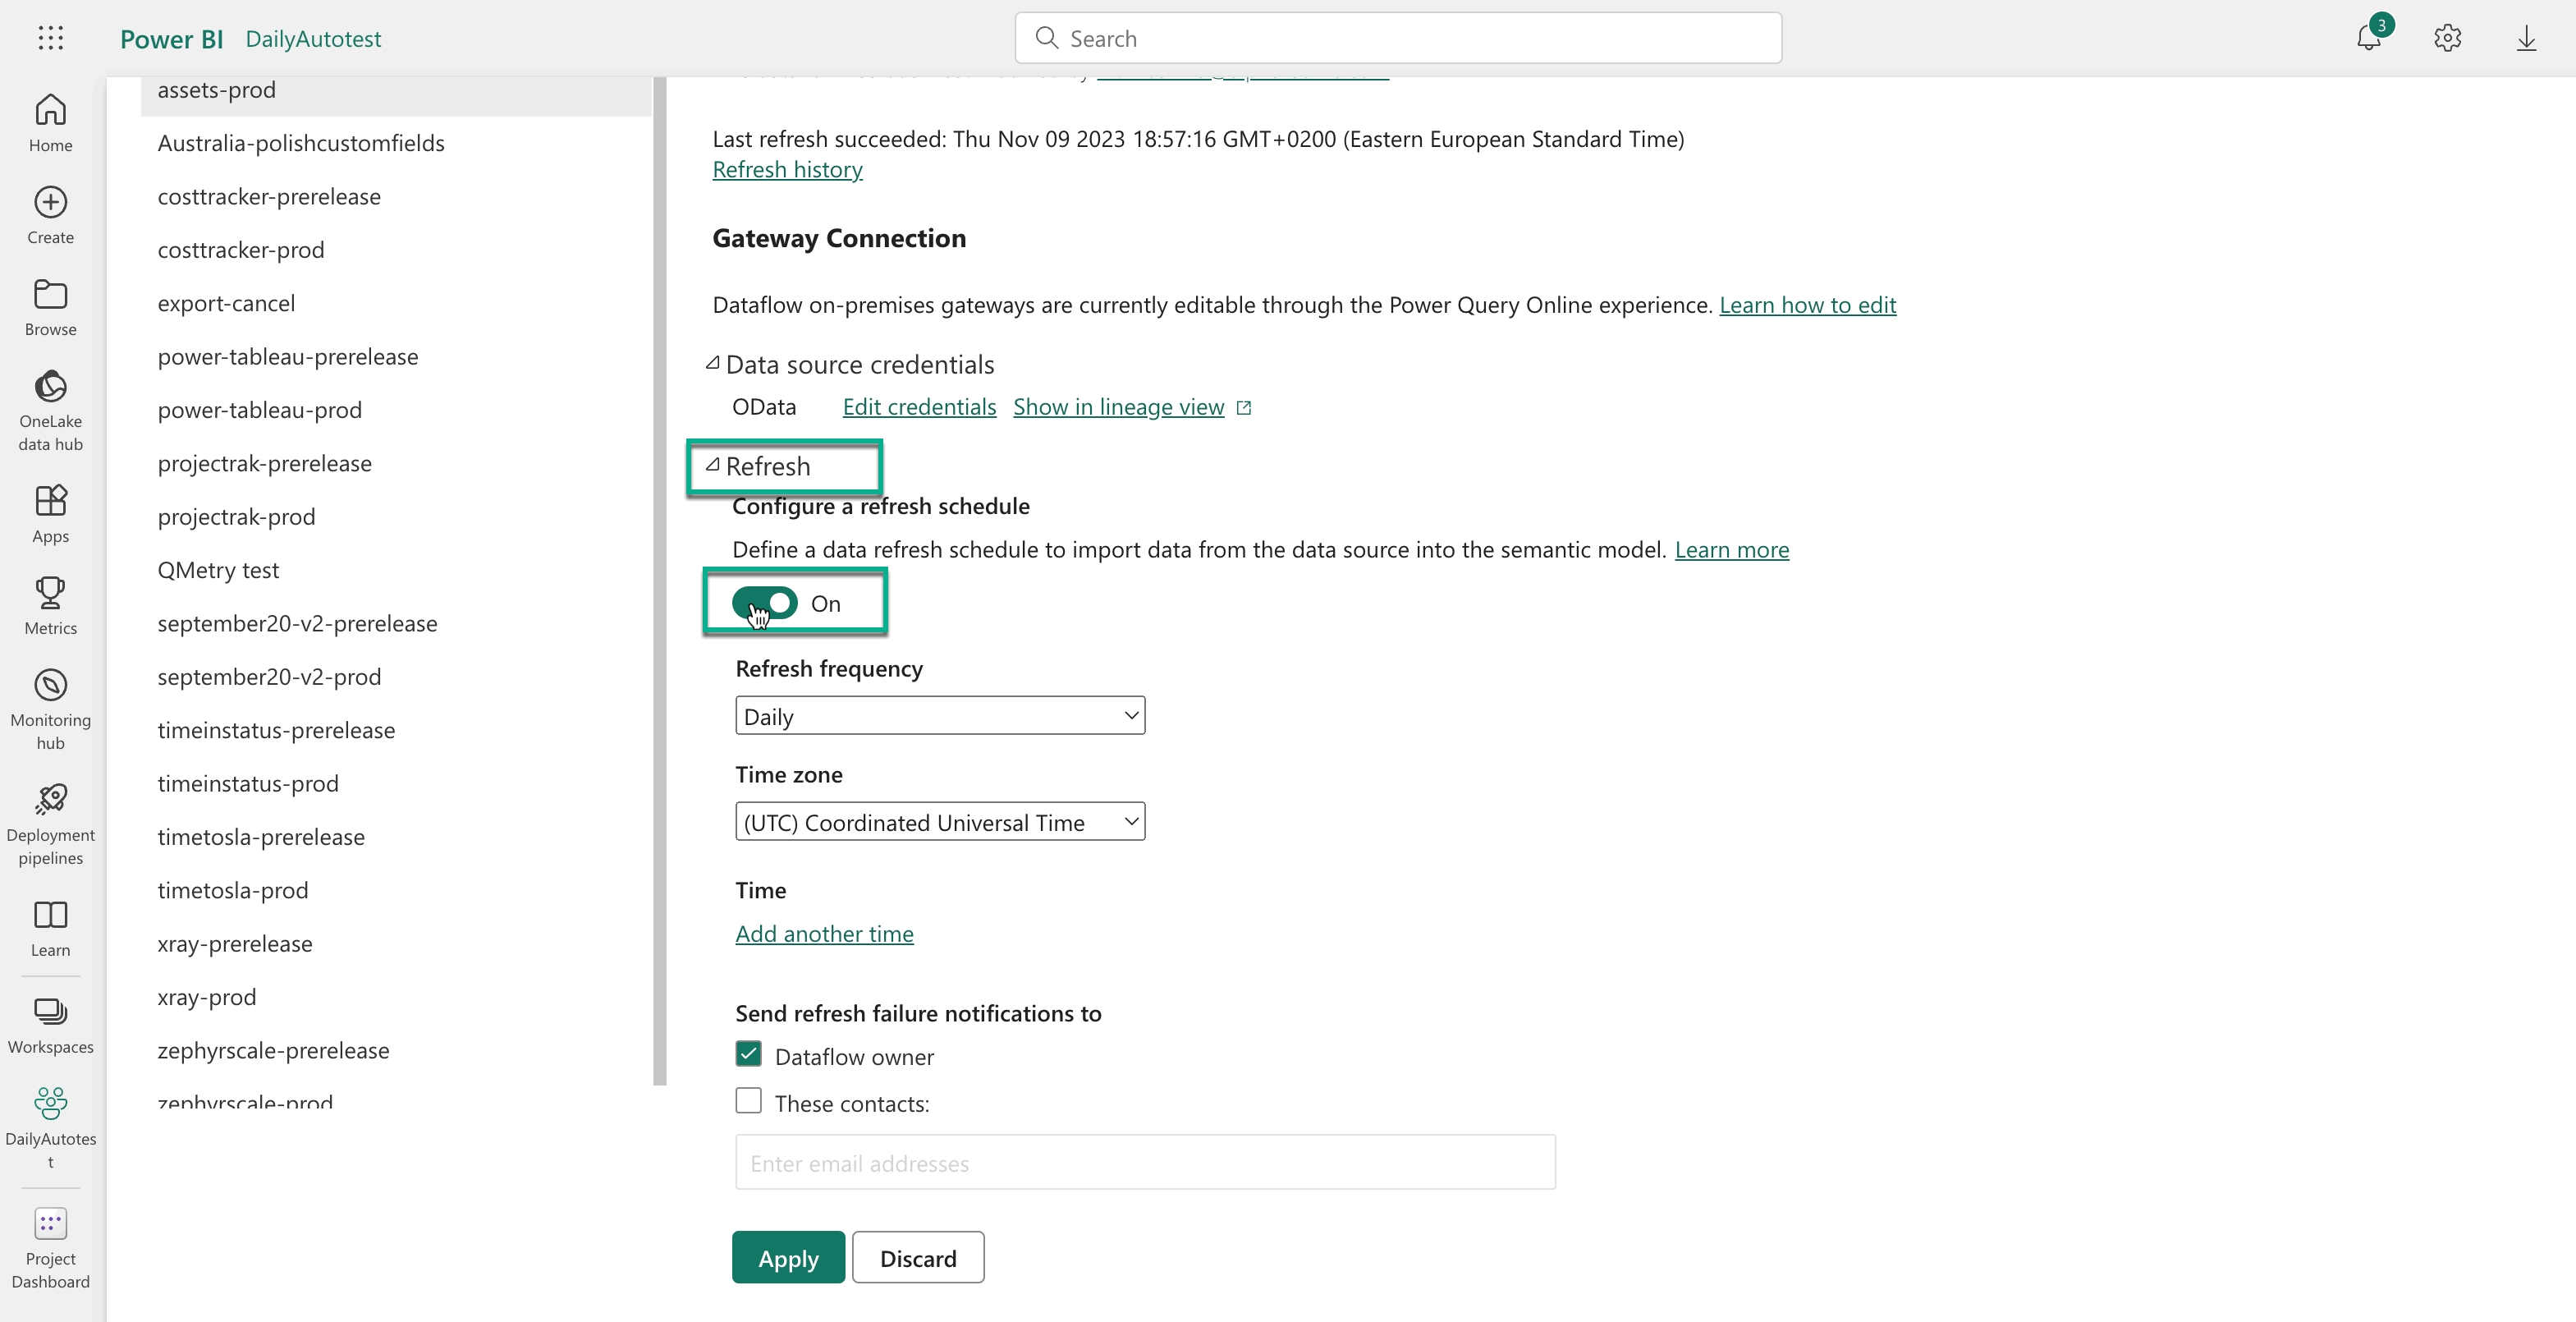
Select refresh frequency and time zone, and then select Add another time.
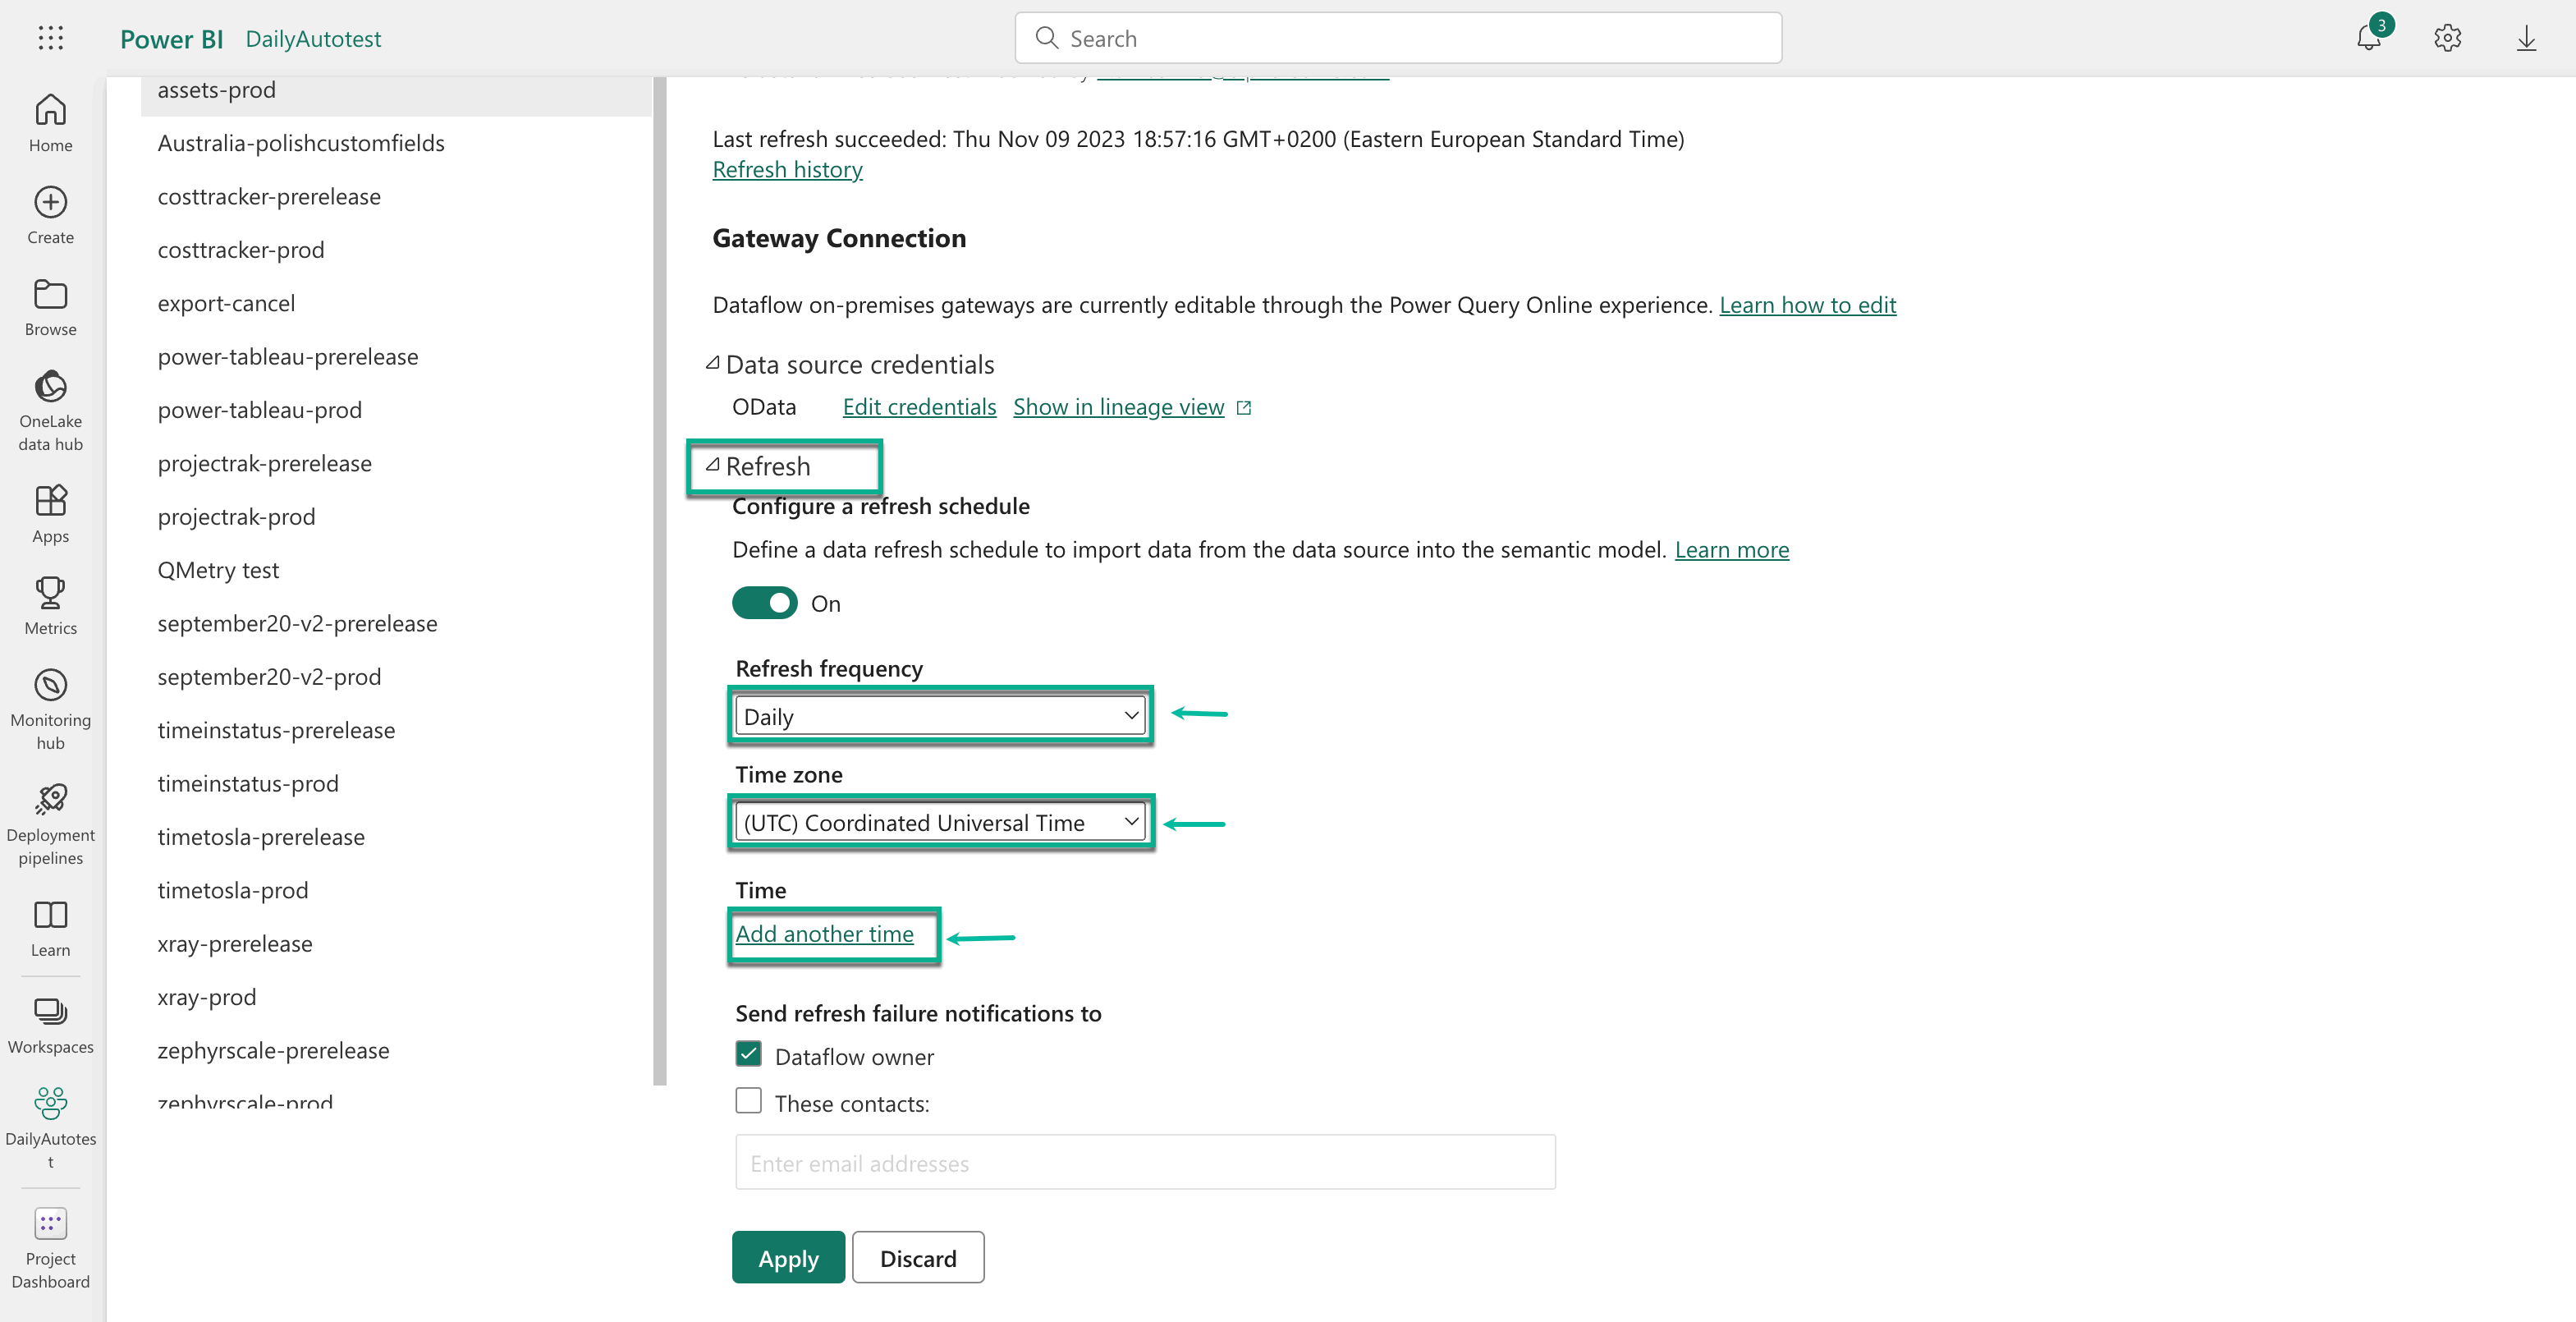
Configure the time you need, and then select Apply.
| Infotip |
|---|
Now your data set will be refreshed according to the configured schedule. |