Before you start
To be able to change the SEO attributes for the products in your Shopify store, you should have the relevant Shopify account permissions.
Check Shopify Help Center for more information.
Settings tasks for editing SEO attributesThe table of contents
| Table of Contents | ||||
|---|---|---|---|---|
|
Selecting the products to change
Step 1. Open Edited - Bulk Product Management app in your selected shopShopify store.

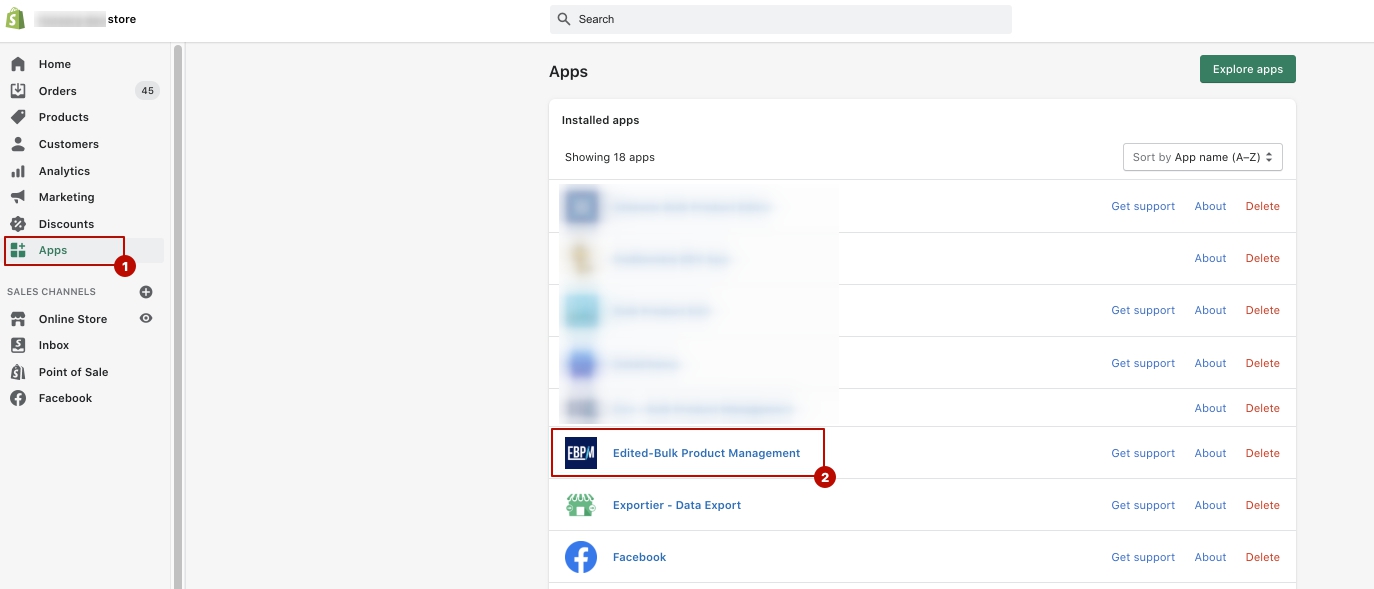
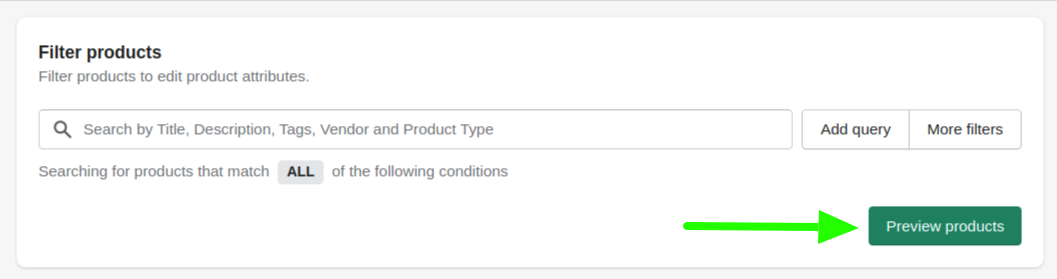
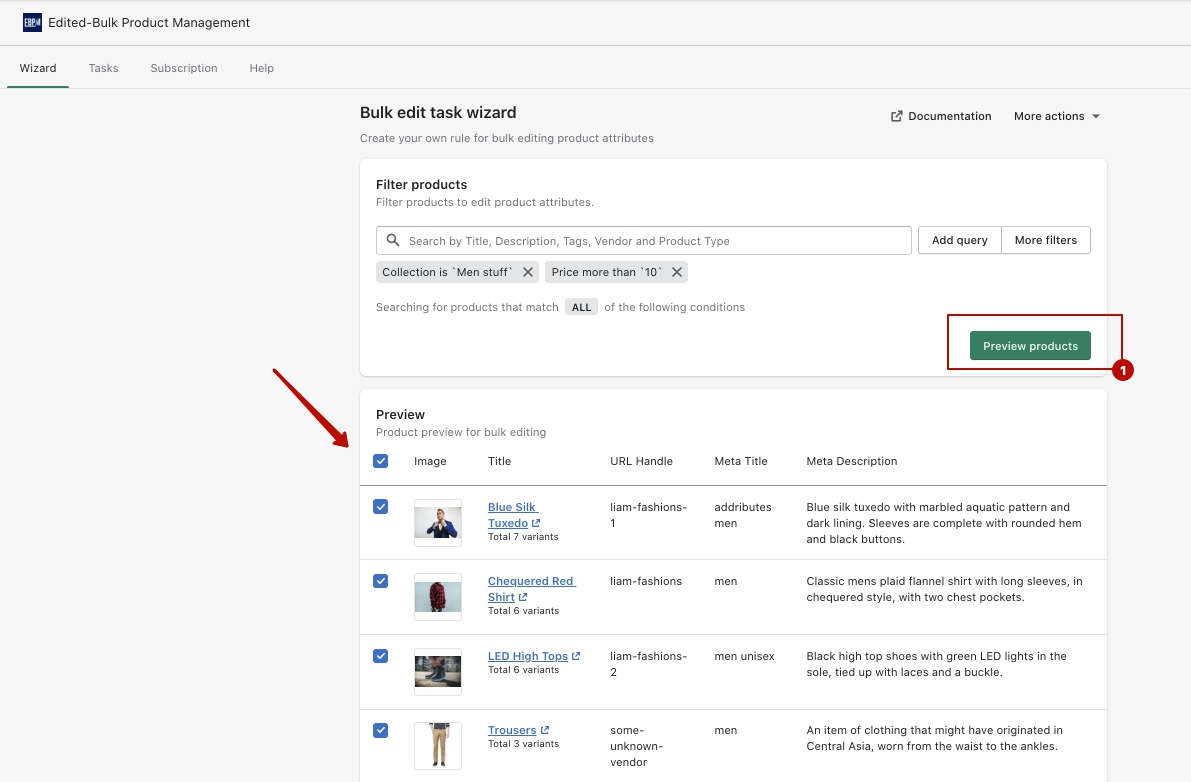
Step 2. First of all, you need to select the items for which you’d like to make changes in Pricing or certain SEO attributes on the Main tab. To do this, choose .
Go to the Wizard tab and change the appropriate filter criteria. Choose an attribute, set criteria and enter a value.
You can add several parameters by clicking + sign. Press as many parameters as you need. To do this, press More filters, select your preferences and click Add Filter.
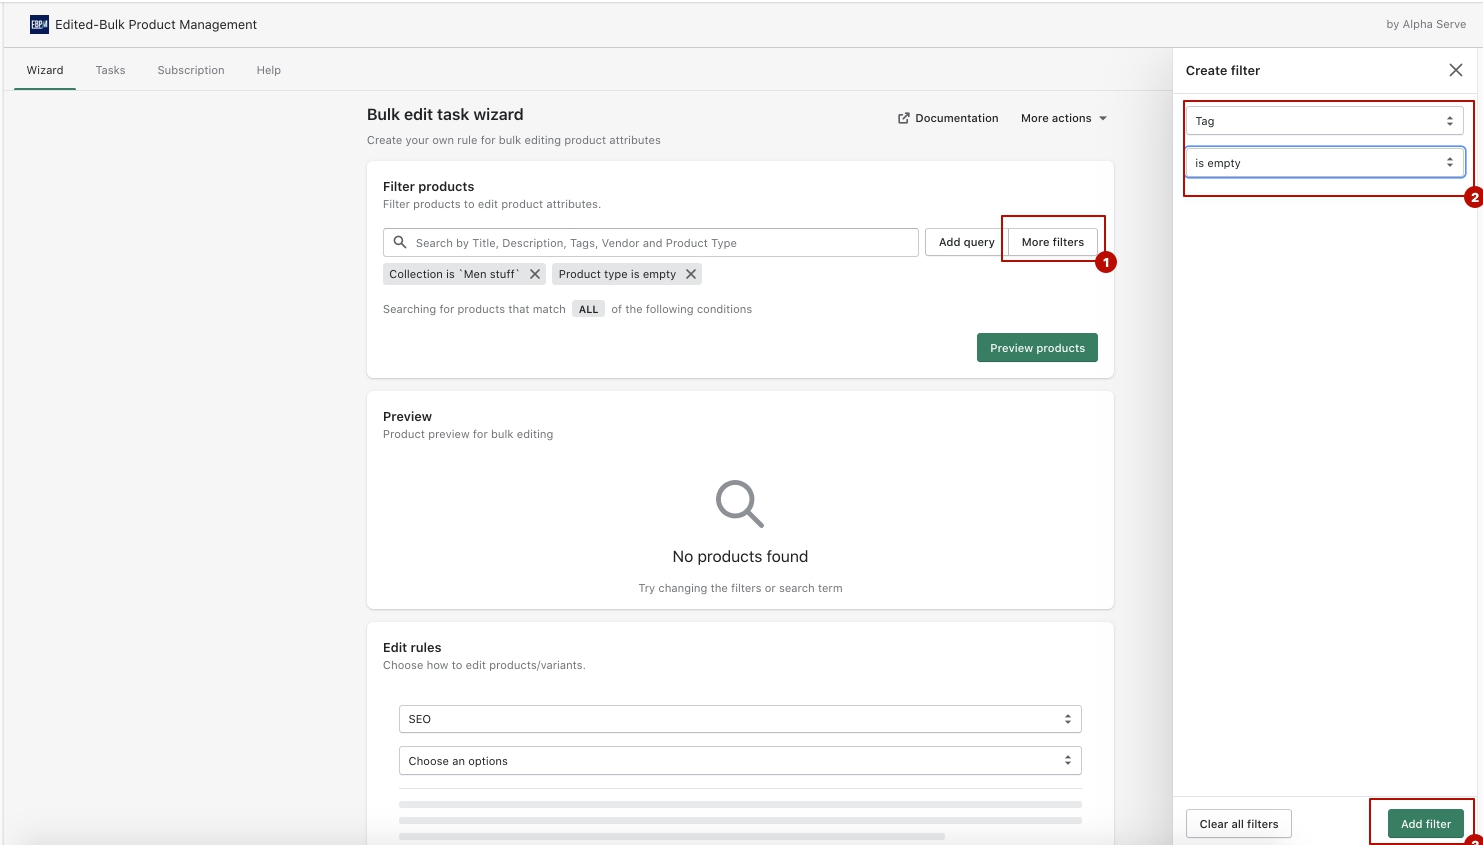
You can also filter products based on all the mentioned criteria or any of them by selecting the relevant option.
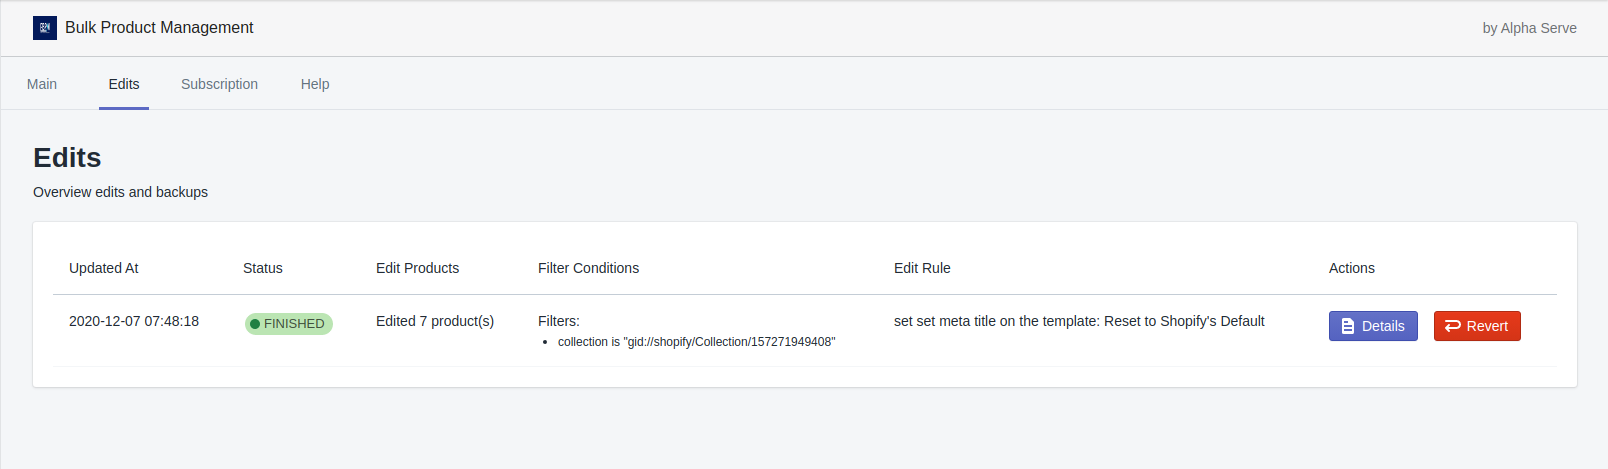
View Edits History
Step 3. Press the Preview products button to view a list of products to be edited selected for edits according to your choice.
Step 3. You can see the full list of products matching your criteria in the window that opens next.
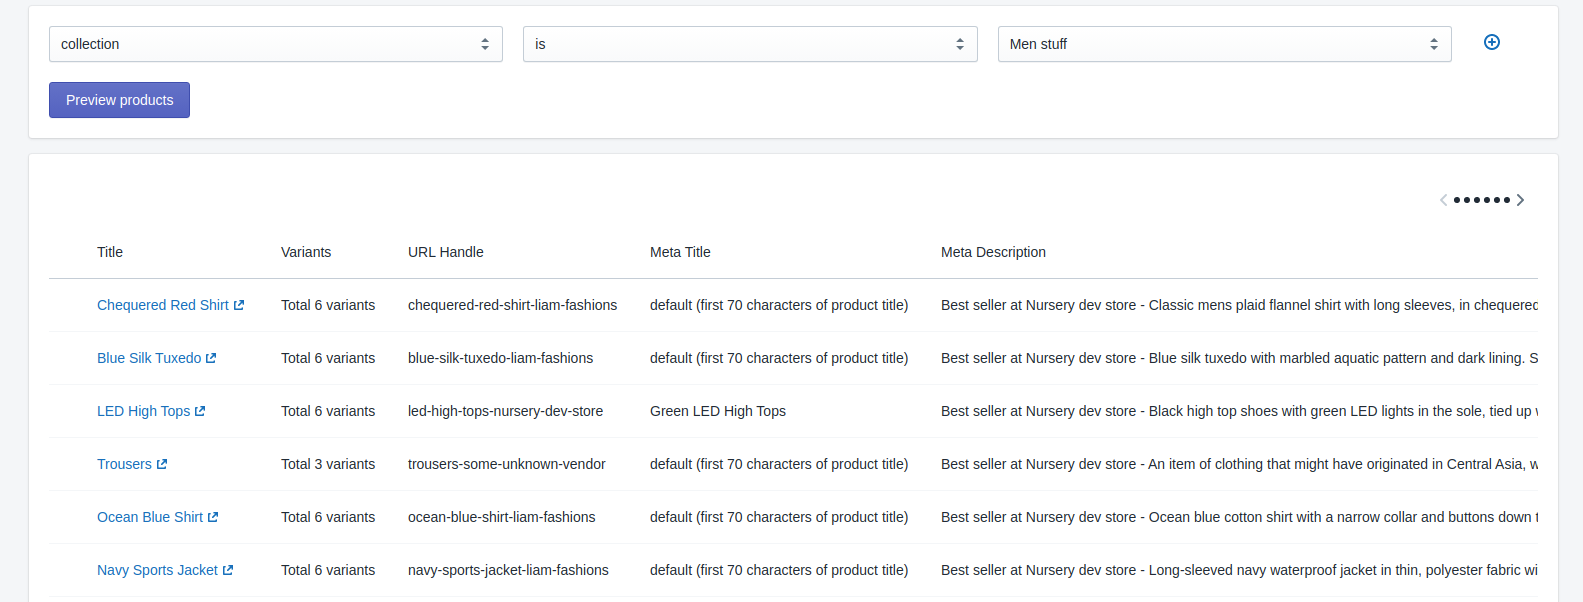
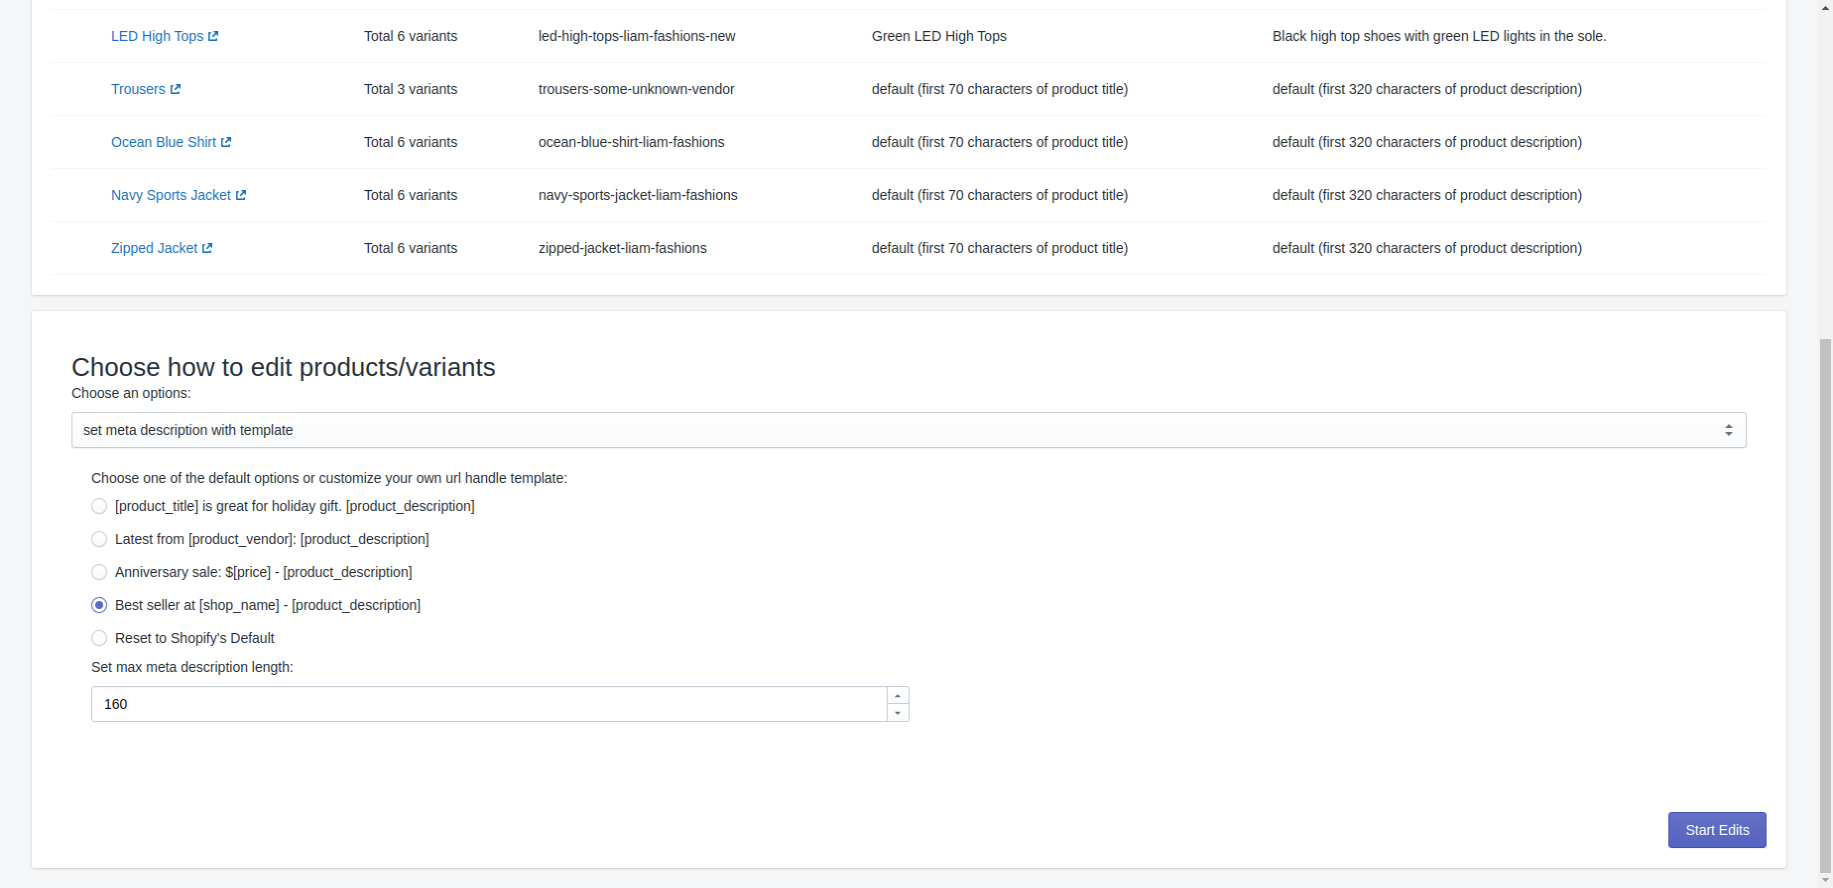
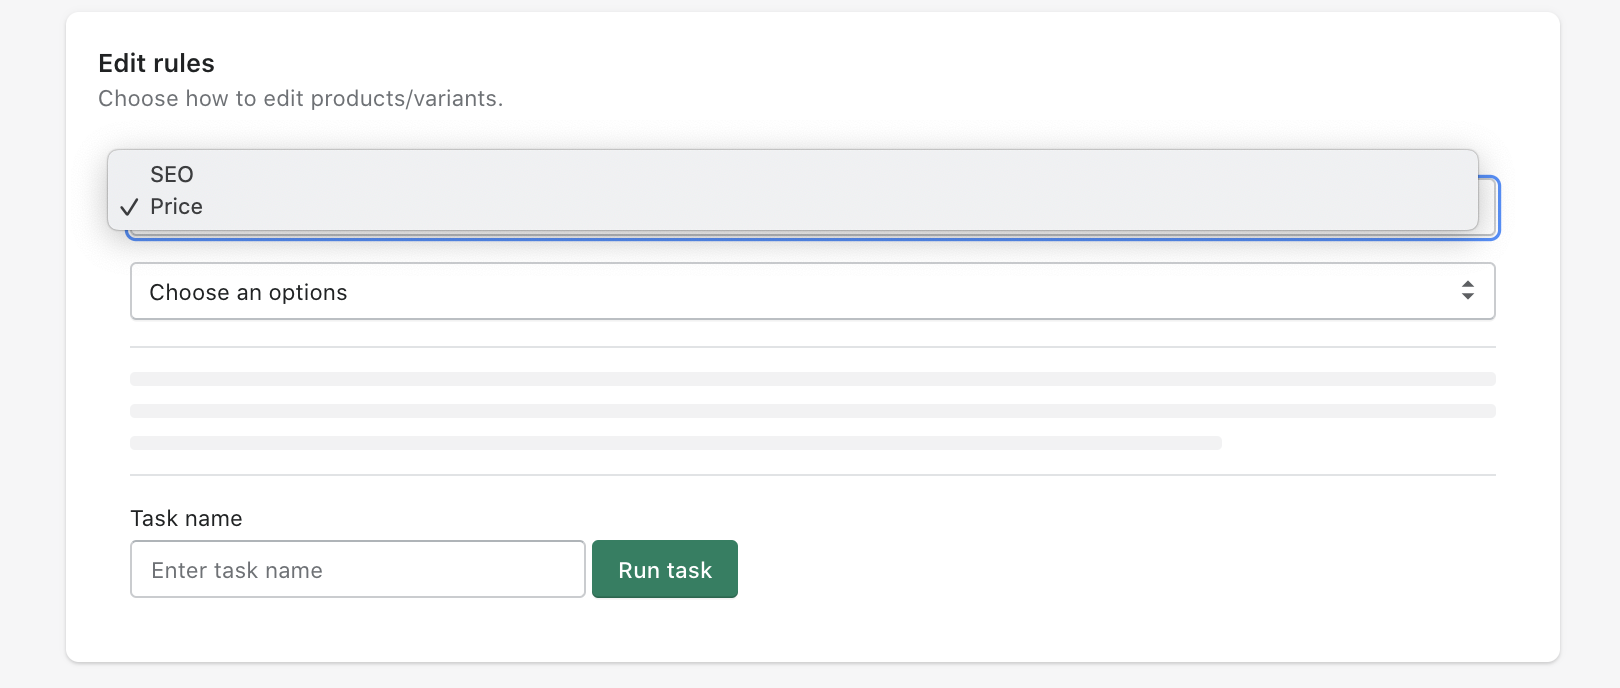
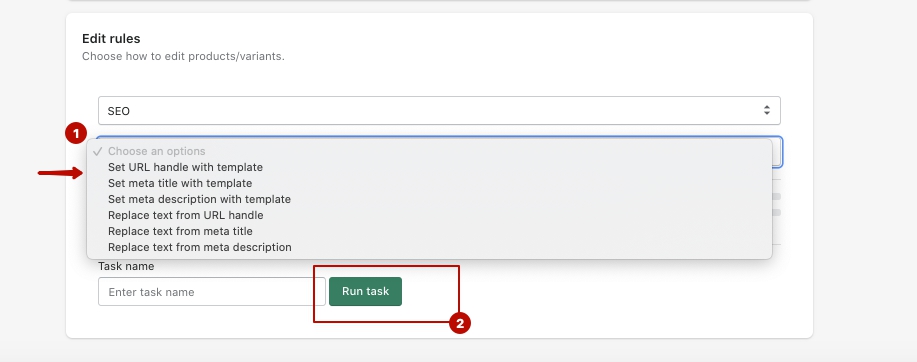
Step 4. Choose the appropriate option on how to edit the selected products.
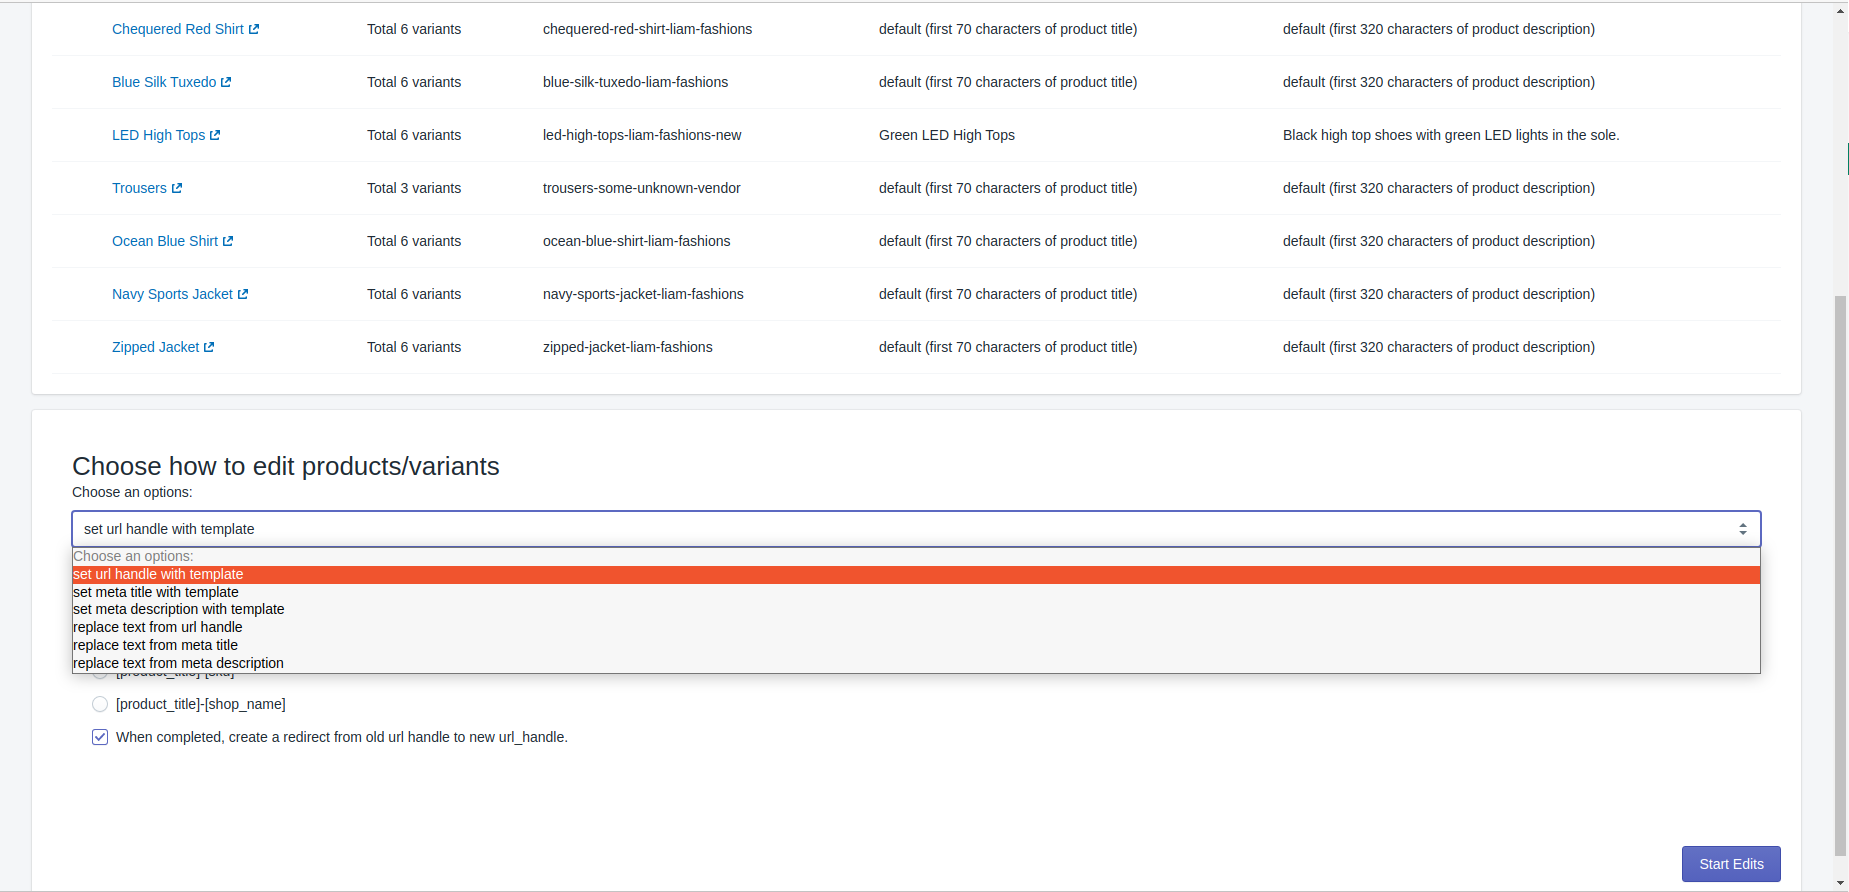
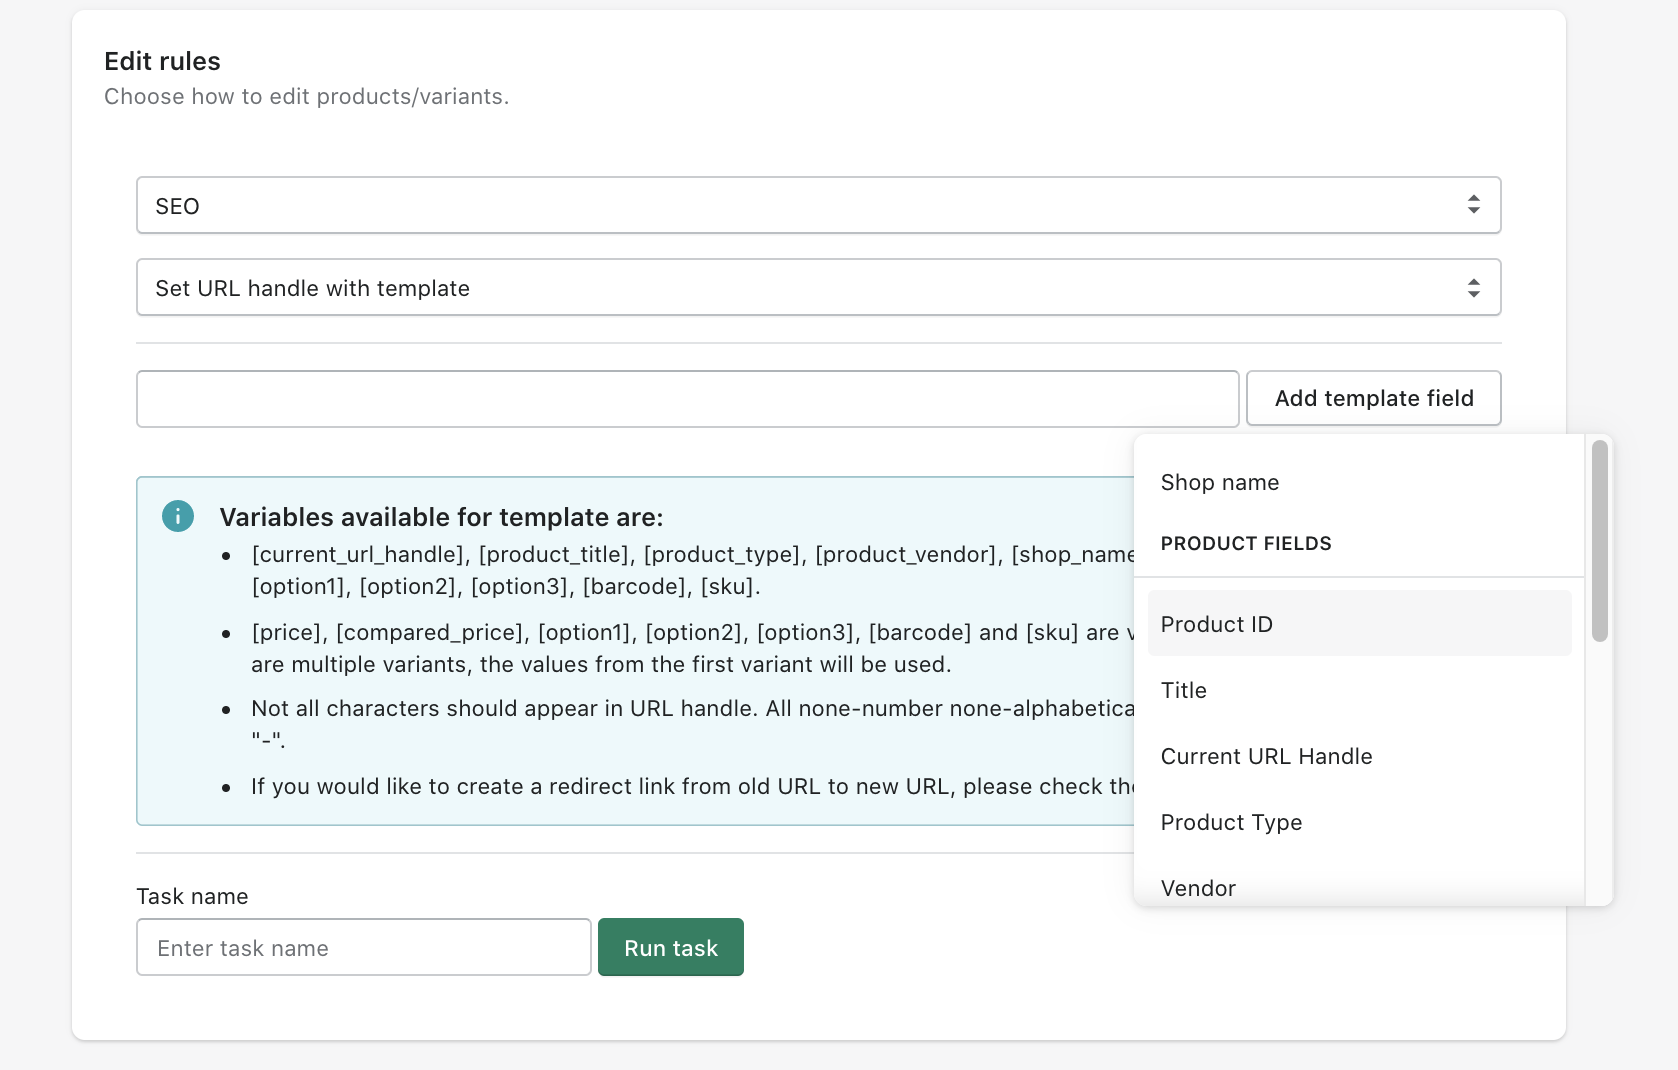
Step 5. Select a template for editing or enter it manually. When you’re done, press Start edits button to run the task.
Switch to the Edits Thus, you can make sure that changes will be applied to the relevant list of items.
| Info |
|---|
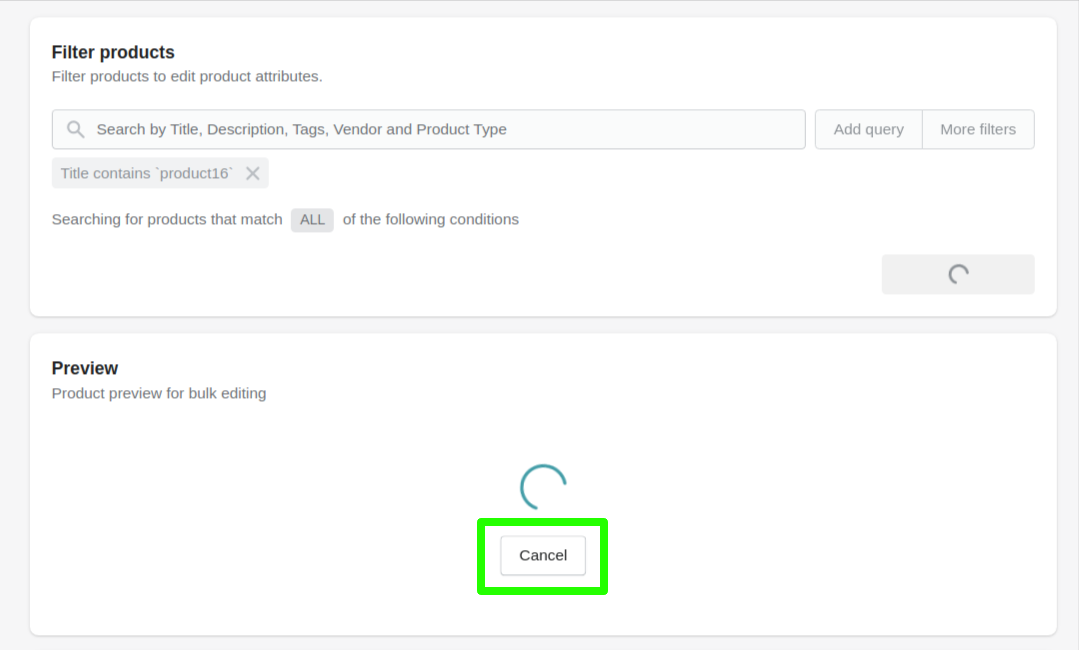
The Preview process depends on the filter conditions you’ve selected. Usually it takes a few seconds. But sometimes this can take even minutes or more, for example, if there are thousands of products to be processed. |
You can cancel preview operation by clicking Cancel button and change filter conditions.
You can preview search results and include/exclude specific products if you need.
Setting tasks for the price changes
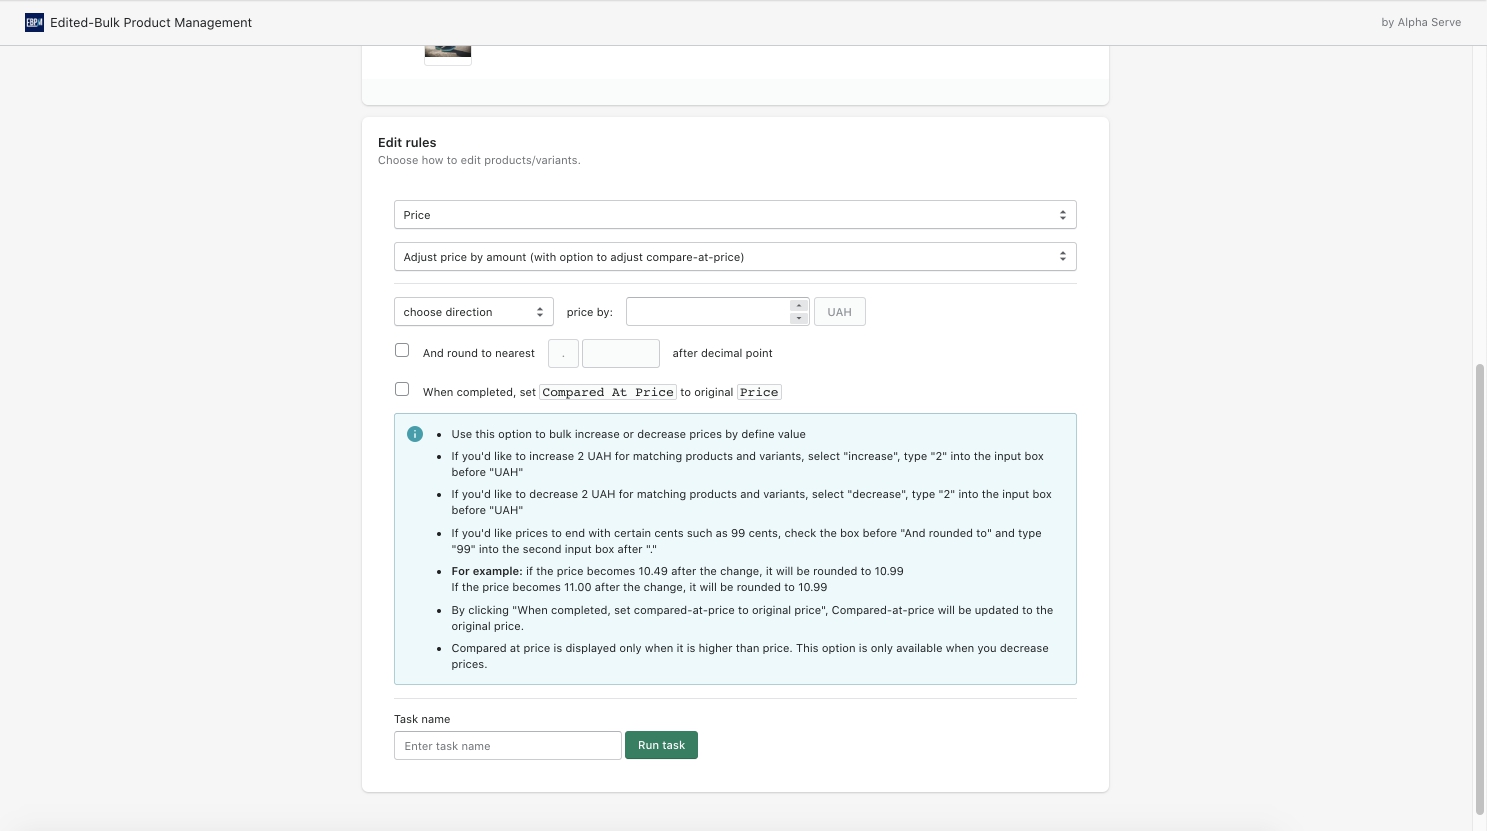
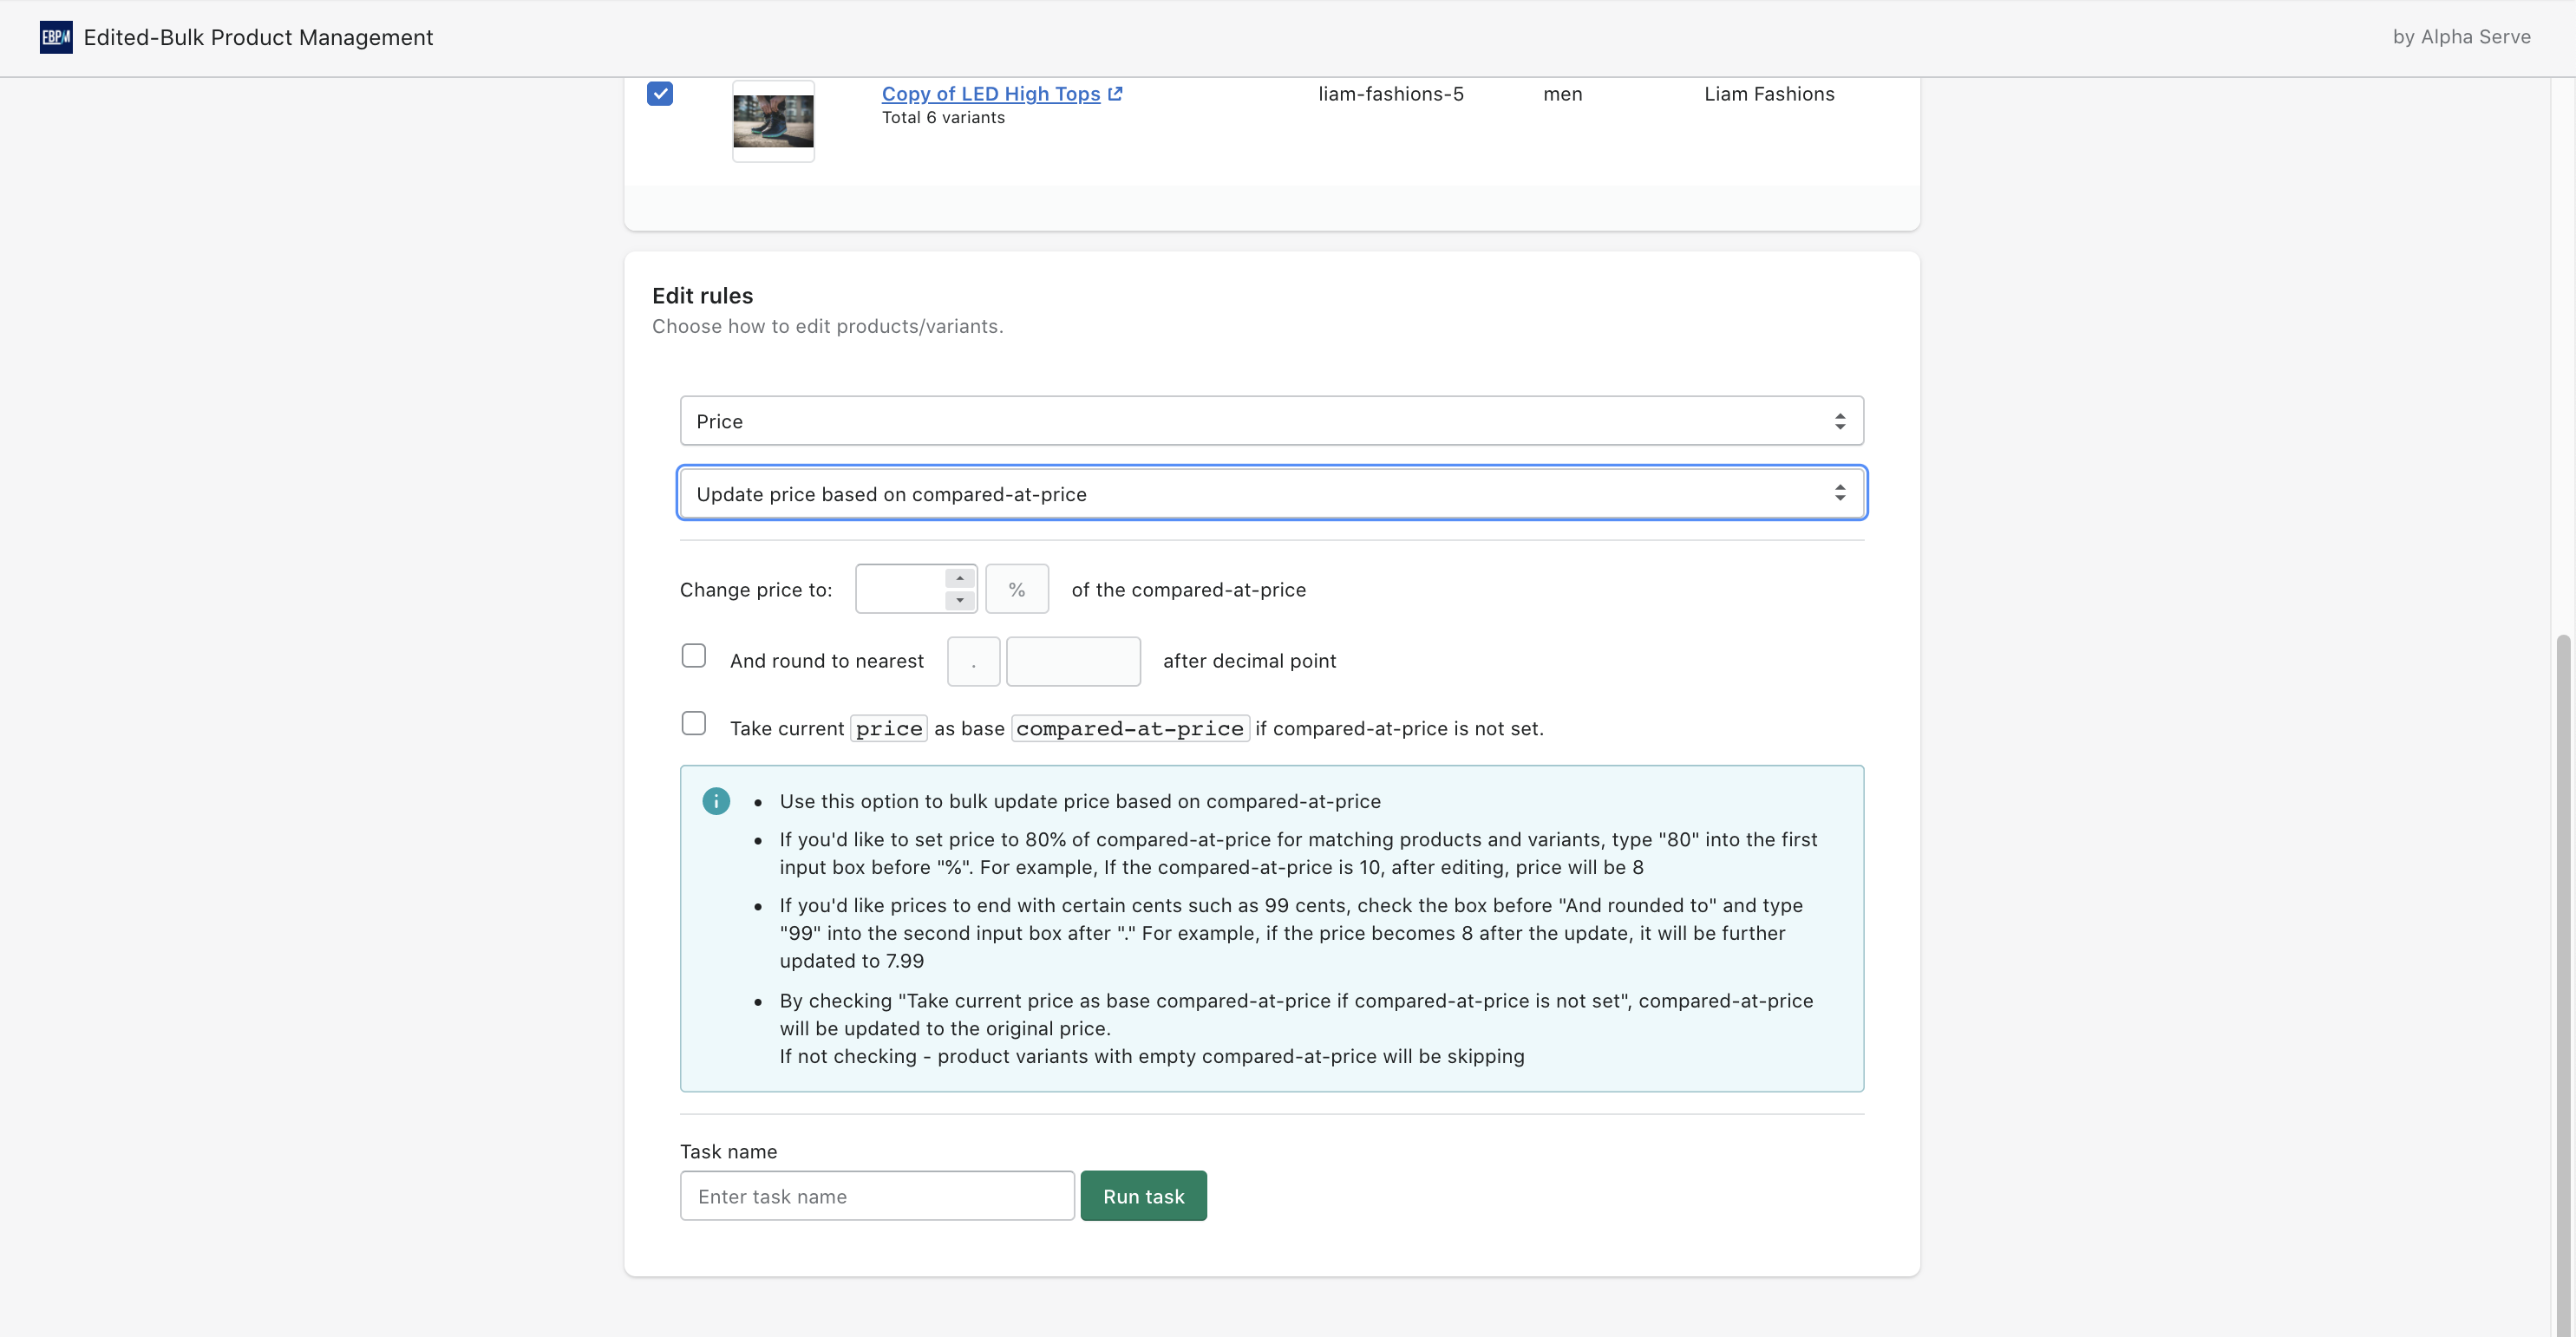
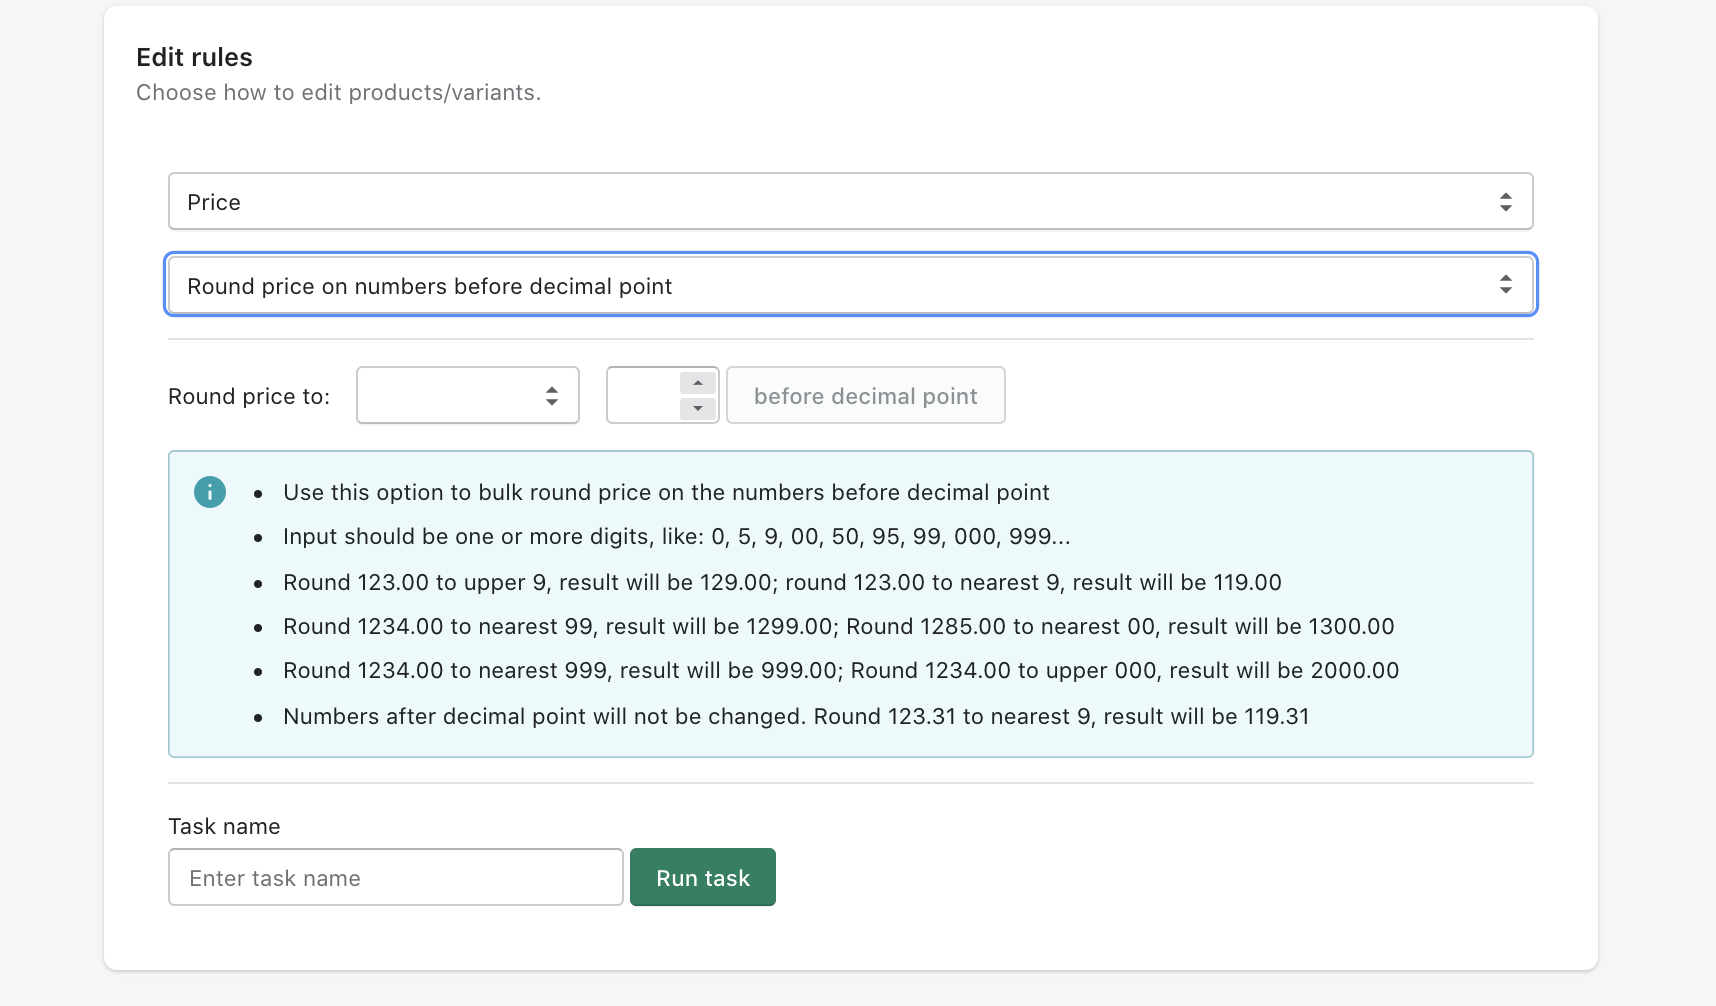
Step 1. Choose Price in the Edit rules section below.
Step 2. Select an option of changes you need to apply and enter the task name.
When you’re done, press the Run task button to start the task.
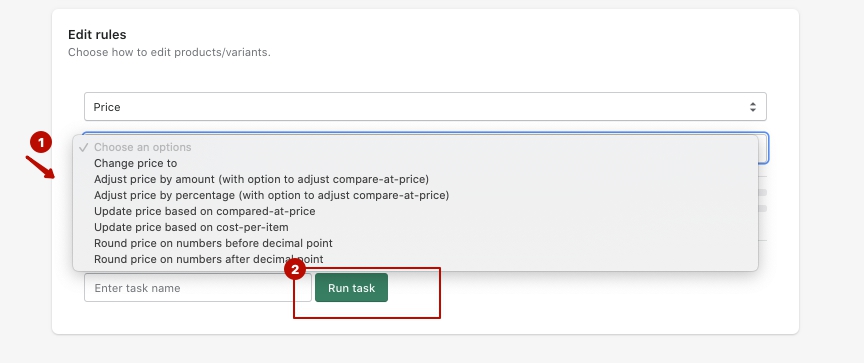
Edited - Bulk Product Management allows various changes in prices:
Change price to - set the exactly defined value to be applied to the selected products (for ex., 100 USD);
Adjust price by the amount or by percentage - set the amount (for ex., 10 USD) or percentage (for ex., 15%) on which the price will be increased or decreased. You also have the option to adjust compare-at-price at a time by clicking the checkbox.
| Info |
|---|
Read more about Shopify bulk price change in our blog. |
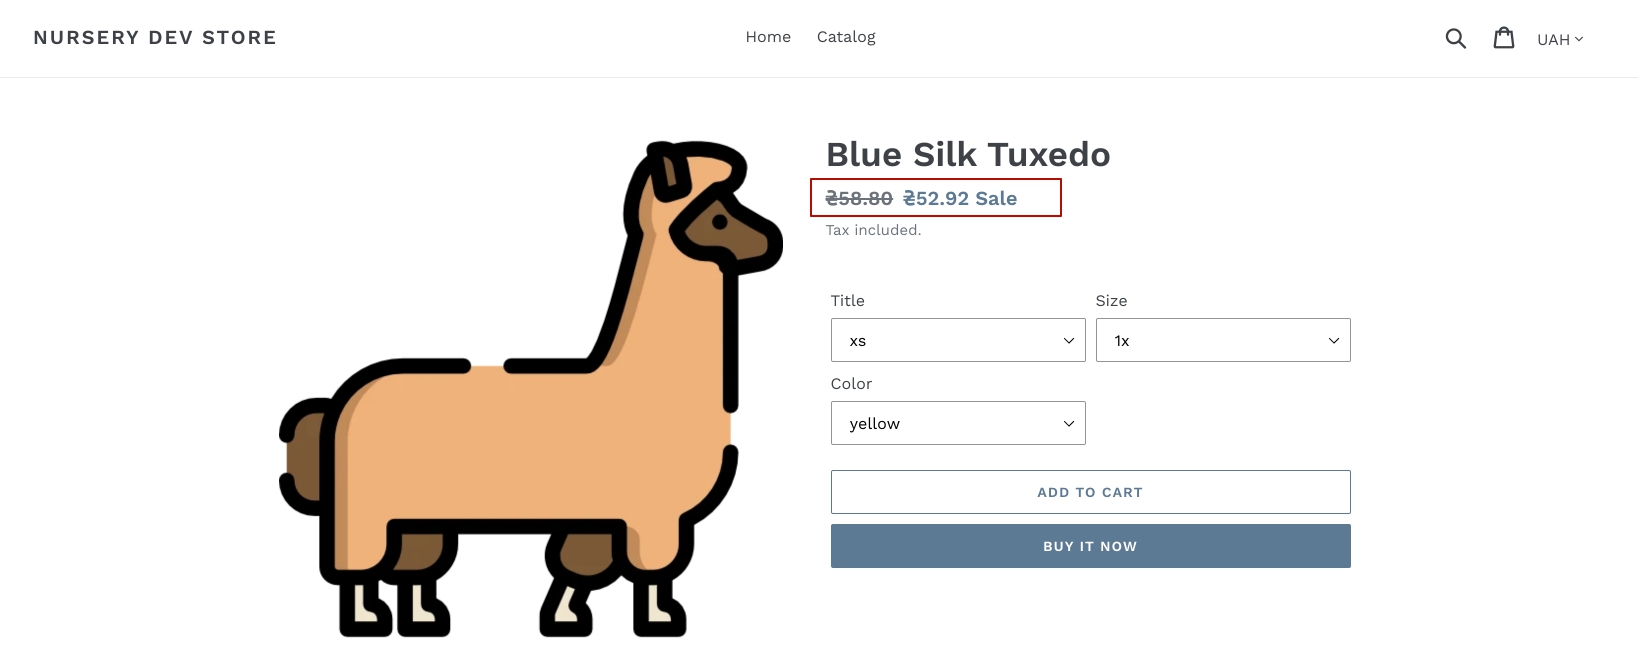
If the price was decreased with updates to compare-to-price, customers will see a Sale notification in the store.
Update price based on compared-at-price or cost-per-item - with the ability to update the compared-at-price at a time.
Round price on numbers without any other changes.
Settings tasks for editing SEO attributes
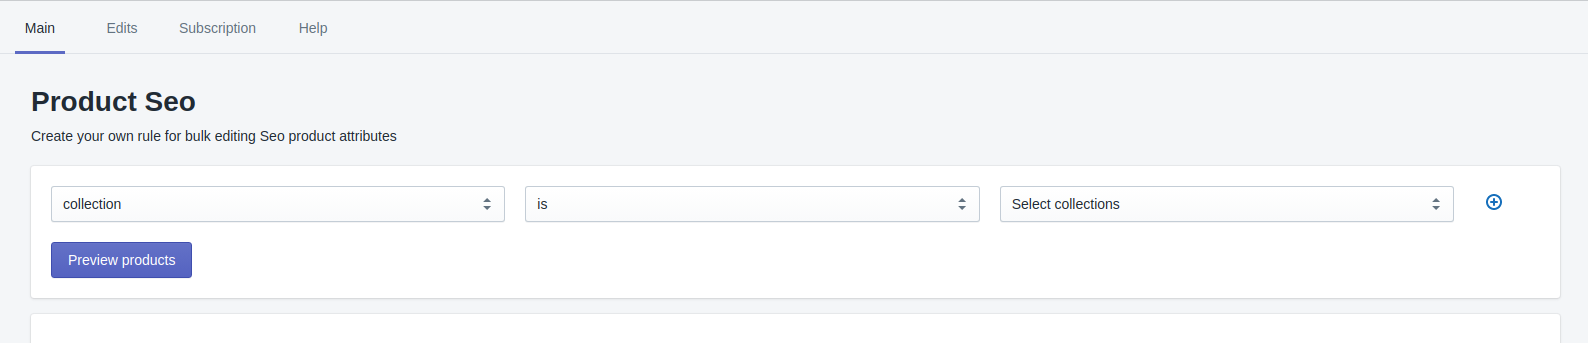
Step 1. Choose SEO in the Edit rules section below.
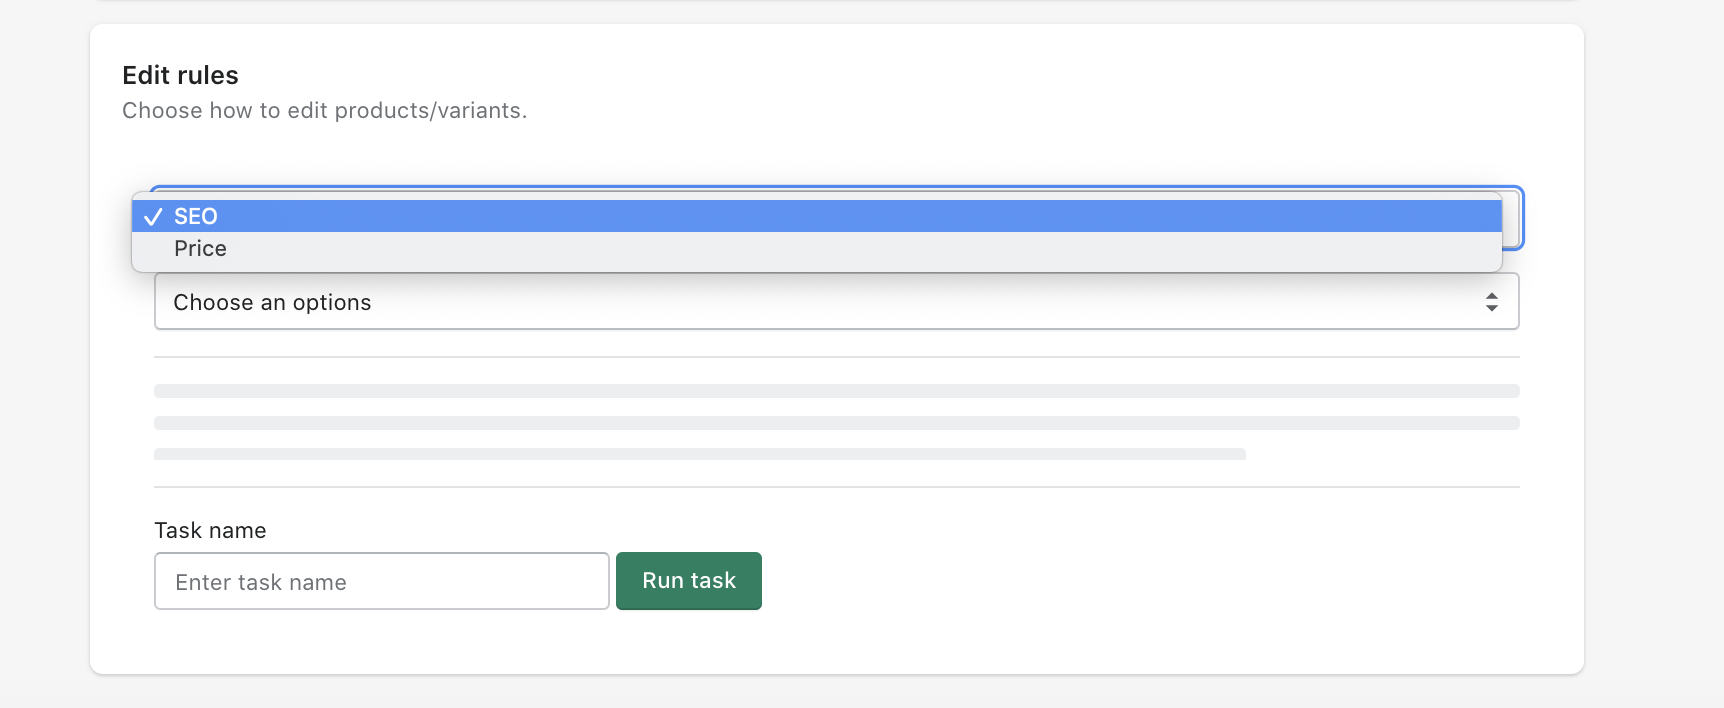
Note! You can change SEO attributes using templates to save your time.
The app allows numerous attributes to be used. You don’t need to type them manually, you can select what you need by pressing Add template field button.
| Info |
|---|
Read how you can improve SEO for your Shopify store in this article. |
Step 2. Select an option of changes you need to apply and enter the task name.
When you’re done, press the Run task button to start the task.
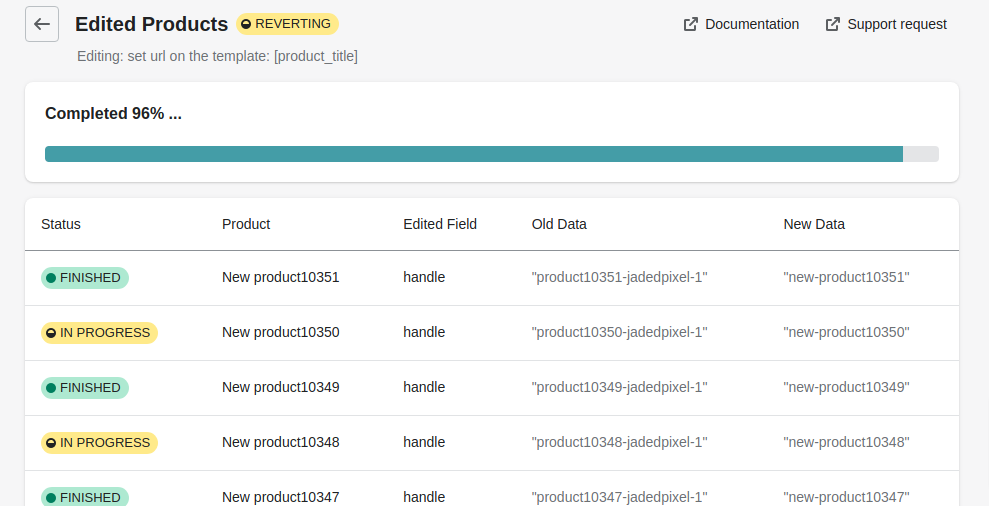
The task will be added to the queue and you can see the progress in the Tasks tab.
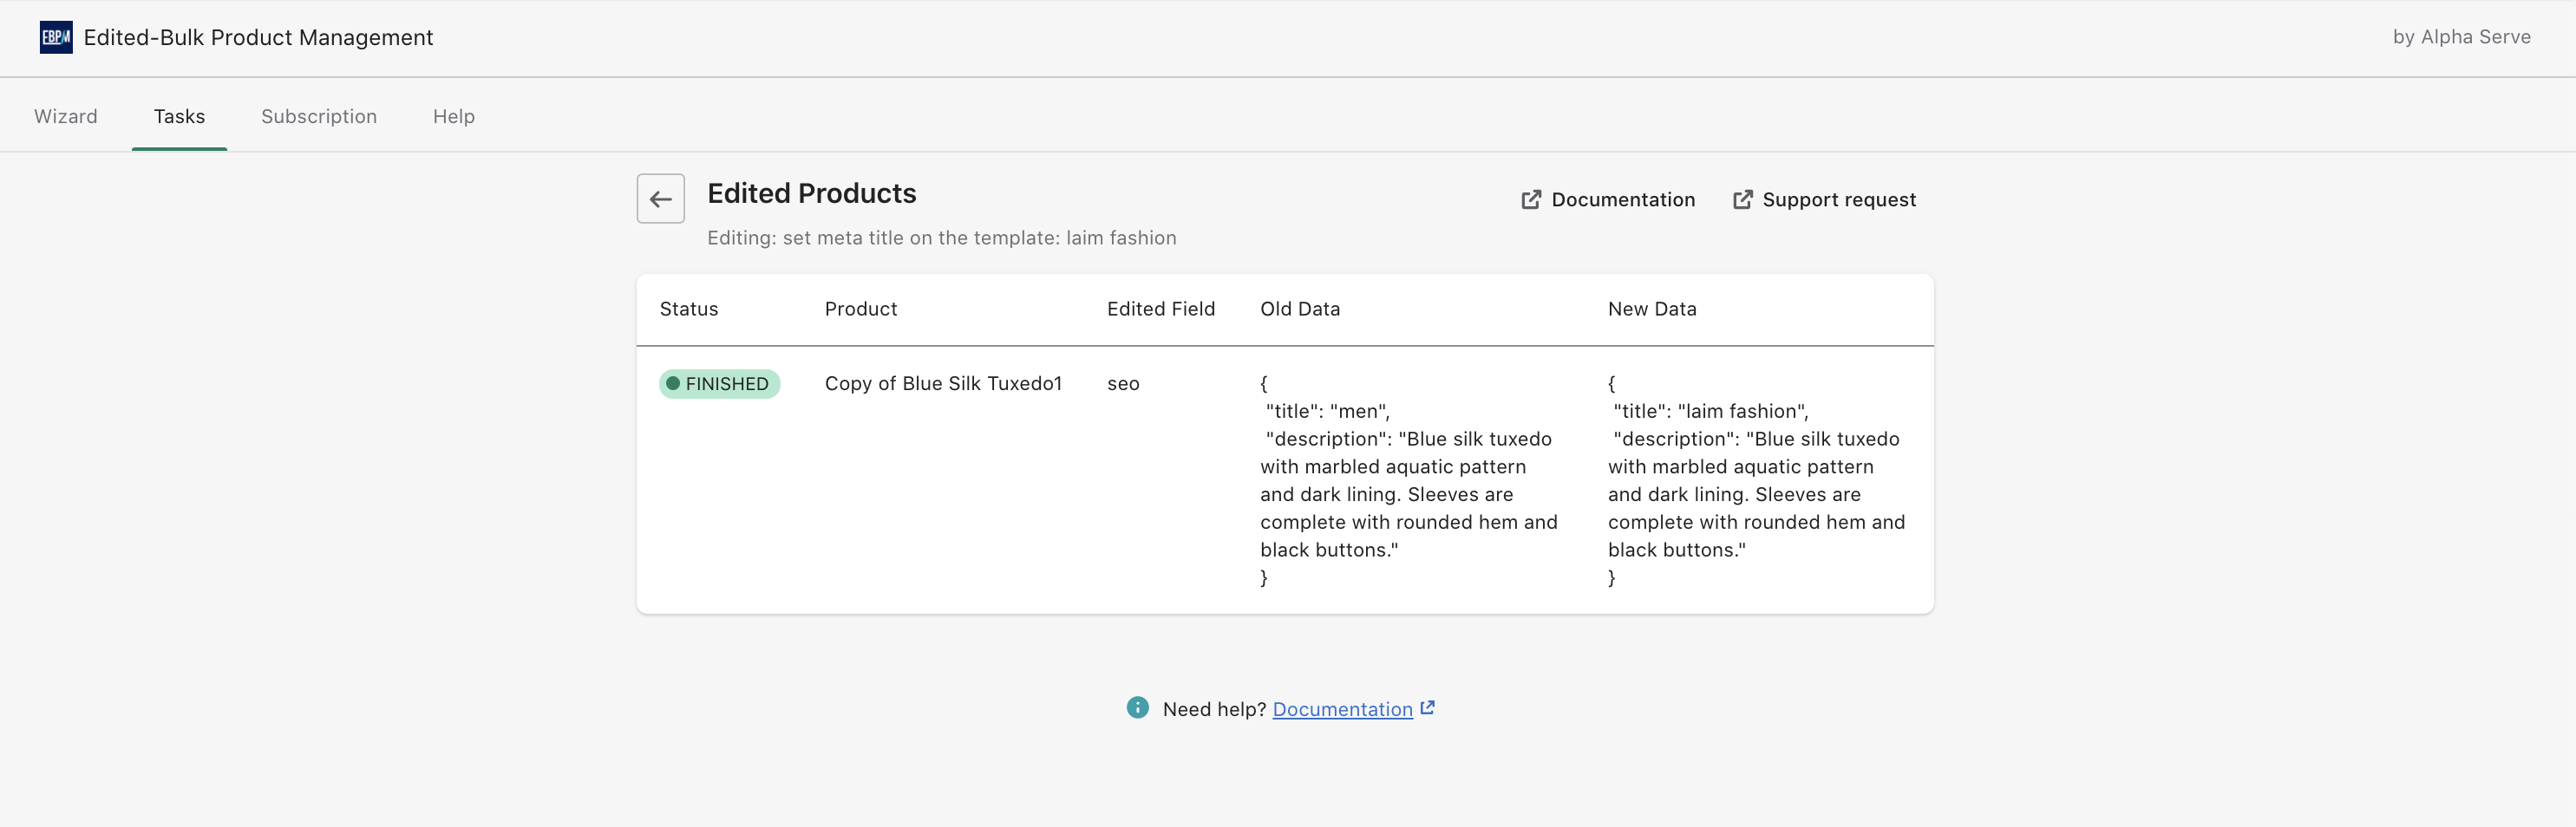
In the detailed view of the task, you can see the processing status of each product in the task and overall status of the current task.
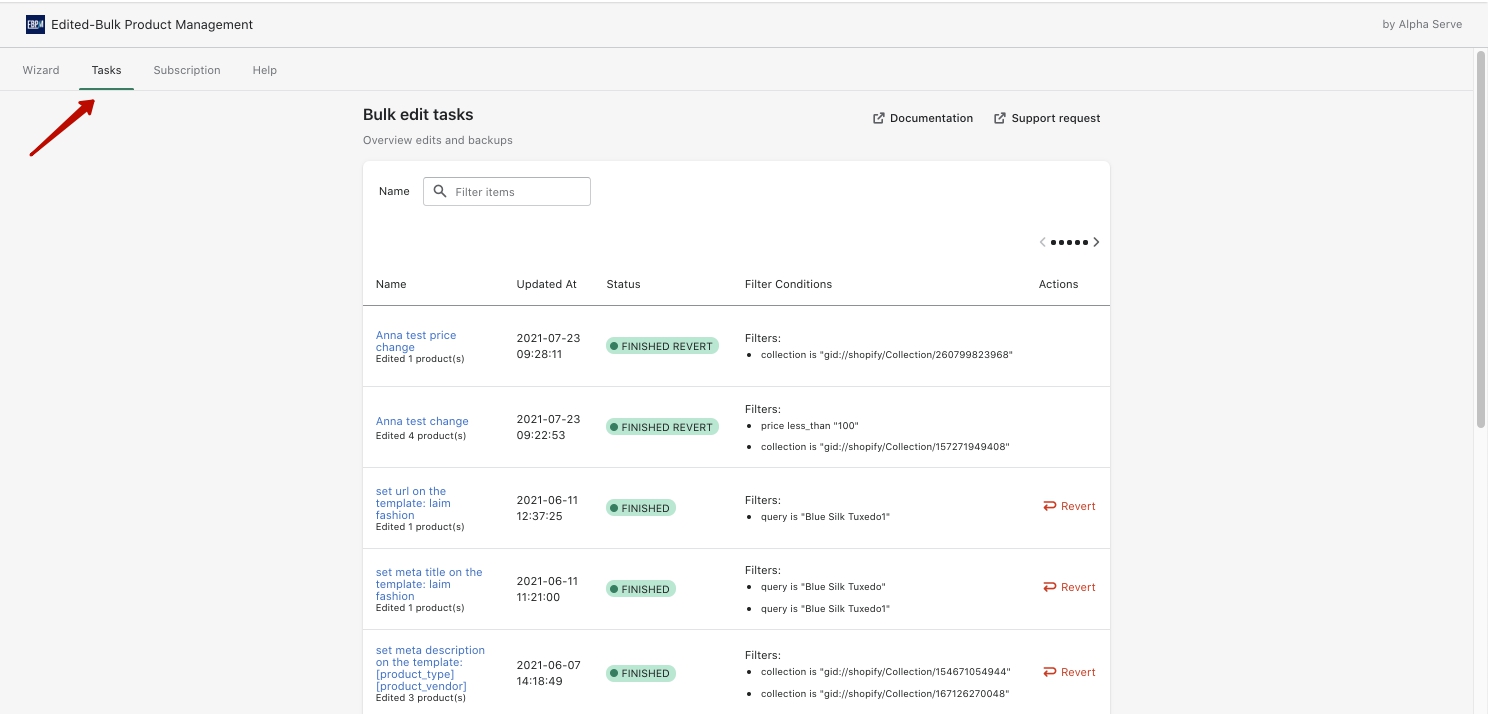
View Tasks History
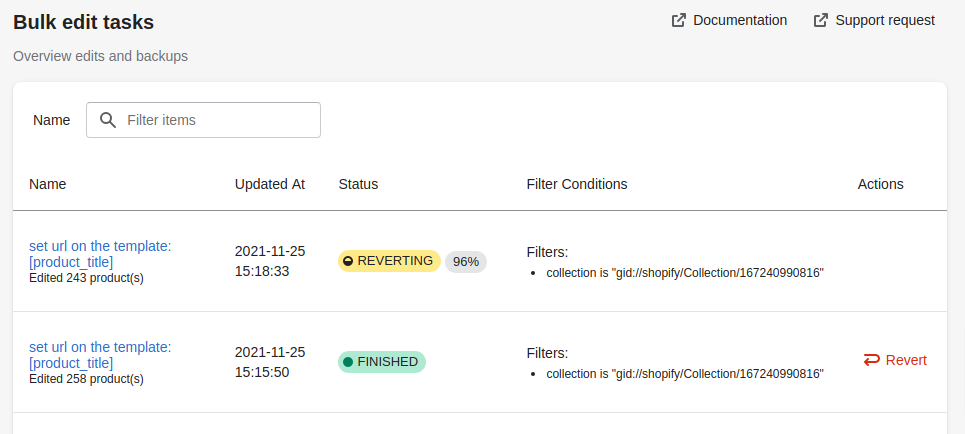
Switch to the Tasks tab.
You will see a list of tasks for edits there, including their name, date and time, status, Filter conditions, Rules applied etcActions applied.
if the task status is New, it means that the task has just been created but not launched and not executed yet
if the task status is In progress, it means a task in the process of applying changes
if tasks status is Finished, it means that the task has been run successfully
if the task status is Revert finished, it means that the task has been reverted (changes cancelled) successfully after the task was run.
If you’d like to see the full information on the task, press Detailsclick on the task name.You will see a list of items and the parameters which were changed for each item including old and new meaningmeanings.
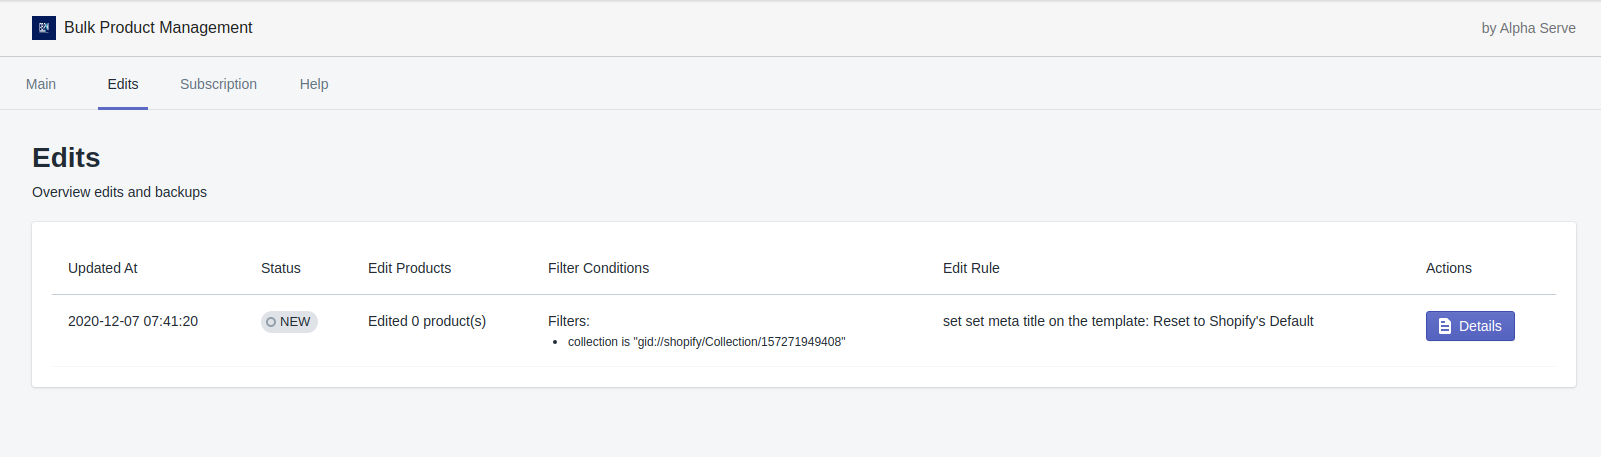
Each task on the Edits tab will have a certain status:
NEW - means a new task which was created, but not launched and not executed yet
QUEUED - means a task in the process of applying changes
FINISHED - means that the task is executed and finished, the changes are applied.
Revert Changes
Edited - Bulk Product Management allows users to revert any changes applied to the items with the help of the application. This is very convenient if
you need to apply changes to a certain period of time only and then turn back
there are mistakes in changes that need to be corrected.
Go to Edits Tasks Tab, find the task you’d like to revert and press Revert button.
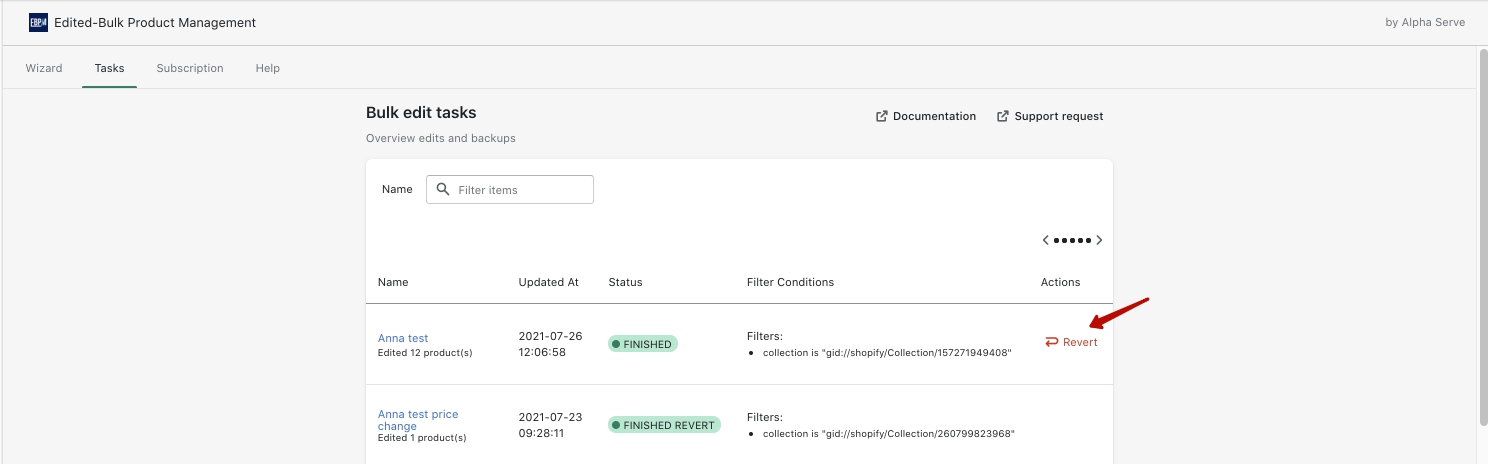
Reverted tasks have the following statuses:
NEW_REVERT New Revert - means that the task is to be reverted, but the revert hasn't started yet
QUEUED_REVERT Reverting - means that the revert task is currently running and is not finished
FINISHED_REVERT Revert finished - means that the revert task is executed and the changes are reverted back.
.png?version=1&modificationDate=1651201386031&cacheVersion=1&api=v2&width=340)