Requirements
...
Before using U2F for Jira you need to install and enable it in the Universal Plugin Manager. Also, enable it in own configuration. All base and additional settings are explained below.
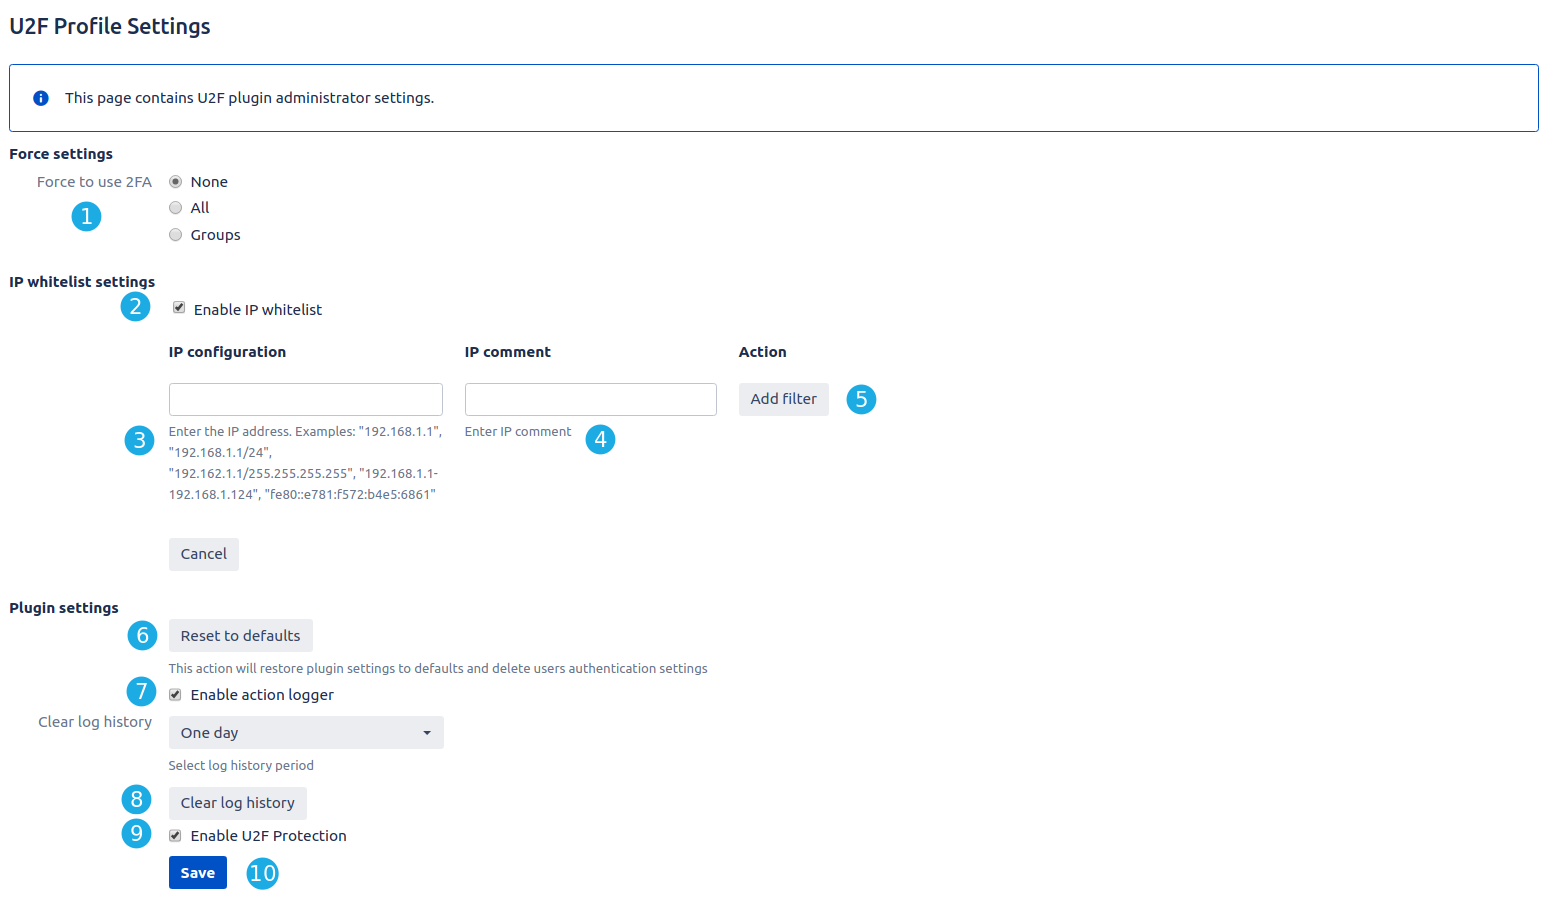
- It’s force setting for 2FA:
- None - 2FA not necessarily for Jira users. If you need to make it compulsory - use
- All - it’s compulsory for all users
- Groups - it’s compulsory only for selected groups.
- Mark the checkbox Enable IP whitelist to enable whitelist of IP addresses that pass without 2FA check.
- Enter the desired IP address.
- Enter the IP comment to recognize the IP address from the list. (not required)
- Click the Add filter button to add IP to whitelist.
- Reset to defaults. This action will restore plugin settings to defaults.
- Mark the checkbox Enable action logger to allow logging all action with 2FA. For example: adding or remove the device, log it into the system with U2F device.
- Clear log history. Select the log history period and clear logs.
- Mark the checkbox Enable U2F Protection to turn on the plugin.
- Click the Save button to save the configuration.
...
- Click on "Reset" to reset settings.
Action logger
We logged all relevant actions of U2F for Jira. It's accessible for administrators only: you can easily find out which user has logged in or registered and when.
- It's username column. Type letters into input.
- Date for a certain action. Select a date.
- Action type stores all relevant actions.
- User IP.
- Click "Filter" to filter logs.
- Clear filter.
- Use navigation to see more results.


