Being signed in to your Jira instance, select BigQuery, and then select Data Sources.

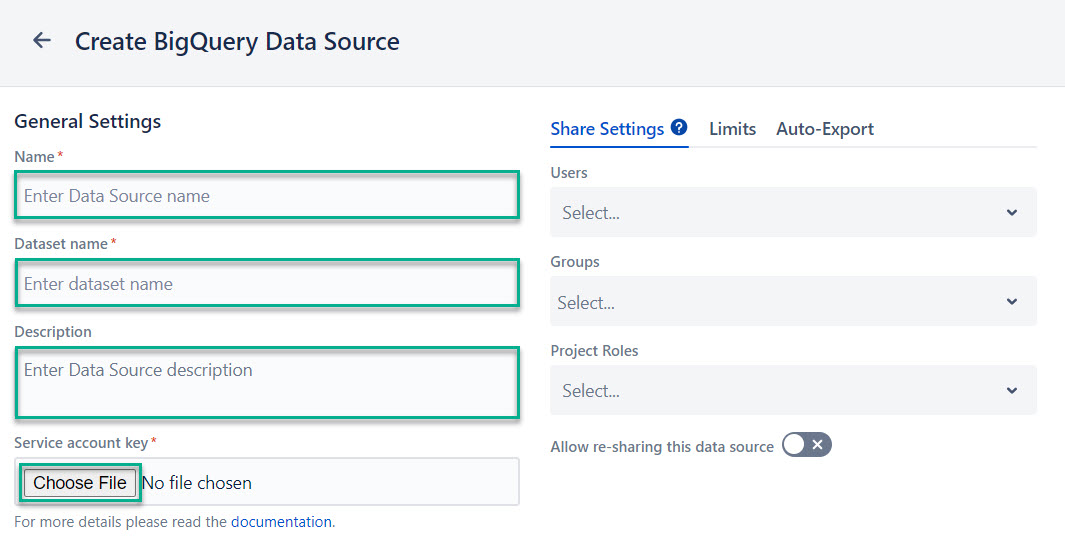
Select Create Data Source.
In the Name* field, enter your data source name.
| Info |
|---|
The Description field is optional. You can enter data related to your data source or some hints you might need in the future. |
In the Dataset name* field, enter the dataset name for exporting data.
In the Service account key* keyfield, select Choose File, and then select your service account key.
[Optional] In the Description field, enter the description for your data source.
| Info |
|---|
Enable auto-export to have your data source exported at the set time interval. |

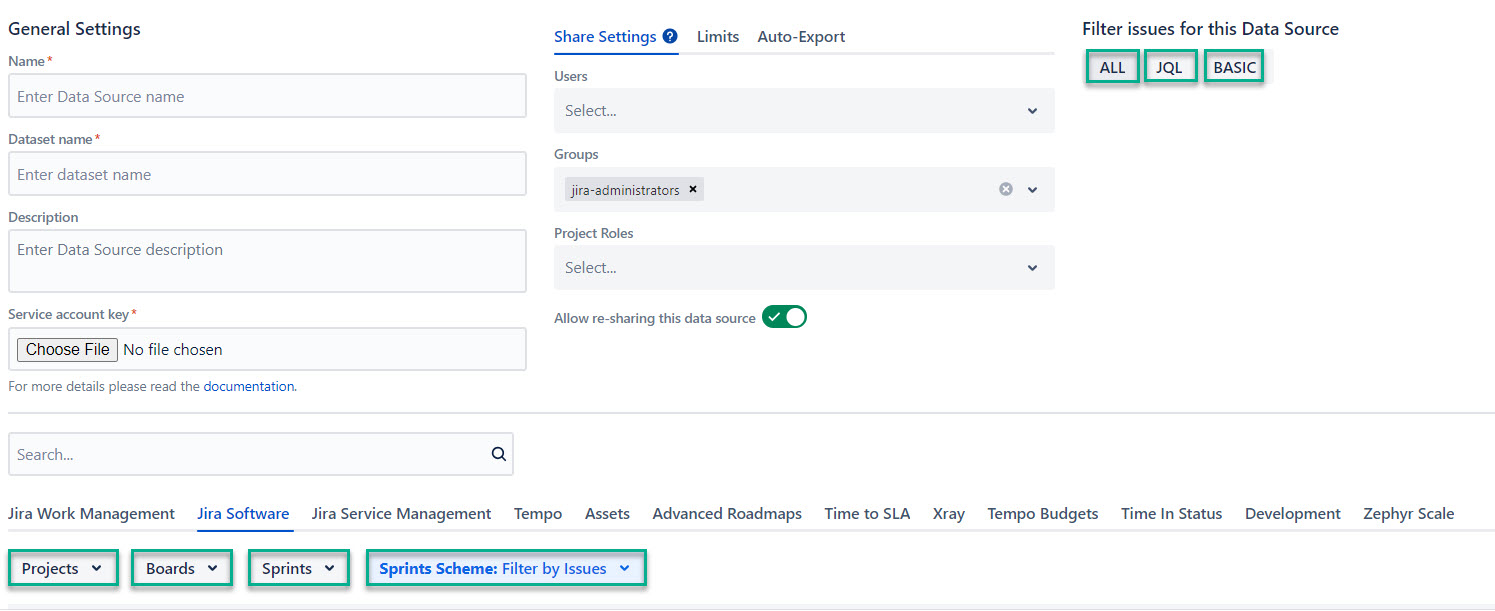
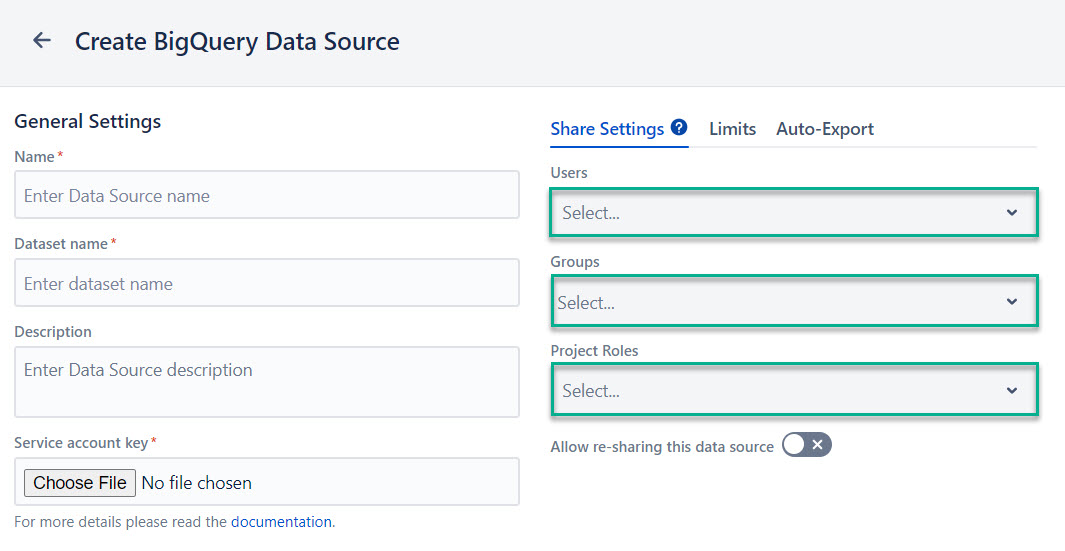
[Optional] Select Share settings.
[Optional] In the Users field, enter the username you want to share the data source with.
| Info |
|---|
Once you start typing, the drop-down list with username suggestions will appear. Select the user from the list. |
[Optional] In the
Groups field, select the group you need.
| Info |
|---|
Once you select the Select group Groups field, the drop-down list with available groups will appear. Select a group from the list. |
[Optional] In the
Project Roles field, select the roles you need.
| Info |
|---|
Once you select the Select project role Project Roles field, the drop-down list with available project roles will appear. Select a role from the list. |
Select Save.
| Note |
|---|
Other users who have access to BigQuery Connector might not get all the data from this data source due to different Jira permissions. |

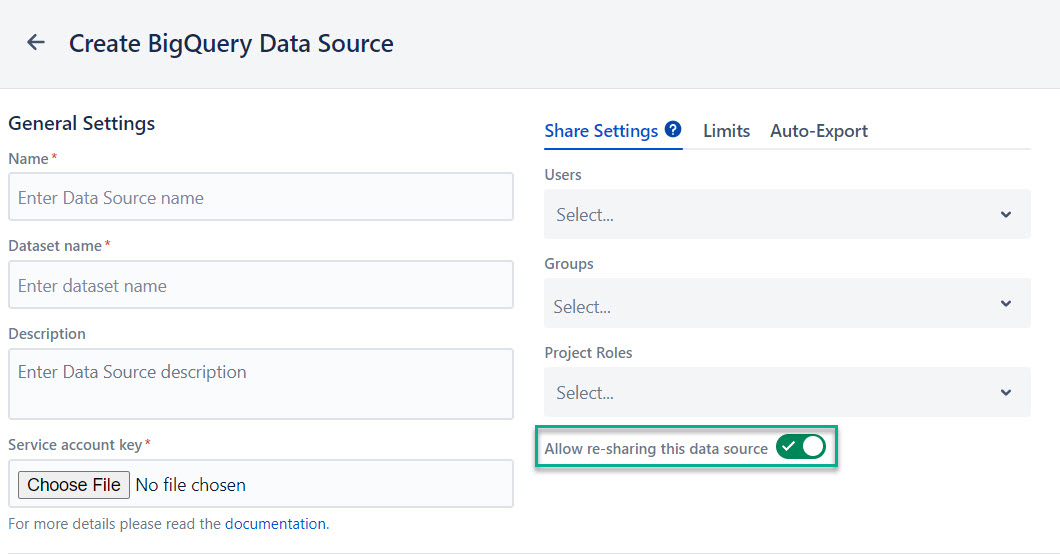
You can also allow other users who have permissions to use BigQuery Connector to re-share the data source.
| Info |
|---|
If needed, enable auto-export to have your data source exported at the set time interval. |


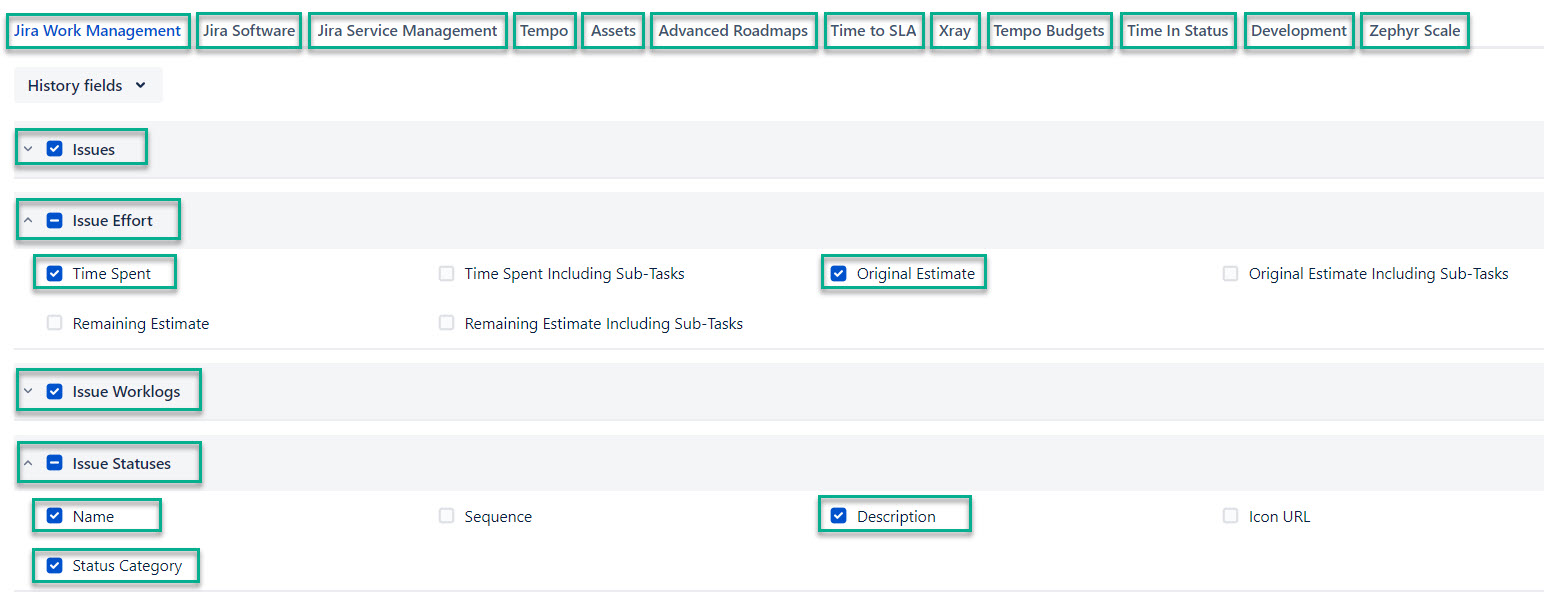
Select all filters and
tables you want to be in your data source, and then select Save.
You can select different filter groups:
All (by default) - will return all data, select it, if you want to export all existing issues.
JQL - Jira Query Language, is a flexible tool that allows you to search for issues, projects, etc. in Jira and pinpoint exactly what you are looking for. Select it, if you want to use JQL to create your own request and filter data.
Basic - select it, if you want to use standard fields filters; to set up Basic filter, select the Issue filter button.
| Info |
|---|
A detailed description of all fields, filters, and buttons, please read in this article. If you need additional information about Jira filters, please refer to this section. |