Since definitely, not all users should have permission to export Jira data, Jira Cloud Administrators can grant the permissions to work with the Tableau Connector for Jira Cloud for certain users or groups of users. Instructions below show how to grant the permissions to work with the connector (ability to create, edit, watch and export connectors).
Please note that users with the Administrator role have the permissions to work with the connector by default.
How to grant the permissions to work with Tableau Connector for Jira?
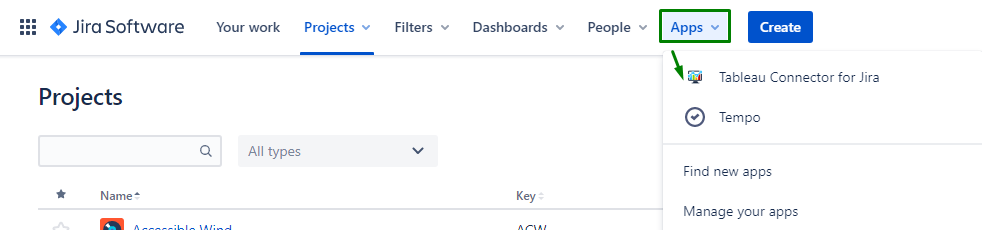
In Jira primary navigation menu click Apps and find Tableau Connector for Jira in your app list.
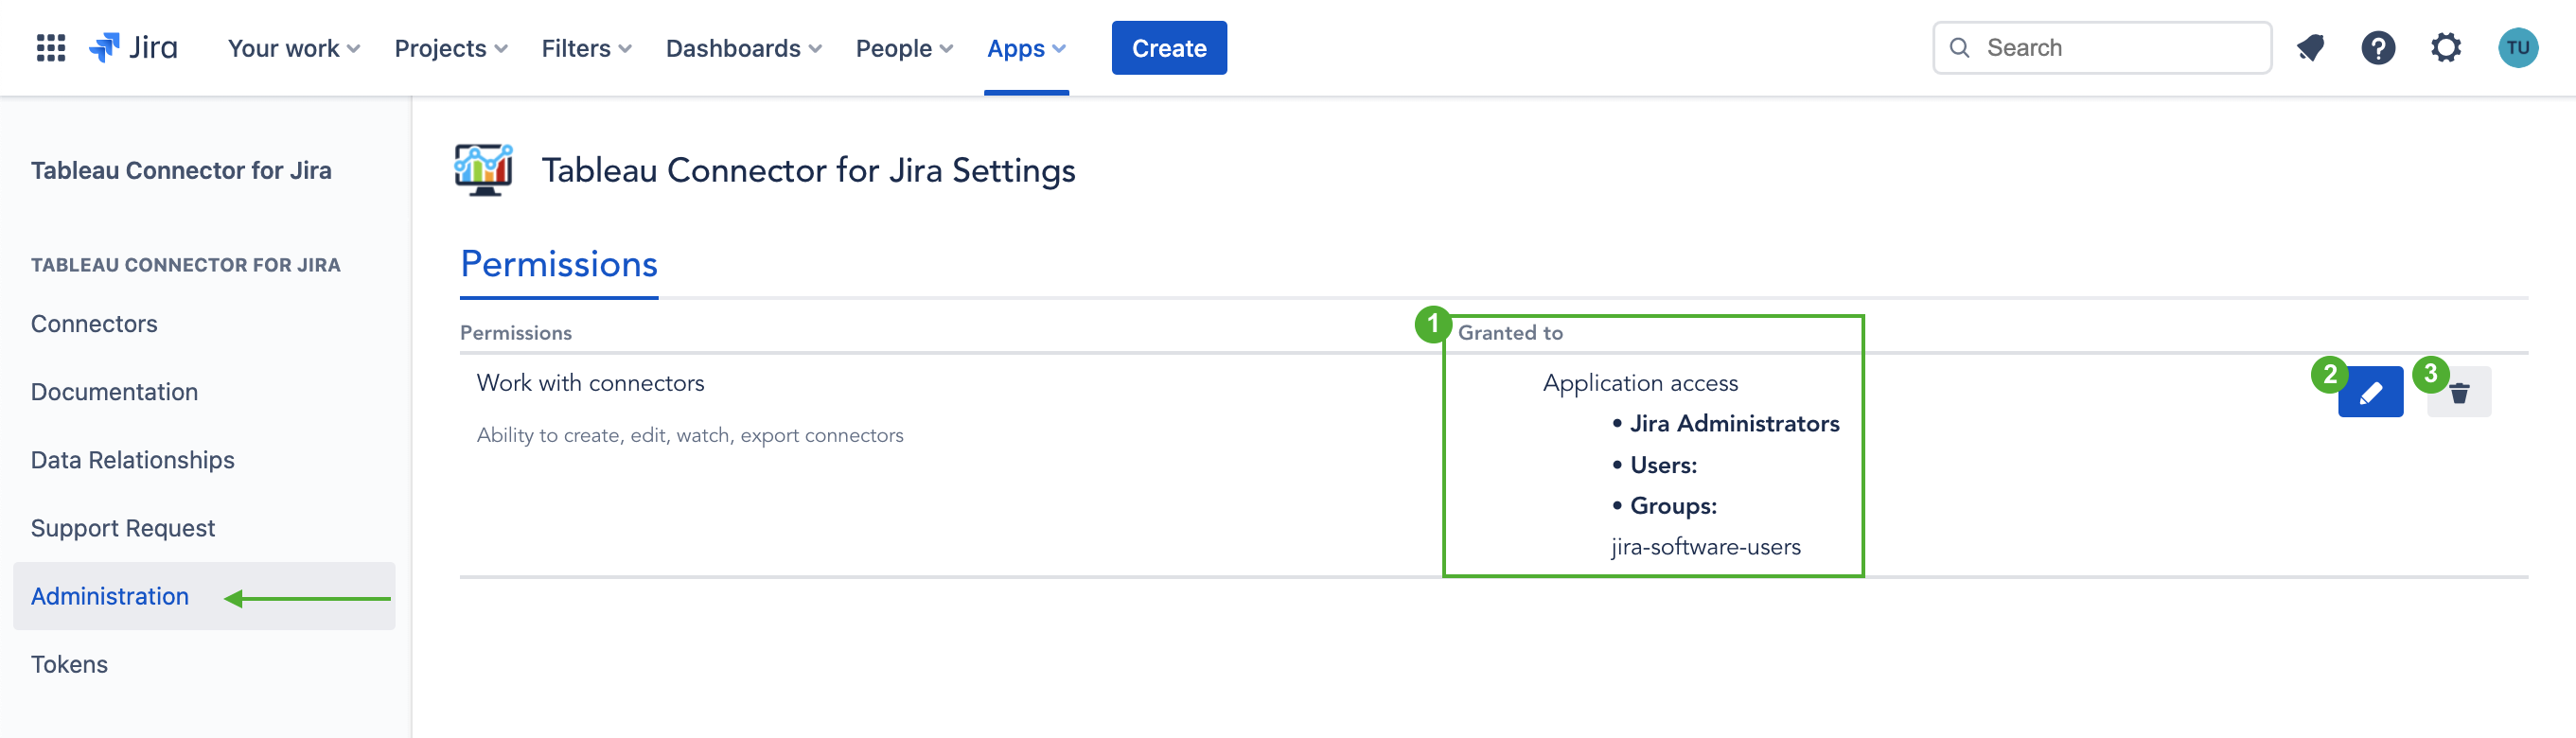
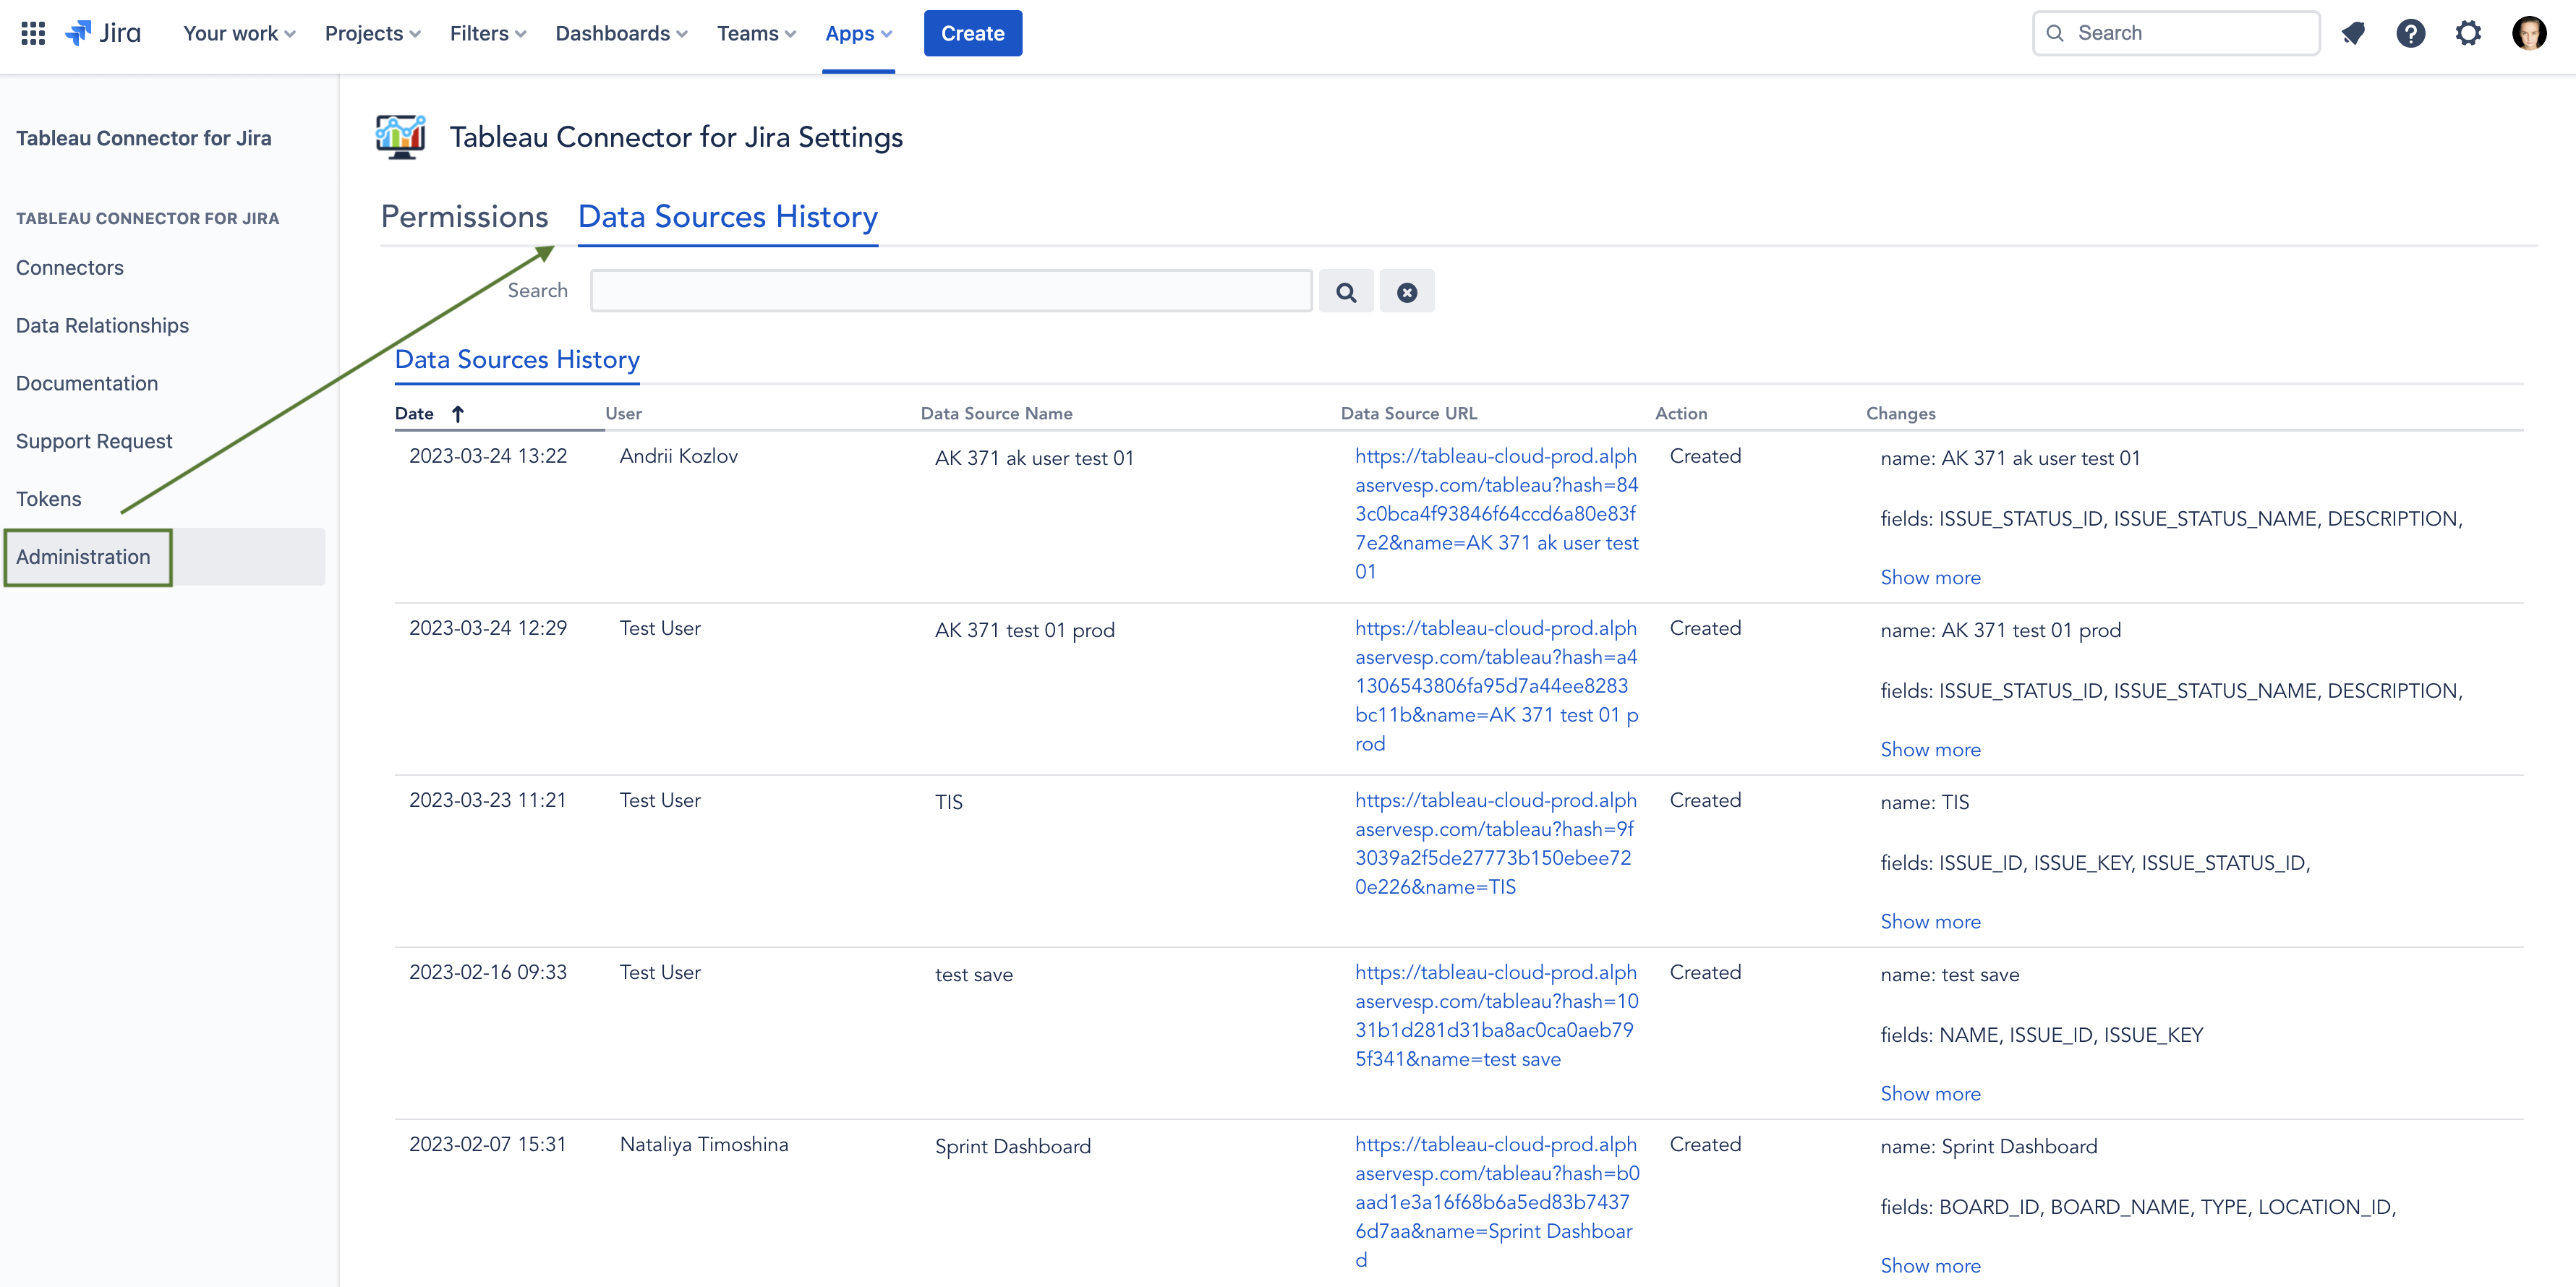
Select Administration from the left-side navigation menu.
At Tableau Connector for Jira Settings page you can:
(1) Overview Granted permissions.
(2) Click the Edit icon to edit the permissions: add or remove users or groups who could work with connector.
(3) Click the Remove icon to completely clear all granted permissions
Besides, you have an ability to also check the Documentation,view Data Relationships diagram and raise a Support request from the side menu of the Tableau Connector for Jira page.
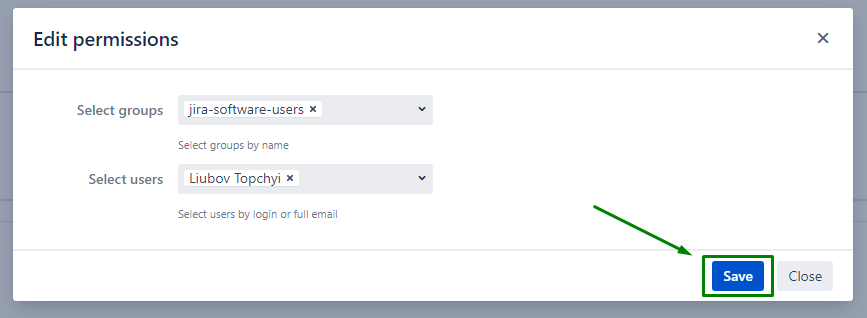
In the Edit permissions(2) window click the Select groups field and select groups from the available groups in the list. You can select as many groups as you need.

To select users click the Select users field and start to type username you want to grant permissions to work with the connector. Select user from the list. You can select as many individual users as you need.
To save the permissions click the Save button.
How to View the Data Sources History?
Go to Administration → Data Sources History. It displays all changes performed to the data sources by all users, such as creating, editing the fields or filters, sharing, changing owner, etc.
IP Whitelisting
Here are the current instances IP addresses of Tableau Connector for Jira Cloud application. Please add these IPs to your IP allowlisting:
| Code Block |
|---|
54.189.226.121
54.187.129.78 |
IP allowlisting gives you an additional level of control, allowing you to specify which IP addresses users must use to access content for Jira Software, Jira Service Management, and Confluence. When you set an allowlist for Jira Software Premium, it applies to customer and agent-facing portals for your Jira Service Management on the same site.
To view your IP allowlists:
Go to admin.atlassian.com. Select your organization if you have more than one.
Select Security > IP allowlisting.
| Info |
|---|
You will be able to access admin.atlassian.com even if the IP is outside the range of the allowlist. |
