Before you start
To be able to export data from your Shopify store, you should have the relevant Shopify account permissions.
Check Shopify Help Center for more information.
Create a report
Step 1. To export the data, you need to create a new report based on your criteria. To do this, click on New Report button on the Reports page.
Step 2. Follow the steps below to configure the report based on your parameters.
Select data type for the default tab. There are such types available:
Products
Customers
Orders
Inventory Items
Product Variants
Draft Orders
Tender Transactions
Bank Accounts
Disputes
Payouts
Collections
Add one or more filters if needed in the Filters subsection in the FILTERS section.
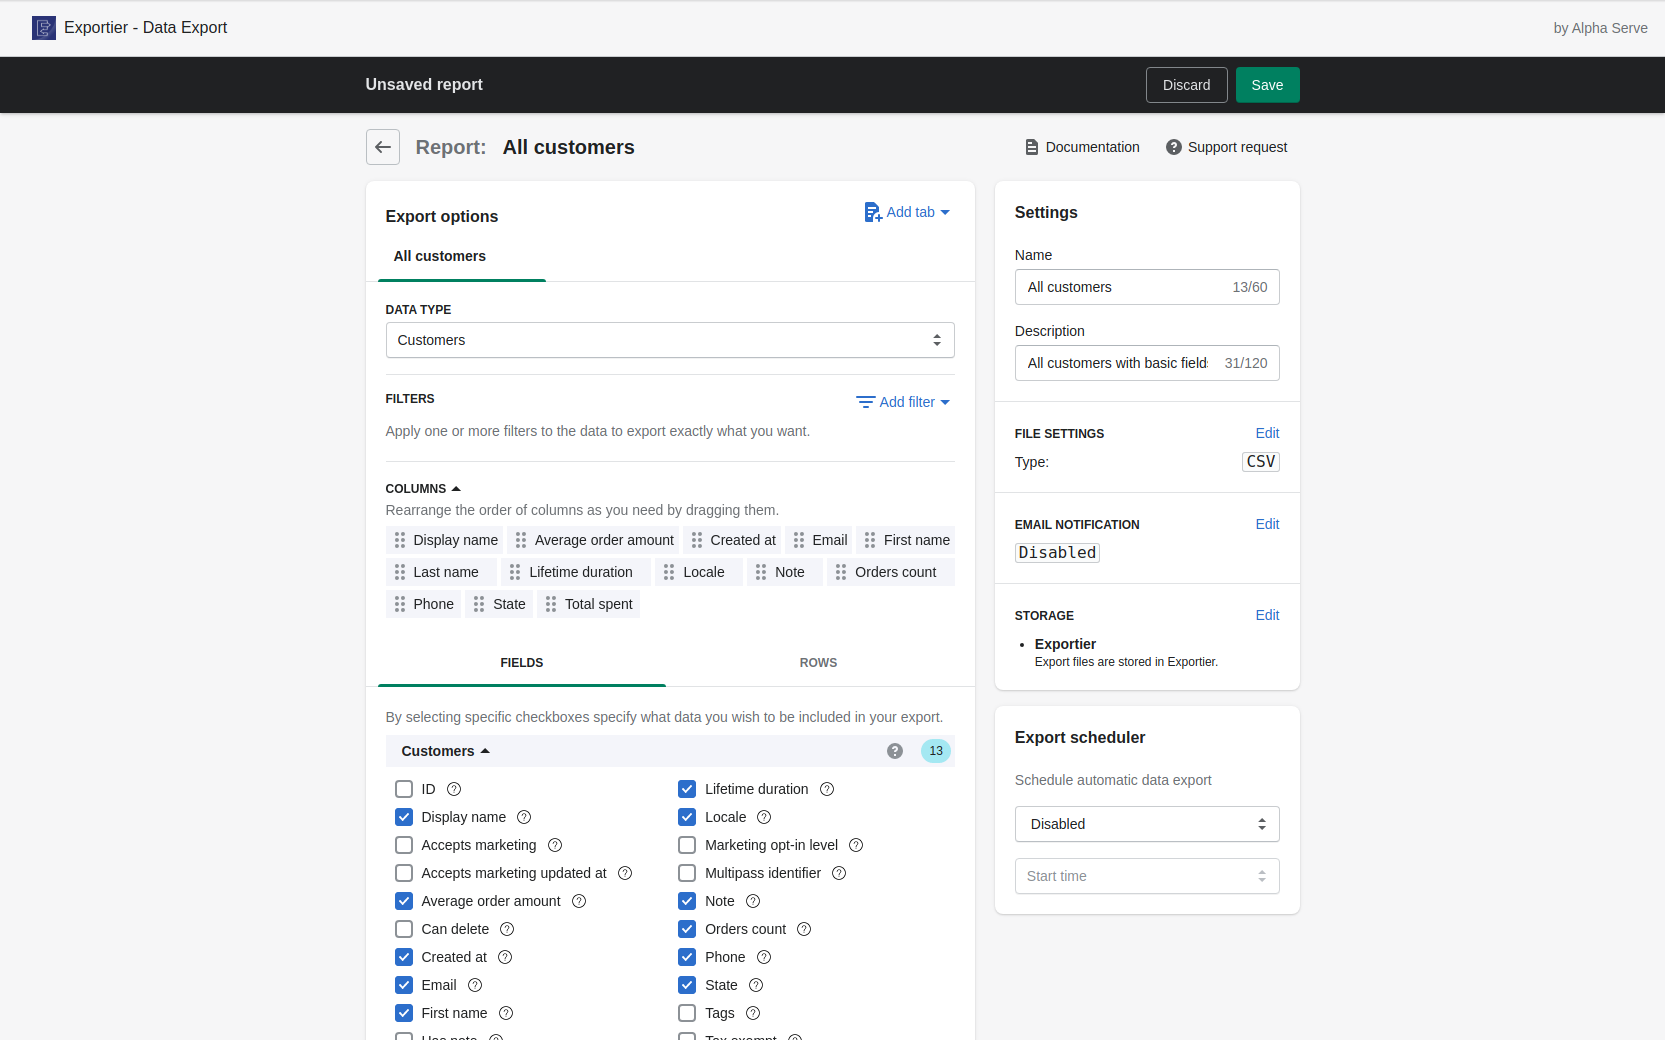
Choose the fields you’d like to export by marking the relevant checkboxes next to the field you’d like to export in the FIELDS section.
Optionally, change the order of the columns by dragging them in the COLUMNS section.
Enter report name in the Name field.
Optionally, add a report description in the Description field.
Set up export file settings:
Choose a file format: Excel or CSV
Click Save button to confirm and save the configured report or Discard button to reset parameters to default values.
You can include multiple sheets in your report with the “Add tab“ button.
Tabs works properly with Excel reports. CSV files don't support sheets. Therefore, the data from each tab will be appended one by one.
Due to Shopify API limitations it is impossible to export fields of the groups below at a time:
Orders / Fulfillment ordersOrders / Customer journey / MomentsOrders / Line itemsand any group under it (Orders / Line items / Discount allocations,Orders / Line items / Fulfillment service, etc...)Orders / MetafieldsOrders / Shipping lines
You can only select fields out of 4 data types at once. If you wish to export all of them, please split your data preparation into parts and consolidate it after export.
Run data export
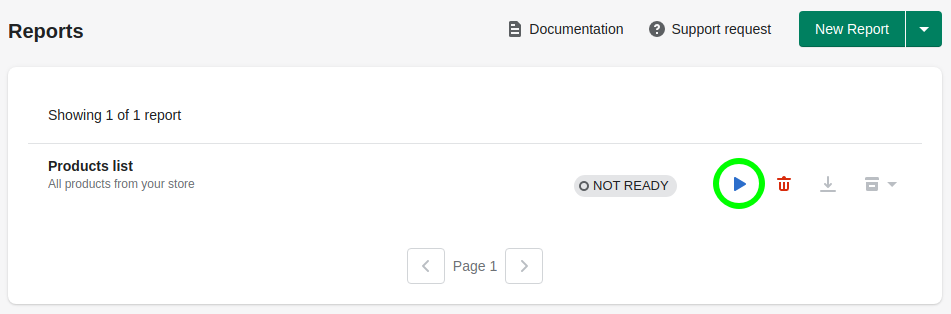
After you’ve successfully created a Report, navigate to the Reports page. Here you can see your newly created report in “Not ready” status.
To generate an export file click on the Run button. The status will be changed to “Pending” and then to “In progress”.
The speed of data generation depends on the amount of data you’ve selected for export. Most data sources preparation takes a couple of minutes. But sometimes this can take even hours, for example, if there are thousands of rows to be prepared.
We recommend to set up the scheduler to prepare and export big amounts of data in advance to a certain time.
If you need assistance with it, please, contact our Support team.
Download data report
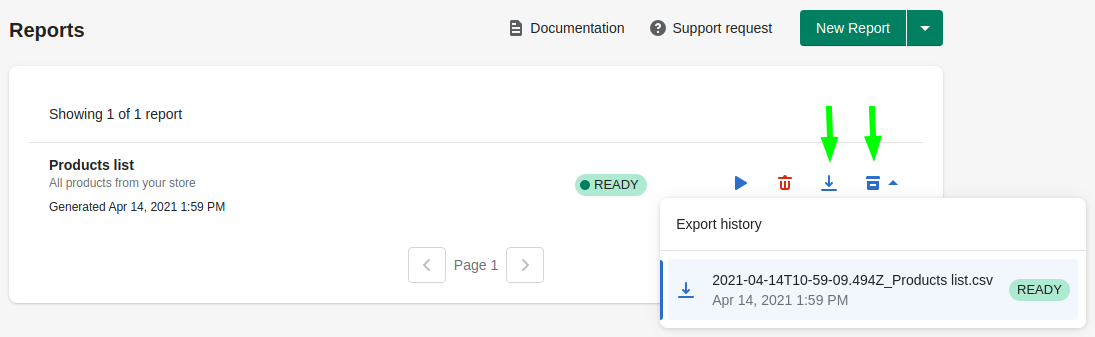
When the export process is completed status will change to “Ready” and you will be able to download the file with all the data you’ve configured in the previous step.
To download last prepared export, click on the Download action.
Alternatively, you can download an export file by clicking on Export history action and select item from the popover. Export history menu contains links to your current and previously generated exports.
Export history size depends on your pricing plan.
Email notification
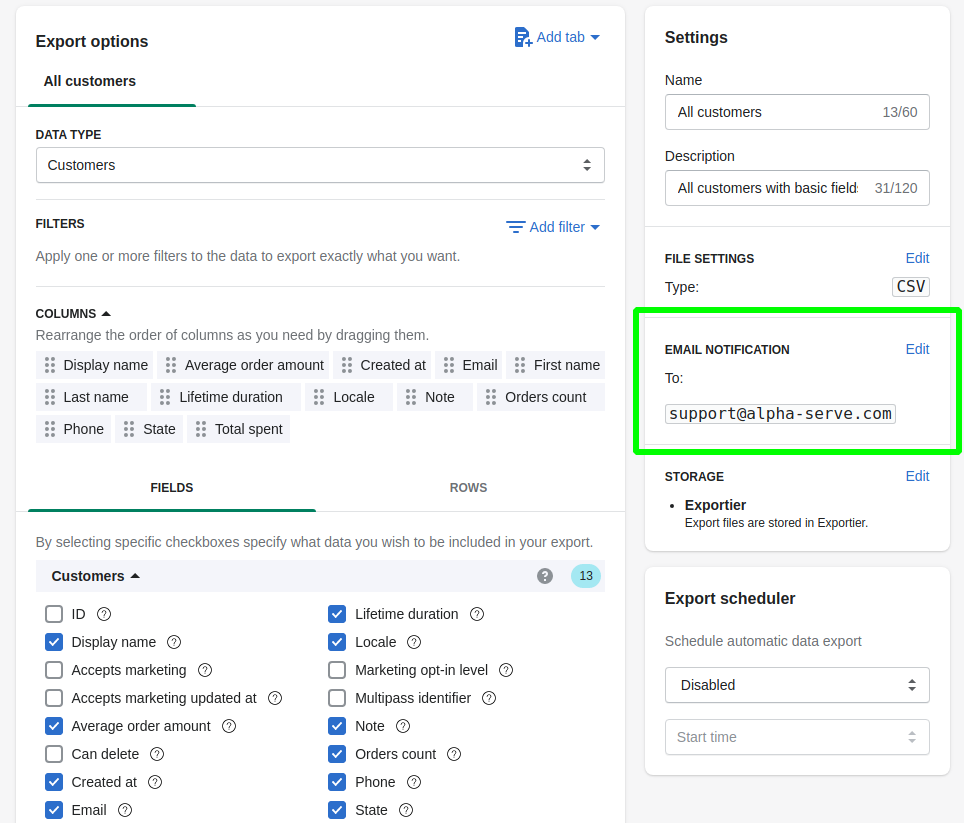
If you’d like to get notified when the data preparation is ready, you can enable Email notification.
Step 1. Go to the Email notification section on the right side of the Export screen.
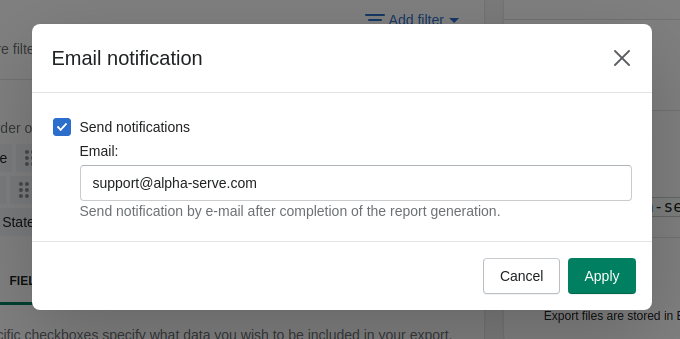
Click the Edit button and switch the notification checkmark to the desired position.
By default, when this option is on, the notification is sent to the email address of the Shopify store account.
Step 2. Add another address or change the default address. Click Apply to save changes, or Cancel to discard them.
Scheduled data export
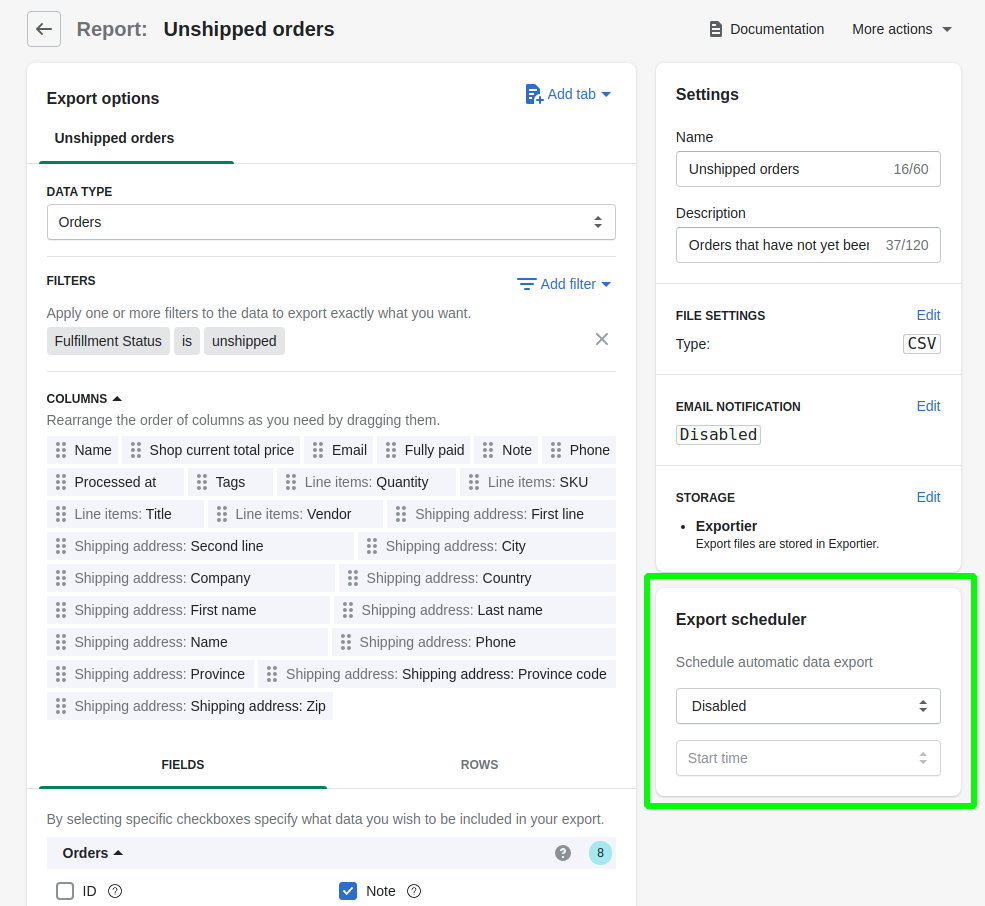
In case you need to schedule periodical data export of any of your reports, you can configure the scheduler.
Step 1. In the Report tab, find the Export scheduler section.
Step 2. Choose the needed recurrent period and start time. In the Export scheduler section select one of the possible options:
Disabled - Export will not be scheduled for this report
Monthly - You can choose between Start of month and End of month options. It corresponds to the first or the last day of the month respectively
Weekly - Export will be created every week on the selected day
Every day - Export will be created on a daily basis.
App will use the time zone of your Shopify account to run scheduled tasks.
Step 3. Click Save button to apply changes.
Export scheduler menu options depend on your pricing plan.
.png?version=1&modificationDate=1611751112943&cacheVersion=1&api=v2&width=204&height=247)
.png?version=1&modificationDate=1611751113171&cacheVersion=1&api=v2&width=204&height=144)
Using report templates
If you don’t want to create your reports from scratch, use Templates. Reports templates designed for export include the best e-commerce practice for data analytics and are based on the most widely used export requests.
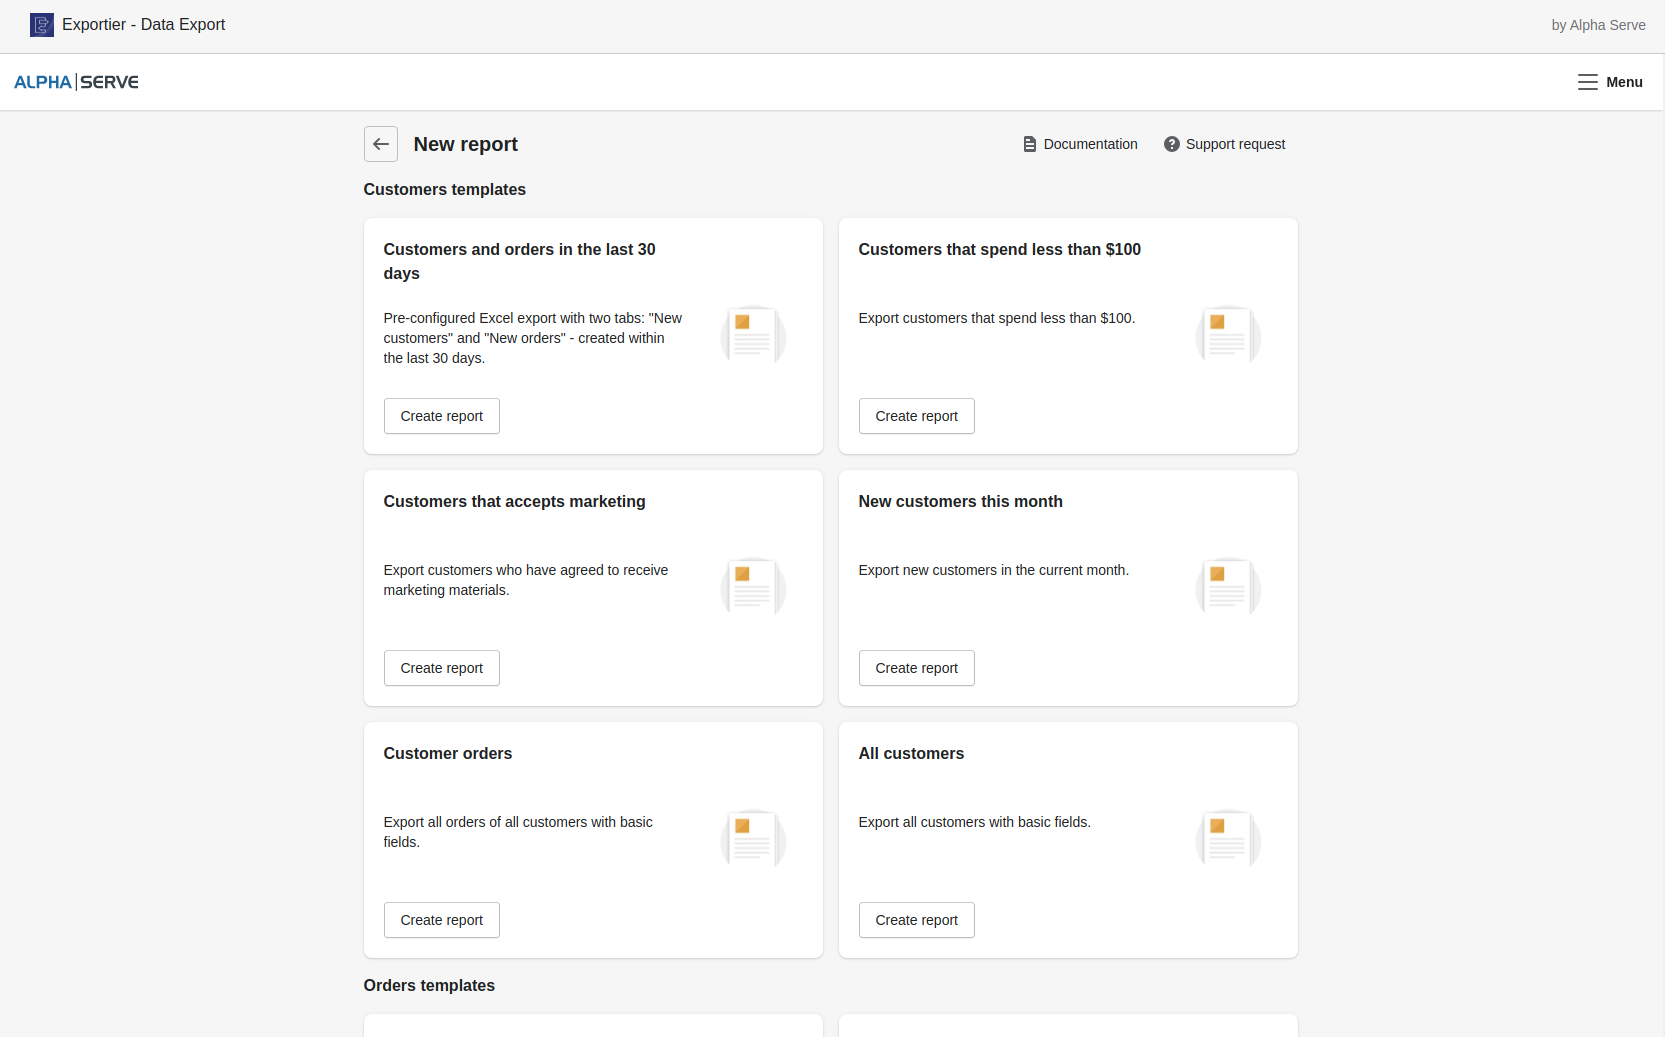
Step 1. To create a new report from the template, click on the Create from template button or navigate to Reports templates page using the link on the start page.

Step 2. You will be redirected to Templates page.
To create a new report from template just select the appropriate template and click Create report button on it.
Step 3. Then you will be redirected to Report form with predefined configuration which you can customize according to your needs.

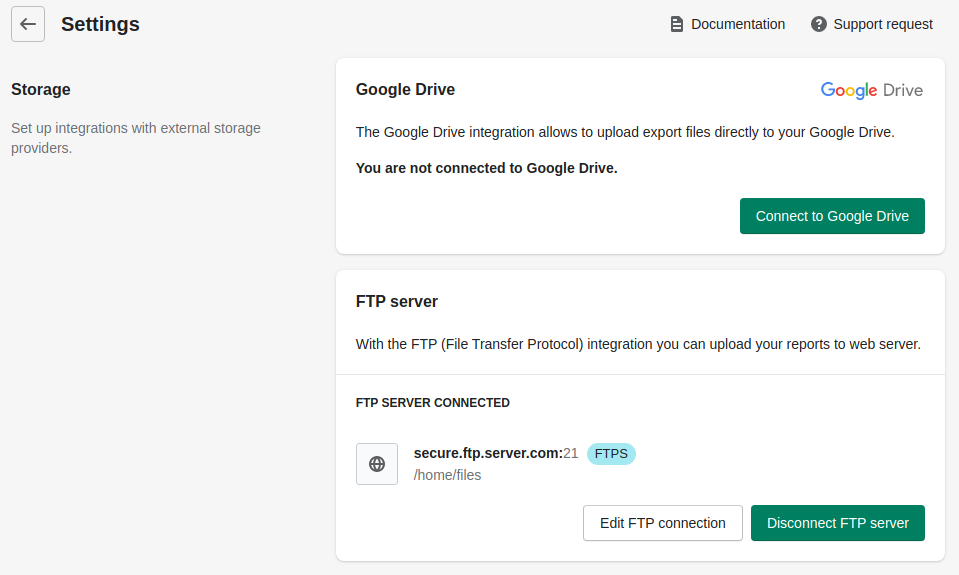
Google Drive support
You can store your reports in the application or download them in the appropriate format.
If you wish to have convenient access to the exported data anywhere, we advise to store them on your Google Drive. You can set this integration directly from Exportier - Data Export.
Step 1. Set up Google Drive integration
To enable this functionality, you need to set up Google Drive integration first.
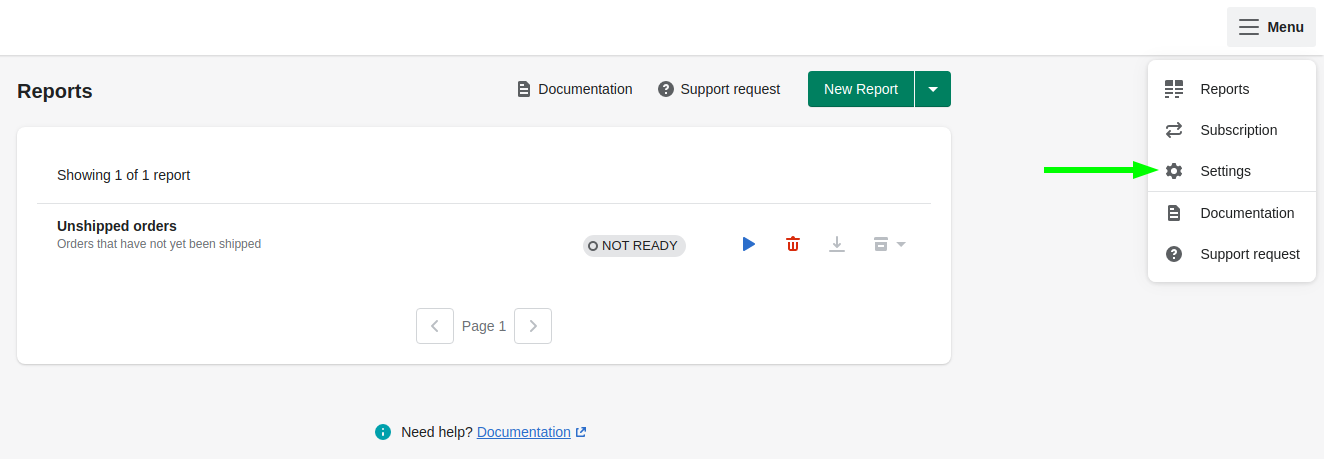
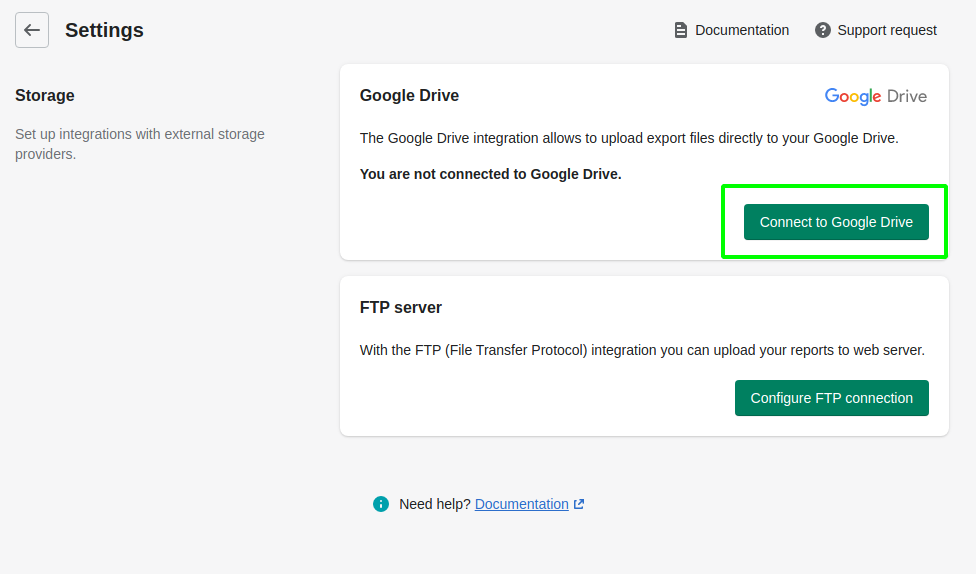
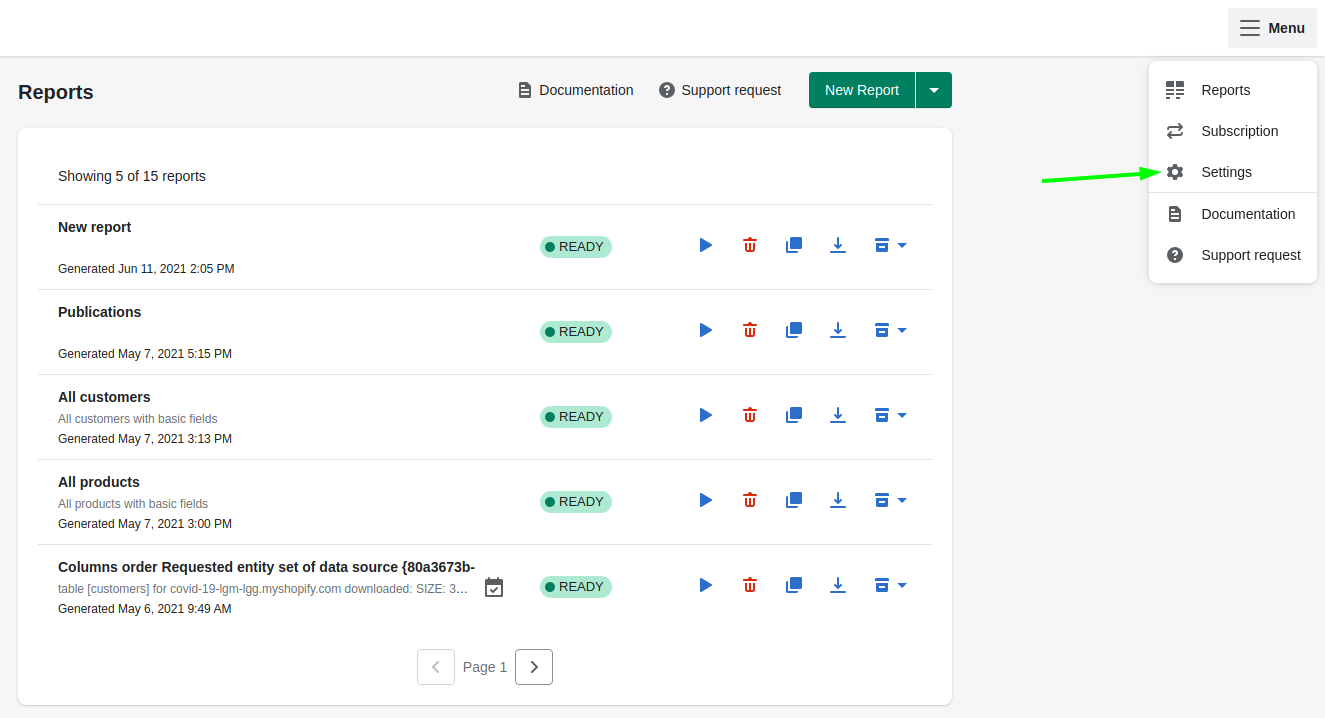
To do this please go to main Menu → Settings → Storage → Connect to Google Drive → enter your Google credentials → click Allow button.
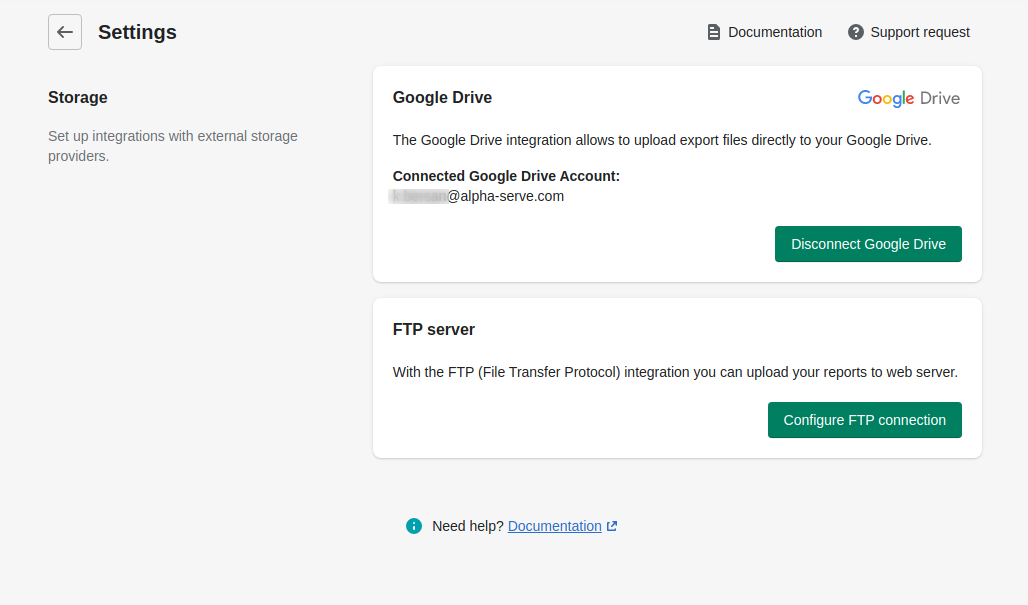
You can disconnect it anytime and connect another account.
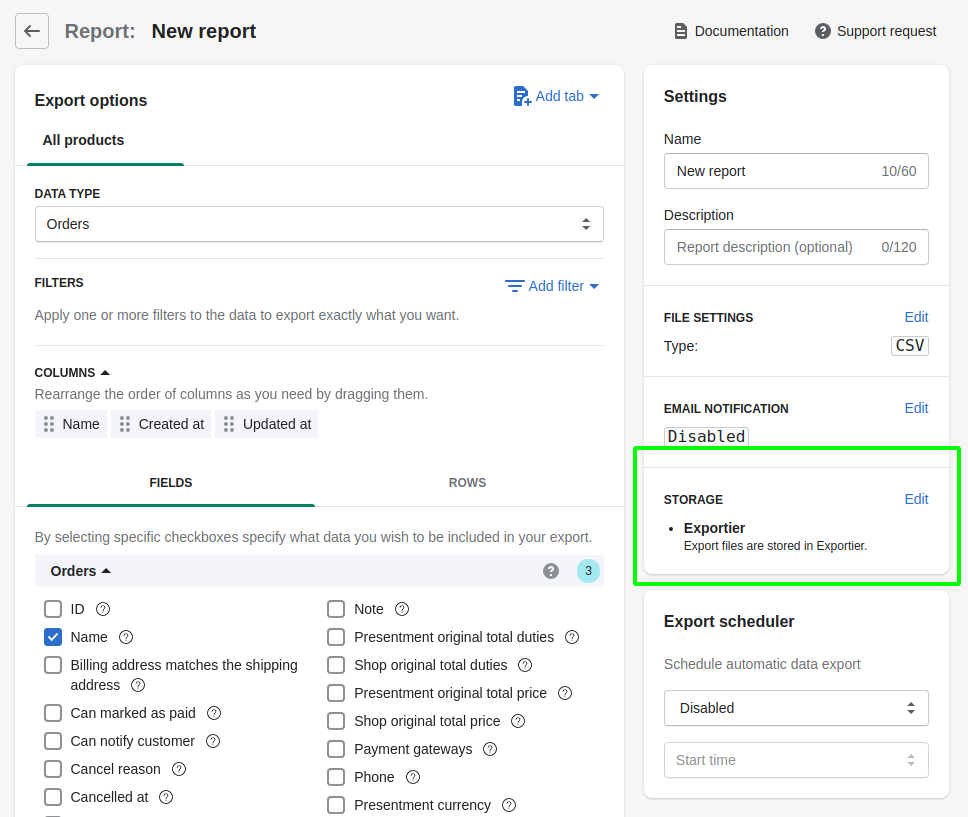
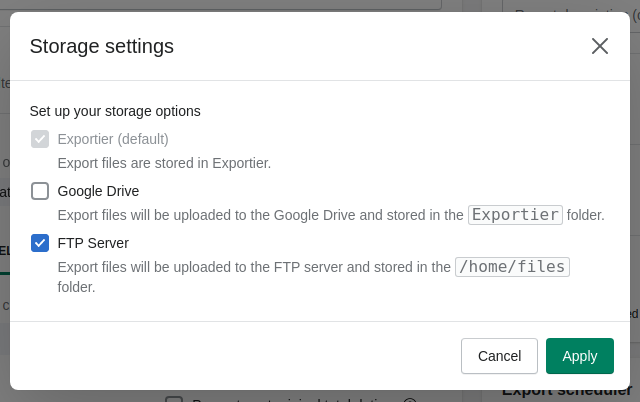
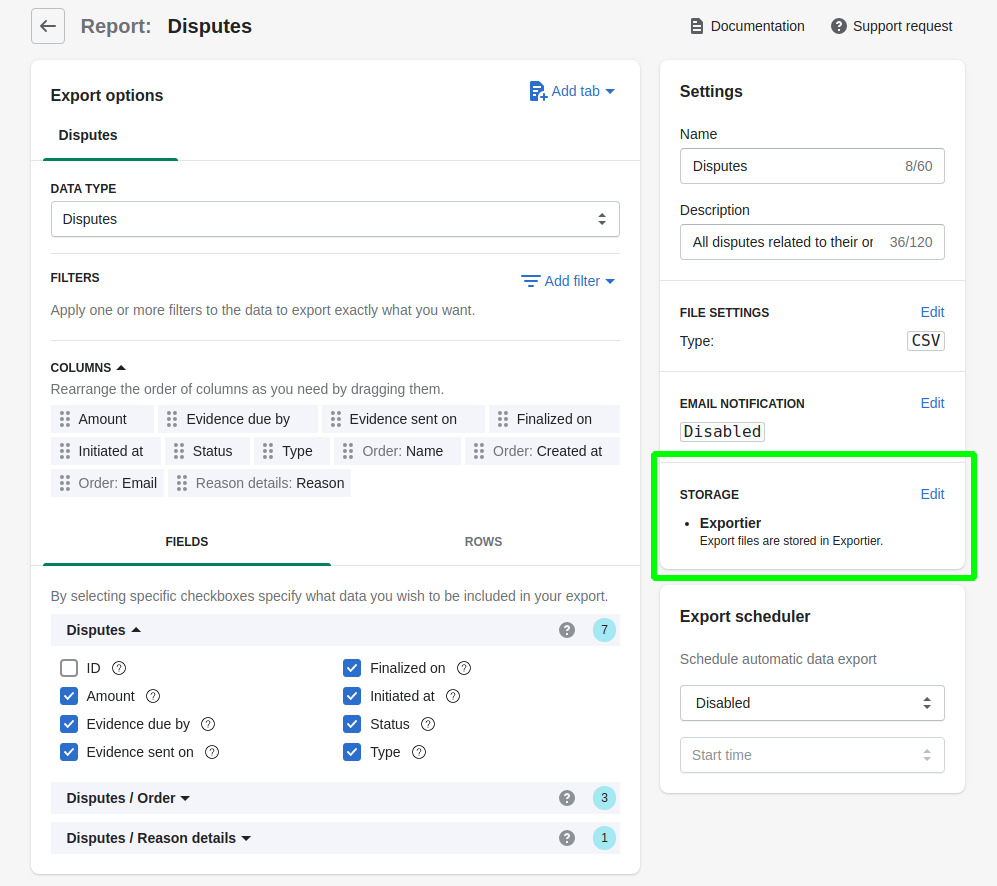
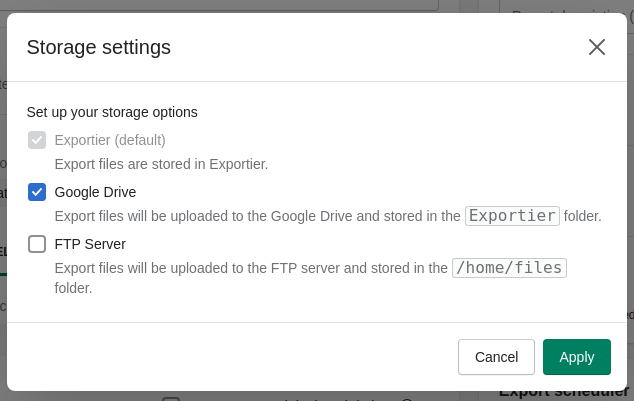
Step 2. Go to the Storage section on the right part of the Report settings screen. Click Edit.
Select the relevant checkbox to store the prepared data of this report at your Google account. Click Apply to save changes, or Cancel to discard them.
FTP support
With Exportier - Data Export you can set FTP integration and upload reports to the FTP sever.
Step 1. Set up FTP integration
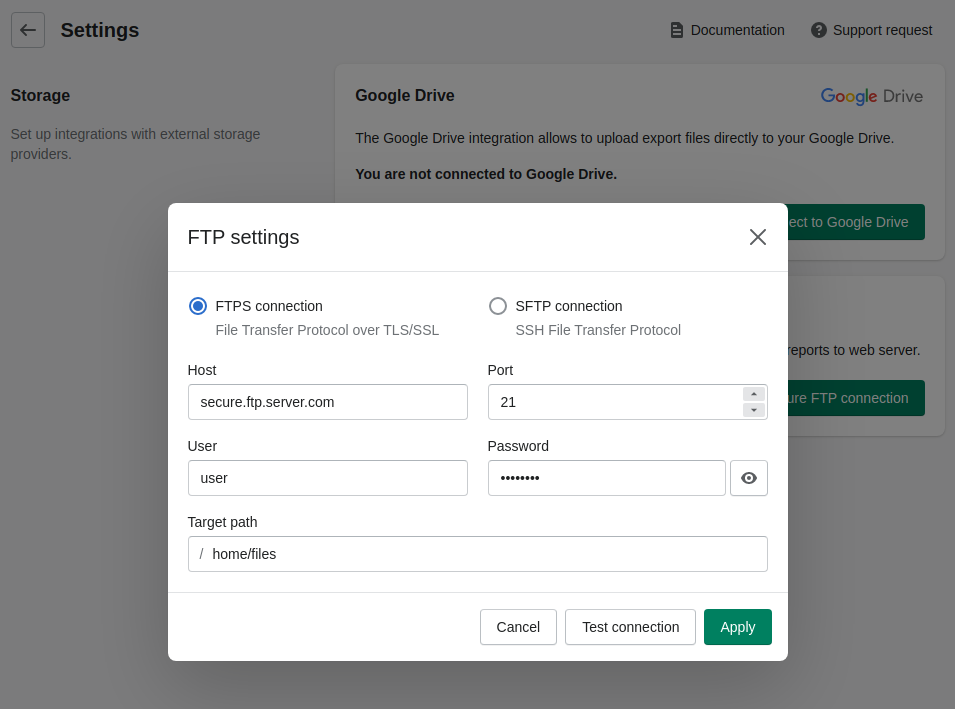
To do this please go to main Menu → Settings → Storage → Configure FTP connection → configure FTP settings → click Apply button.
To check connection to the FTP server click Test connection button.
Make sure the specified user has write access to the selected path. Otherwise, the reports will not be saved on the server.
You can disconnect FTP server anytime.
Step 2. Go to the Storage section on the right part of the Report settings screen. Click Edit.
Select the relevant checkbox to store the prepared data of this report to the connected FTP server. Click Apply to save changes, or Cancel to discard them.