| Table of Contents | ||||
|---|---|---|---|---|
|
Before you start
To be able to use Tableau Connector for ServiceNow users should be assigned to specific roles by ServiceNow System Admin. If you don’t have access to the connector, please contact your System Admin and request to assign any of the following roles: Tableau Connector for ServiceNow: User roles.

Depending on roles assigned, users can access Tableau Connector from
Platform UI
Instance-Name.service-now.com/Service Portal main page
Instance-Name.service-now.com/spTableau Connector page
Instance-Name.service-now.com/tableau_connector
How to create a data source in ServiceNow?
To create a Data Source, user should have TABLEAU ADMIN or TABLEAU EDITOR role.
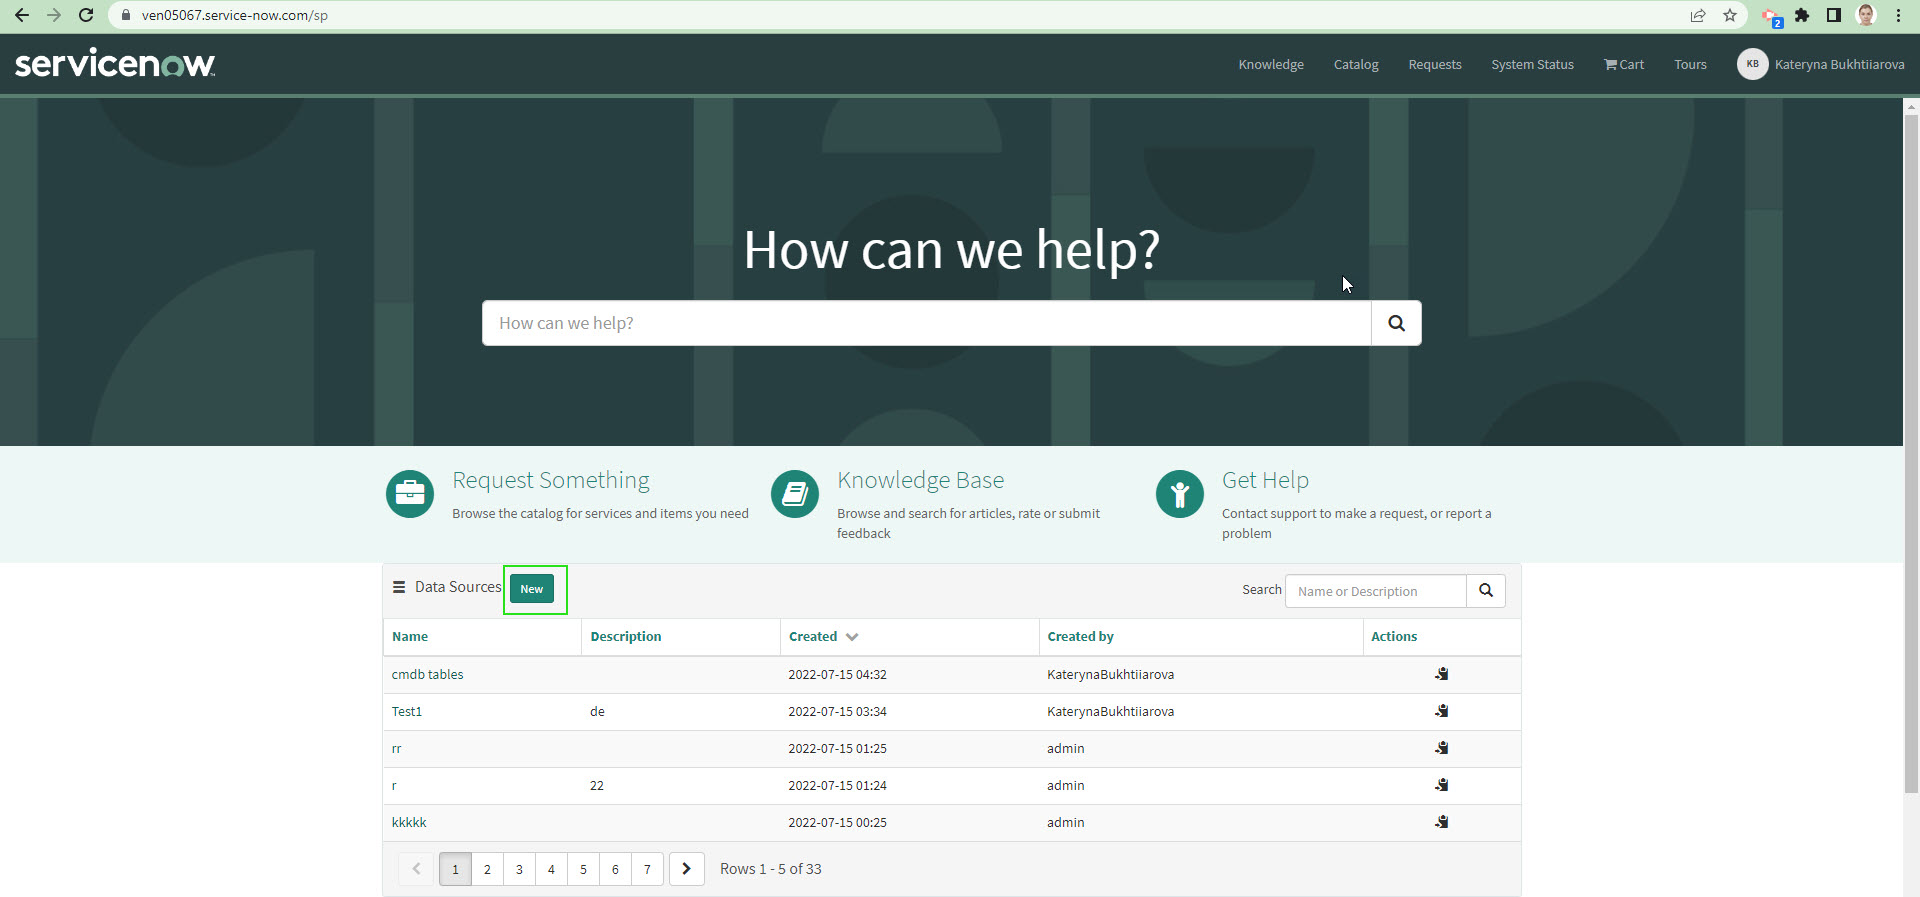
From the Service Portal Instance-Name.service-now.com/sp:
Scroll down and find Data Sources table.
Click New button.
or
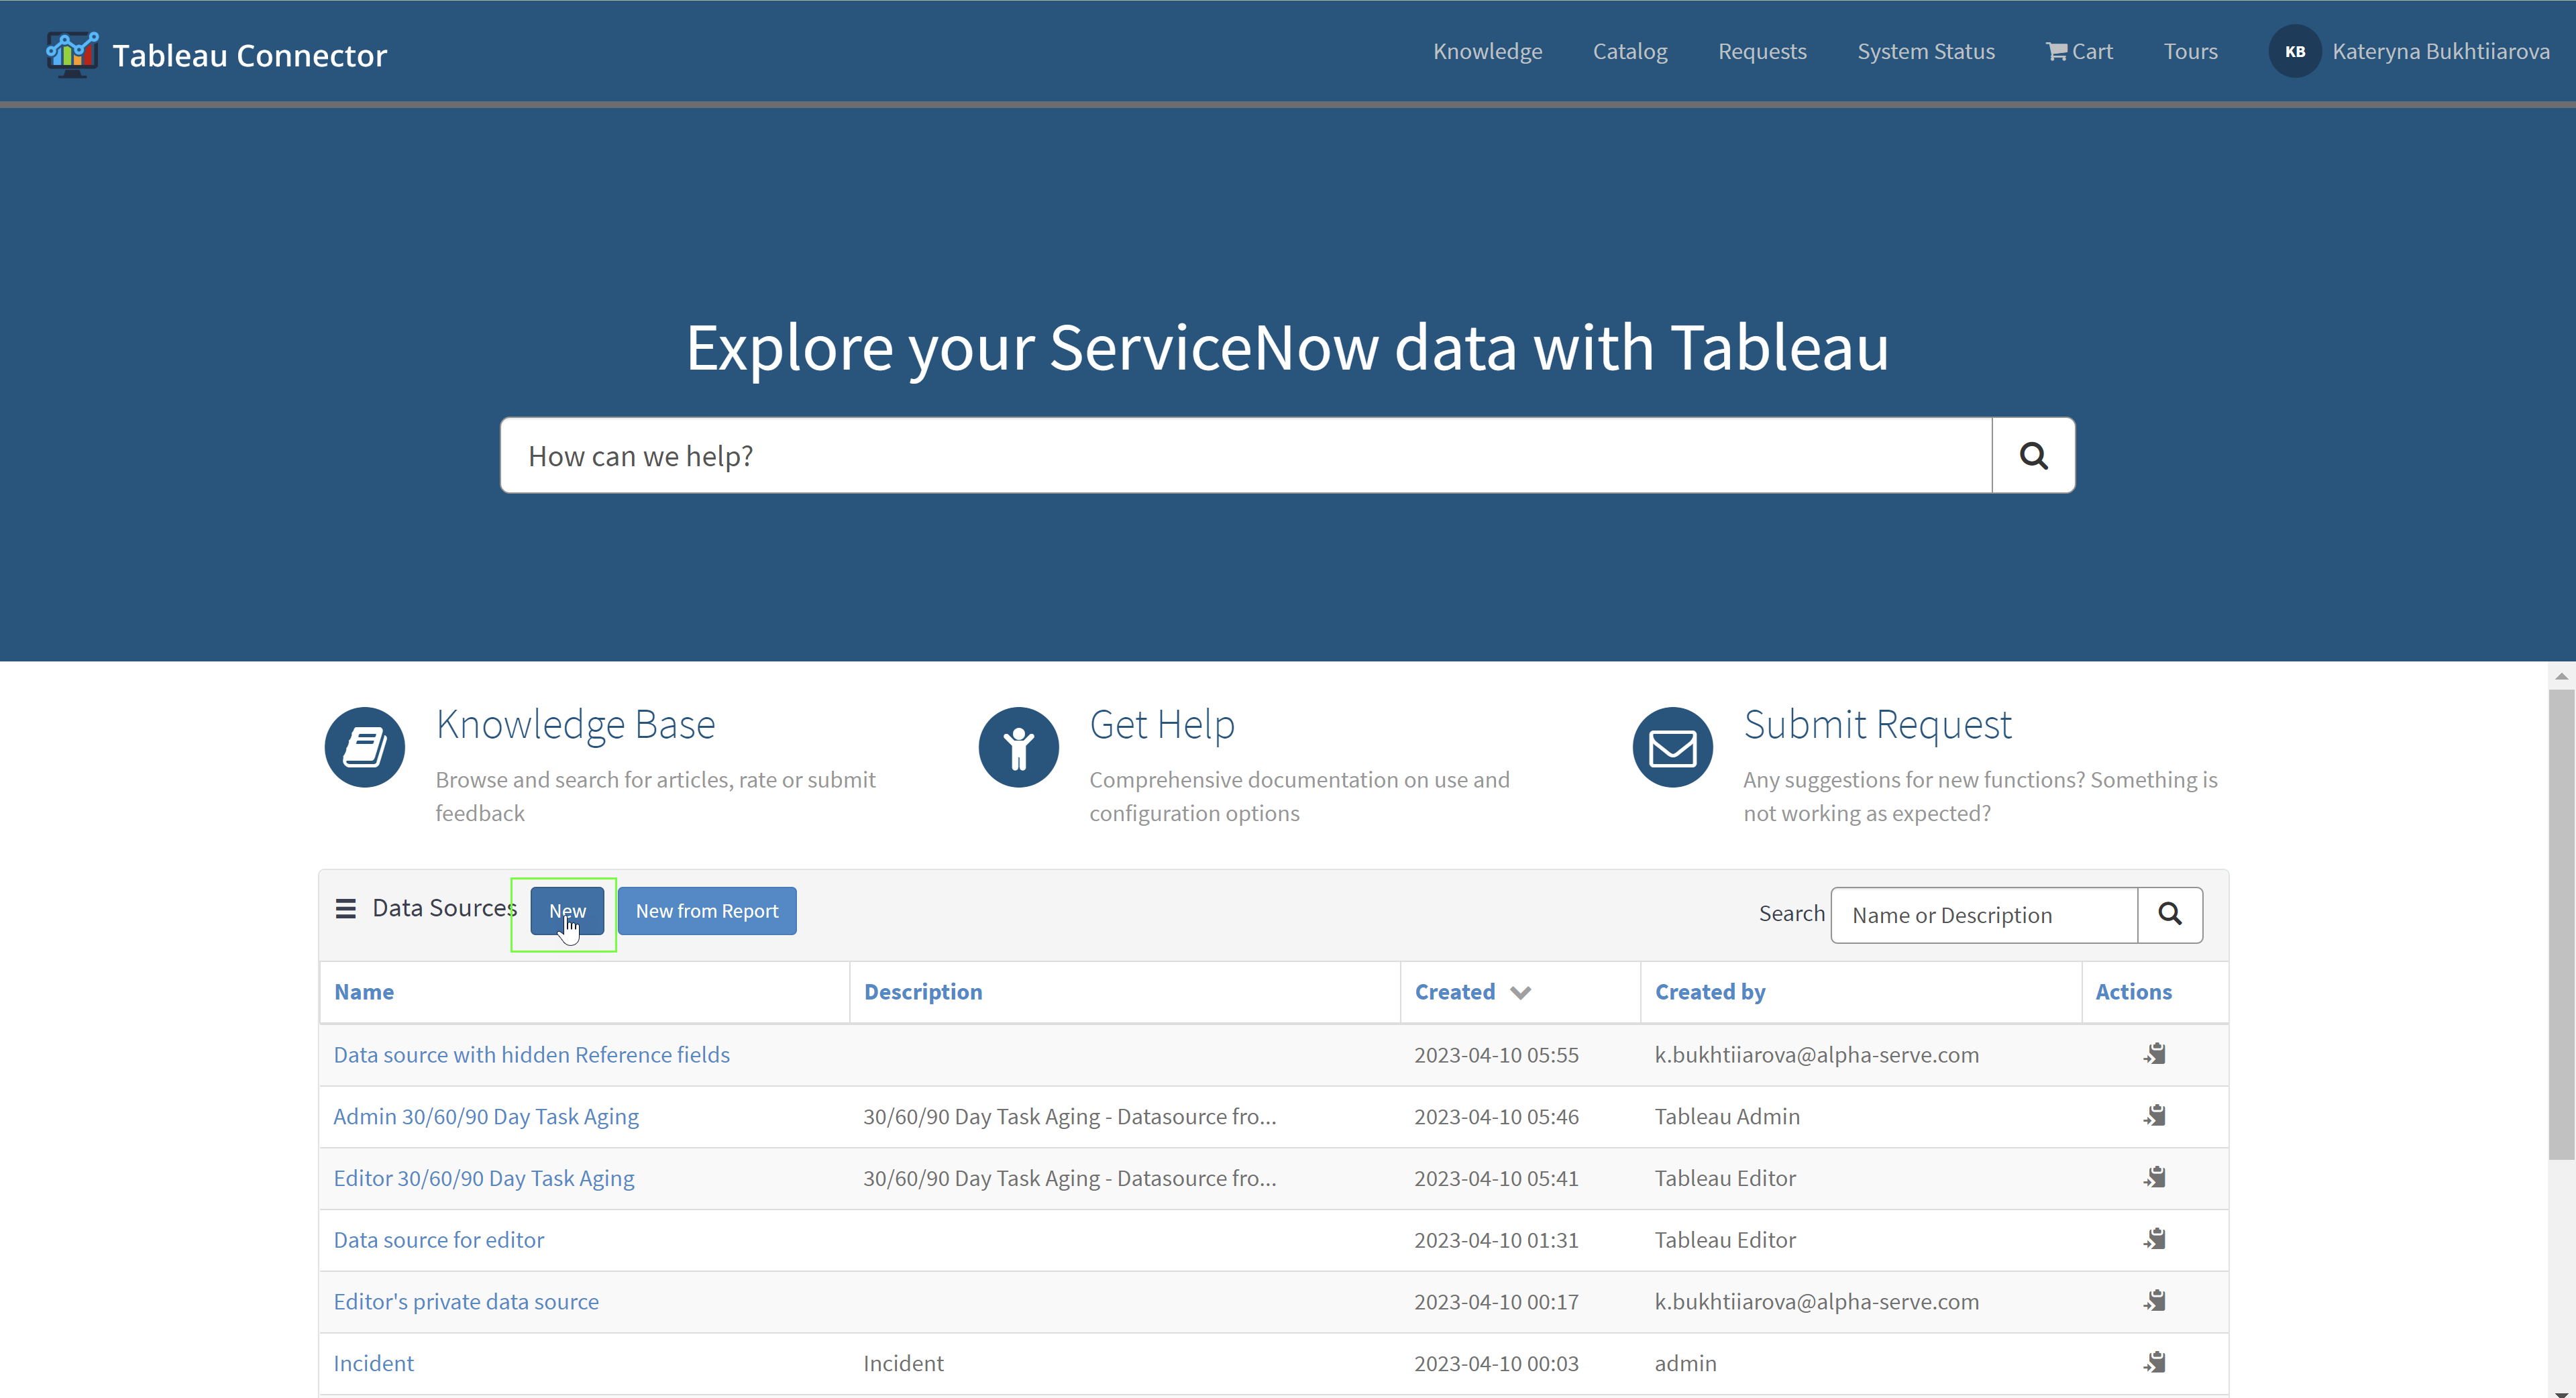
From the Tableau Connector pageInstance-Name.service-now.com/tableau_connector:
Click New button.
Fill in
Data Source name - any descriptive and short name
Description (optional) - any additional details about datasource if needed
Set Rows limit - the number of rows imported into the Tableau, blank by default to export without limit
Check the Disable editing for other users
- setting thatallows restricting
Data Sourcedata source editing for those who is not creator or not
SERVICENOW Admin (SERVICENOWServiceNow Admin.
Option is not selected by default and it means that any user can edit the data source.
If option is checked, but no Groups are selected it means that only Owner and ServiceNow Admin can edit
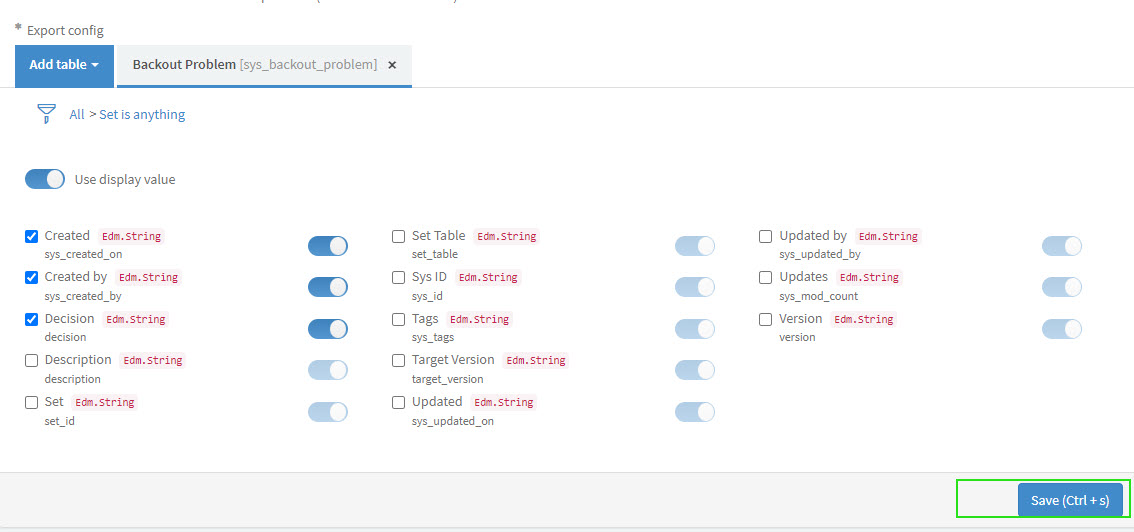
all data sources by default)Add table to configure Export config
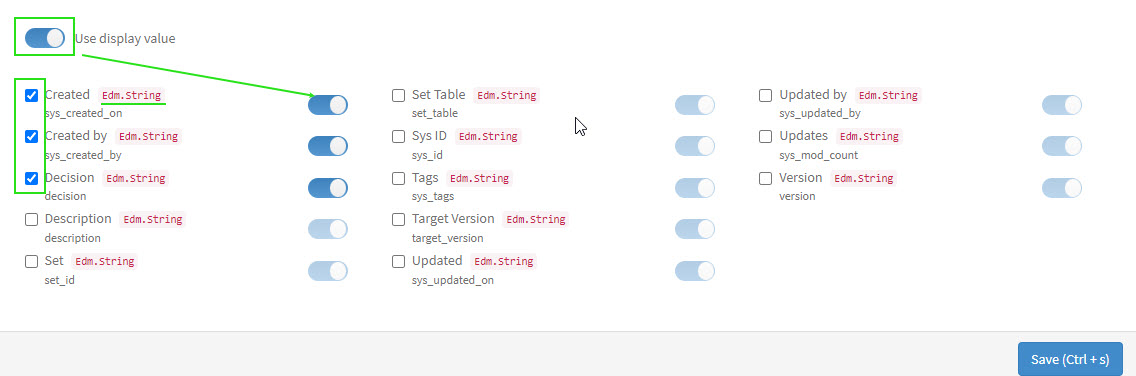
Set Use display value if need export data in string format
Click Save.
the data source.

[COMING SOON]Selecting Group(s) of users will allow the editing of data source for all group members.

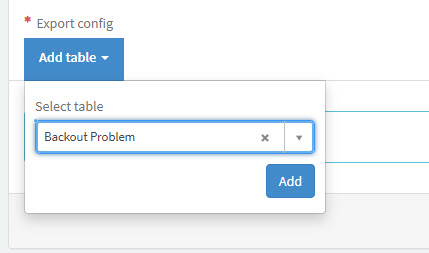
To add tables, click Add Table button and start to type the table name in the Search field. Or alternatively, find the table from the list by scrolling the list down.
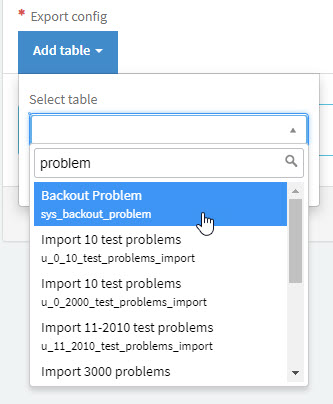
As soon as table is selected, click Add button. By default table fields are not selected, no filter is set and Use display value switchers (global and for each field). Include any amount of tables and fields in your Data Source.
After adding the table, select fields needed for the reports. Export any ServiceNow tables and fields (including Custom tables and fields).
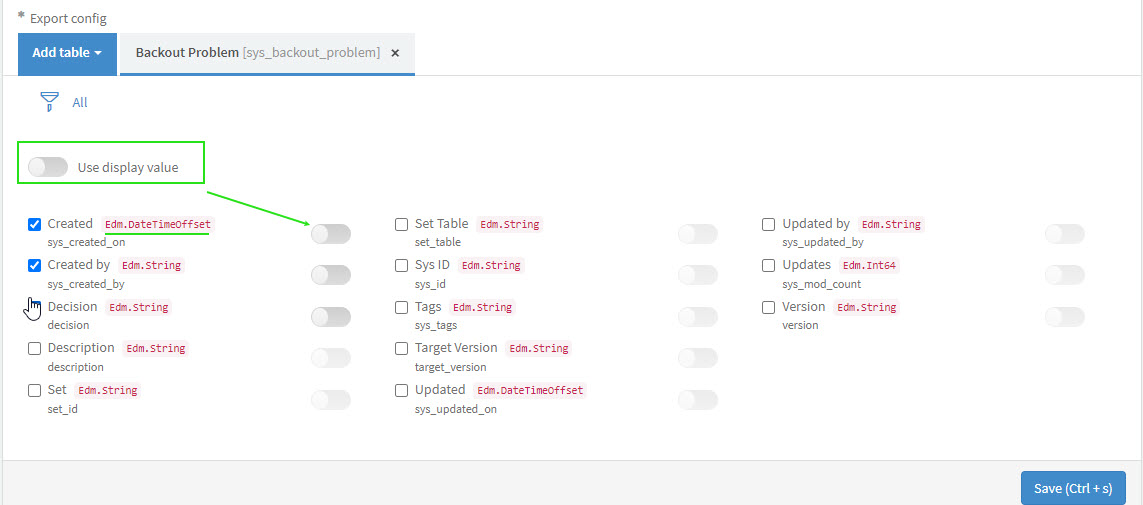
Set Use display value as turn on if need export data in String format
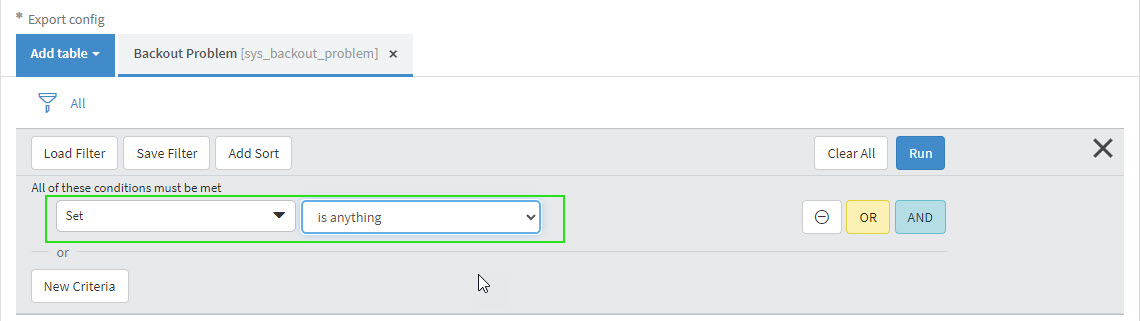
To narrow down export results, a filter can be applied to the tables.
To configure a filter, click Filter icon and configure the conditions.
Add conditions and click on Run button. Filter is set.


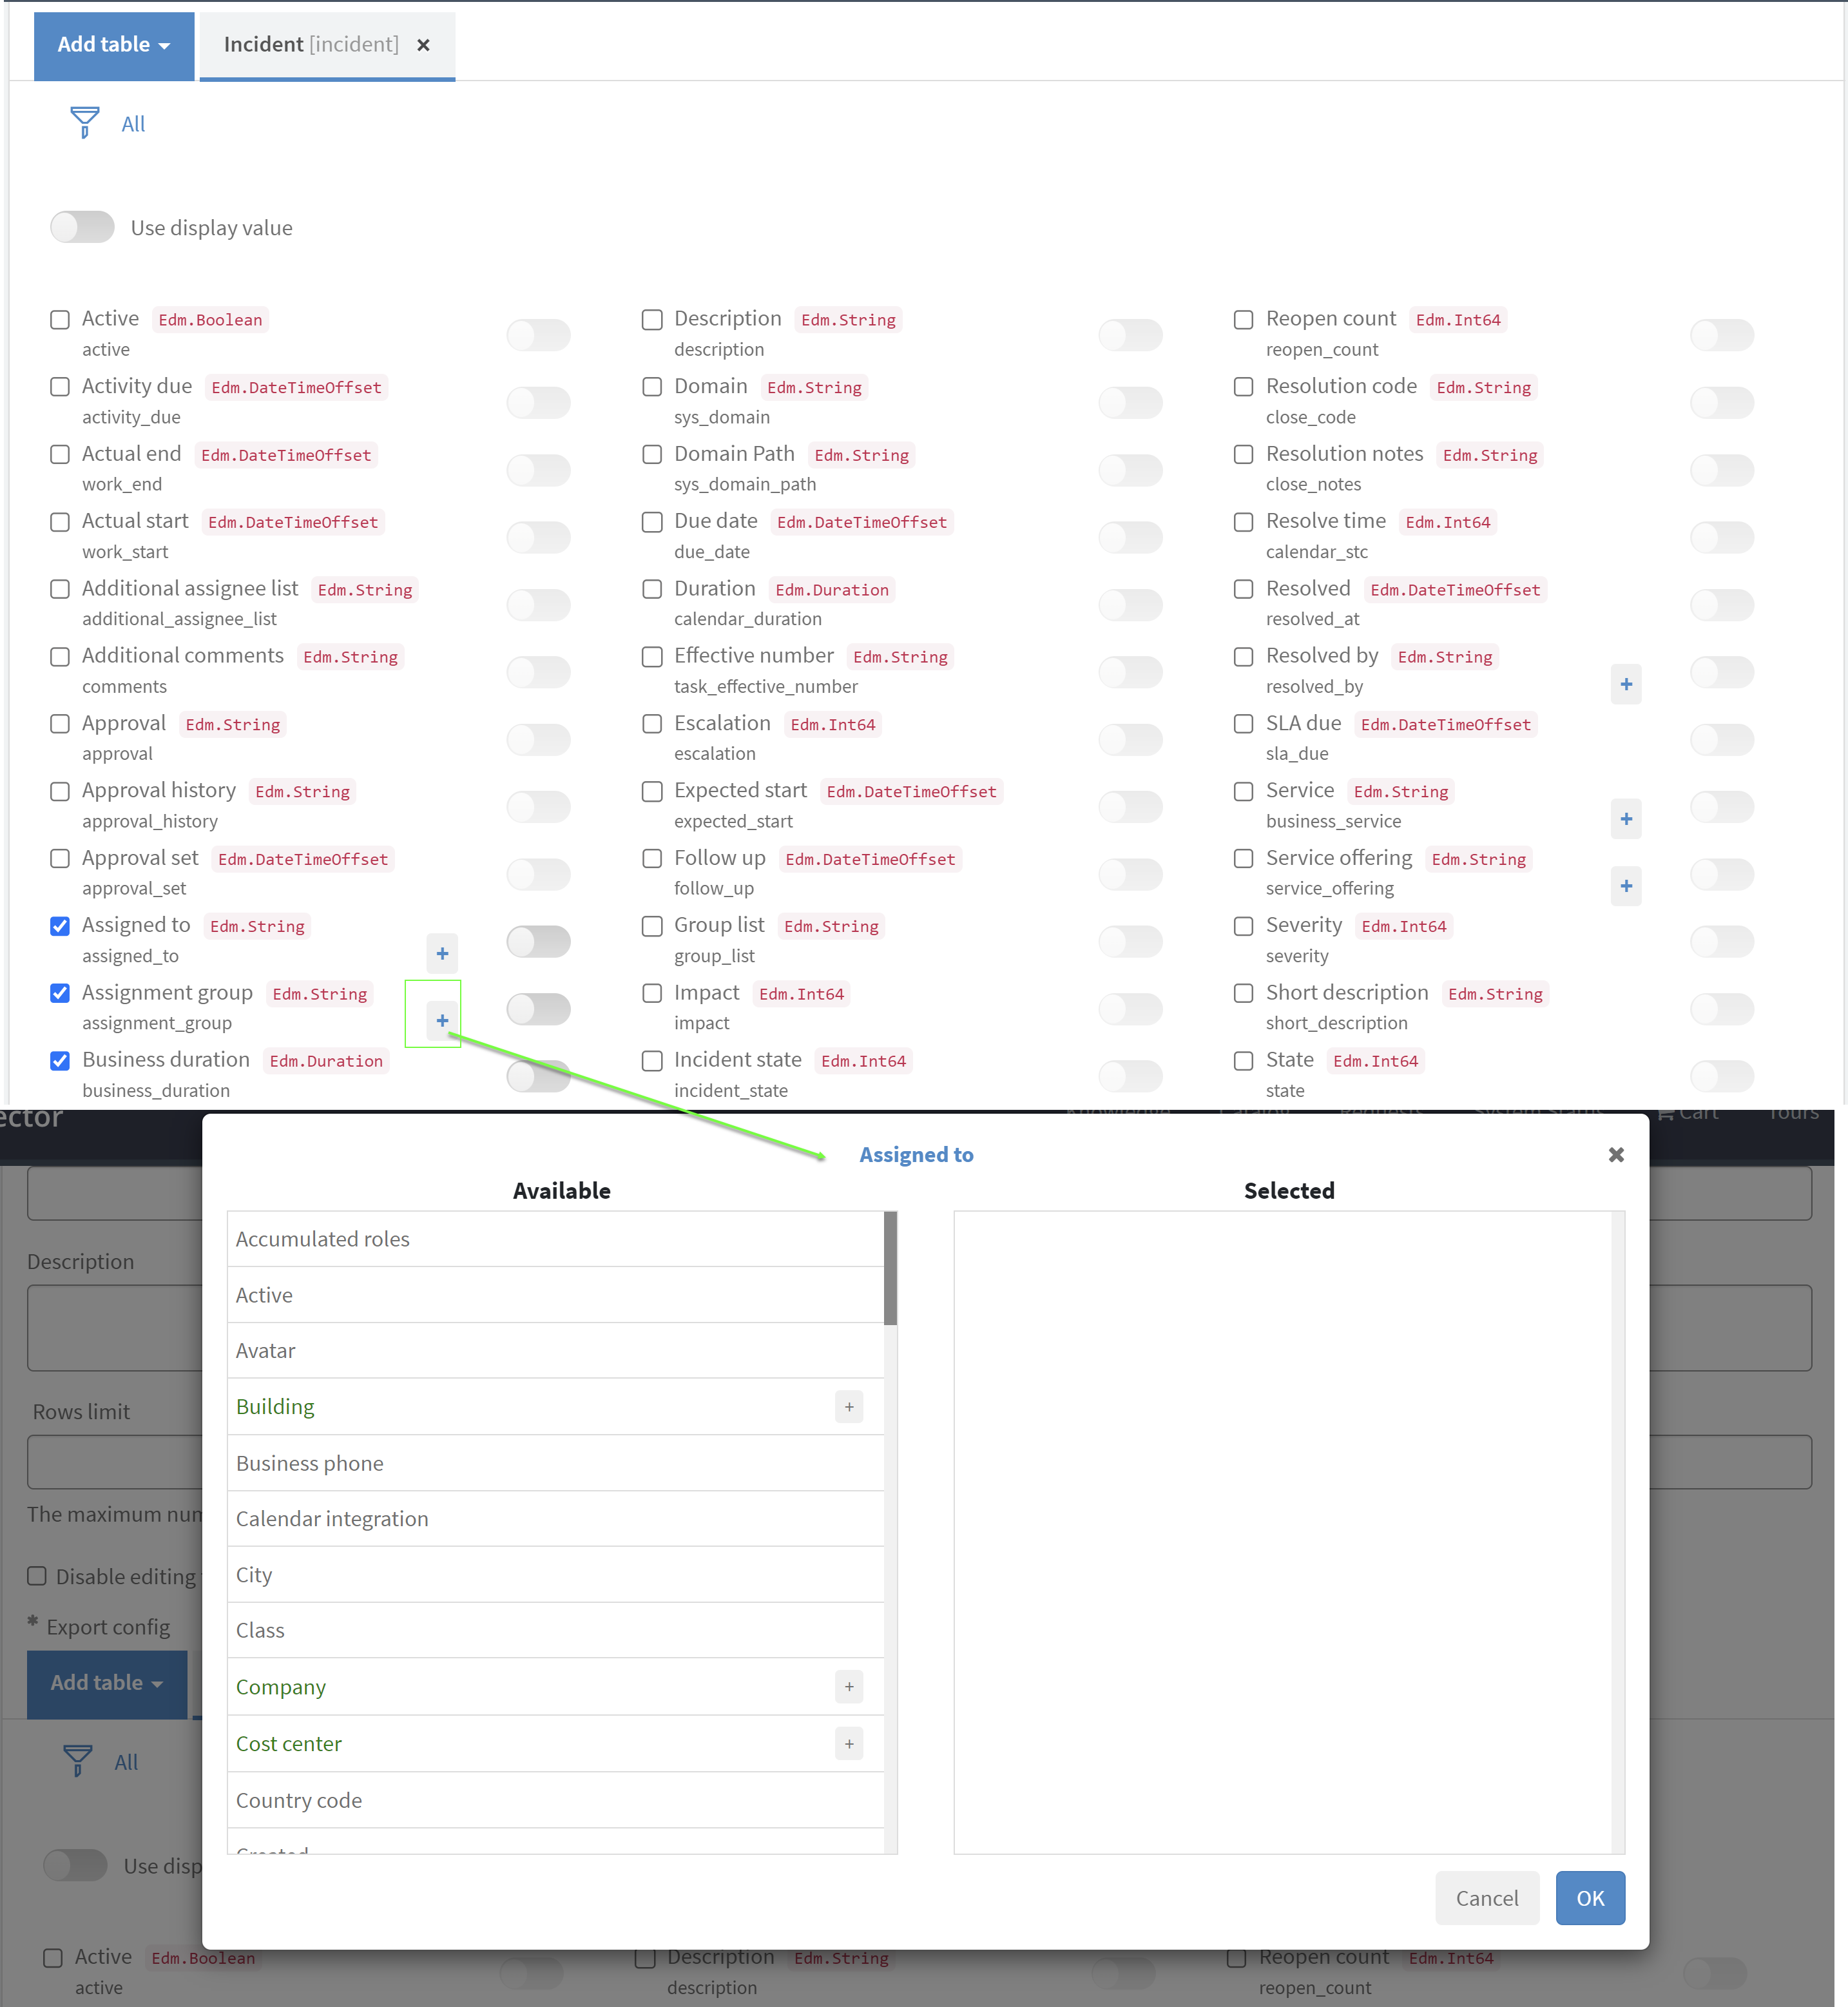
In some cases, it can be a table that contains fields as a Reference type. Click on the “+“ icon and, in opened dialog, select referenced fields that need to be exported. Click OK to close the dialog.
NOTE: It became possible to export not only parent-field but also child fields from Tableau Connector version 1.0.2. For more details, navigate to Use a dot-walking mechanism to export Reference type data
To save the data source, click Save button at the end of the page.
How to import data into Tableau Desktop(Public Edition)?
From the Service Portal Instance-Name.service-now.com/sp:
Scroll down and find Data Sources table.
Find the data source in the list using Search functionality. Pay attention that search is possible by Name or Description.
From the Tableau Connector page Instance-Name.service-now.com/tableau_connector:
Find the data source in the list using Show Matching or Filter Out filters.

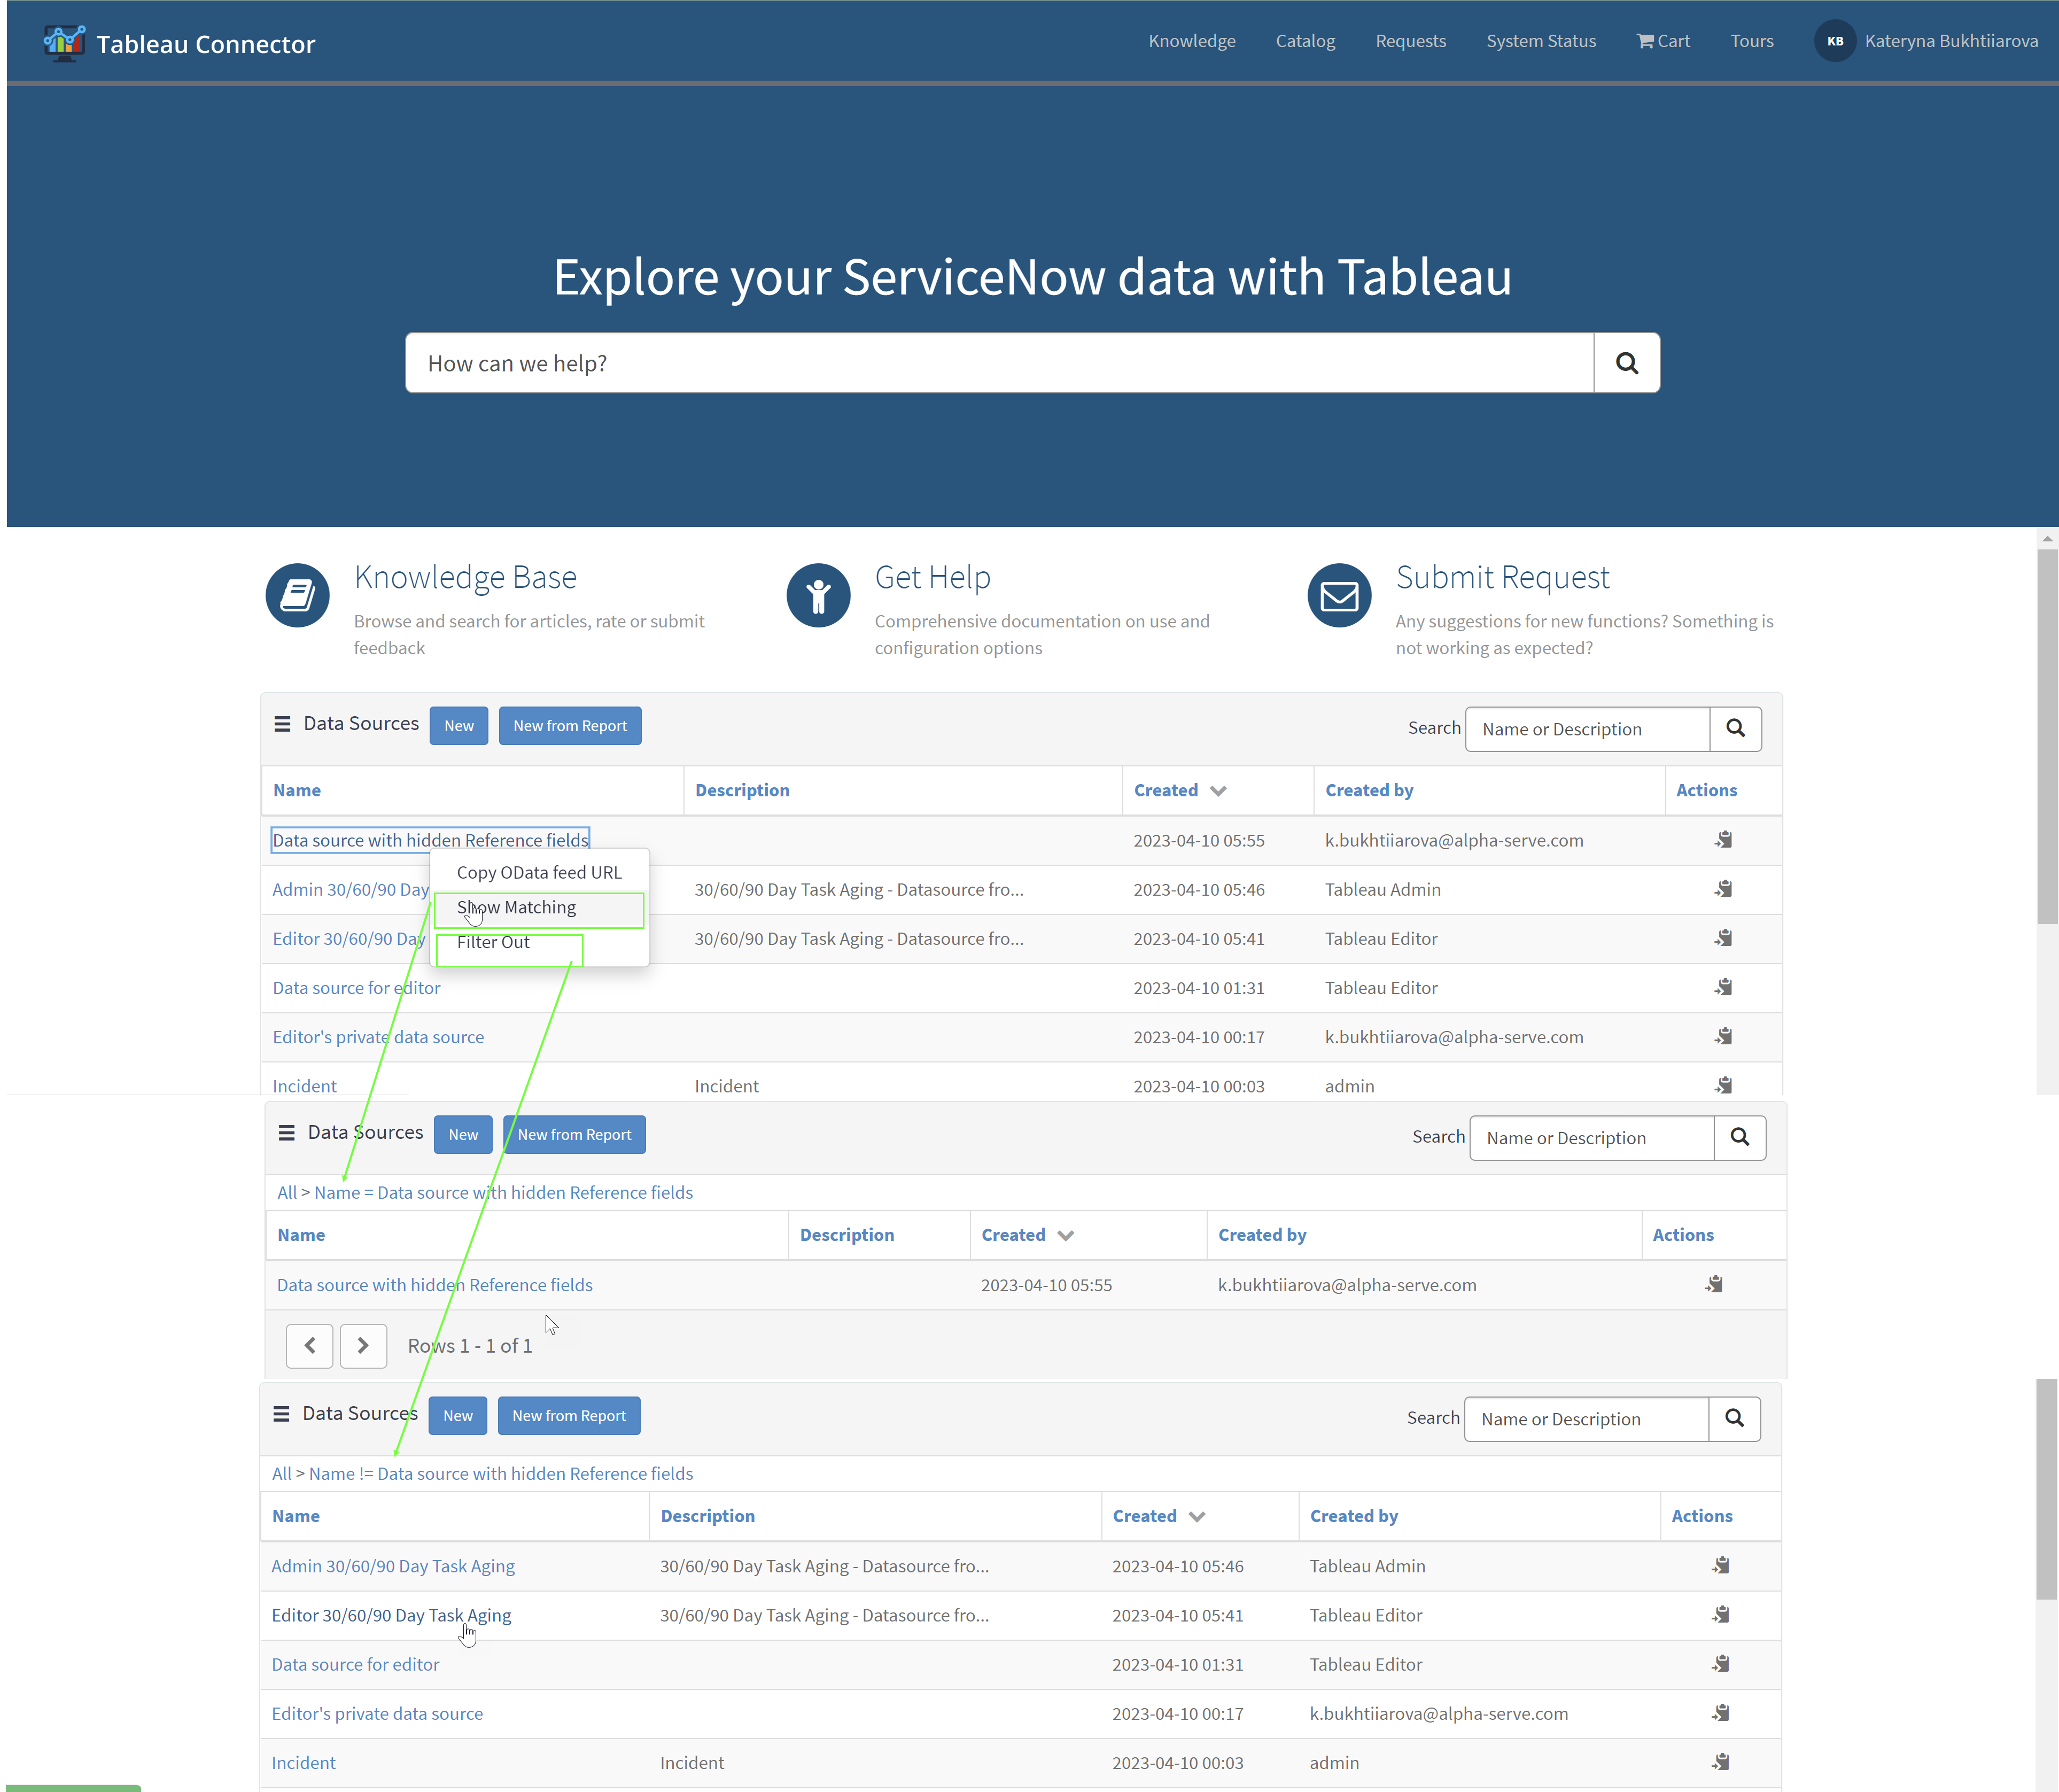
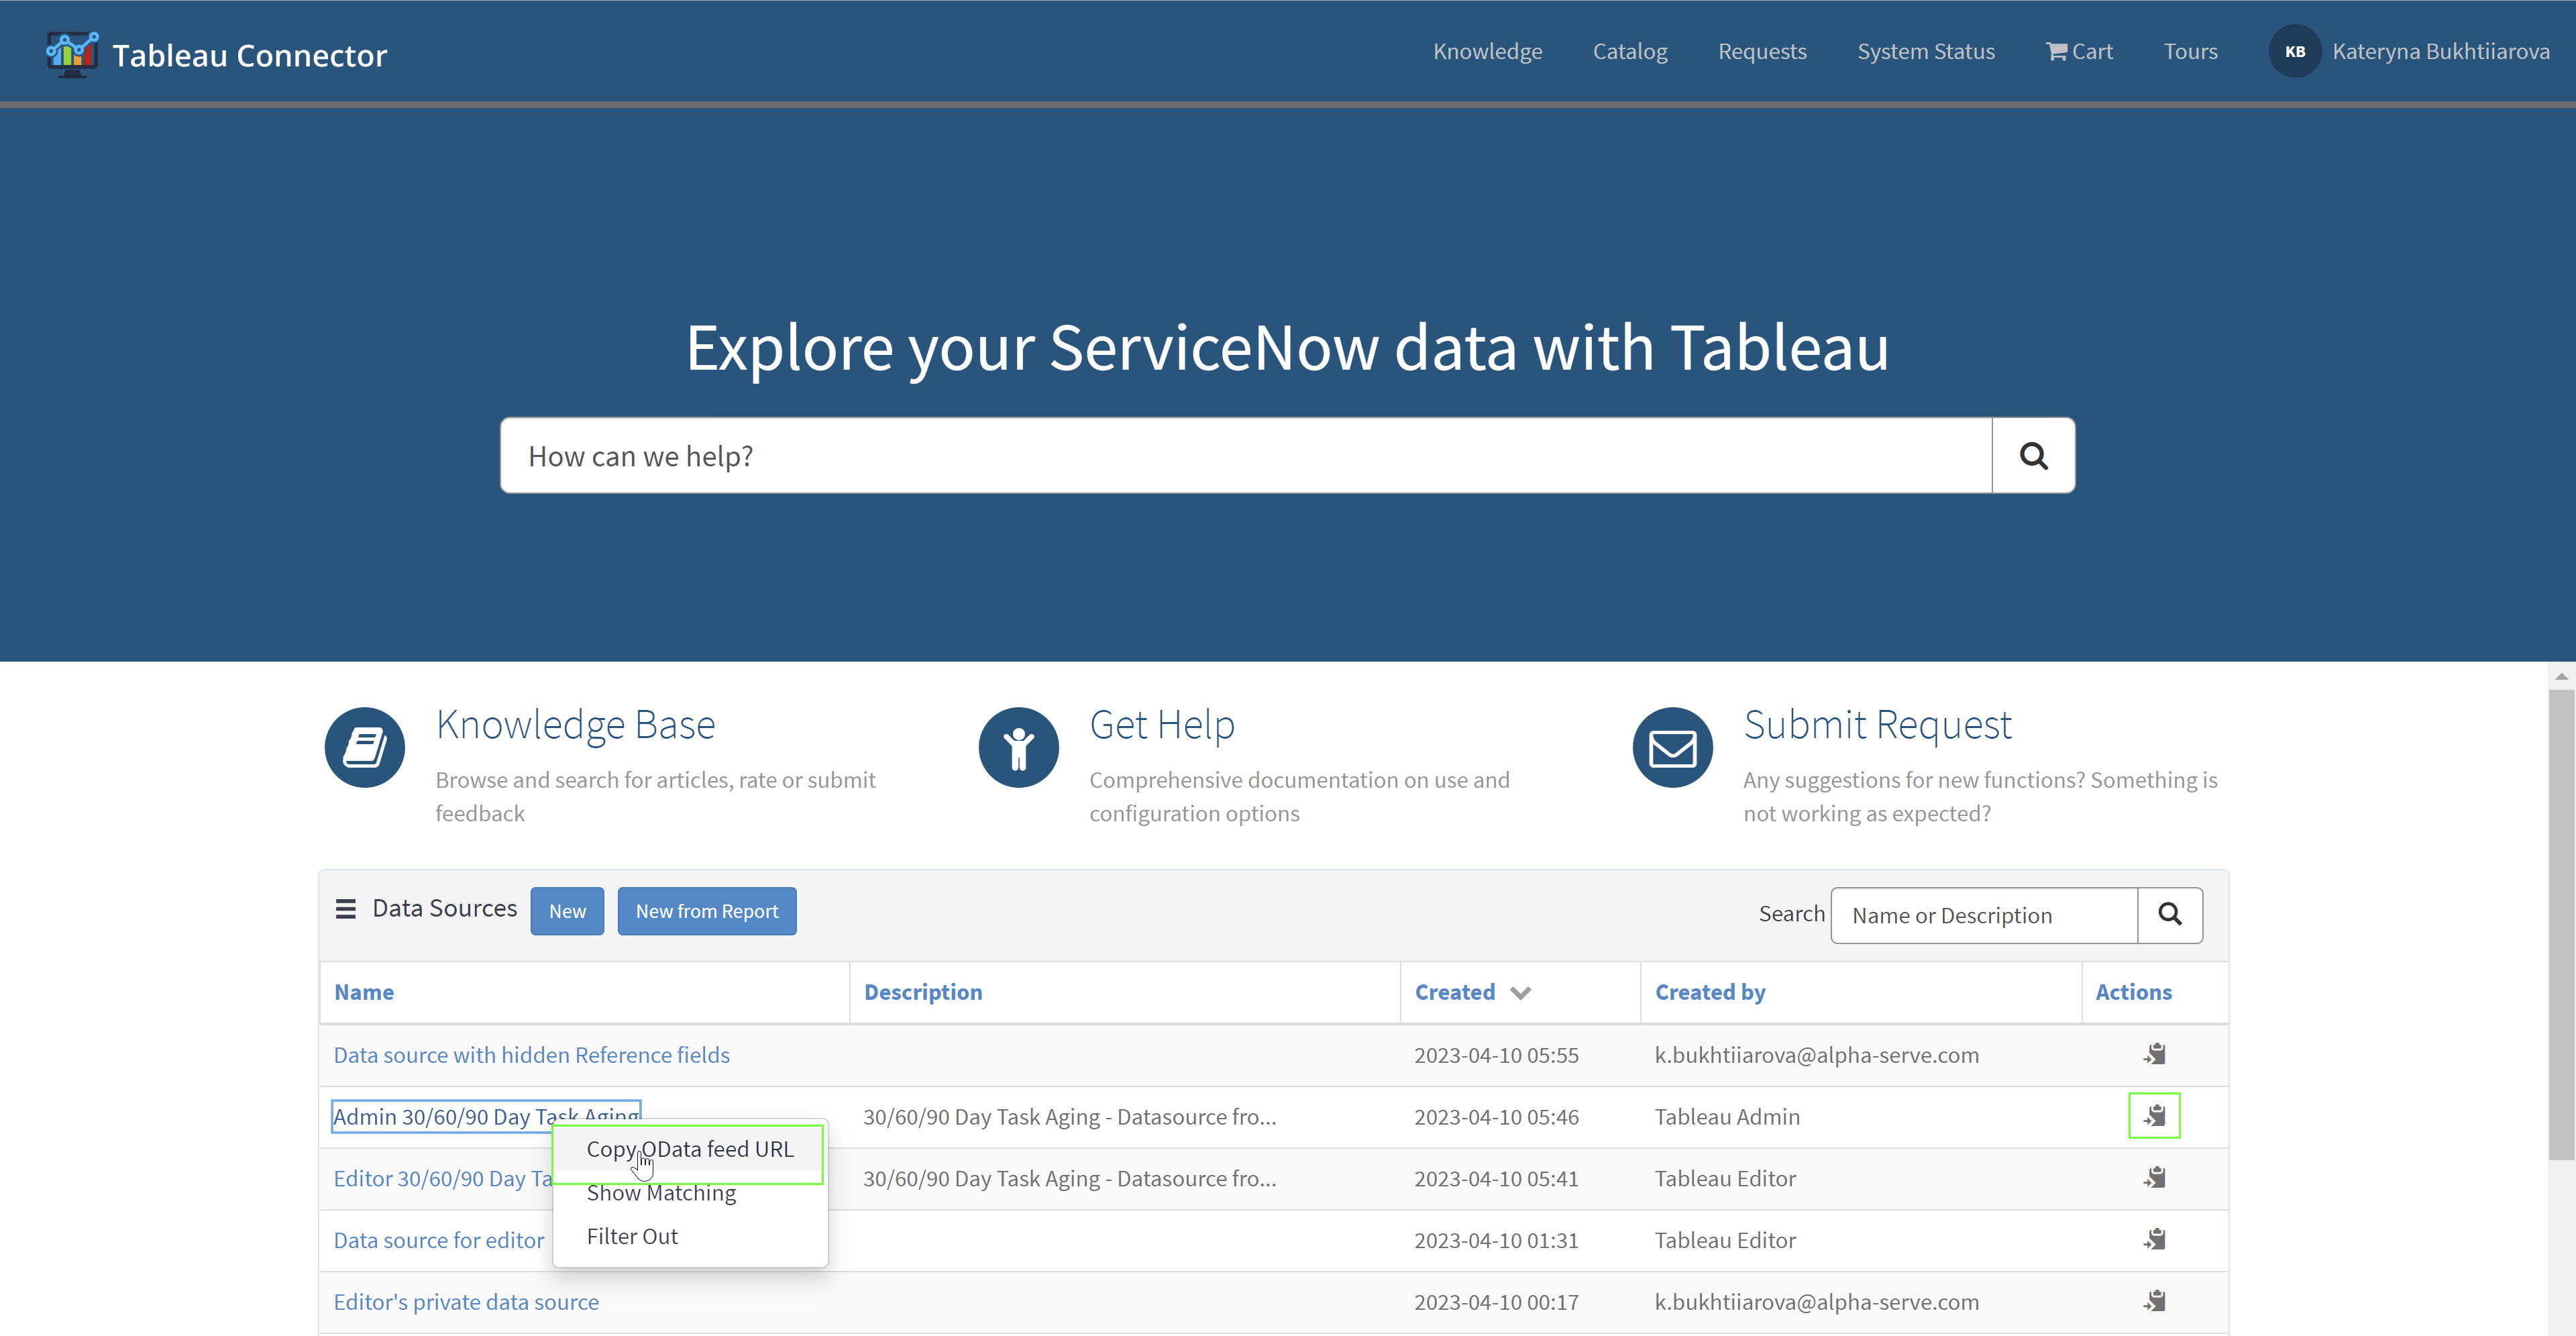
Right-click on the data source to open the menu.
Click Copy OData feed URL. Or use direct Copy action next to each data source.
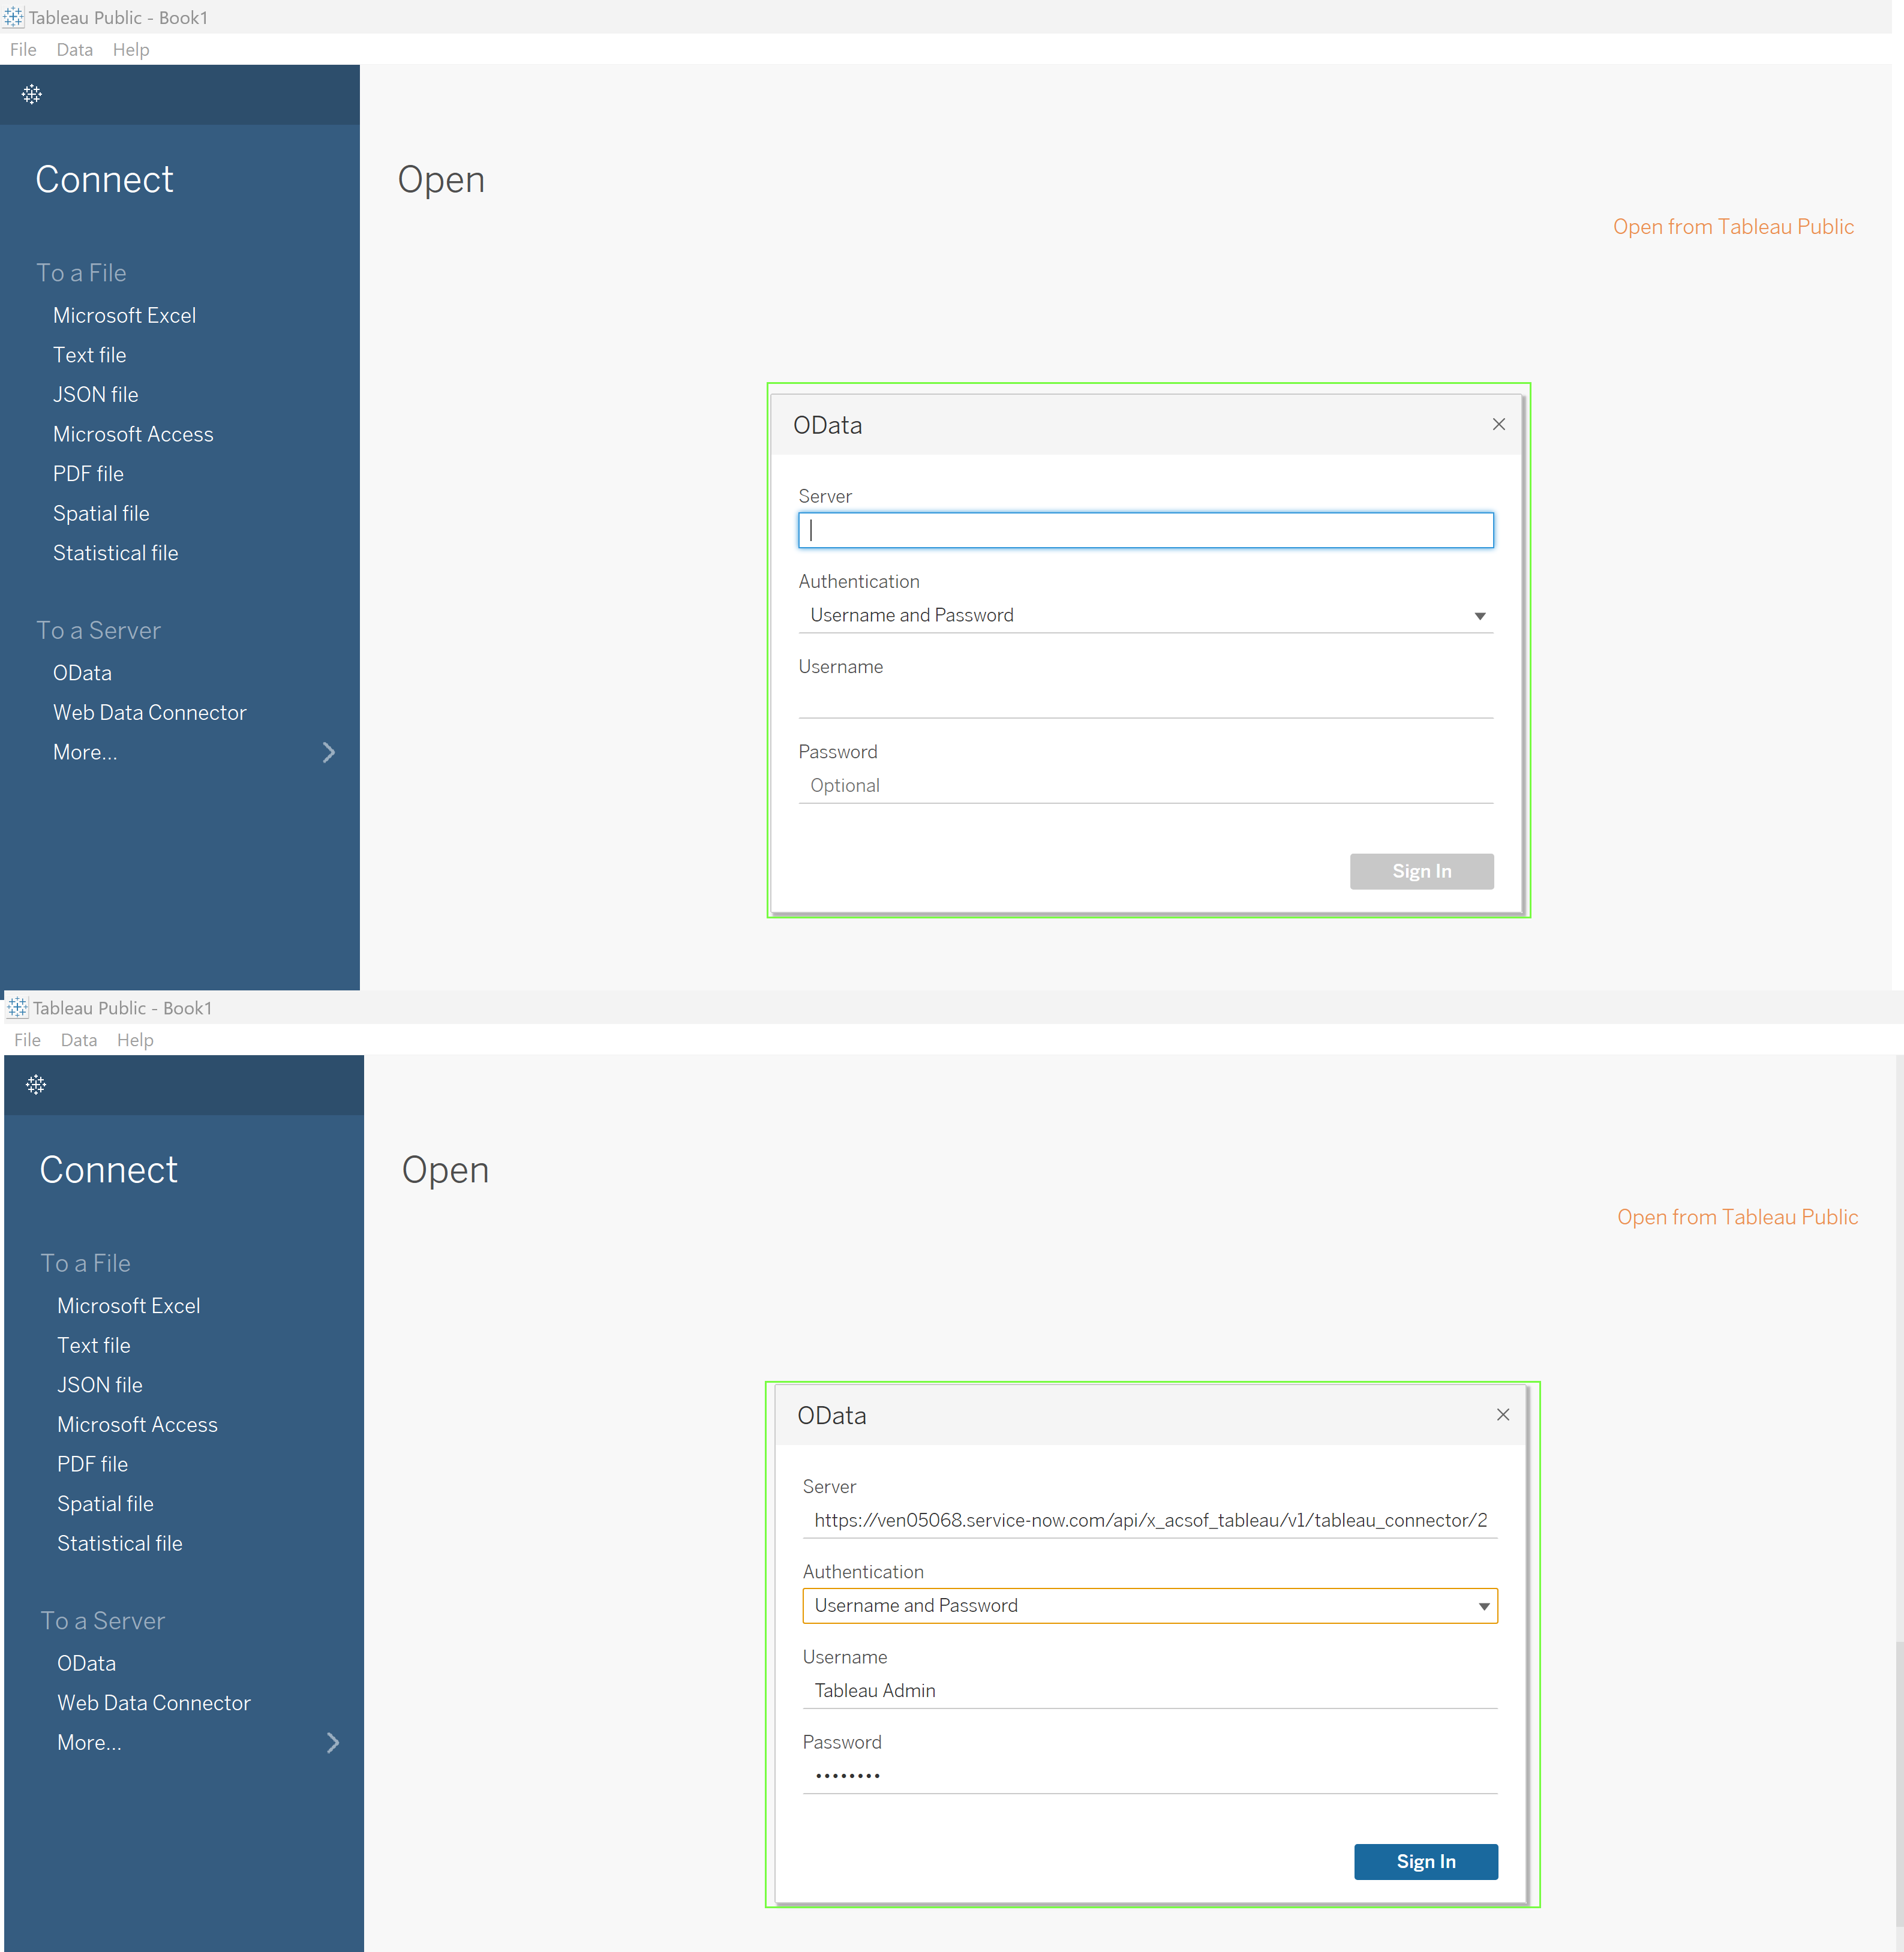
In the Tableau Desktop
Click OData
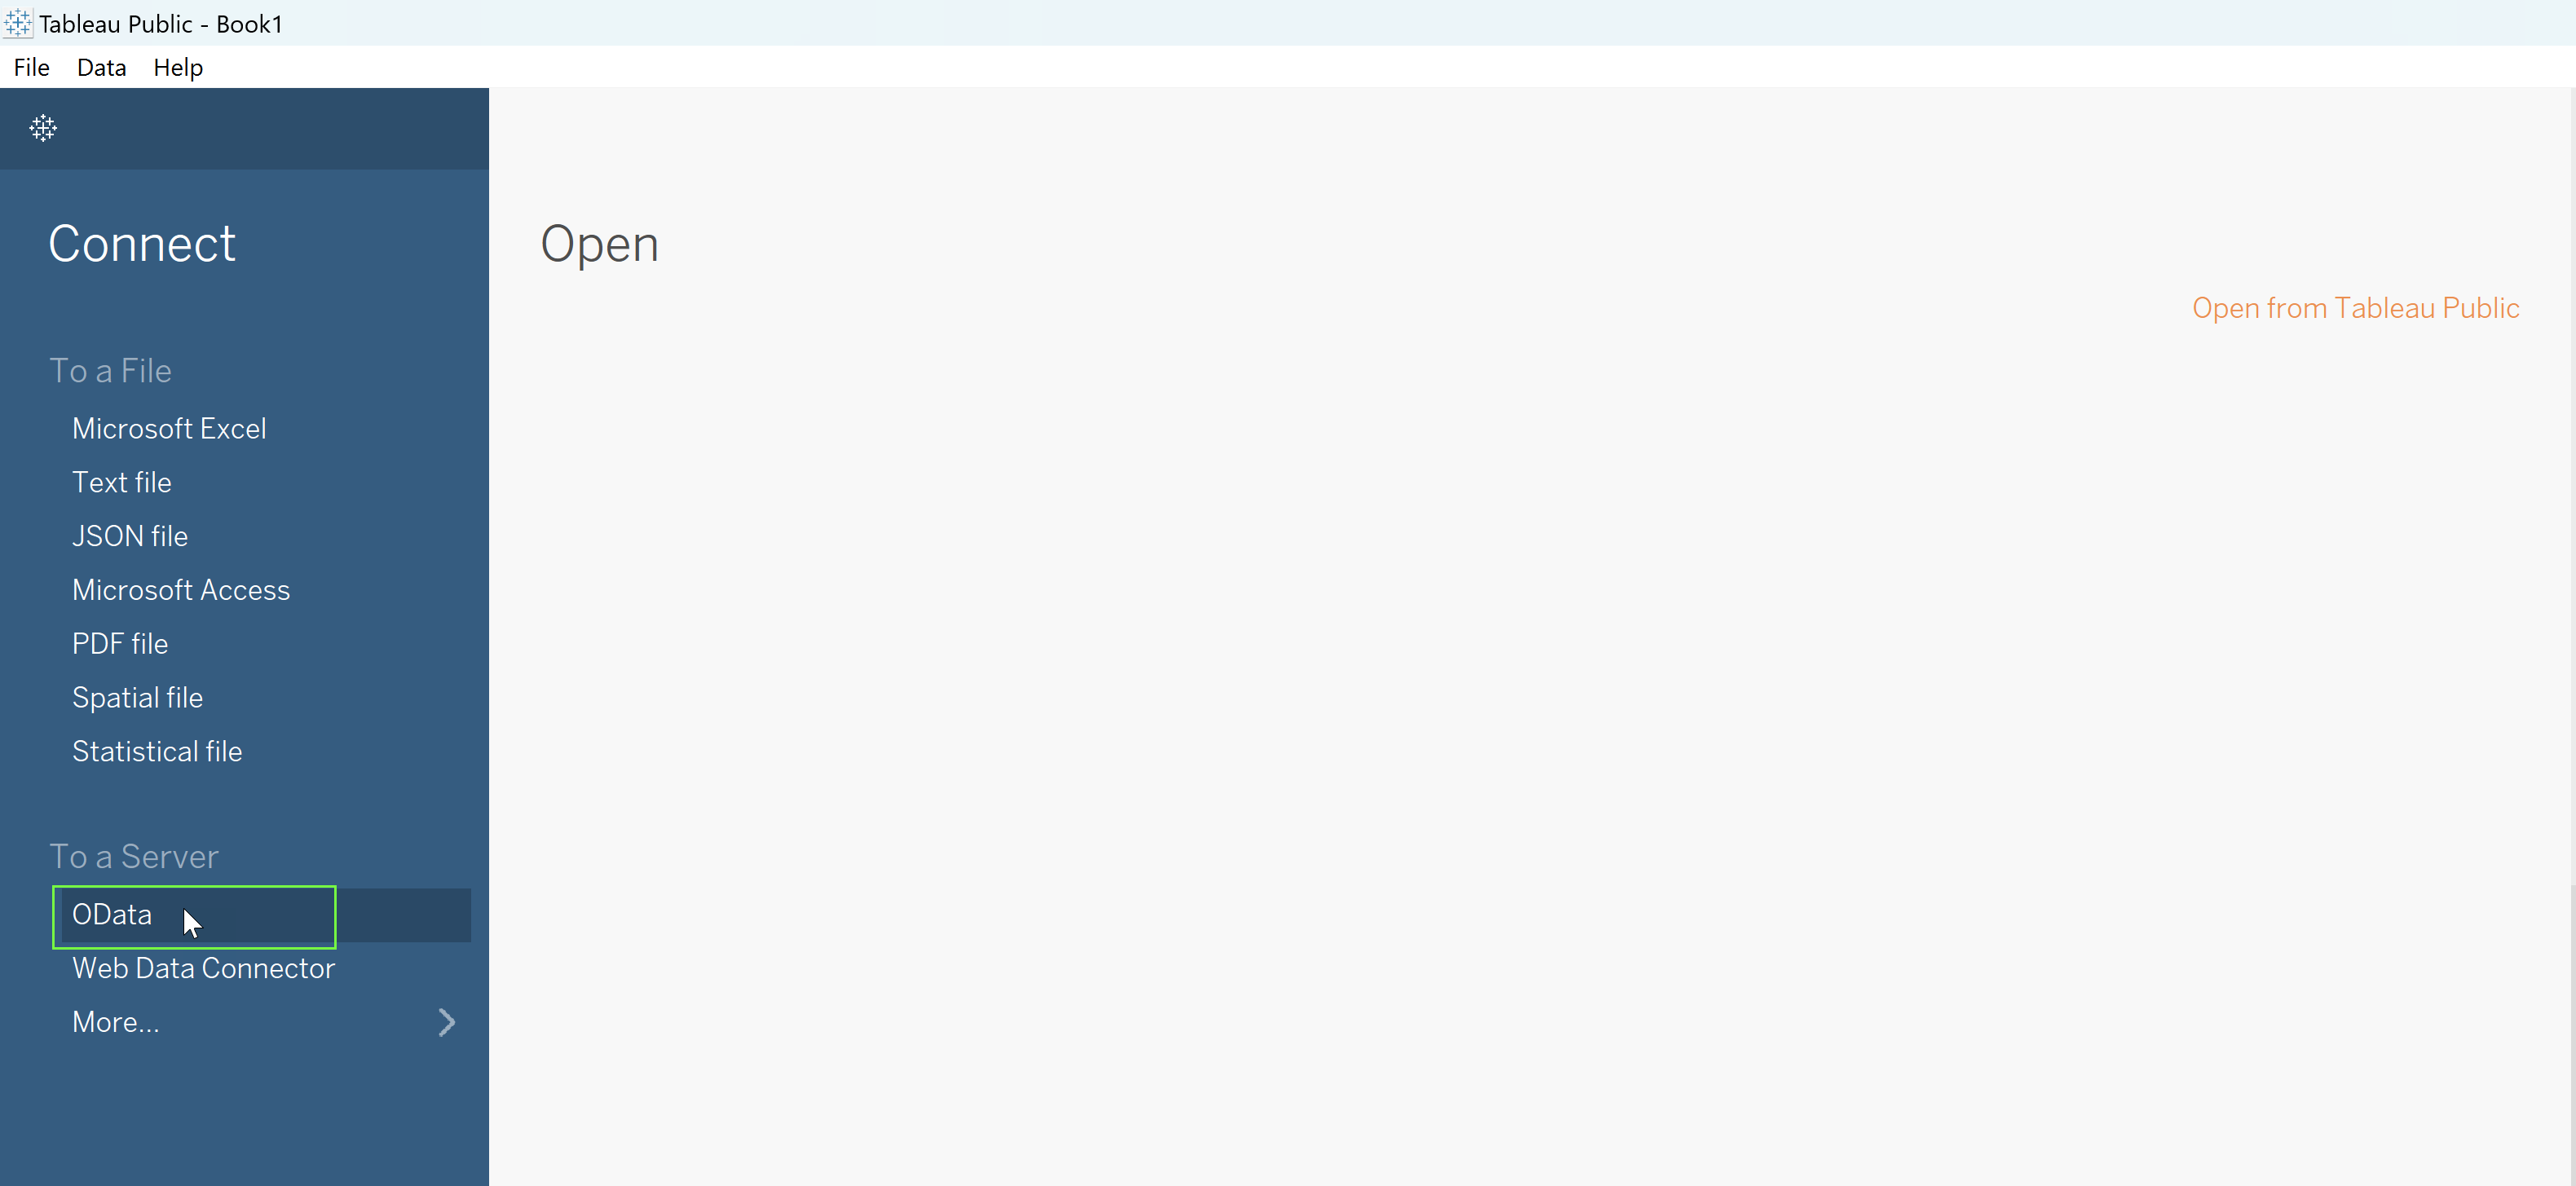
In opened window
Enter copied OData URL in Server field
Select Username and Password authentication type
Enter Username
Enter Password
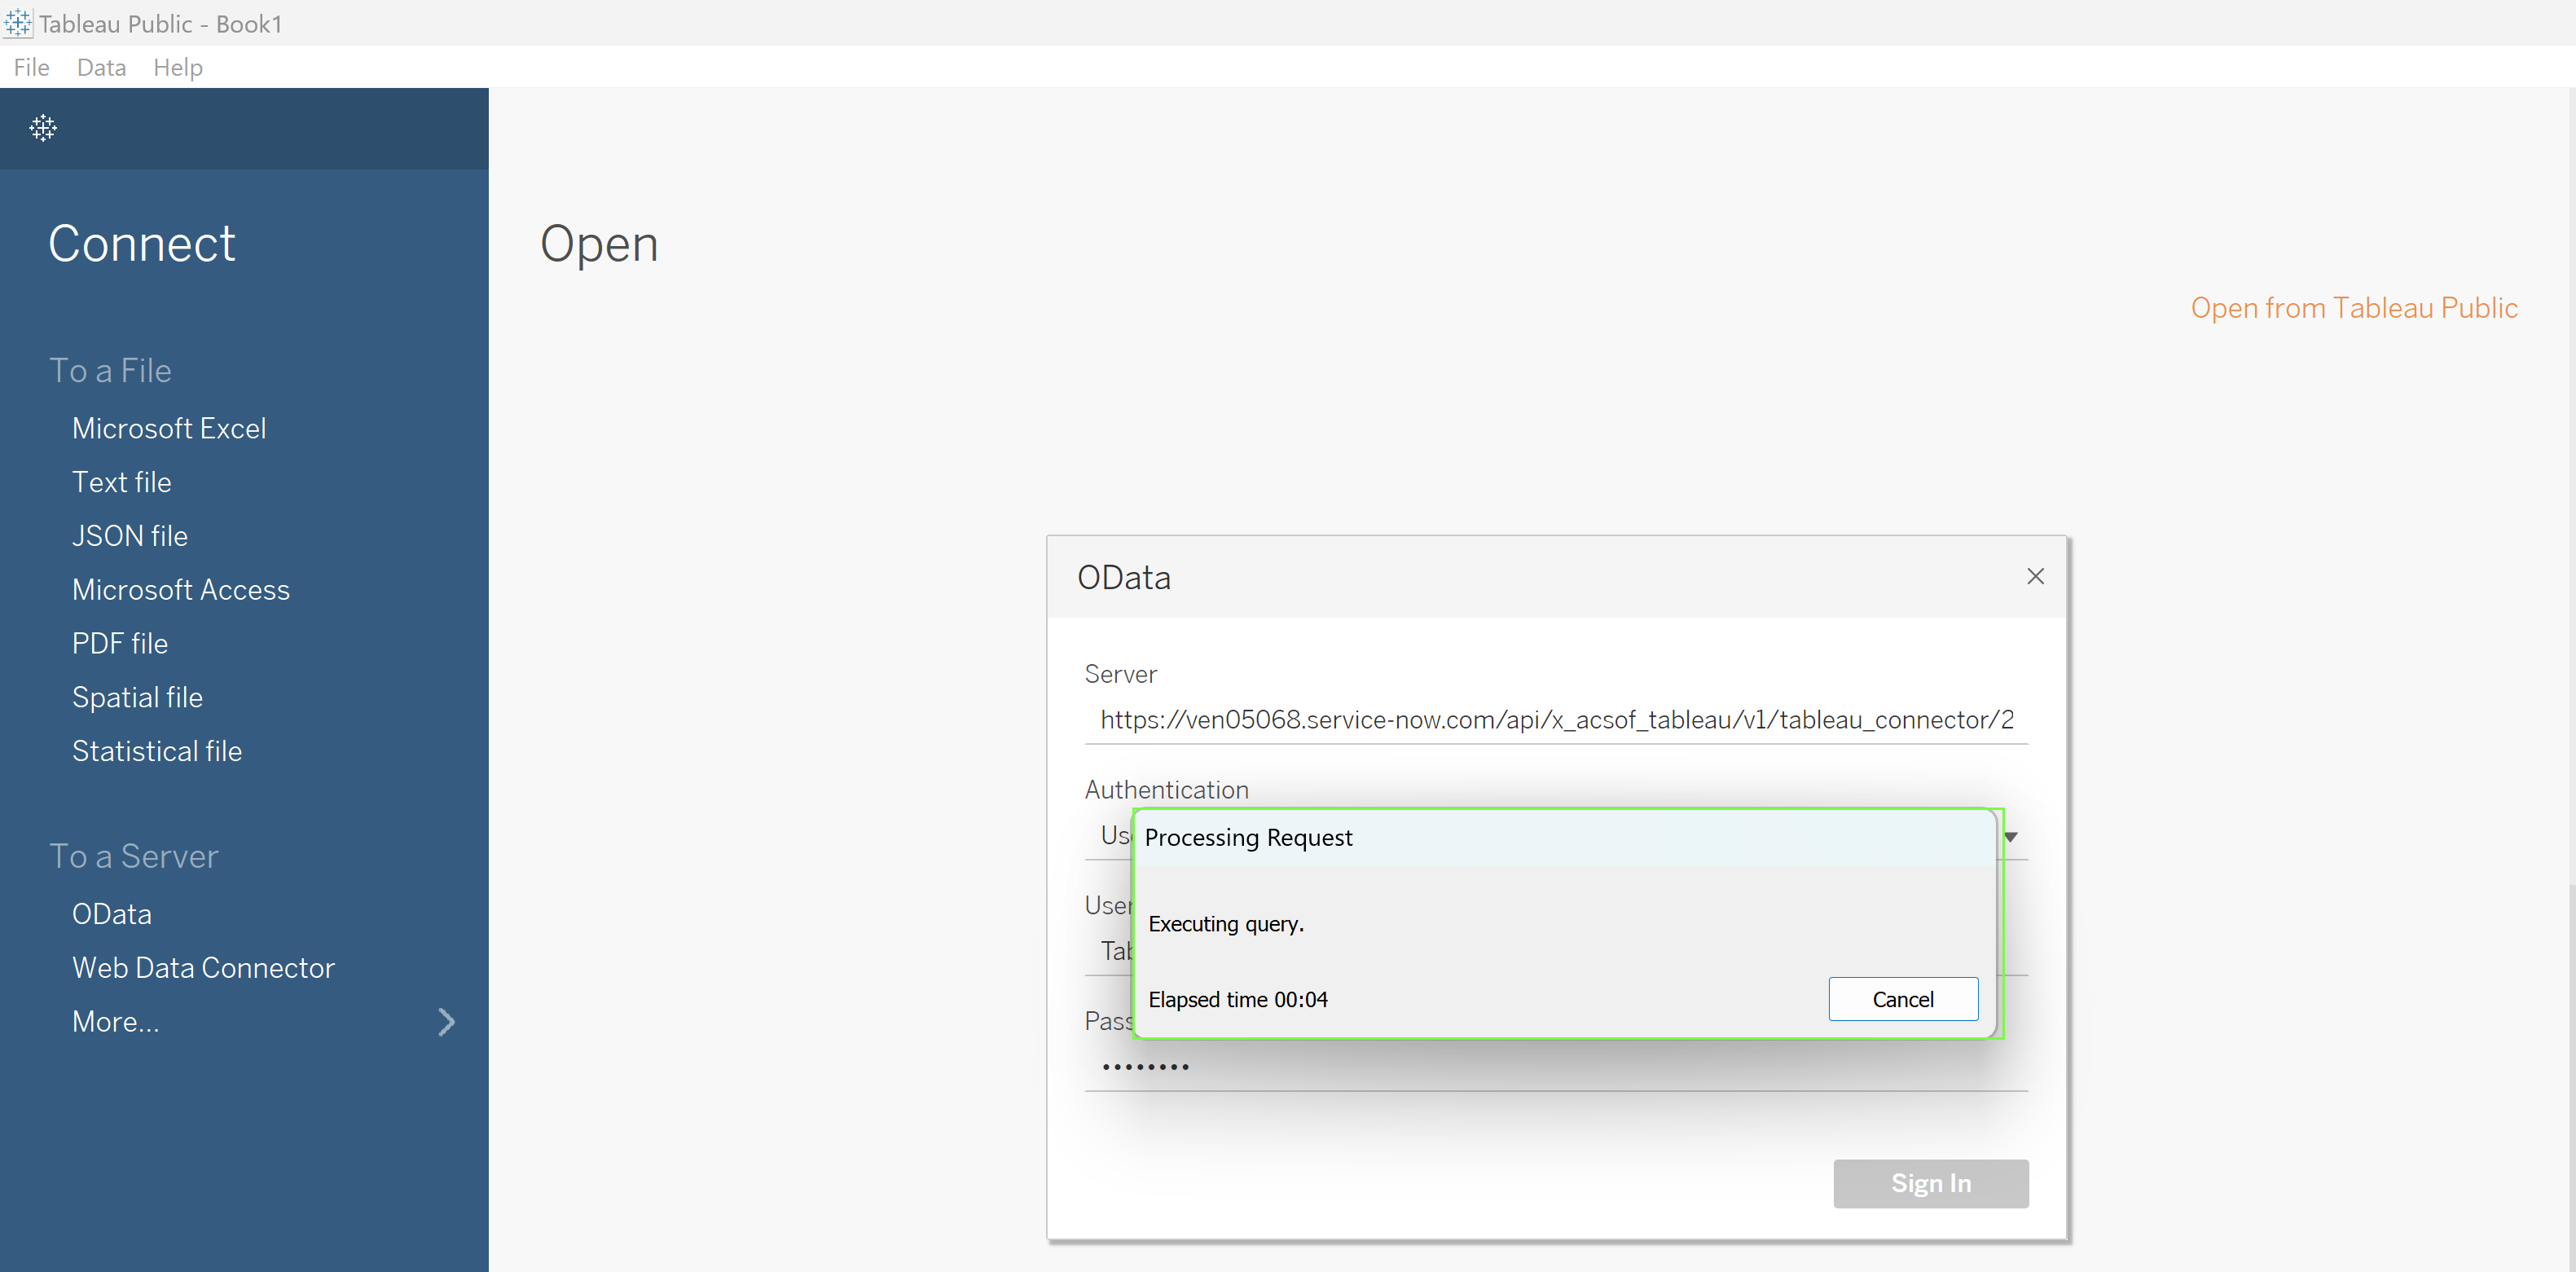
Click Sign In
The import process will start. As soon as it’s done, the user can start to build View for data imported from ServiceNow.
.png?version=1&modificationDate=1680708332064&cacheVersion=1&api=v2&width=204)
| Tip |
|---|
You are already using Tableau Connector for ServiceNow? Leave us an honest review! |