| Table of Contents | ||||
|---|---|---|---|---|
|
Creating and Modifying Checklist for Jira On-the-Fly
Creating Checklist for Jira On-the-Fly
You can easily create a checklist and add the required checklist items (subtasks) directly from the Jira issue page.
This provides a detailed overview of tasks, making it an ideal solution for managing complex recurring tasks or issues.
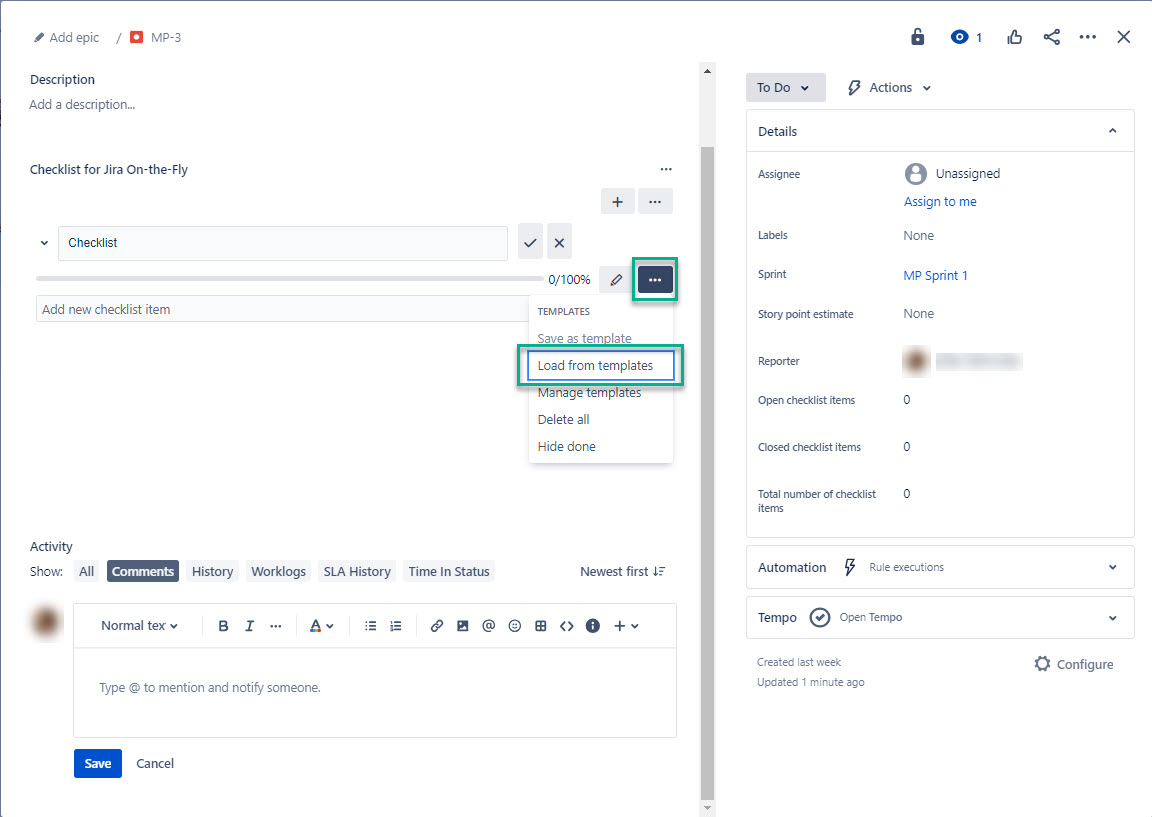
You can create a checklist from templates using the Load from templates button.
First, you have to create and save your template, and then you can create checklists using it.

Editing Checklist for Jira On-the-Fly
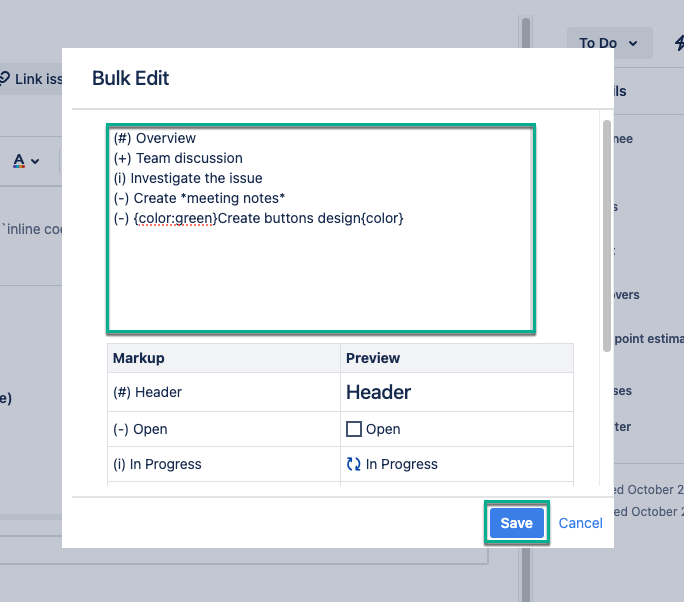
You can both create and edit your checklist using the Bulk Edit button.
Here you can add headings for easy item navigation, create multiple checklist items, and immediately give them certain statuses.
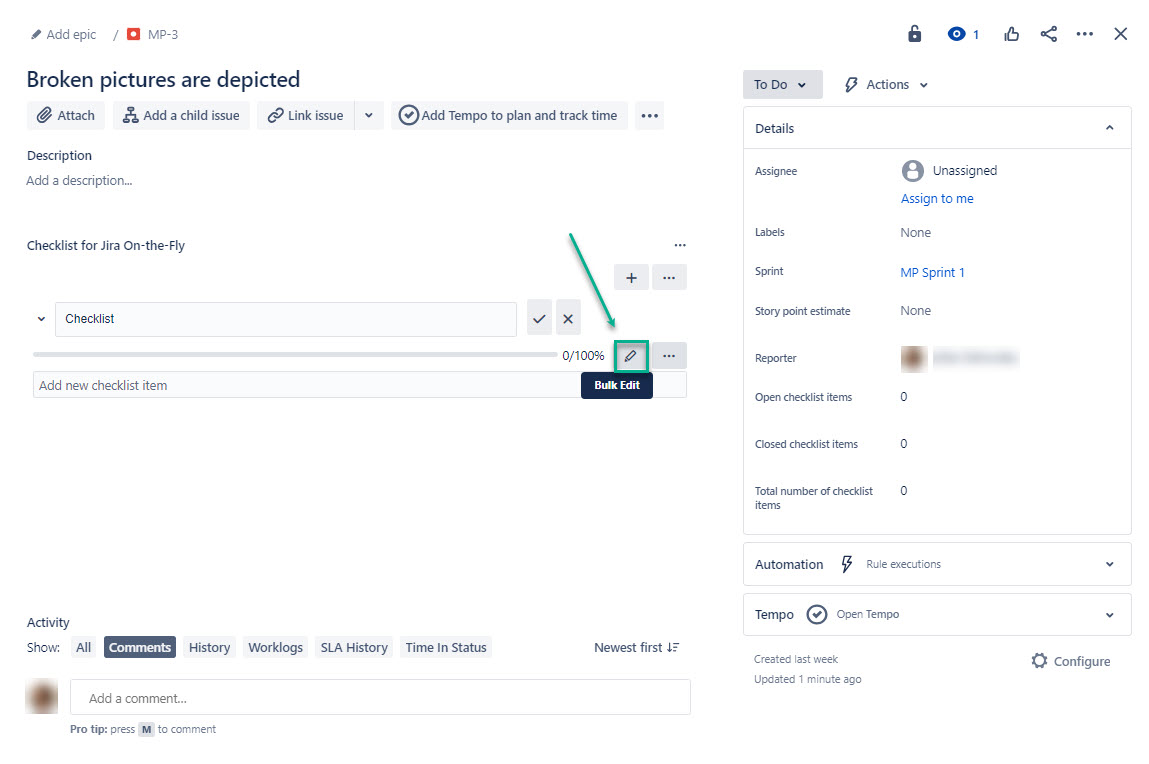
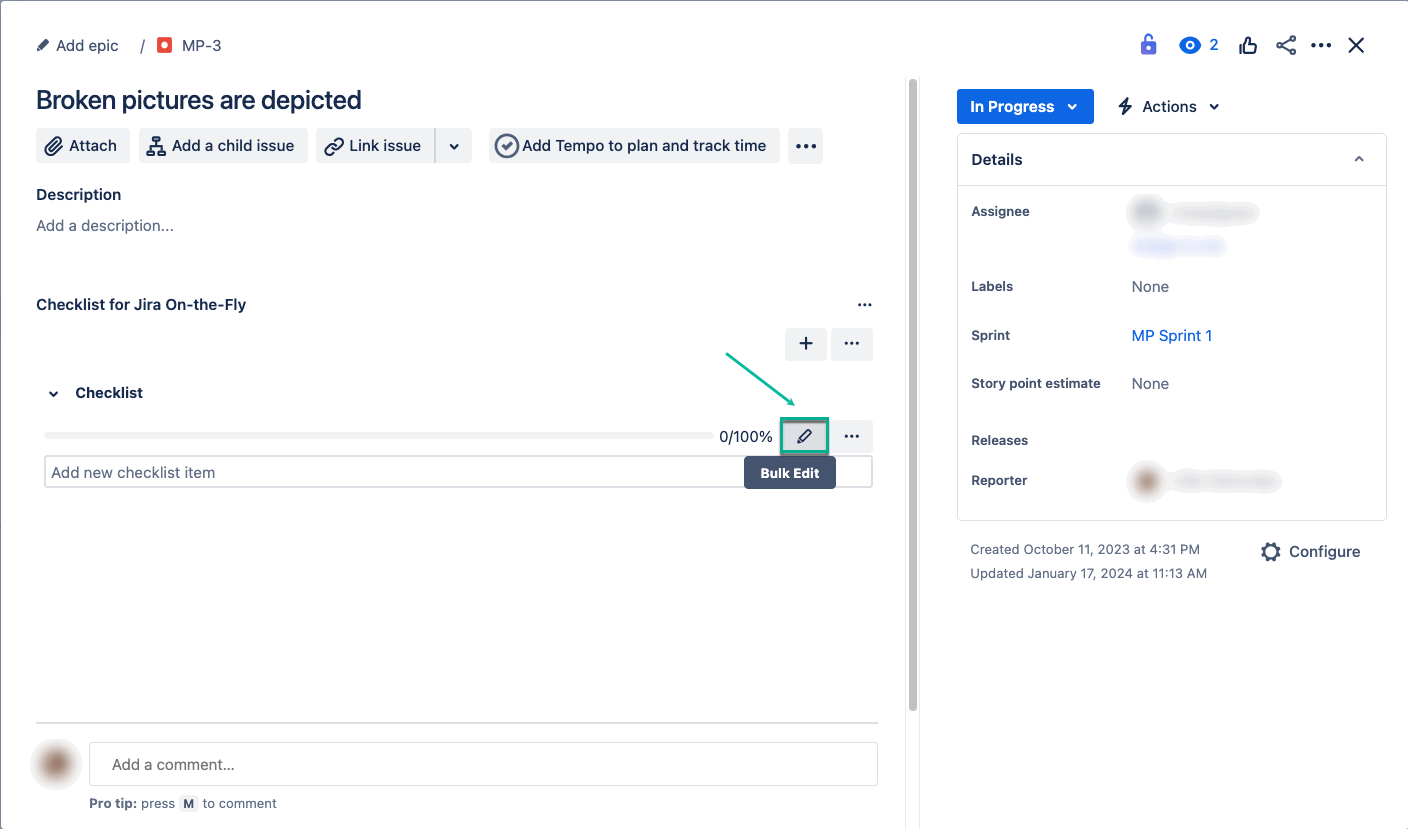
In the Bulk Edit window, you can find hints on how to use it.
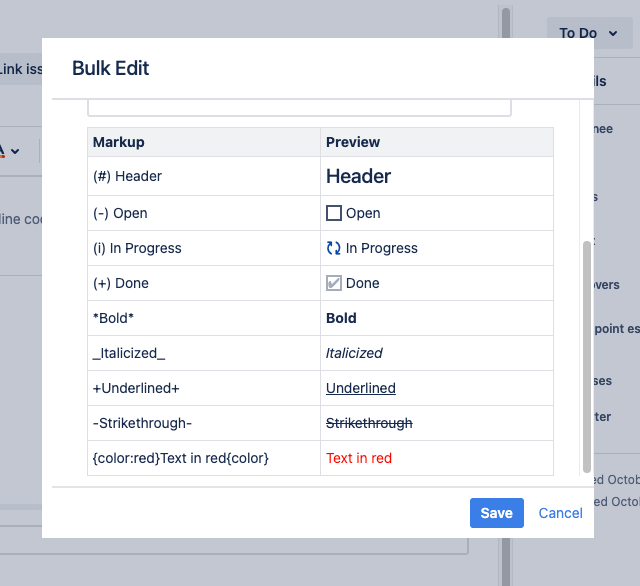
Symbols
(#) - This symbol indicates Header.
| Info |
|---|
For example, if you want to create a header, in your editor, you should put (#) before the word that is supported to be a header. |
(-) - This symbol indicates the Open status.
| Info |
|---|
For example, if you want to put your item in the open status, in your editor, you should put (-) before the item(s) that is supposed to be in the open status. |
(i) - This symbol indicates the In Progress status.
| Info |
|---|
For example, if you want to put your item in the In Progress status, in your editor, you should put (i) before item(s) that is supposed to be in the in progress status. |
(+) - This symbol indicates the Done status.
| Info |
|---|
For example, if you want to put your item in the done status, in your editor, you should put (+) before the item(s) that is supposed to be in the done status. |
Styles
*Bold* - The word enclosed inasteriskswill be bold.
_Italic_ - The word enclosed in underscores will be in italics.
+Underline+ - The word enclosed in pluses will be underlined.
-
Strikethrough- - The word enclosed in hyphens will be strikethrough.{color:red}word{color} - The word(s) enclosed in this formula, where word indicates a placeholder, will be colored.
| Info |
|---|
In the example above the word will be red. In {color:green}word{color}, the enclosed word will be green. You can use the color you need. |
| Info |
|---|
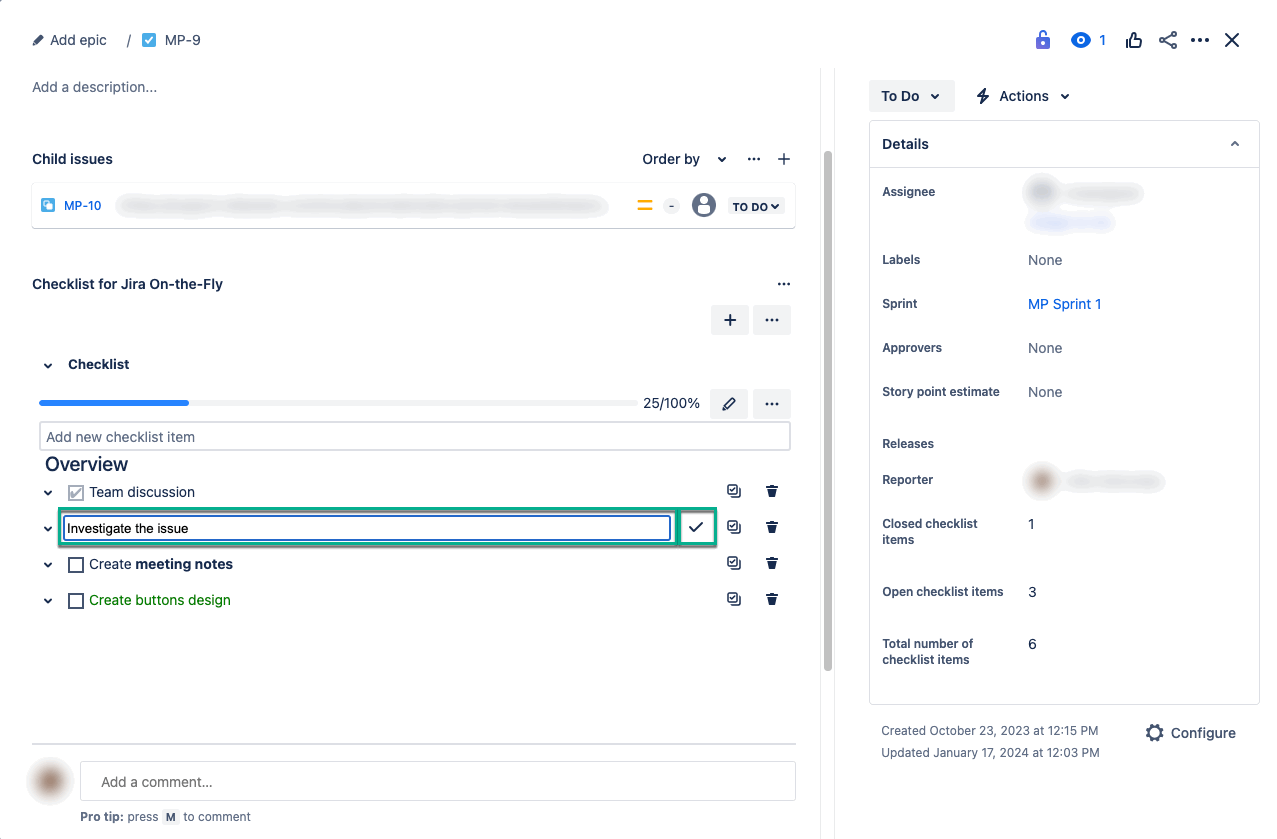
All checklist headings and items are clickable. It means you can edit their names by double-clicking on the required item or heading. |
| Info |
|---|
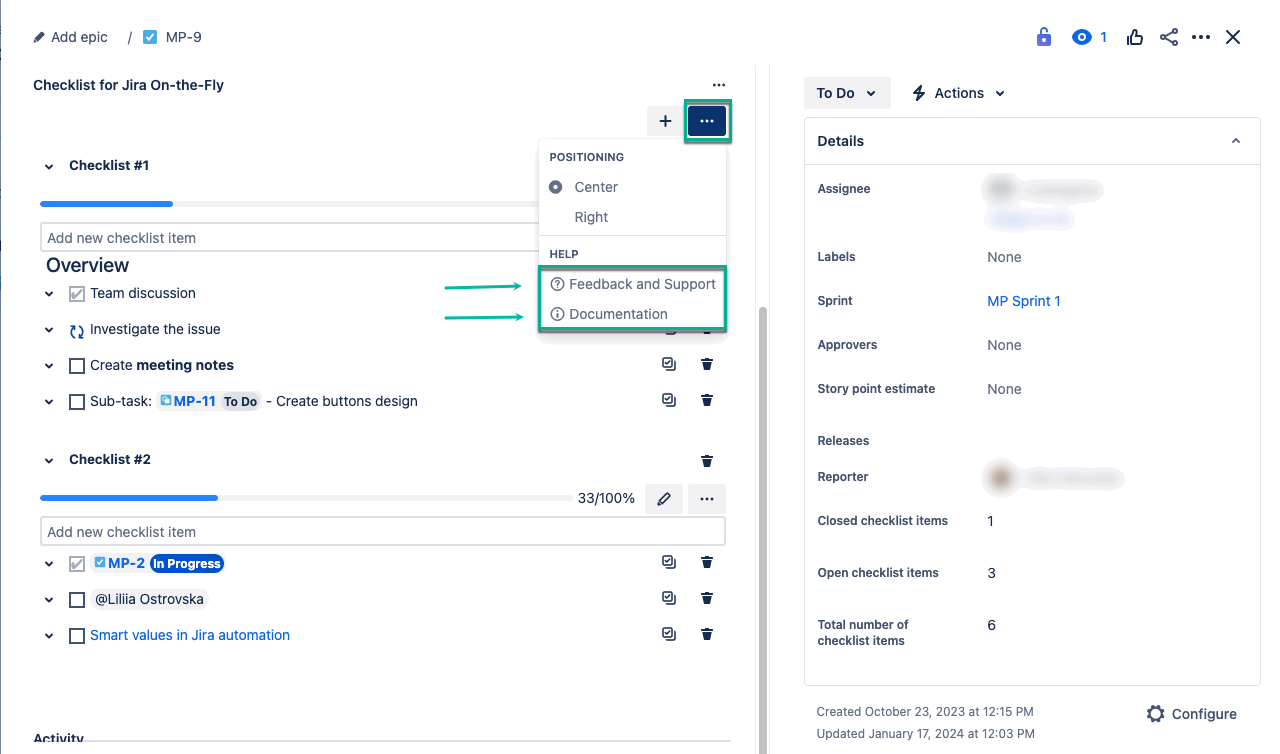
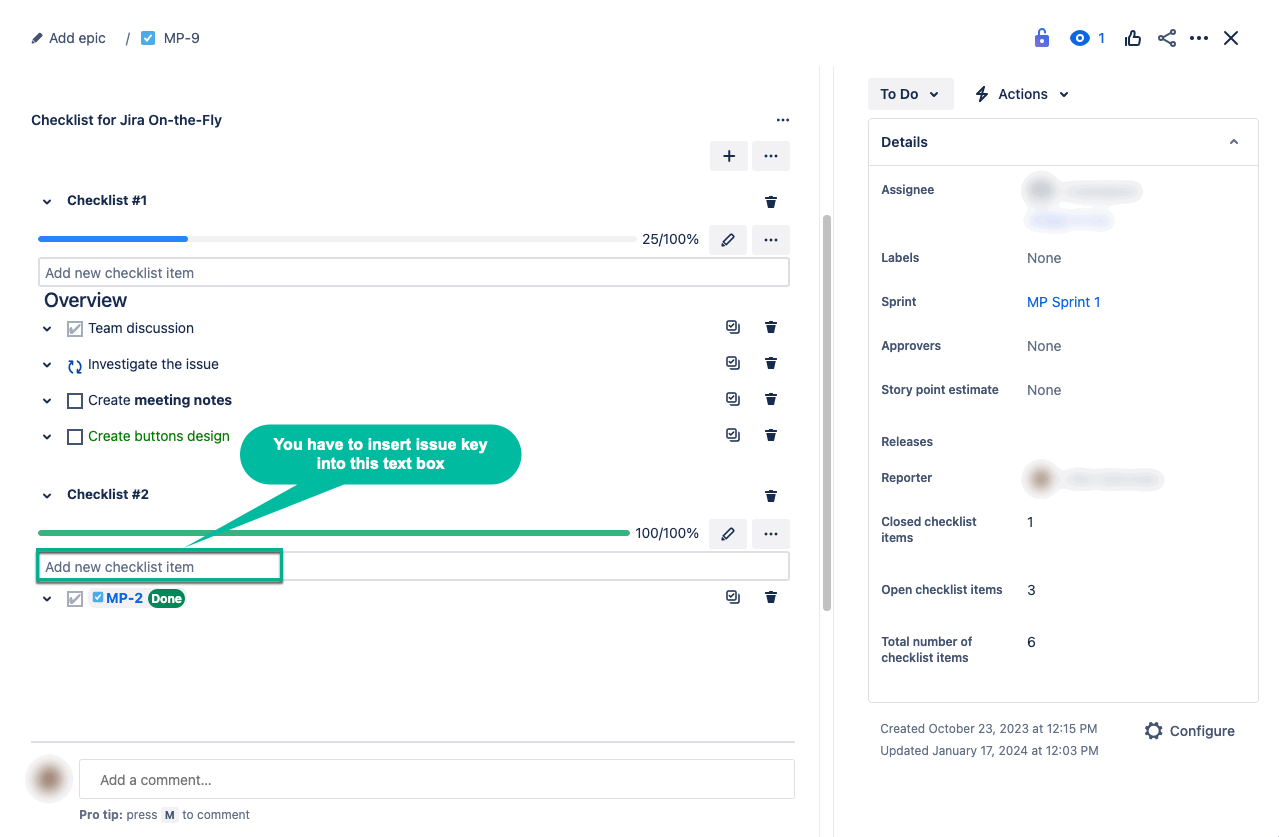
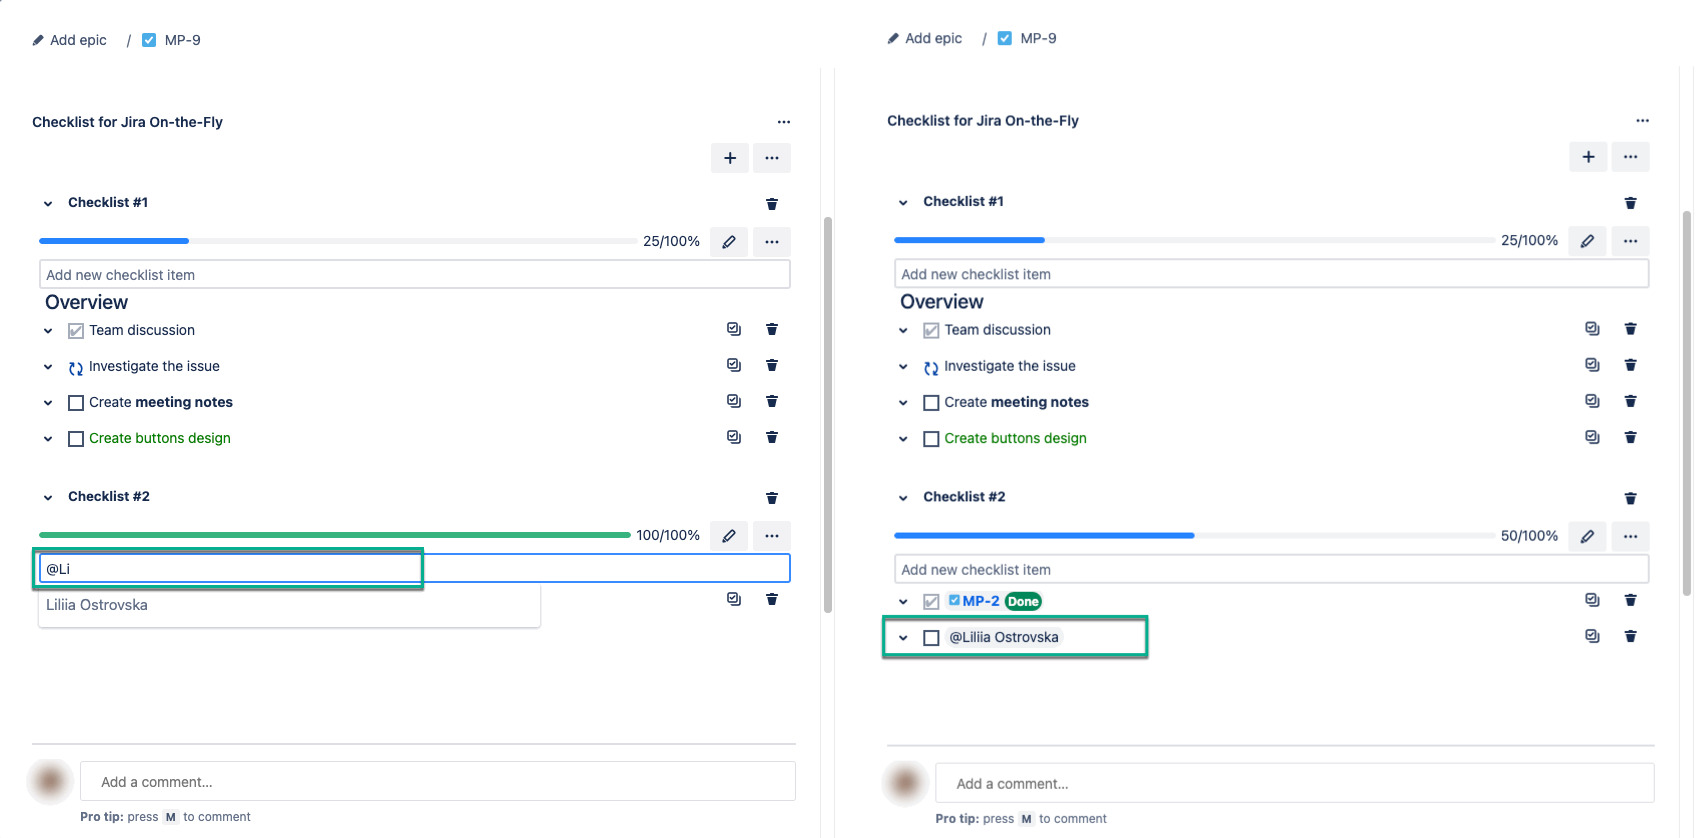
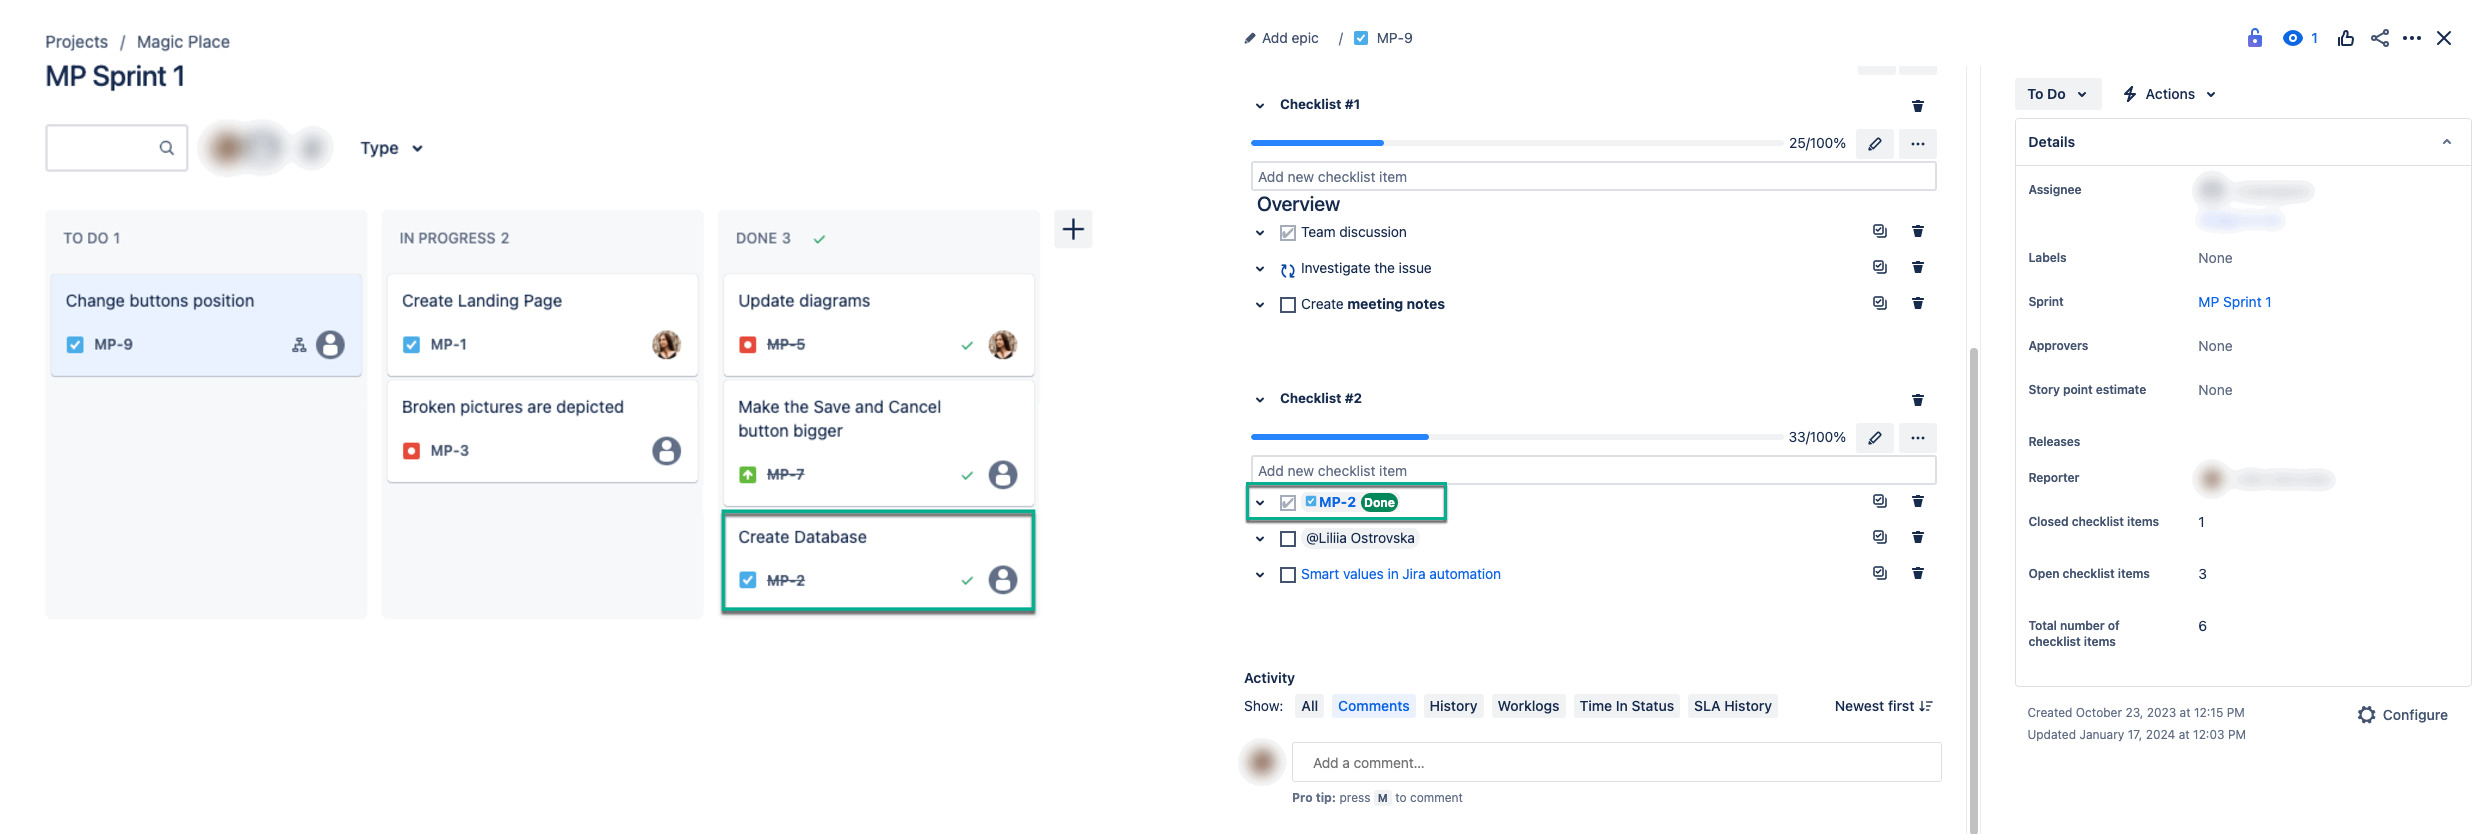
You can have multiple checklists within a single issue. |
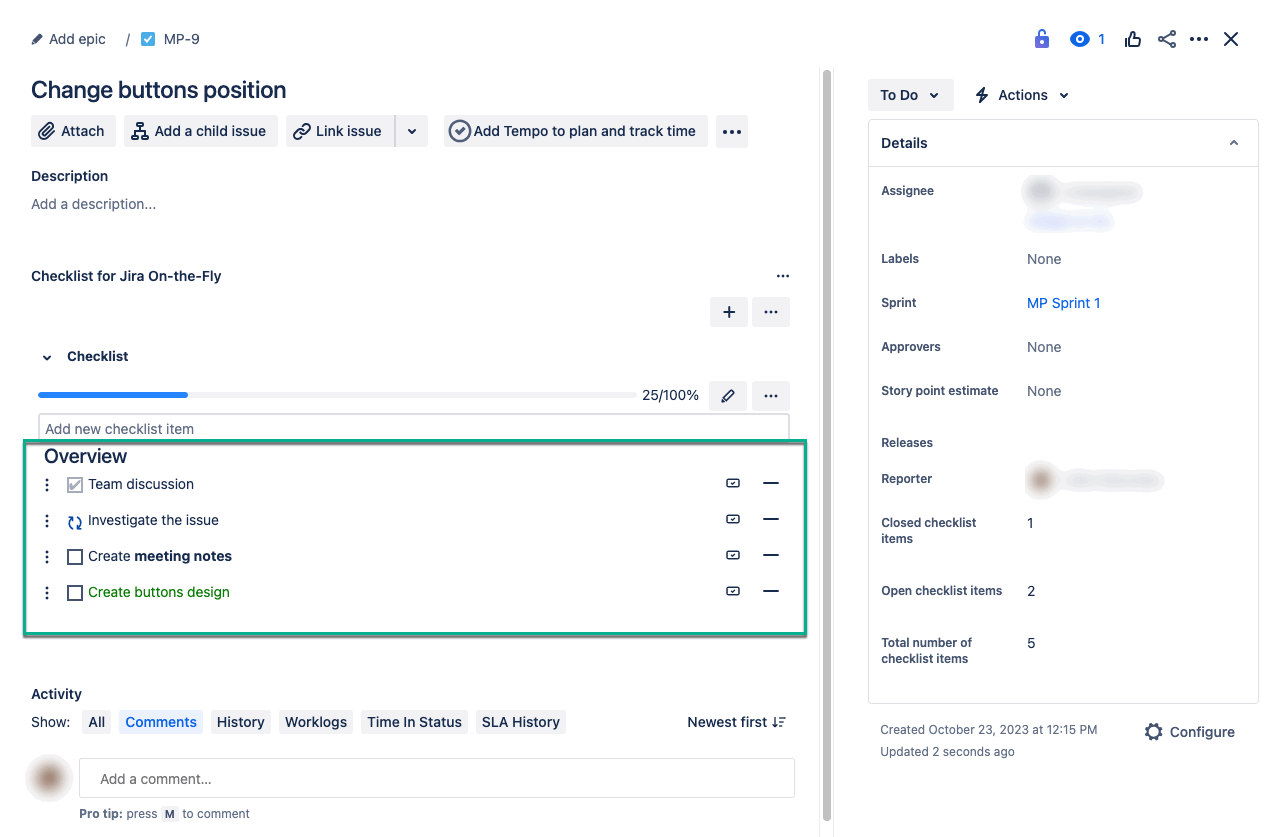
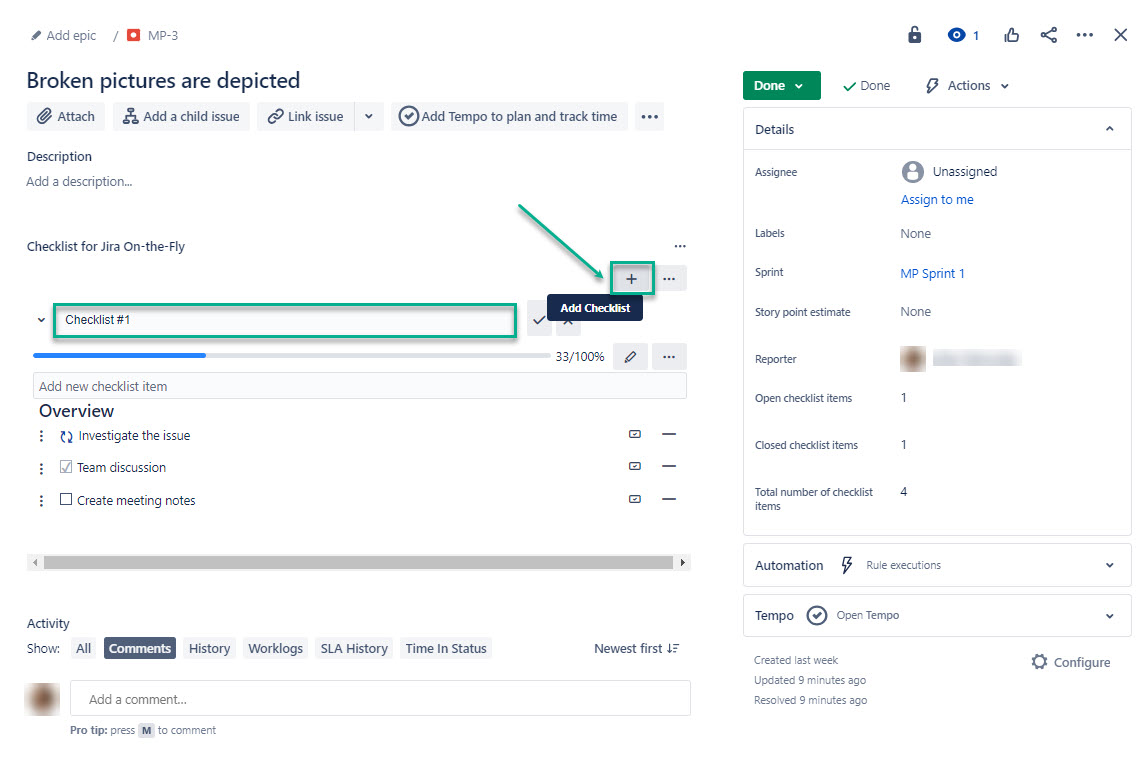
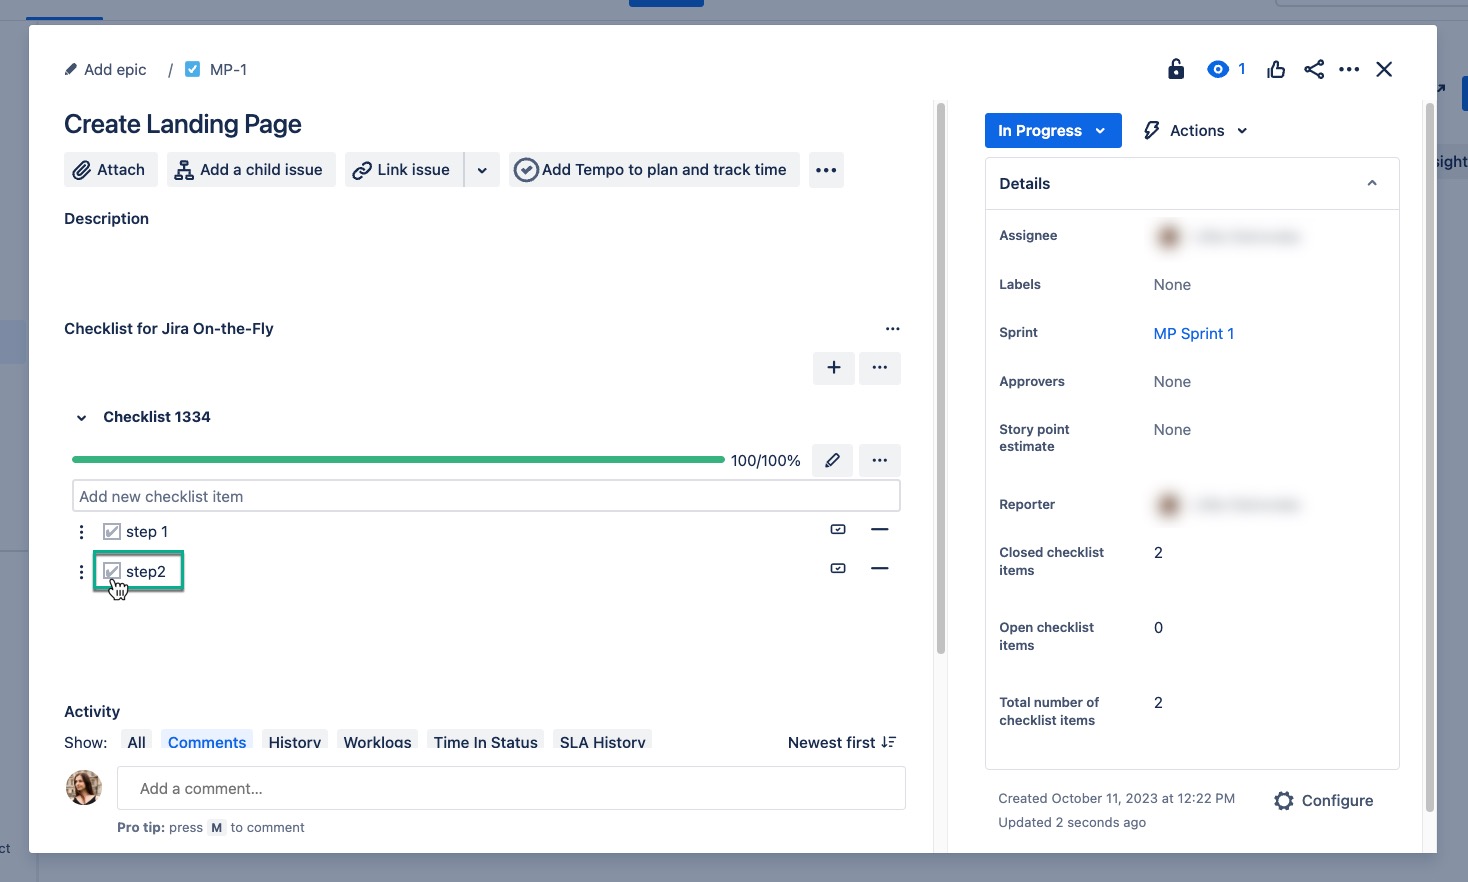
When you add a new checklist, a sequence number appears in each list in the following format: Checklist #1. You can change this name by double-clicking on it.
.gif?version=1&modificationDate=1707471491039&cacheVersion=1&api=v2&width=882)
| Info |
|---|
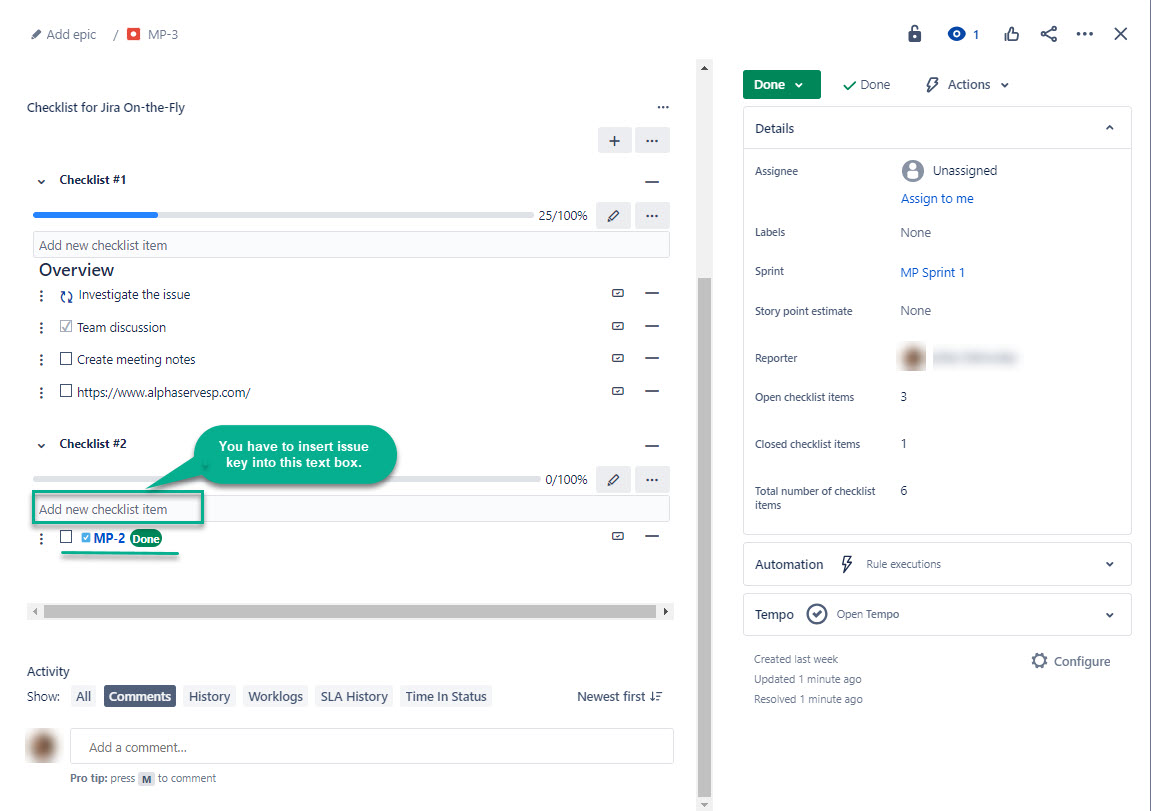
You can link the issue to the checklist. This checklist item will be clickable and will lead to the published issue page. |
| Info |
|---|
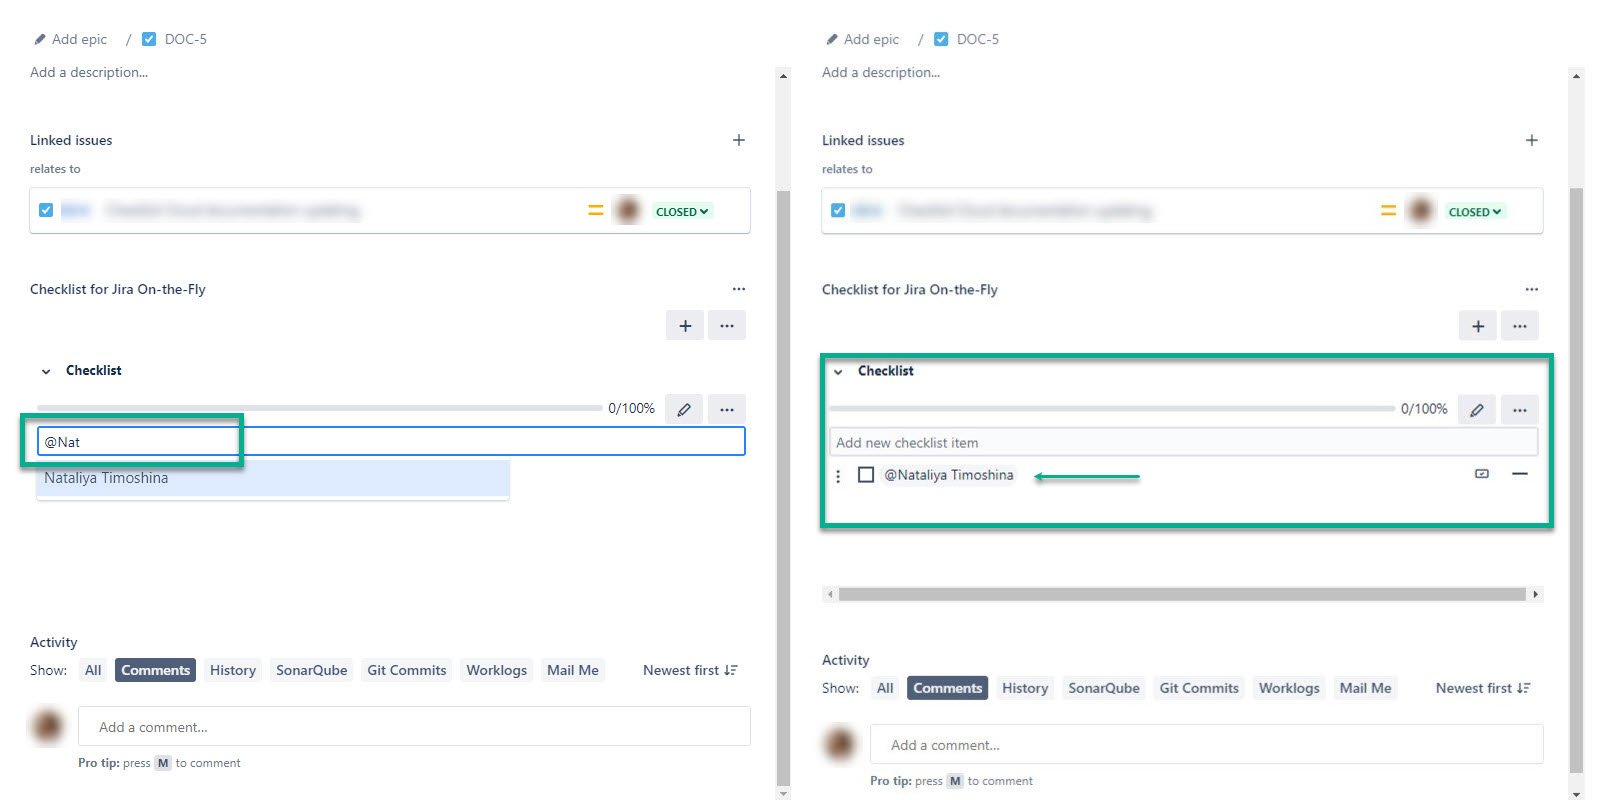
You can also mention the user in your checklist if you’d like. It might be useful if you want somebody specific to perform the task listed in the checklist. Start with @, and then start typing the required name. After the name appears in the list, hit enter. |
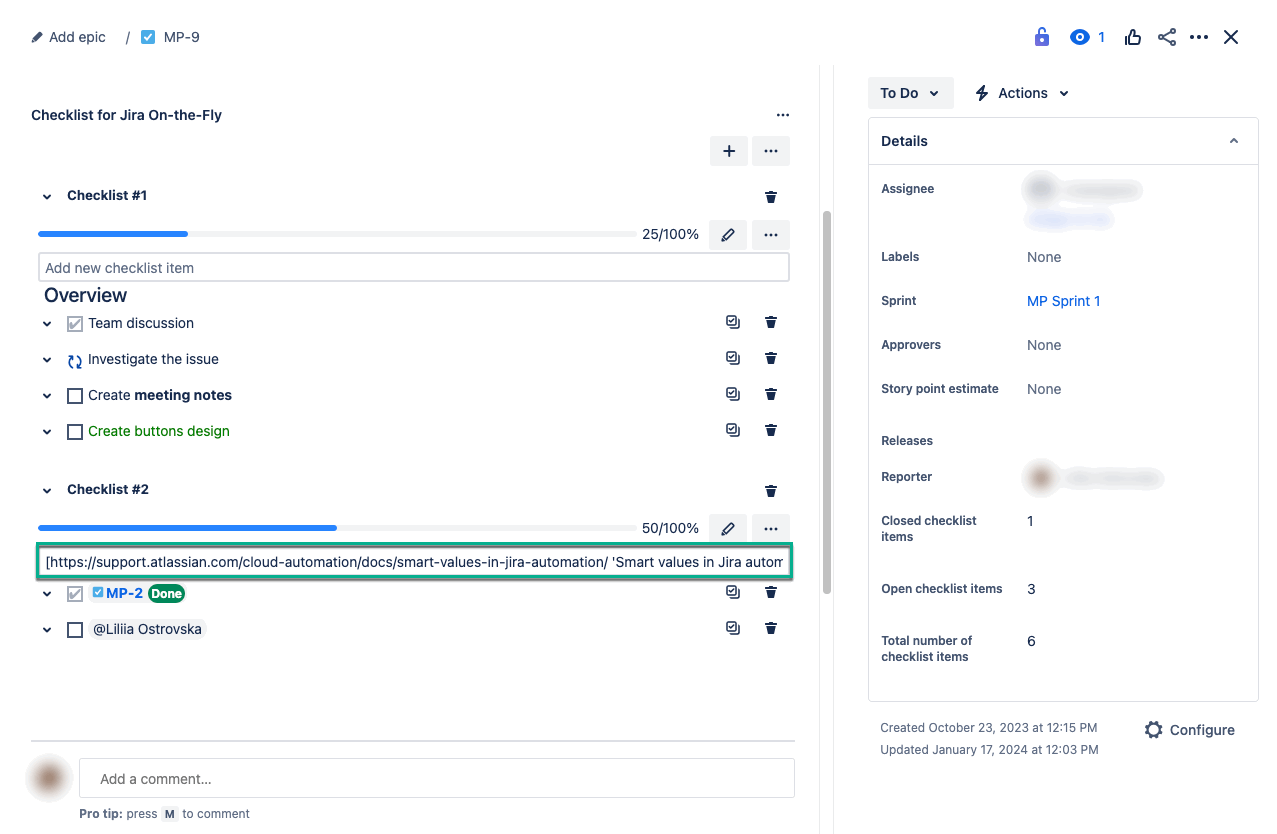
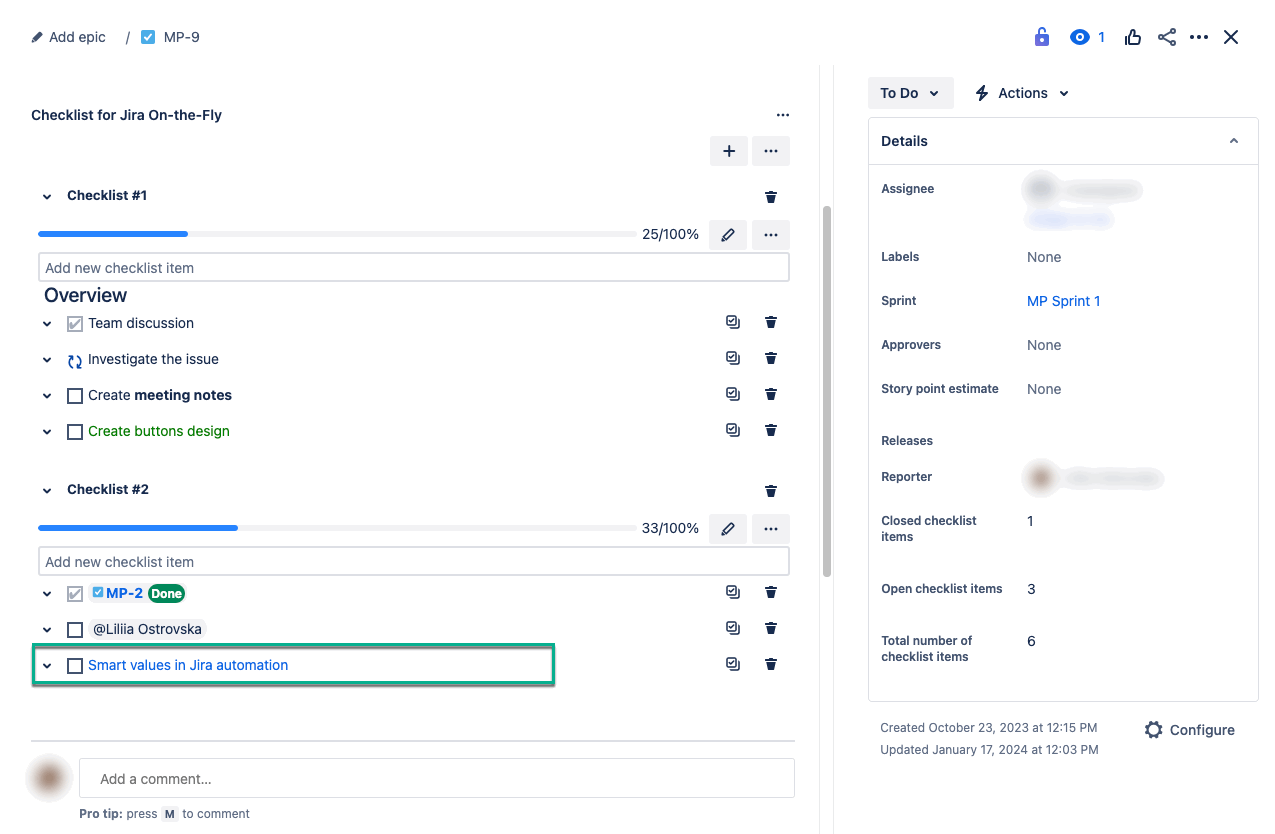
| Info |
|---|
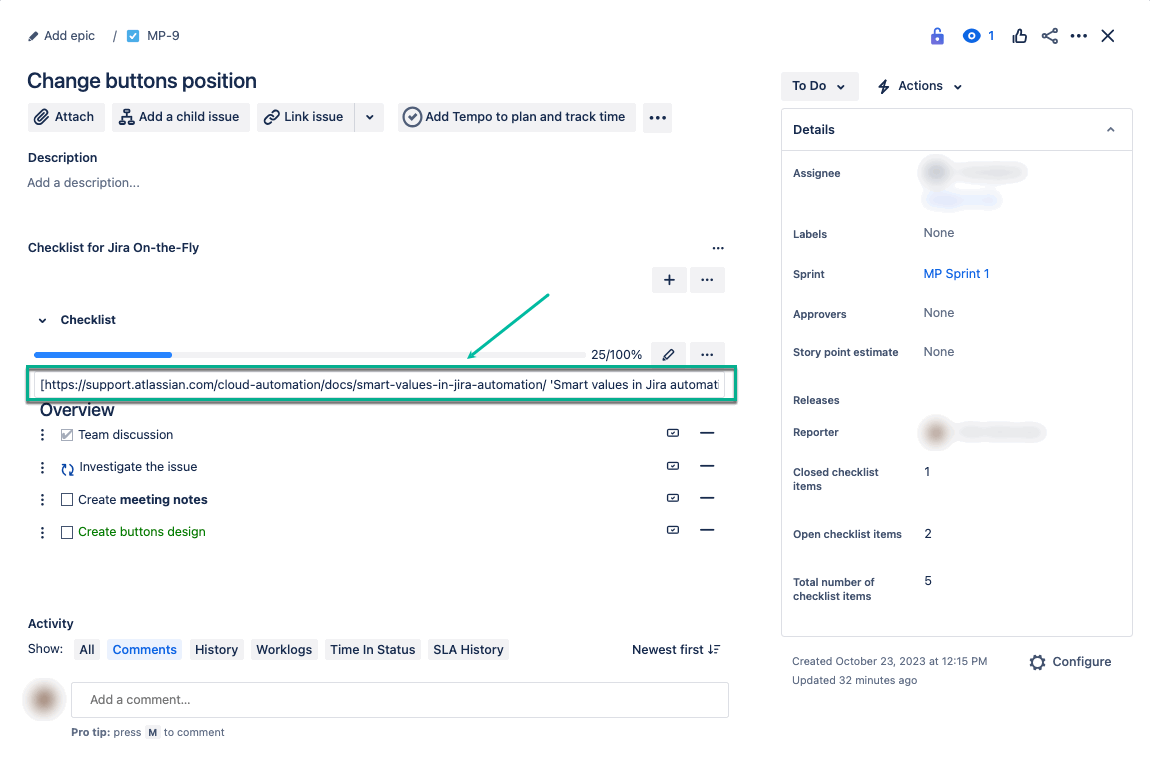
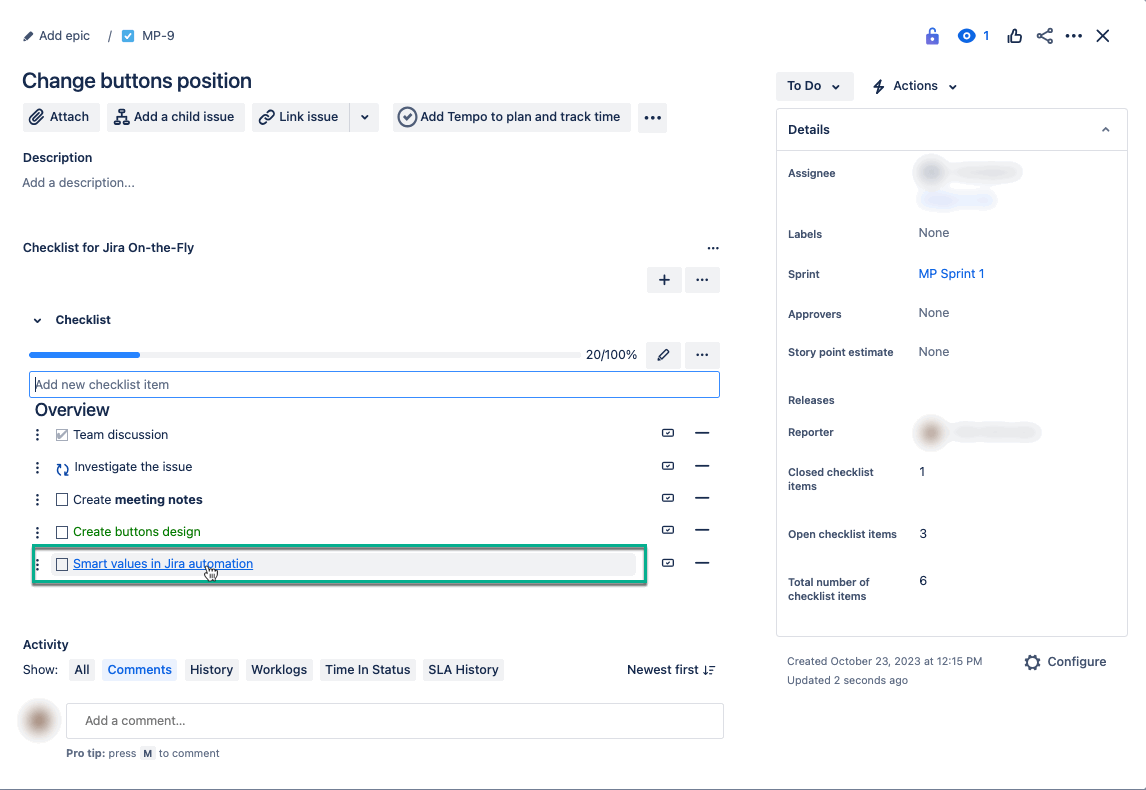
You can insert the link into your checklist item’s text. For example, you need to add a link to the smart values article. The syntax will be the following: |
| Code Block | ||
|---|---|---|
| ||
[https://support.atlassian.com/cloud-automation/docs/smart-values-in-jira-automation/ 'Smart values in Jira automation'] |
| Info |
|---|
After entering the link, hit Enter. |
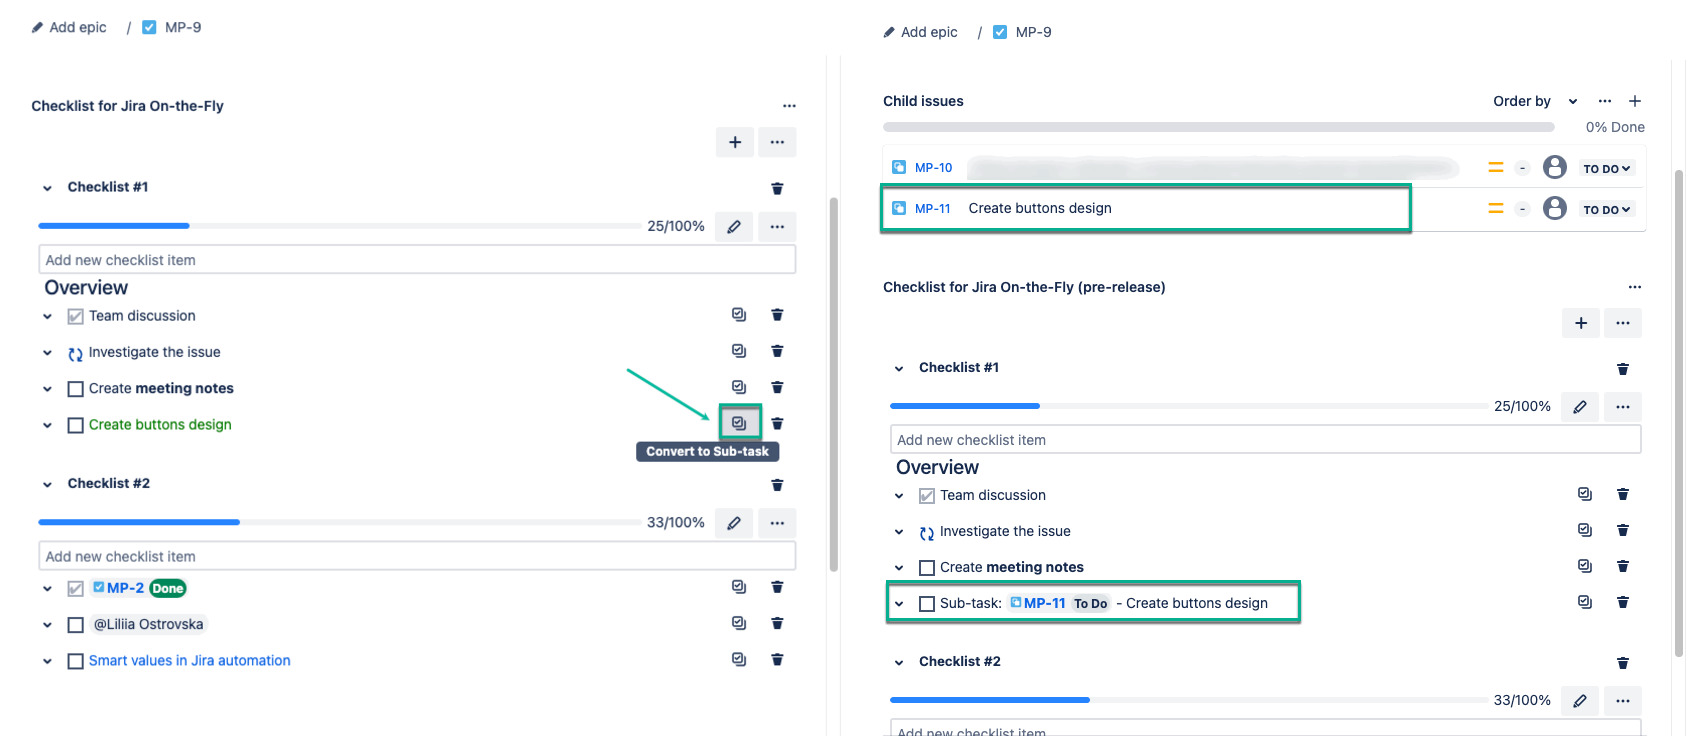
Creating Subtask
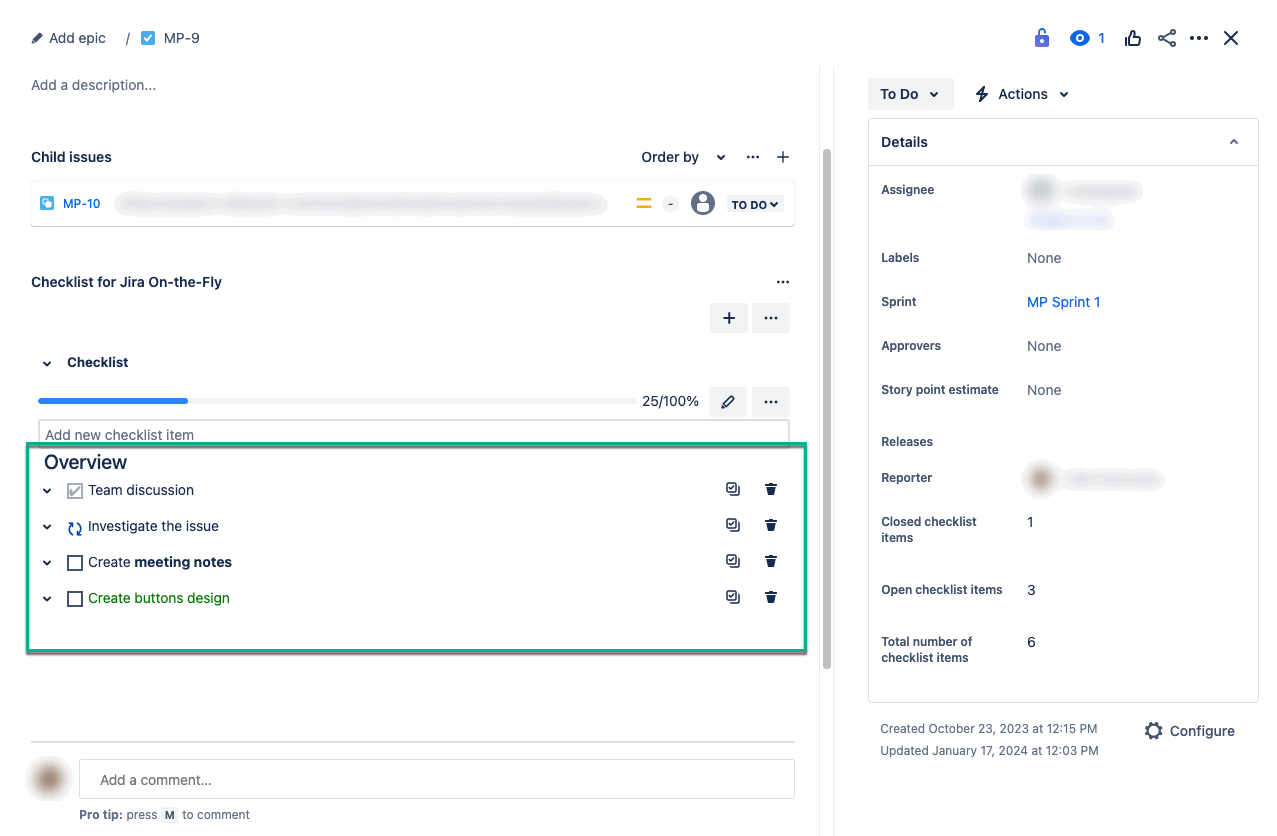
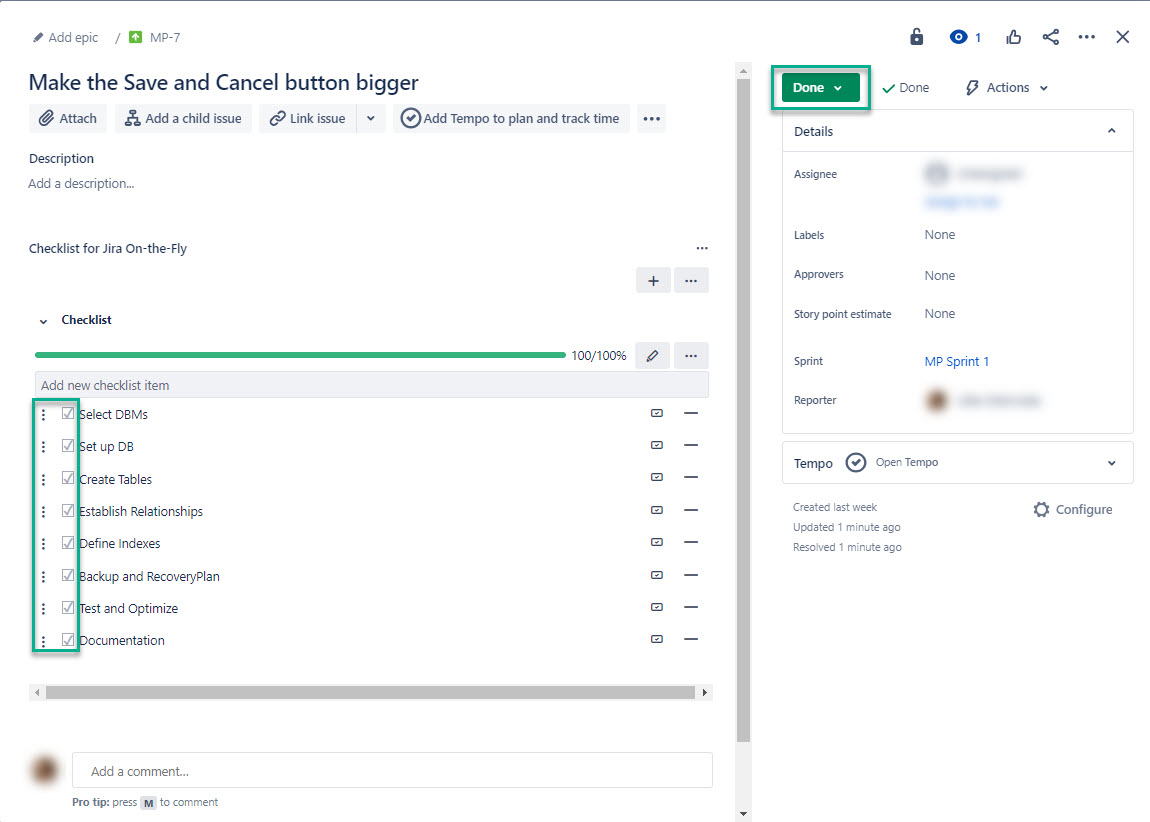
You can convert important checklist items into subtasks sub-tasks by selecting the Subtask button Convert to Sub-task icon in the item toolbar. The converted subtask is visible appears in the subtask Child issues section on the issue page and displays its status. It also remains as a part of the checklist but now with the prefix Sub-task.
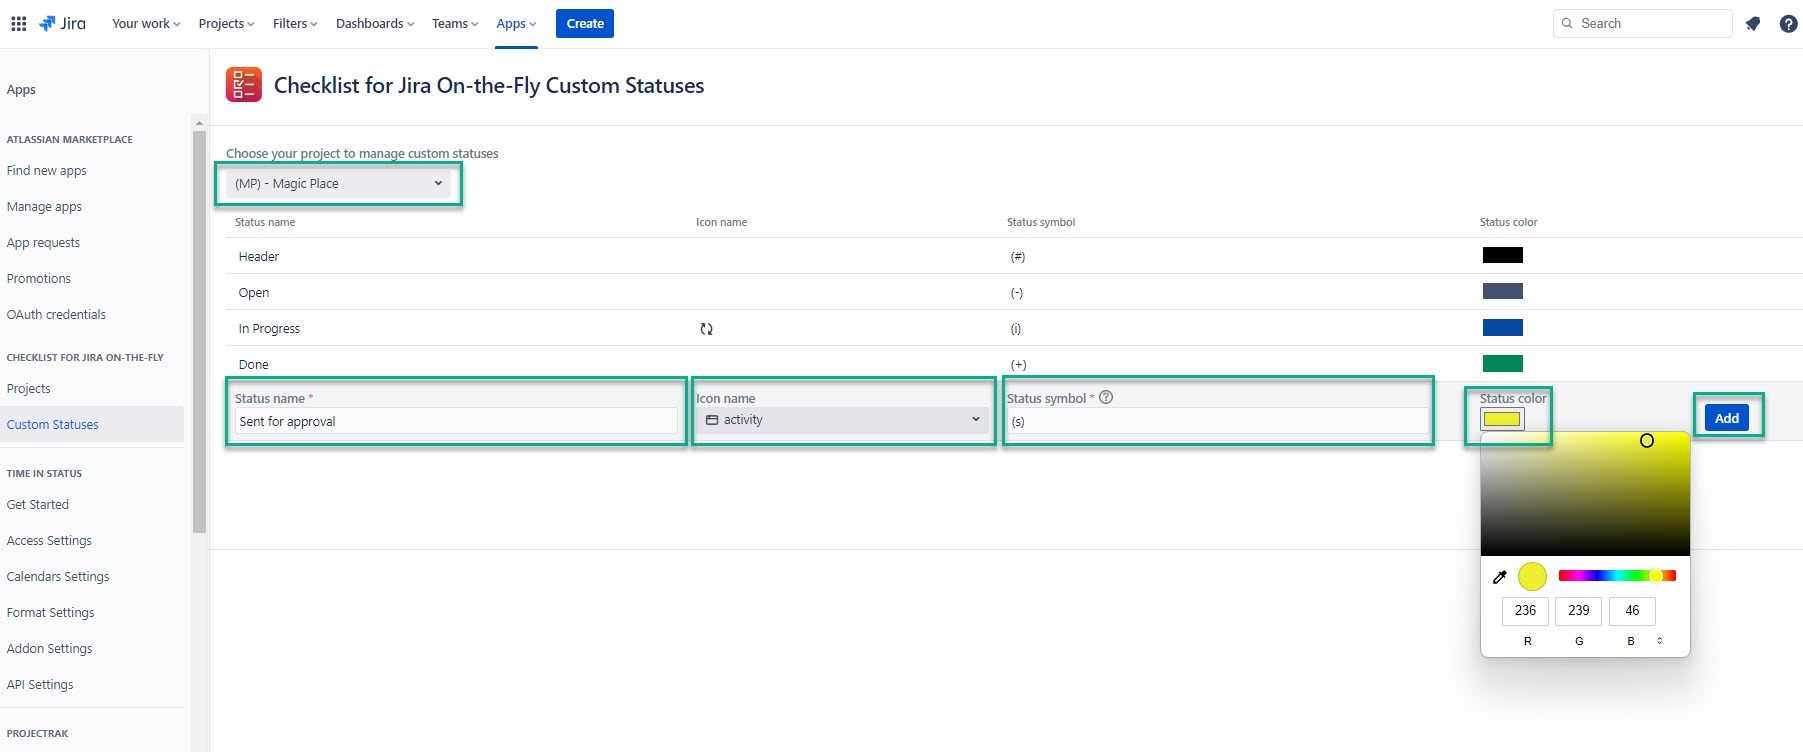
Adding Custom Statuses
Checklist for Jira On-the-Fly allows you to create custom statuses with specific colors for your checklist items.
Choose your project to manage custom statuses - This field allows you to select the project where you want to create custom statuses.
Status name* - This field allows you to enter the name for your custom status.
Icon name - This field allows you to select the icon that your custom status will have.
Status symbol* - This field allows you to select the symbol you will use for editing in bulk editing
Status color - This field allows you to select any color of any shape to indicate your status.
Checklist for Jira On-the-Fly Notification Settings
How Notifications Work
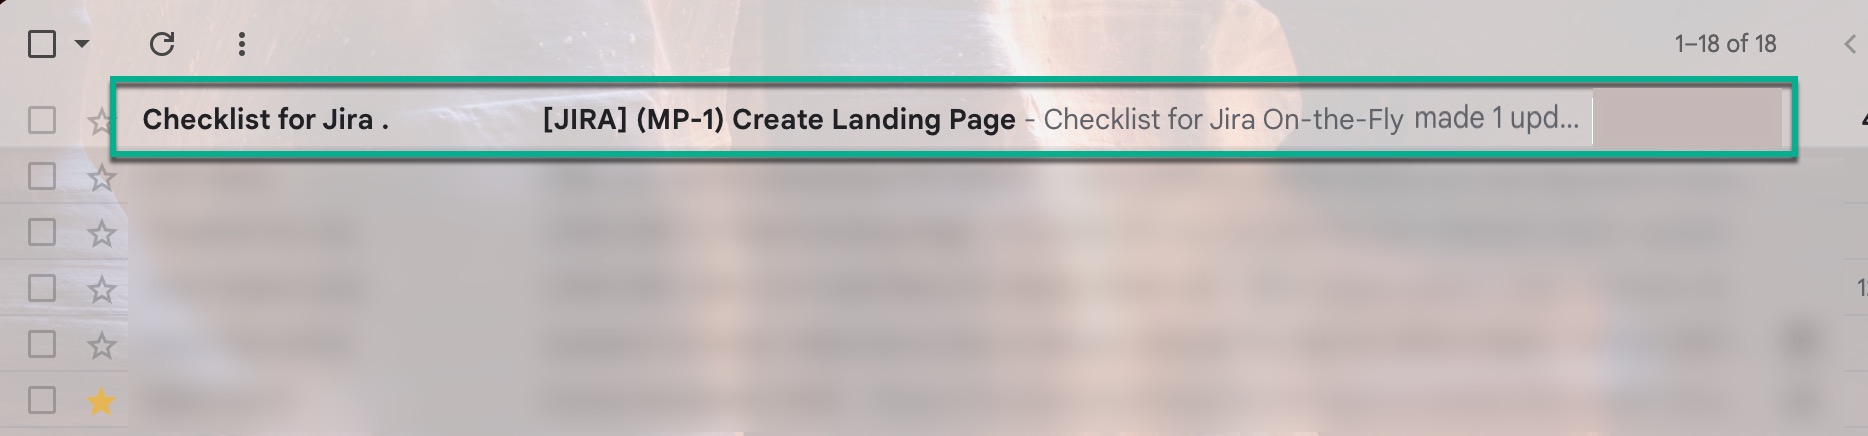
Checklist for Jira On-the-Fly notifications are enabled for all projects by default. These are checklist items update notifications. The app settings allow you to disable them. You can disable notifications for either all projects simultaneously or for a specific project.
| Info |
|---|
When you change a checklist item (e.g. mark its status as done), you will receive a Jira notification and email notification. |
| Info |
|---|
Jira notification 🔔 |

| Info |
|---|
Email notification 📩 |
| Info |
|---|
If you want to disable Checklist for Jira On-the-Fly notifications, please follow the steps below. |
How to Disable Notifications
Being signed in to your Jira Cloud instance, select Apps, and then select Manage your apps.
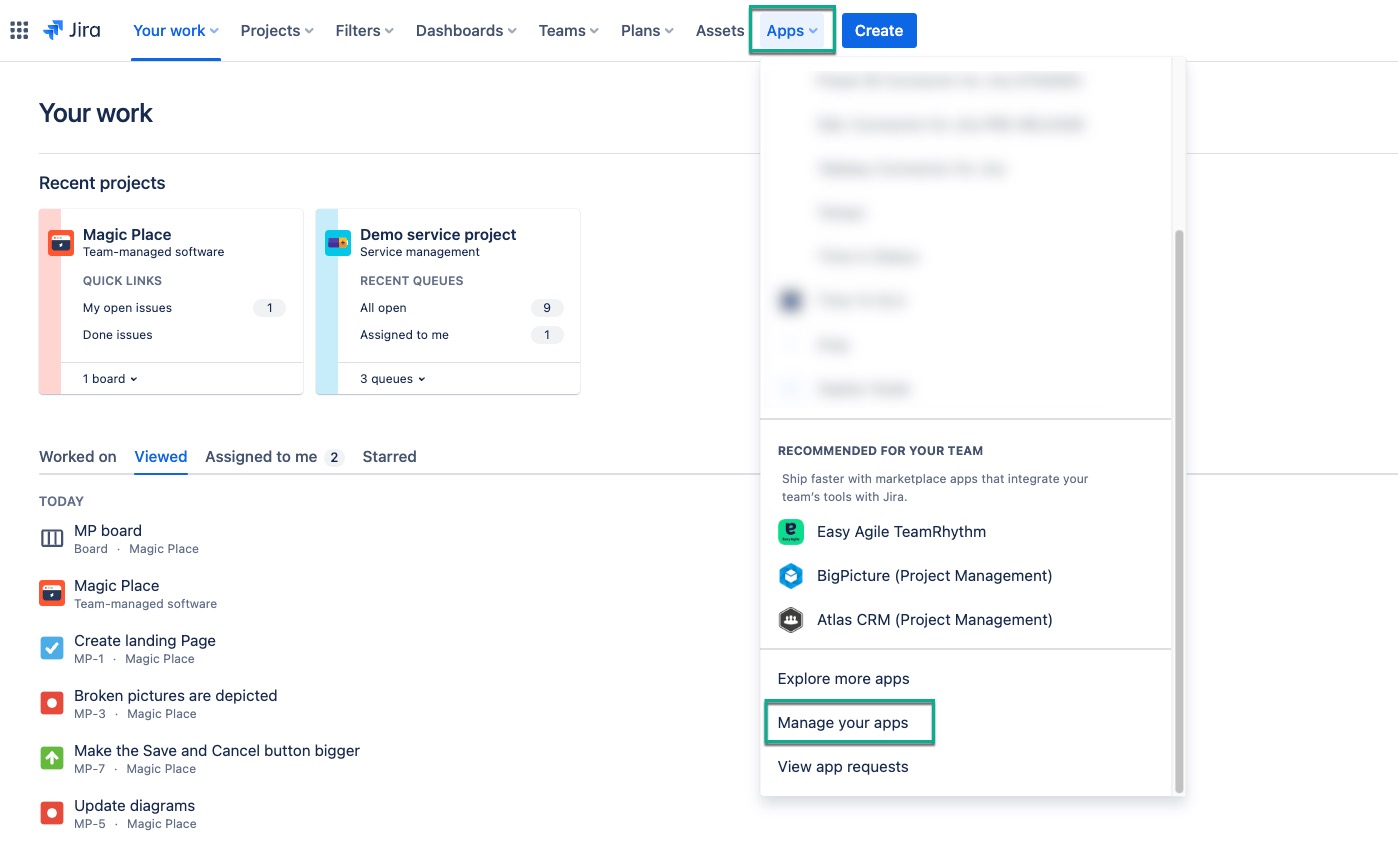
Select Notification Settings (Under the CHECKLIST FOR JIRA ON-THE-FLY section).
| Info |
|---|
All notifications are enabled by default. |
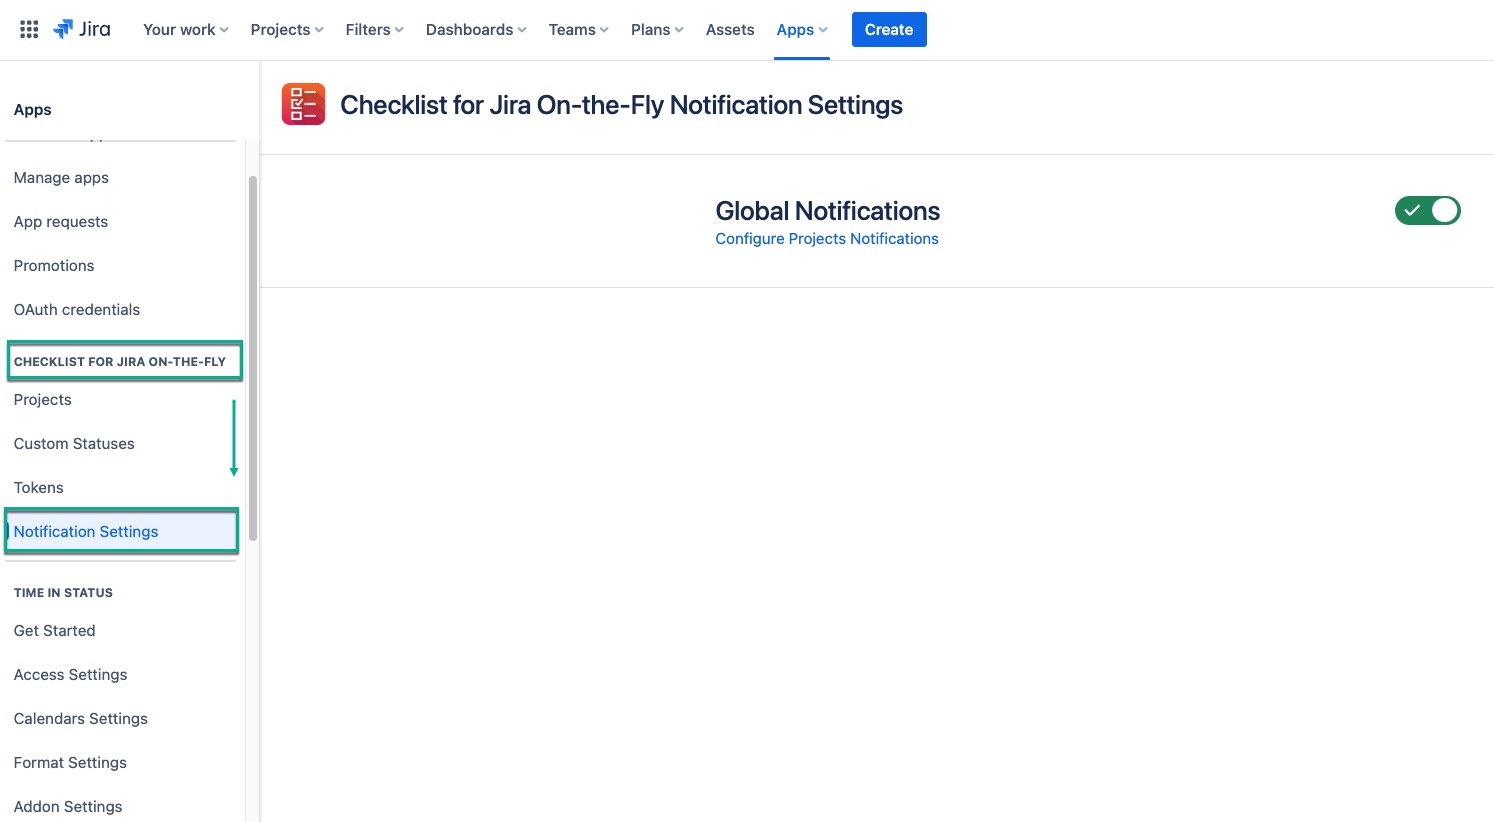
Switch the toggle to disable notifications for all projects.
.jpg?version=1&modificationDate=1702561359704&cacheVersion=1&api=v2&width=882)
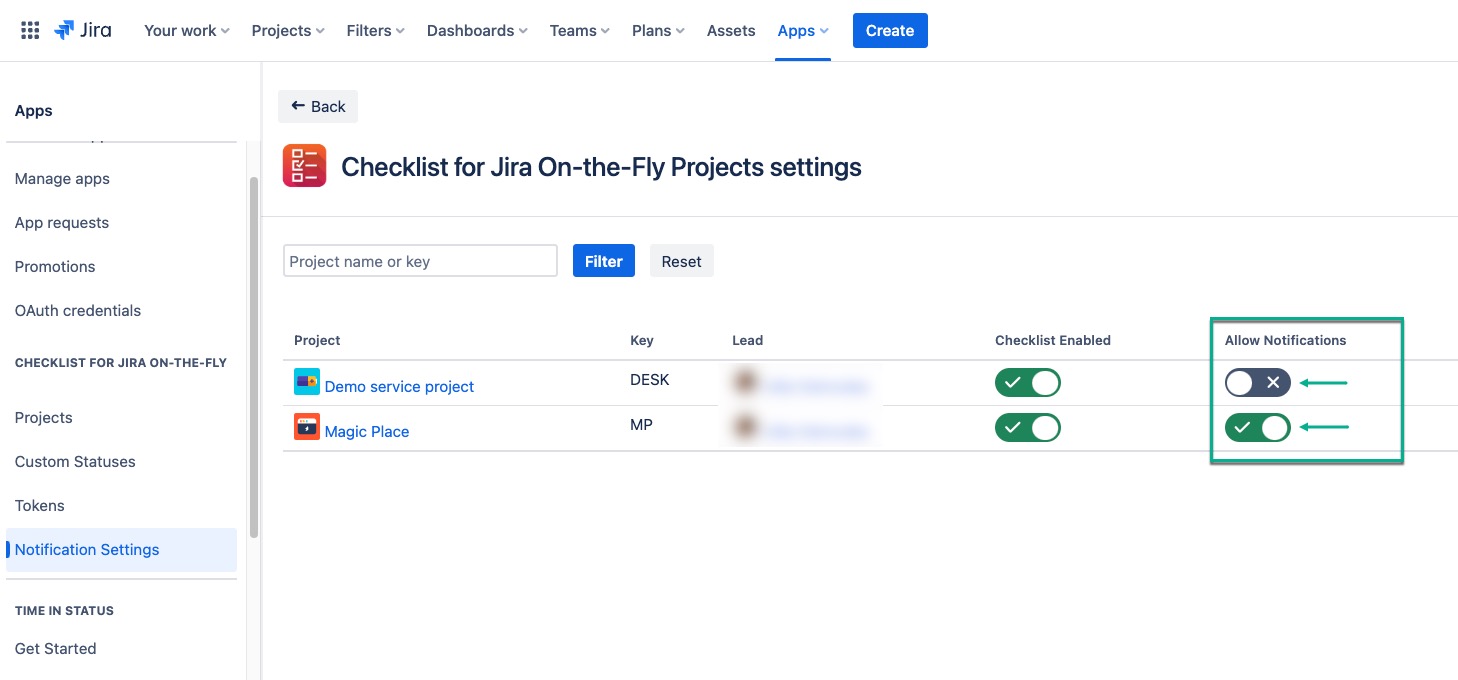
Select Configure Projects Notifications, if you want to disable notifications for a specific project.
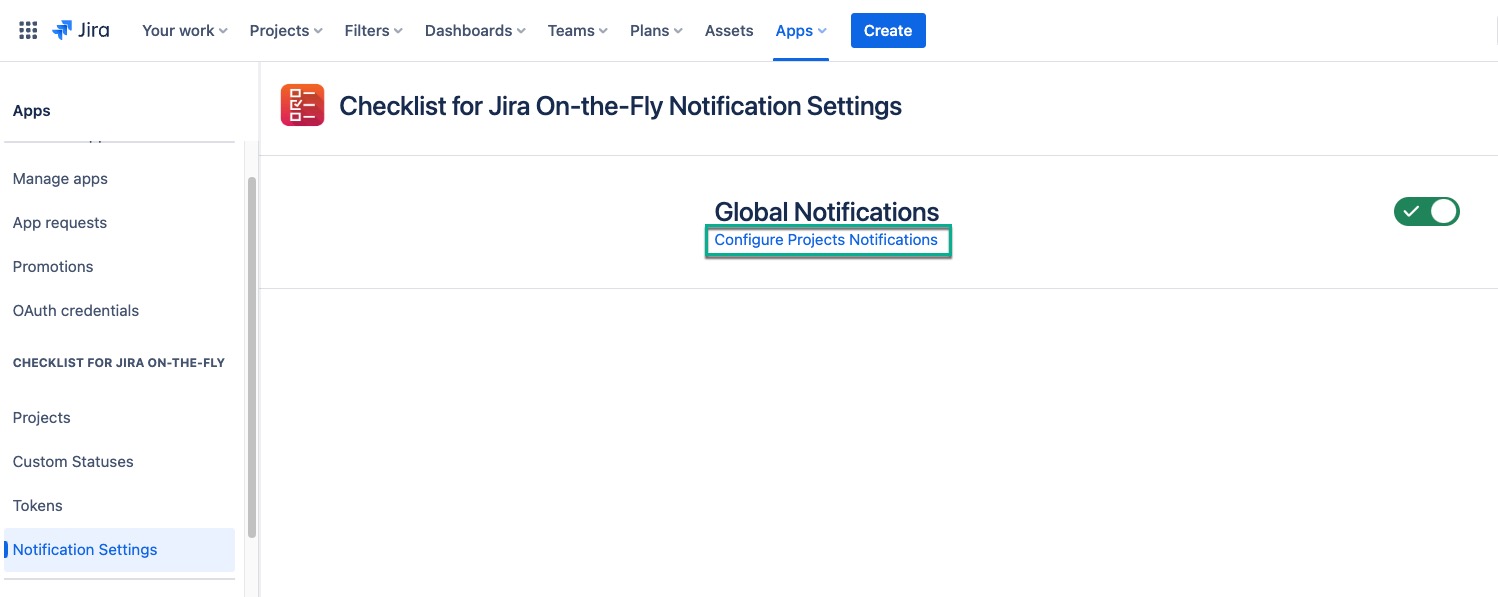
Select where you want to keep notifications and where to disable them, and then switch the toggle.
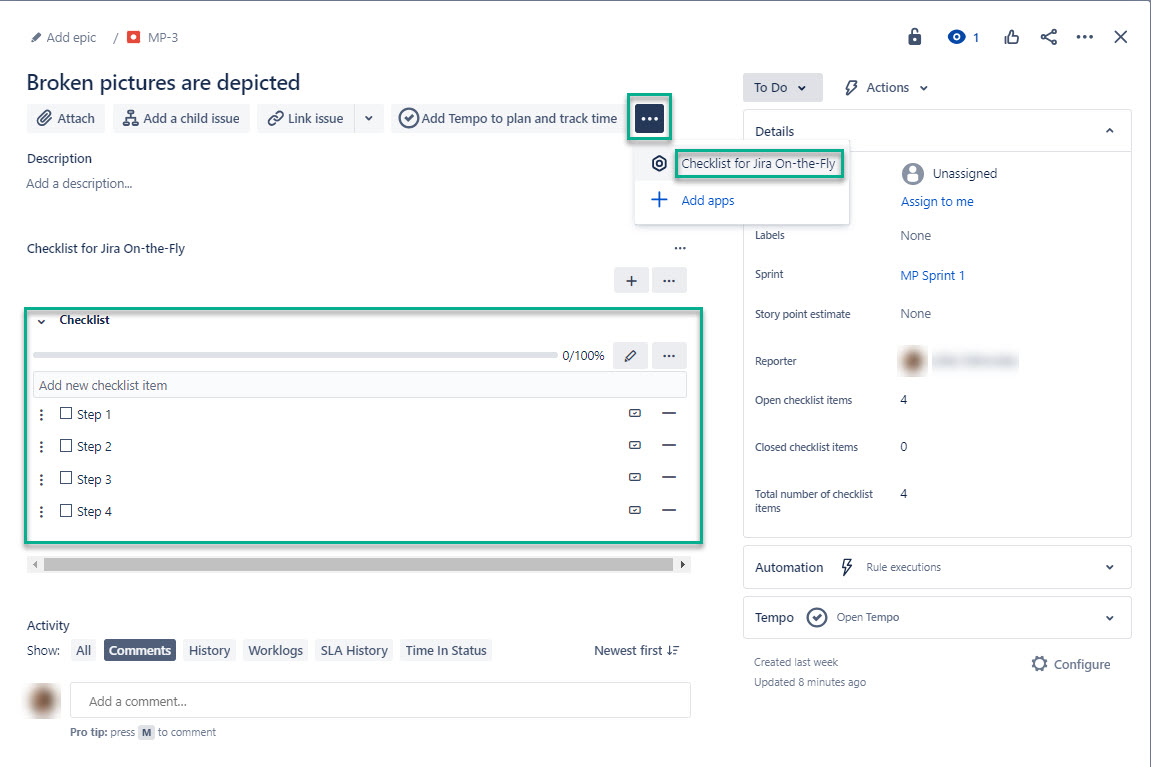
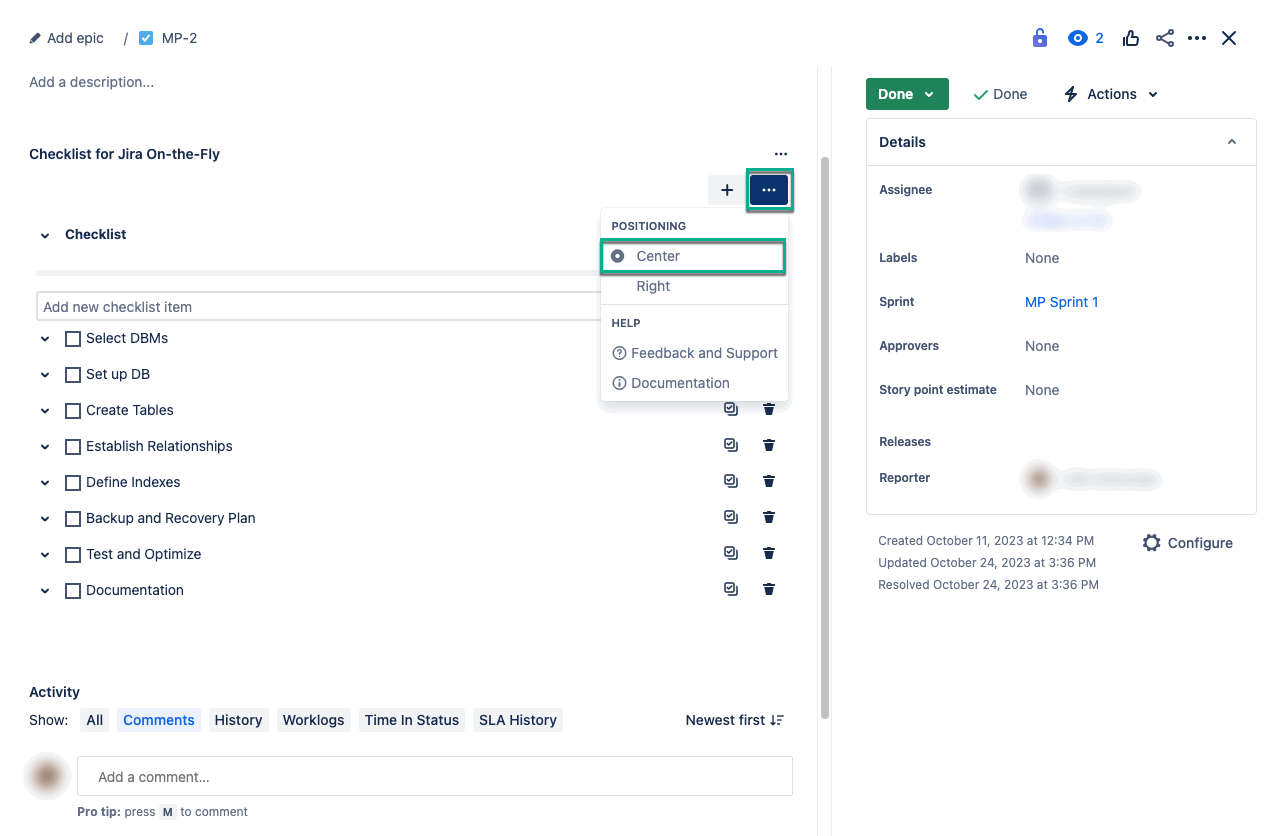
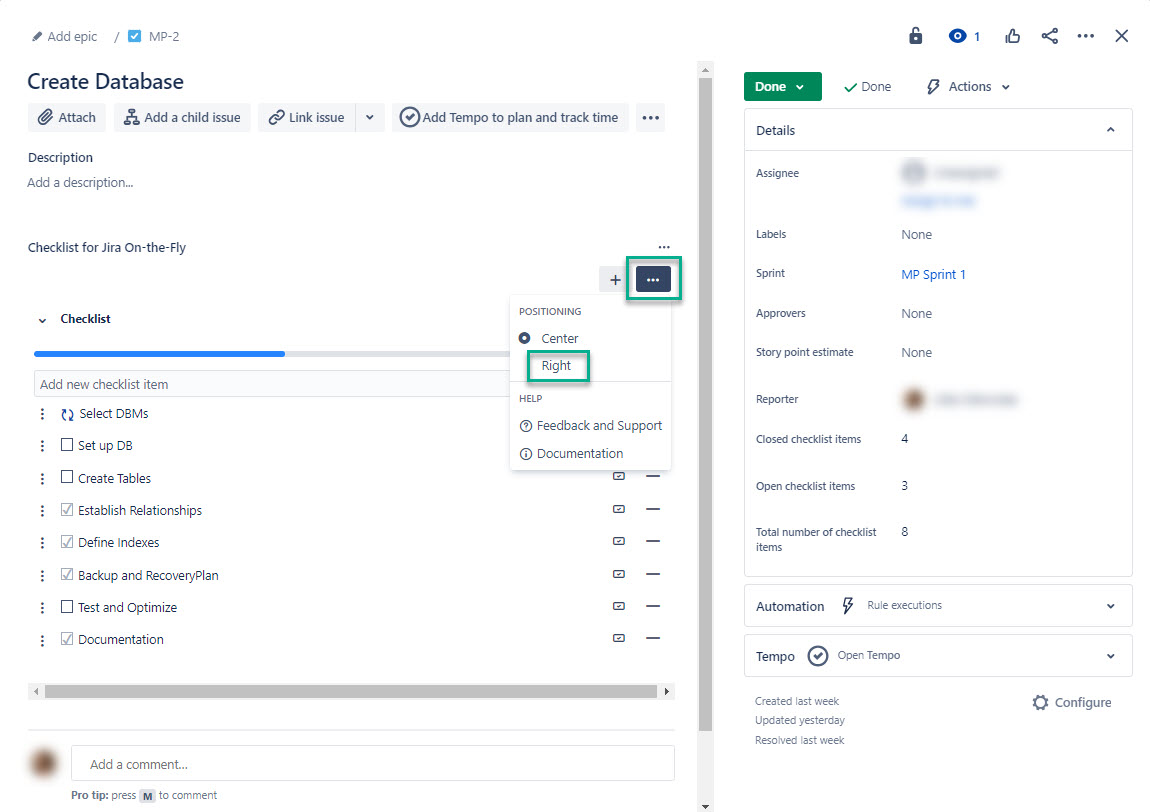
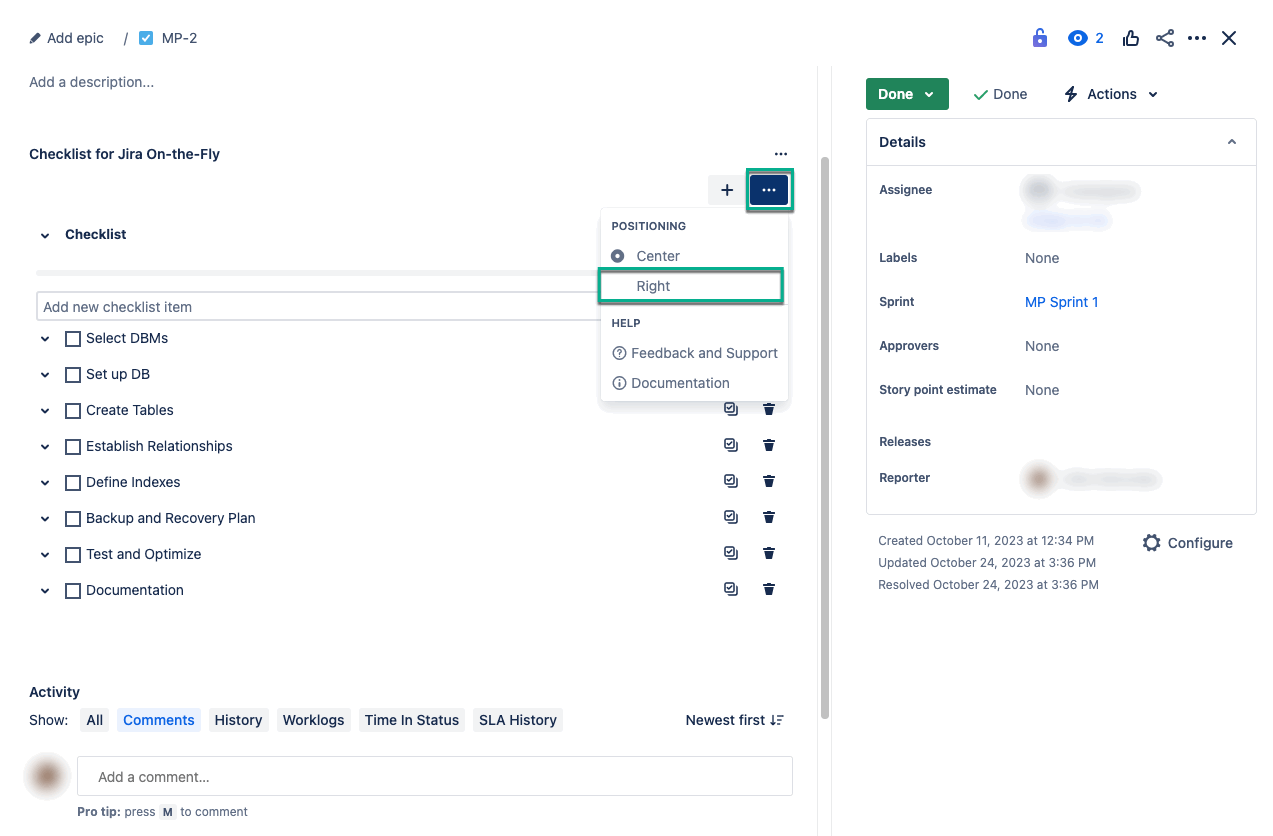
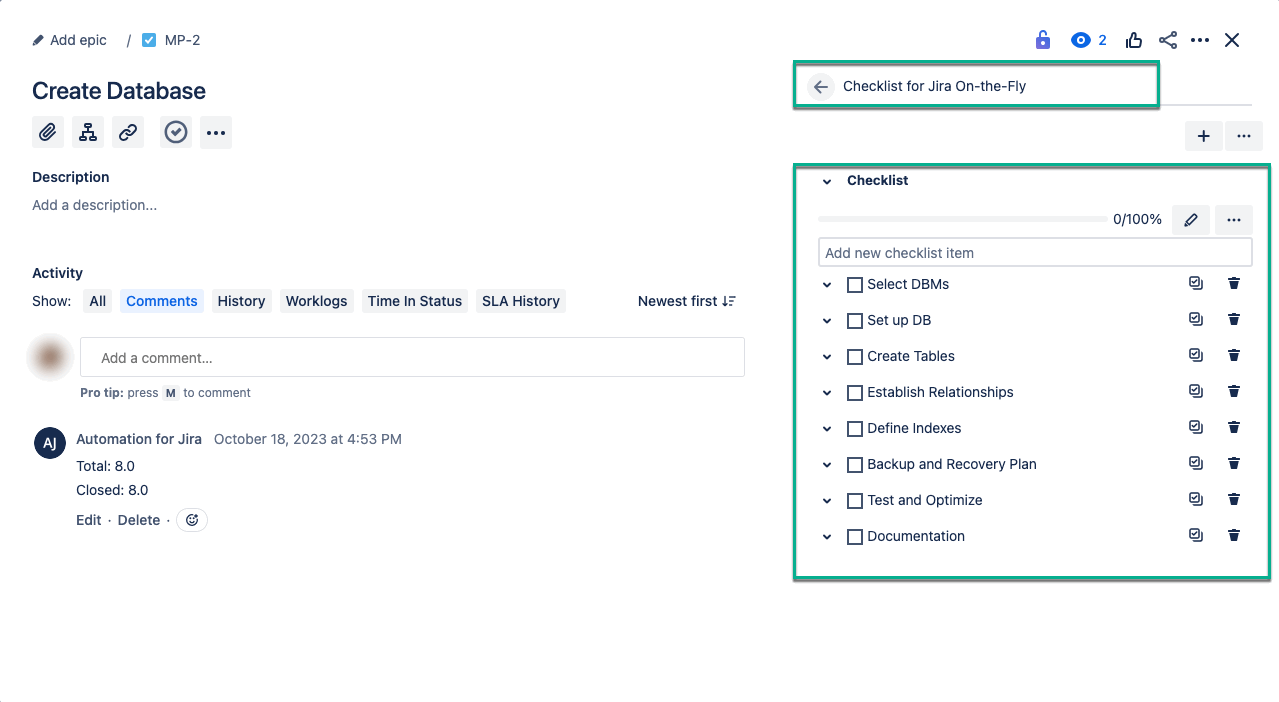
Setting Checklist for Jira On-the-Fly Position
By default, the checklist is located in the center of an issue page.
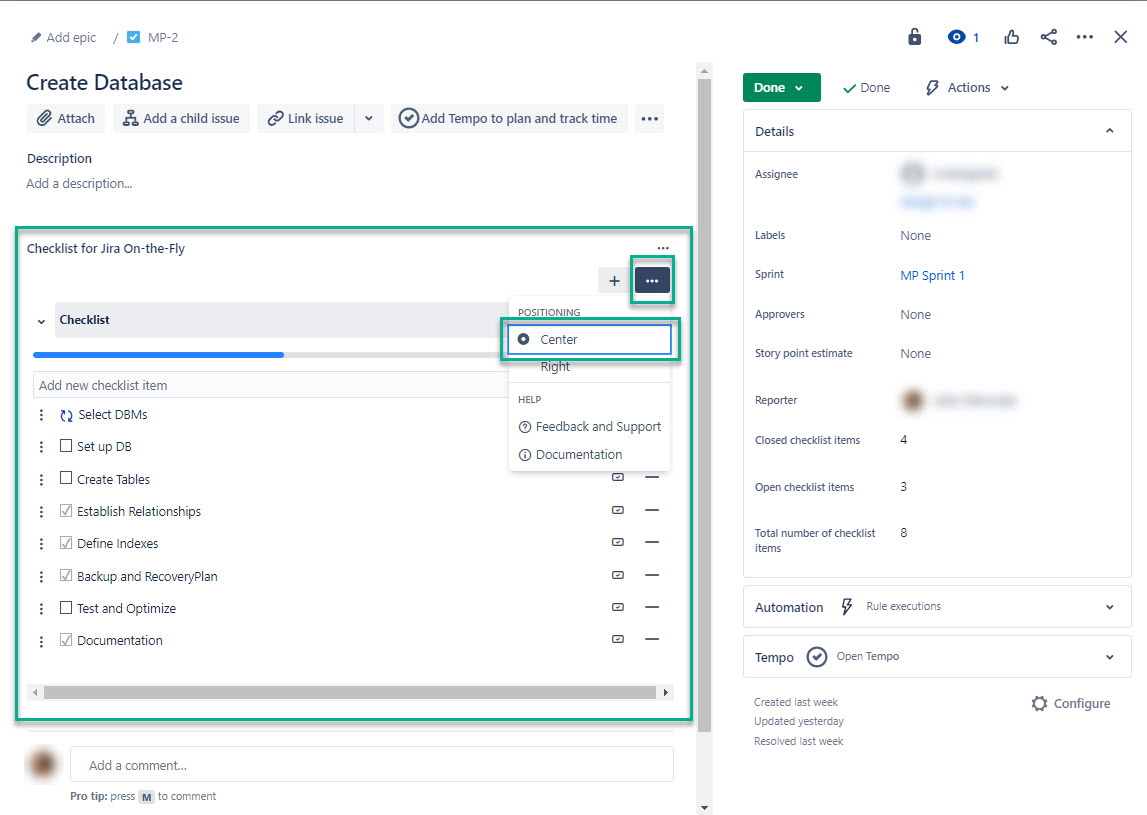
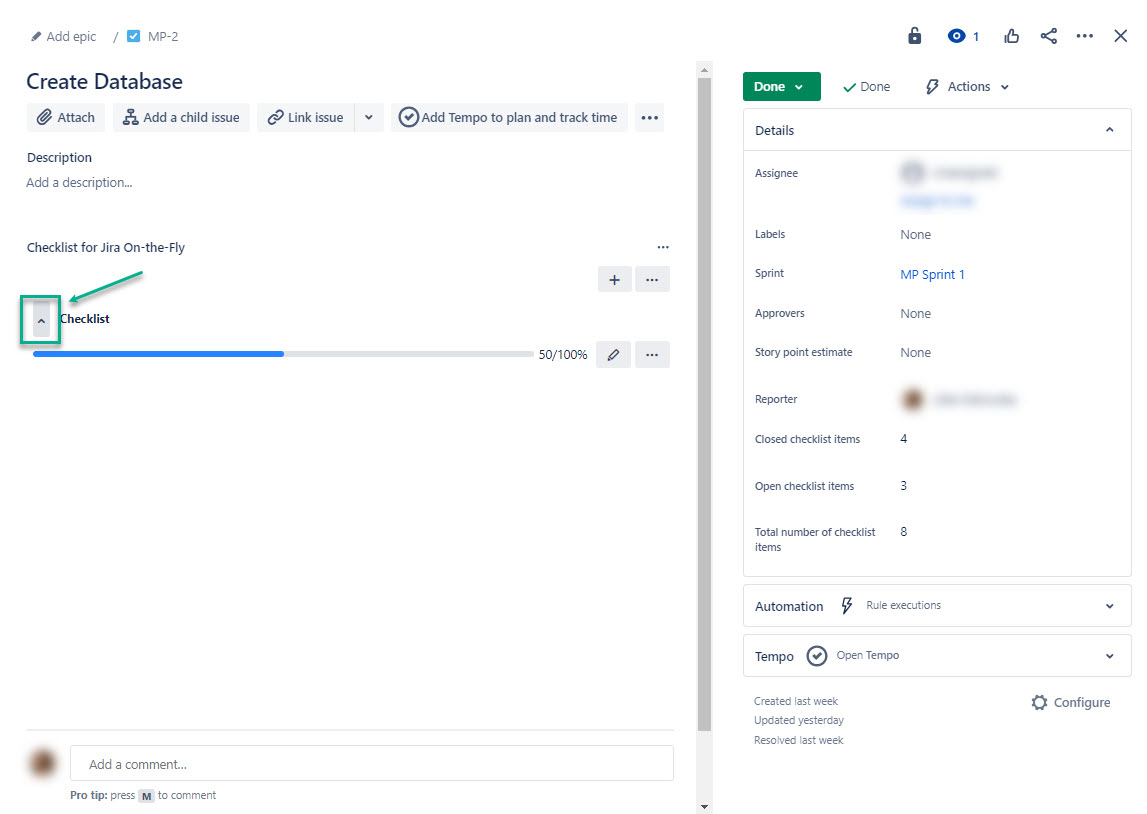
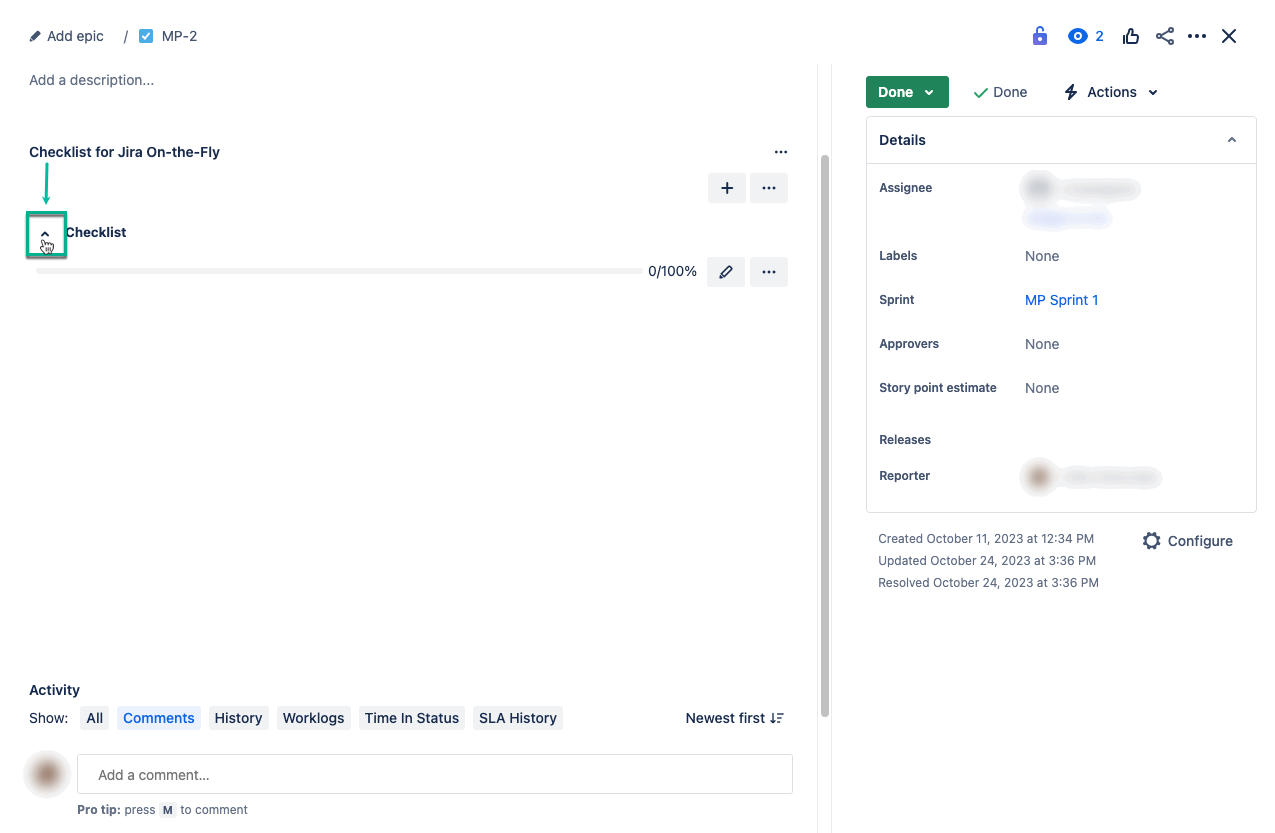
You can collapse the checklist, and then the progress line with percentages of completed tasks will be displayed.
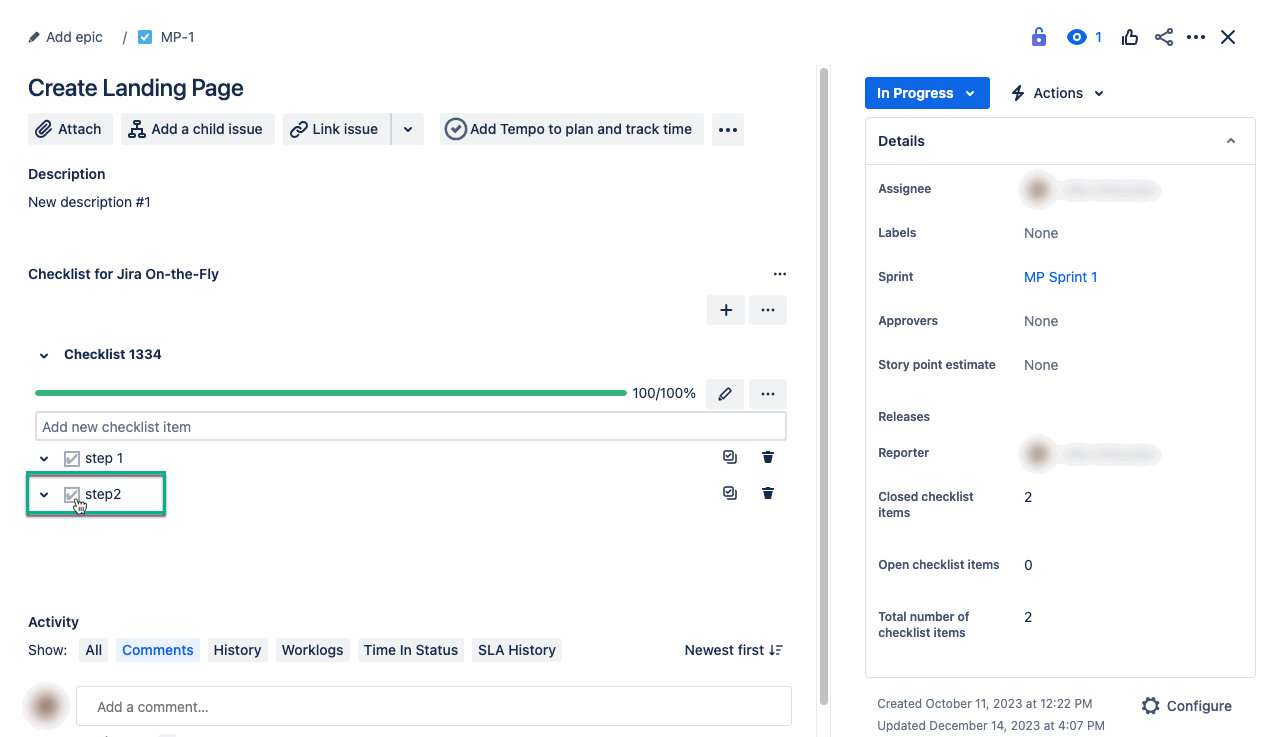
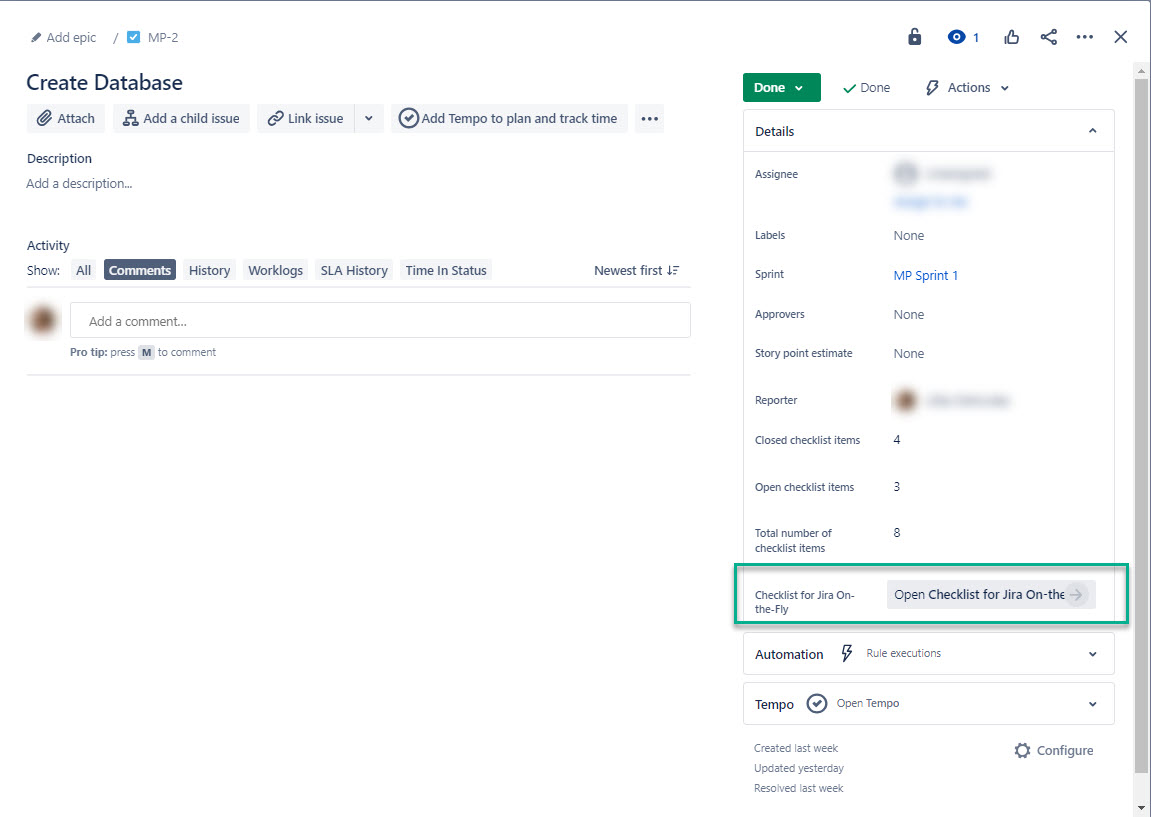
You can move the checklist to the Details section on the right.
| Info |
|---|
Refer to the screenshot for steps. |
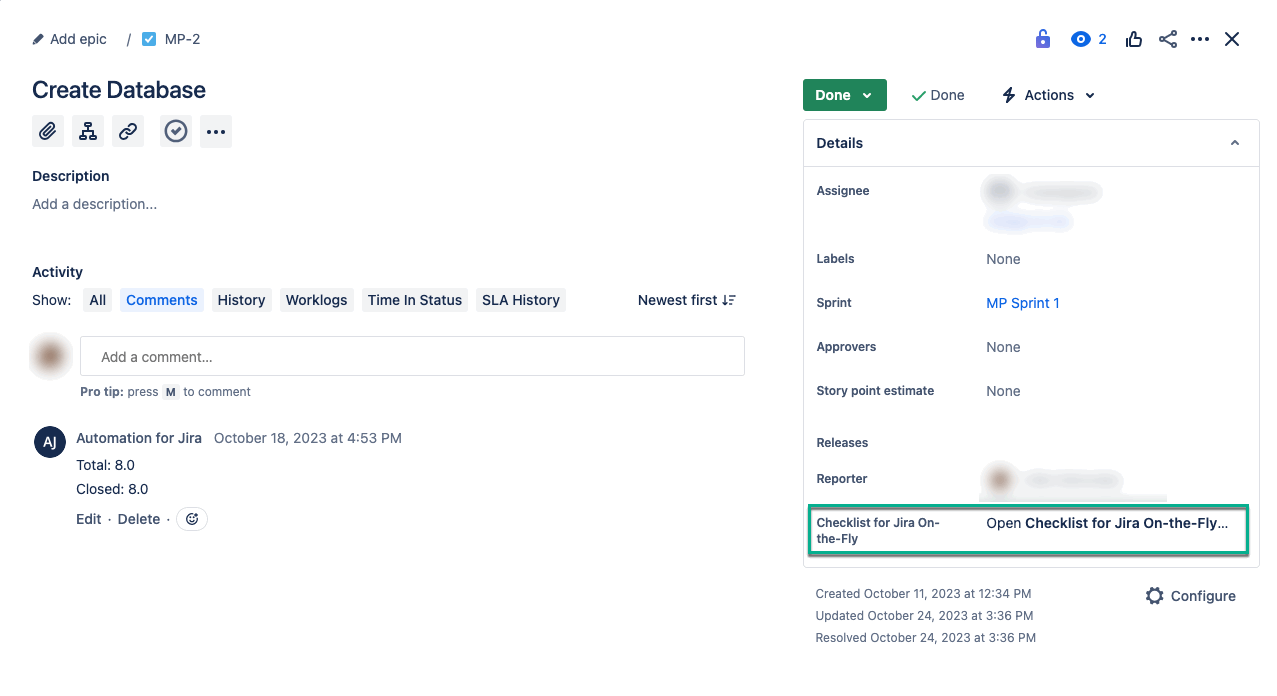
The Checklist for Jira In-the-Fly field will appear on the right side. Selecting Open Checklist for Jira On-the-Fly → expands the checklist itself.
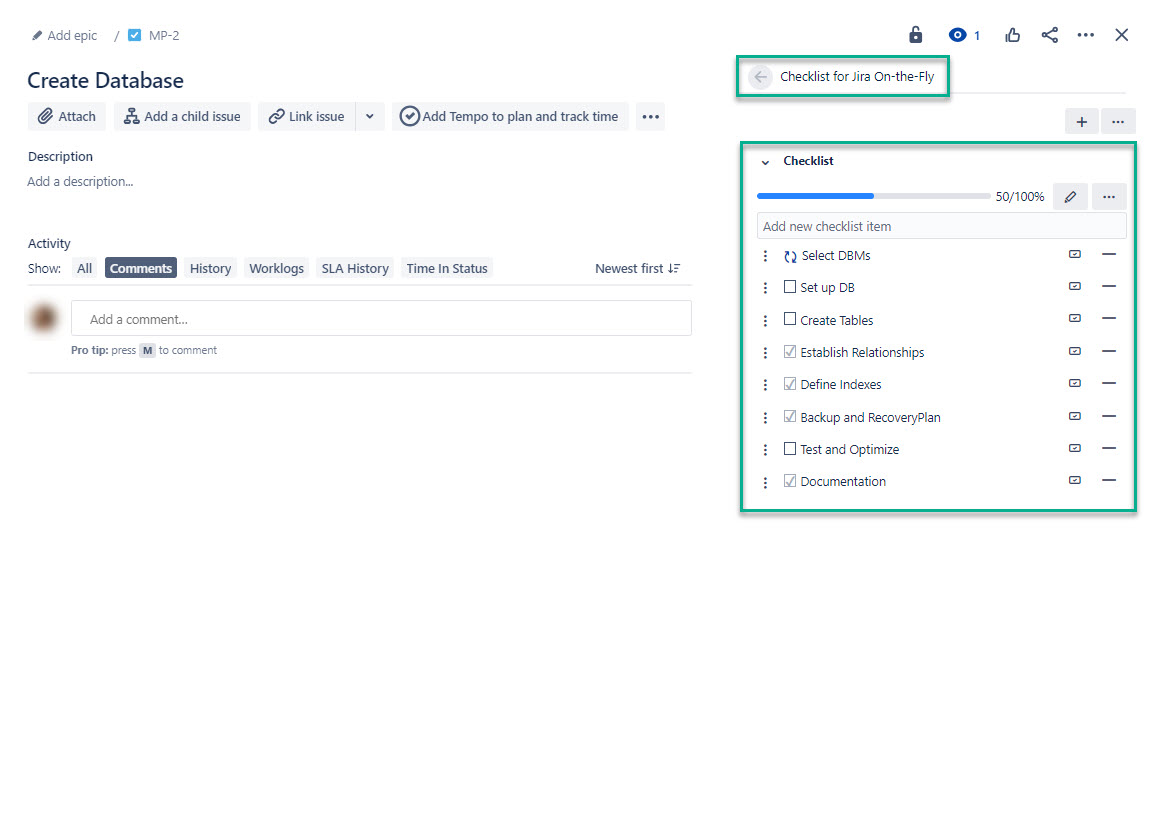
Your checklist will be displayed on the right will the full functionality described before. Selecting ← Checklist for Jira On-the-Fly returns you to the Details tab.
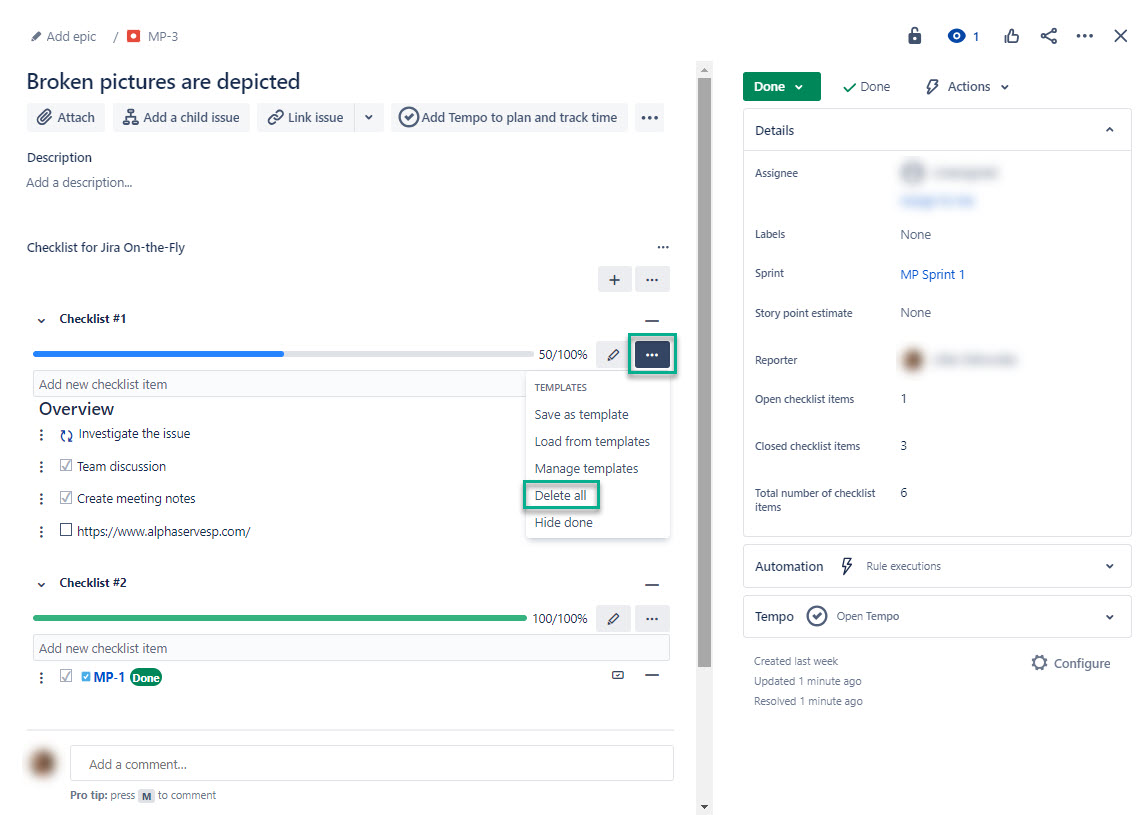
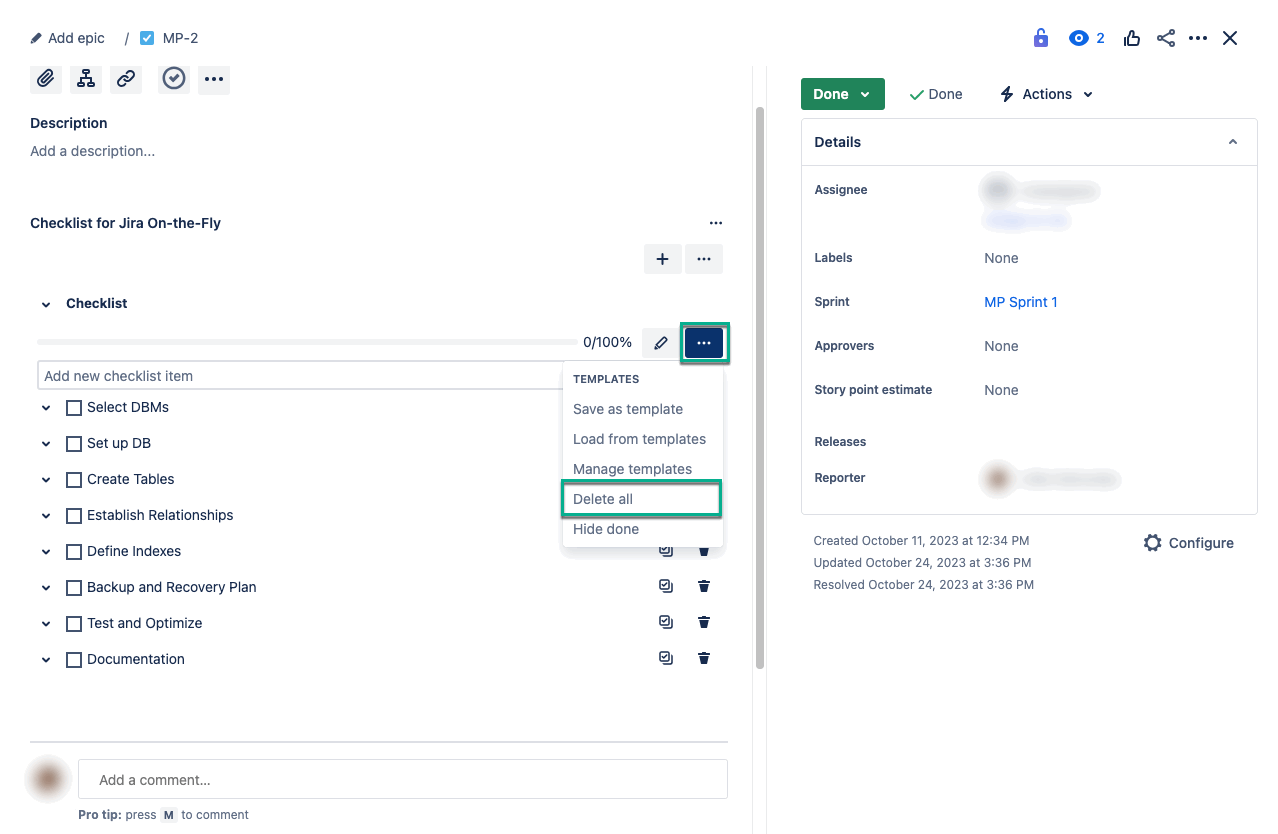
Deleting Checklist for Jira On-the-Fly Items
Checklist for Jira On-the-Fly allows you to delete a single item if you don’t want to delete the whole checklist.
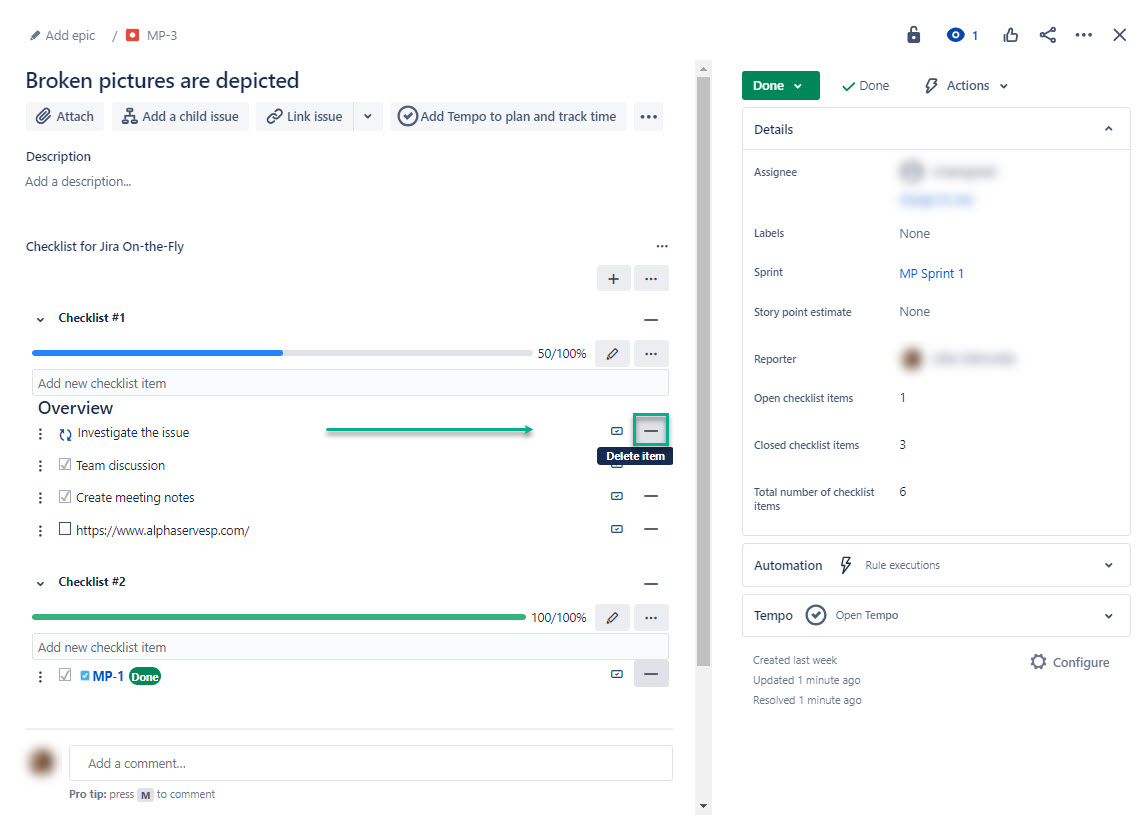

Checklist On-the-Fly also allows you to delete all items at once.
| Info |
|---|
Refer to the screenshot for steps. |
Creating and Managing Templates
Checklist for Jira On-the-Fly allows you to create as many checklist templates as necessary for various projects. These templates help organize the entire task pull effectively, visualizing your progress comprehensively. This not only saves you time and effort but also enhances productivity by streamlining your workflow.
Creating Templates
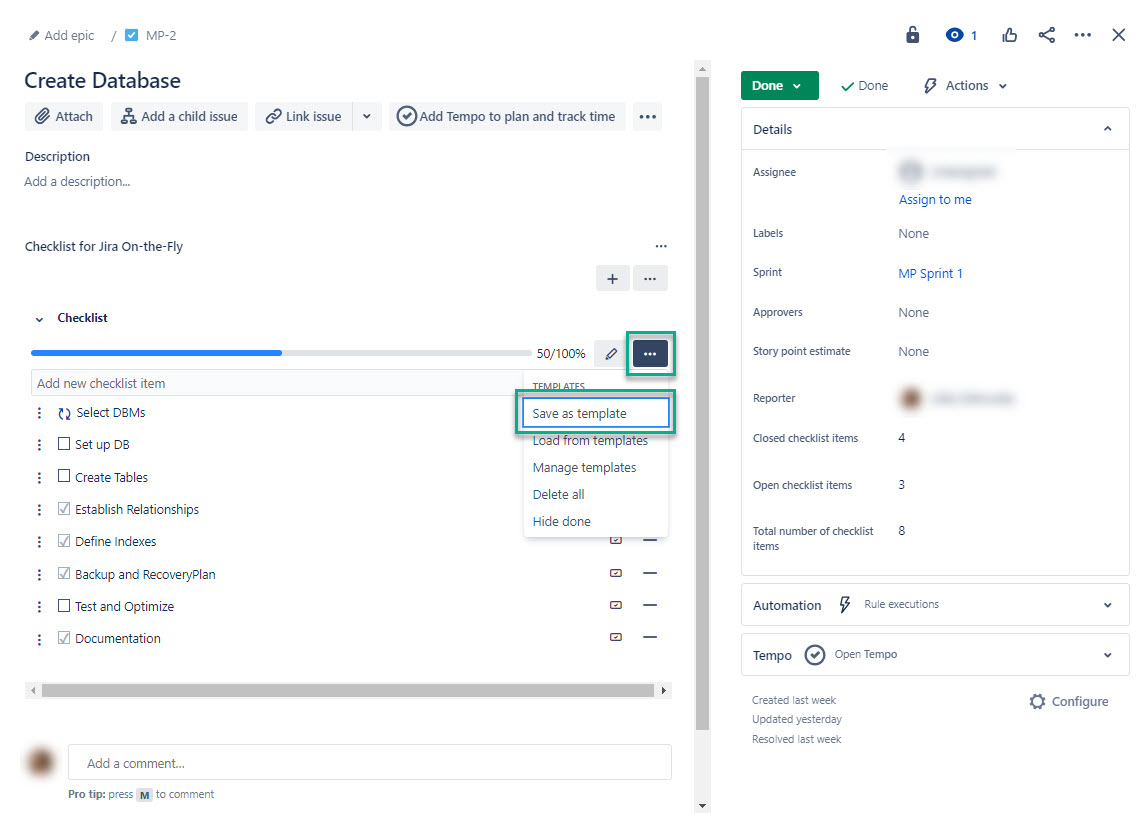
Create a checklist with the appropriate items, and then select Save it as a template.
| Info |
|---|
Refer to the screenshot for steps. |
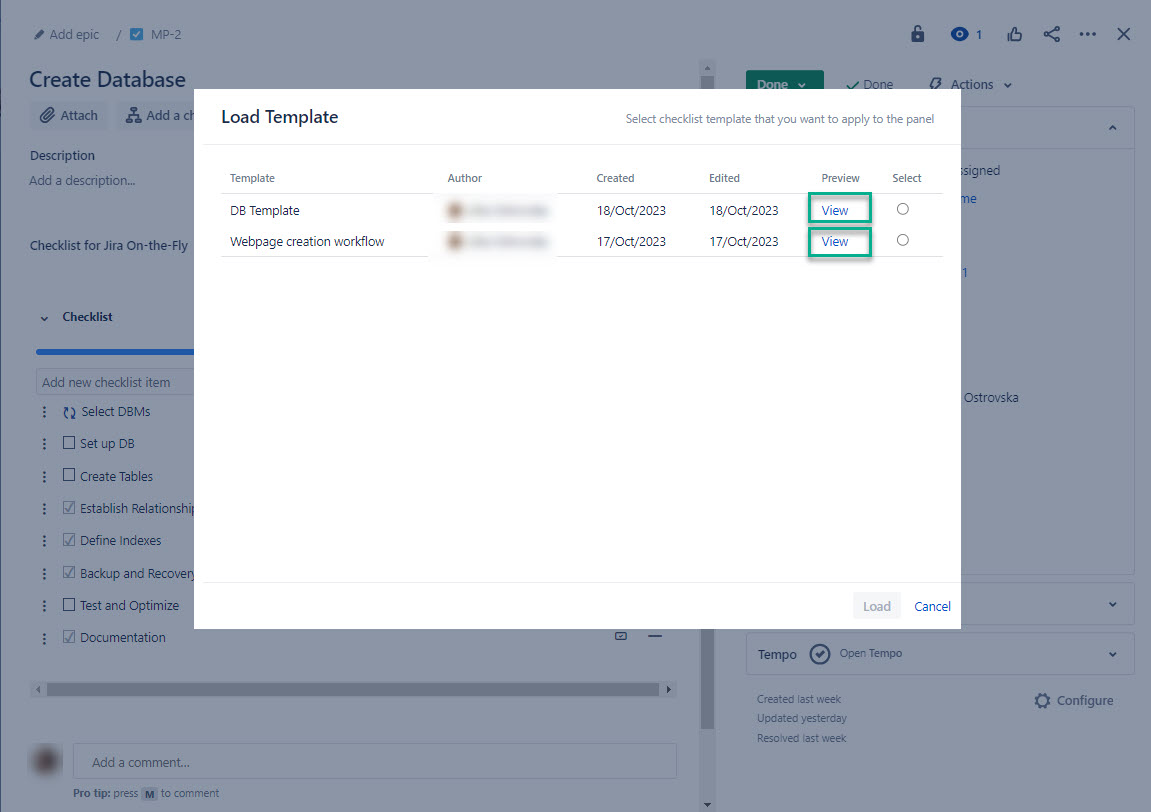
When you need a checklist template, select Load from templates, and then select the necessary one.

| Info |
|---|
Before selecting a template, you can view it to make sure it’s the right one. |
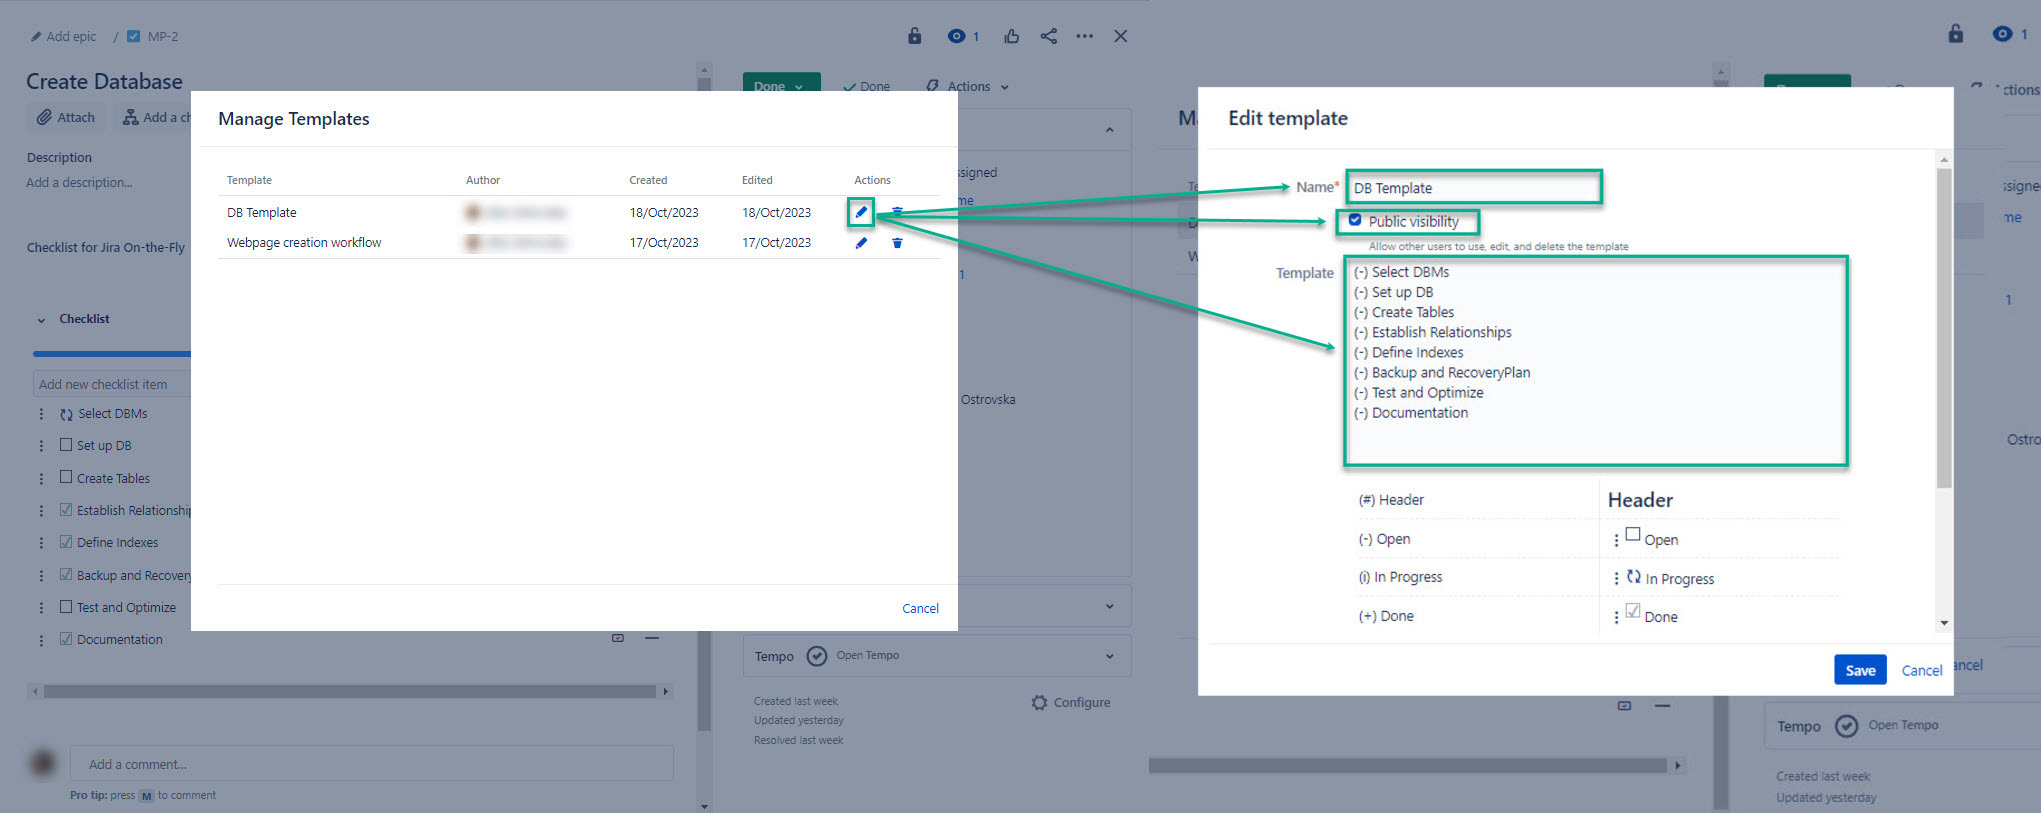
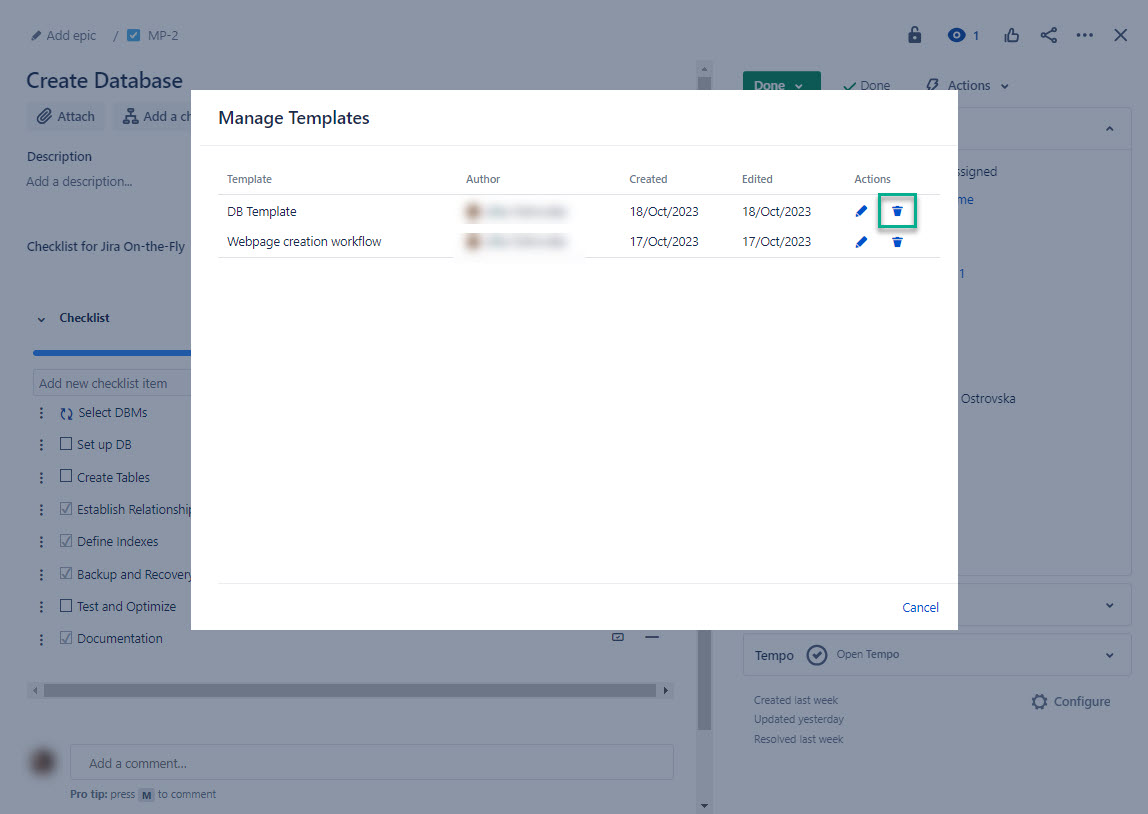
Managing Templates
You can also view, edit, and delete your templates.
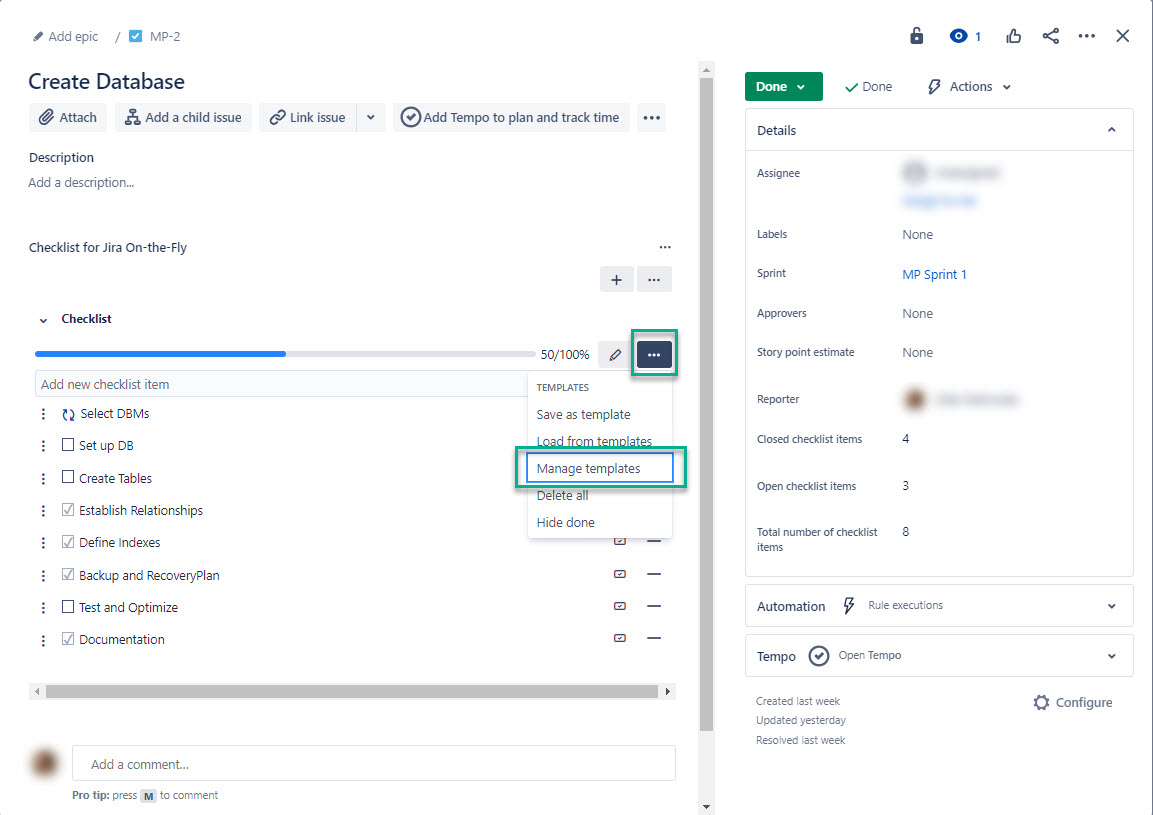
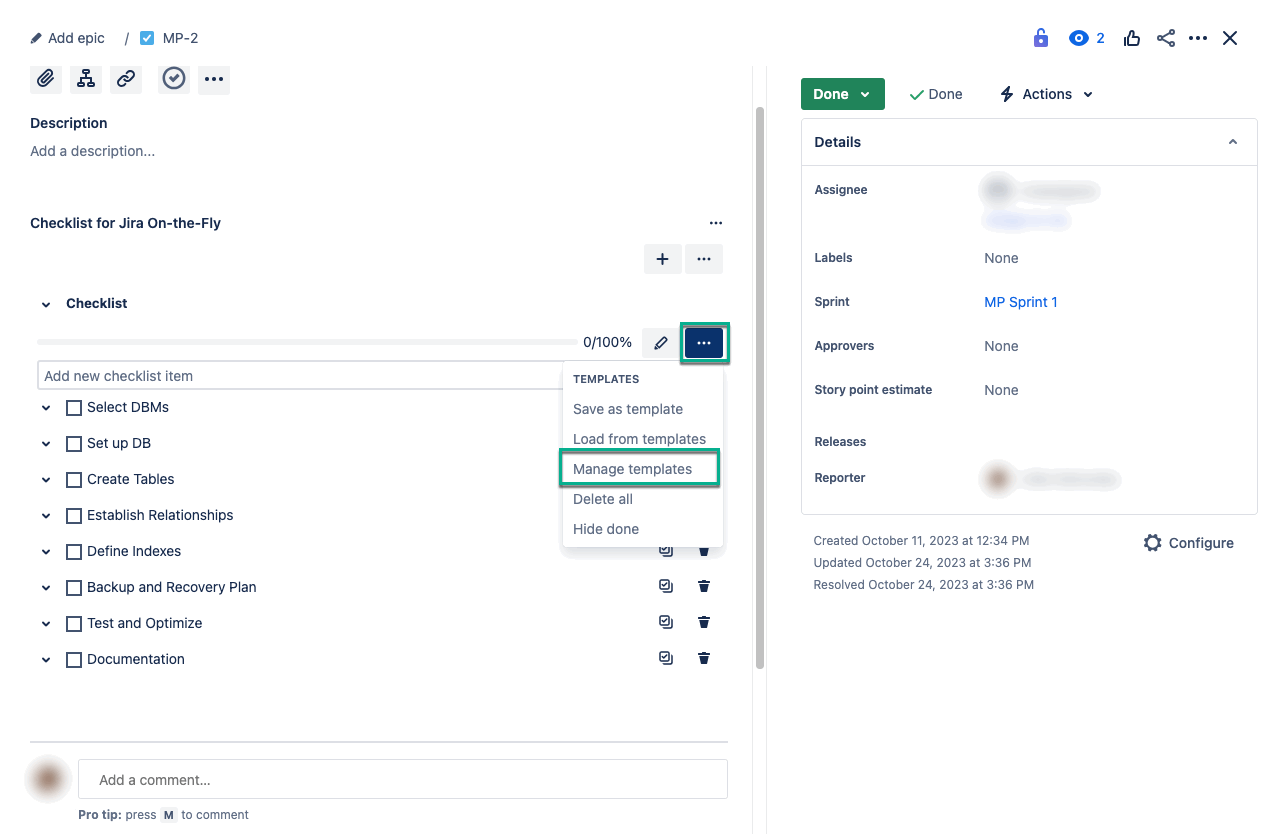
Select the Edit icon to start editing your template.
Name* - This field allows you to change the name of your template.
Public visibility - This option allows other users to use, edit, and delete the template.
Template - This field allows you to modify the checklist body. You can delete or add checklist items, headers, etc.

Select the Recycle Bin icon to delete your template.
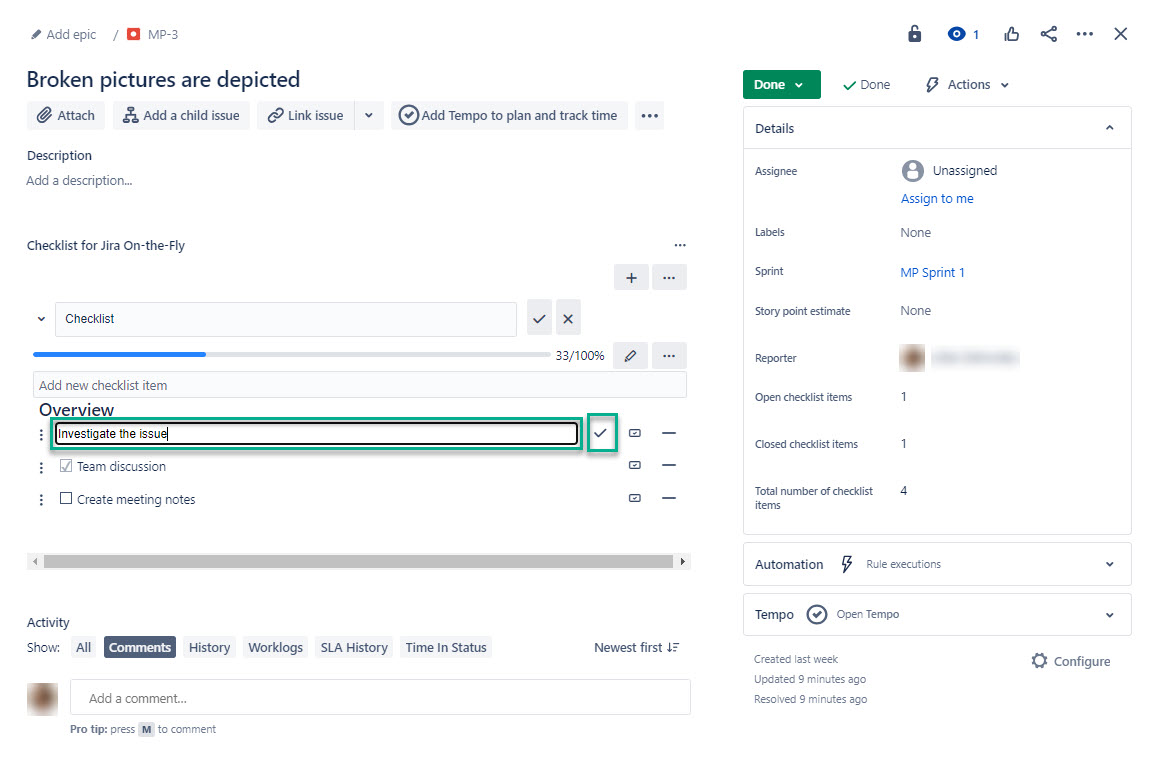
Enabling Issue Status Synchronization
Administer Jira Cloud Permissions are required to perform actions in this section.
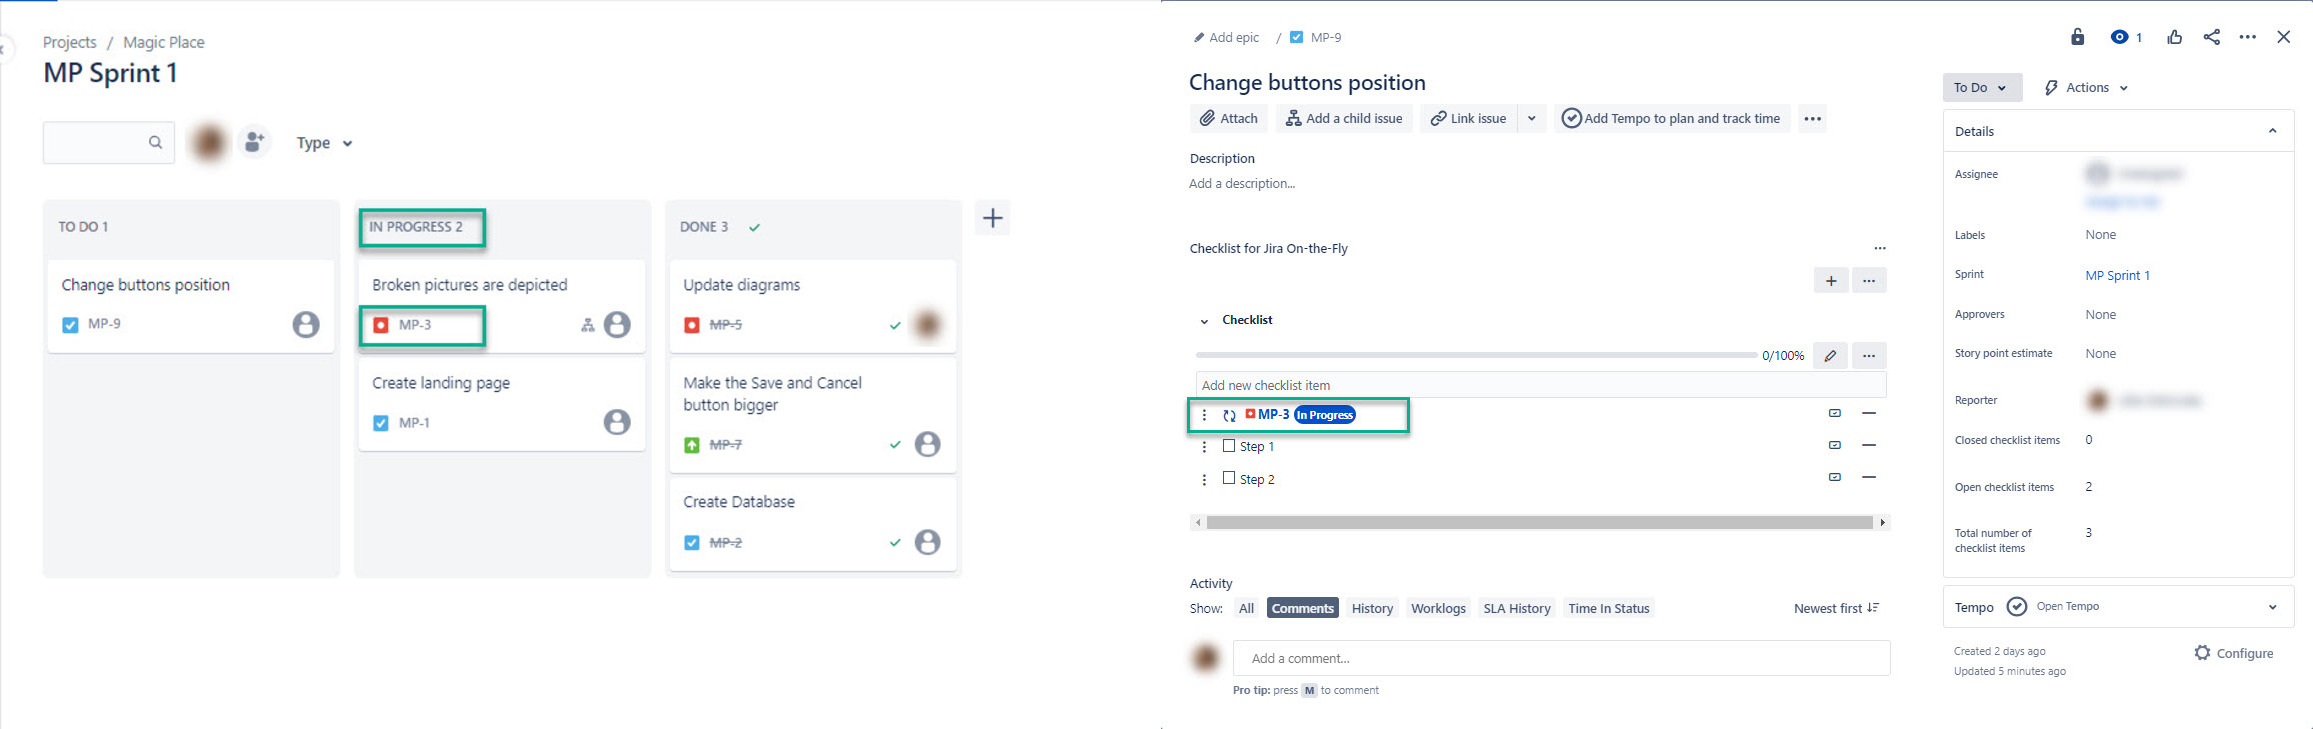
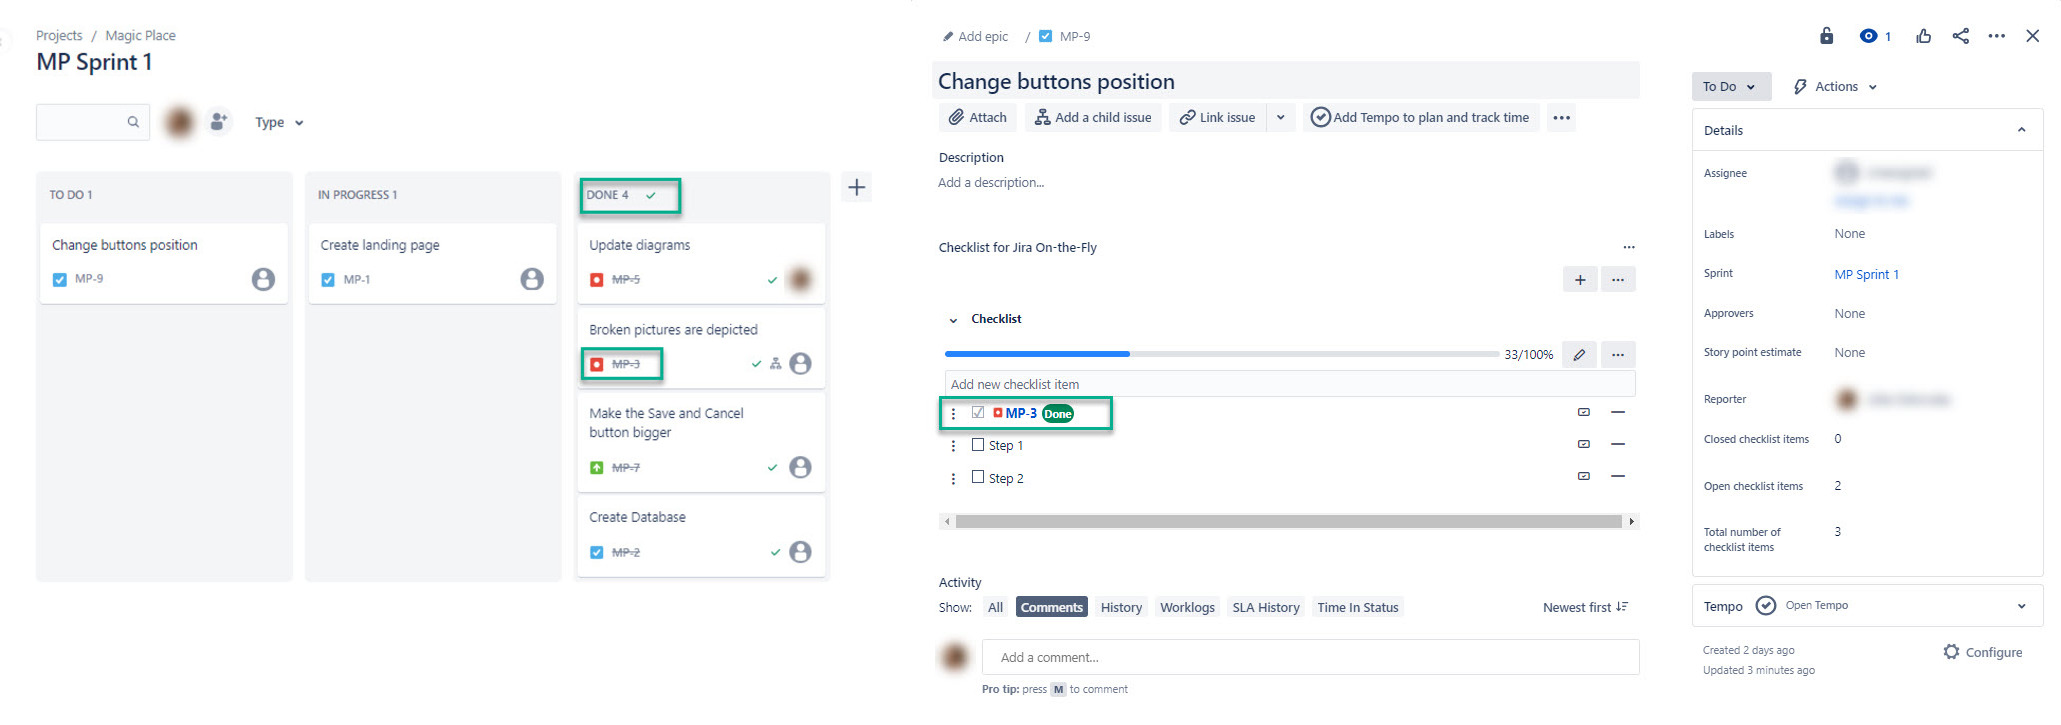
Issue status synchronization - this feature synchronizes checklist item statuses with issue statuses in Jira, ensuring that your checklist and issue statuses are always aligned. It provides a clear and accurate overview of your project’s progress.
If all checklist items are completed, the issue will be automatically moved to the Done status.
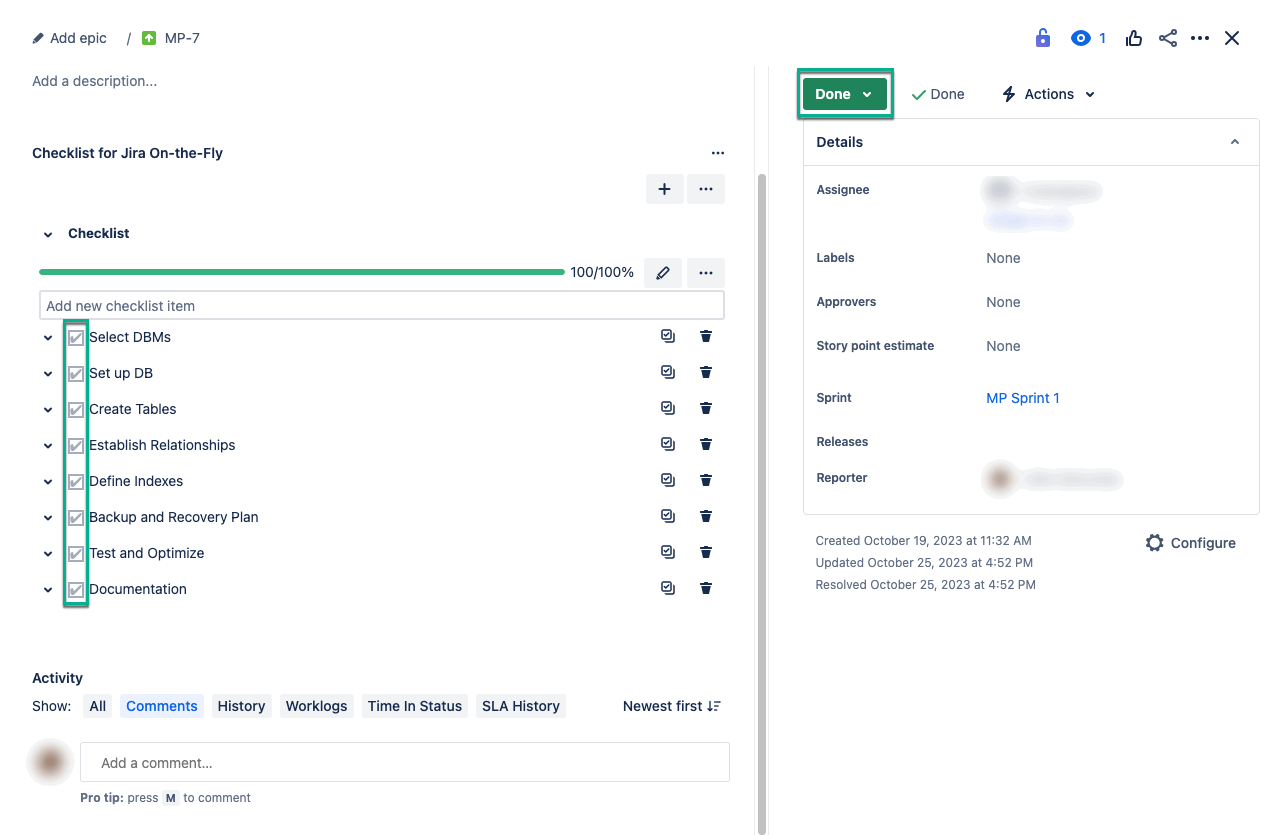
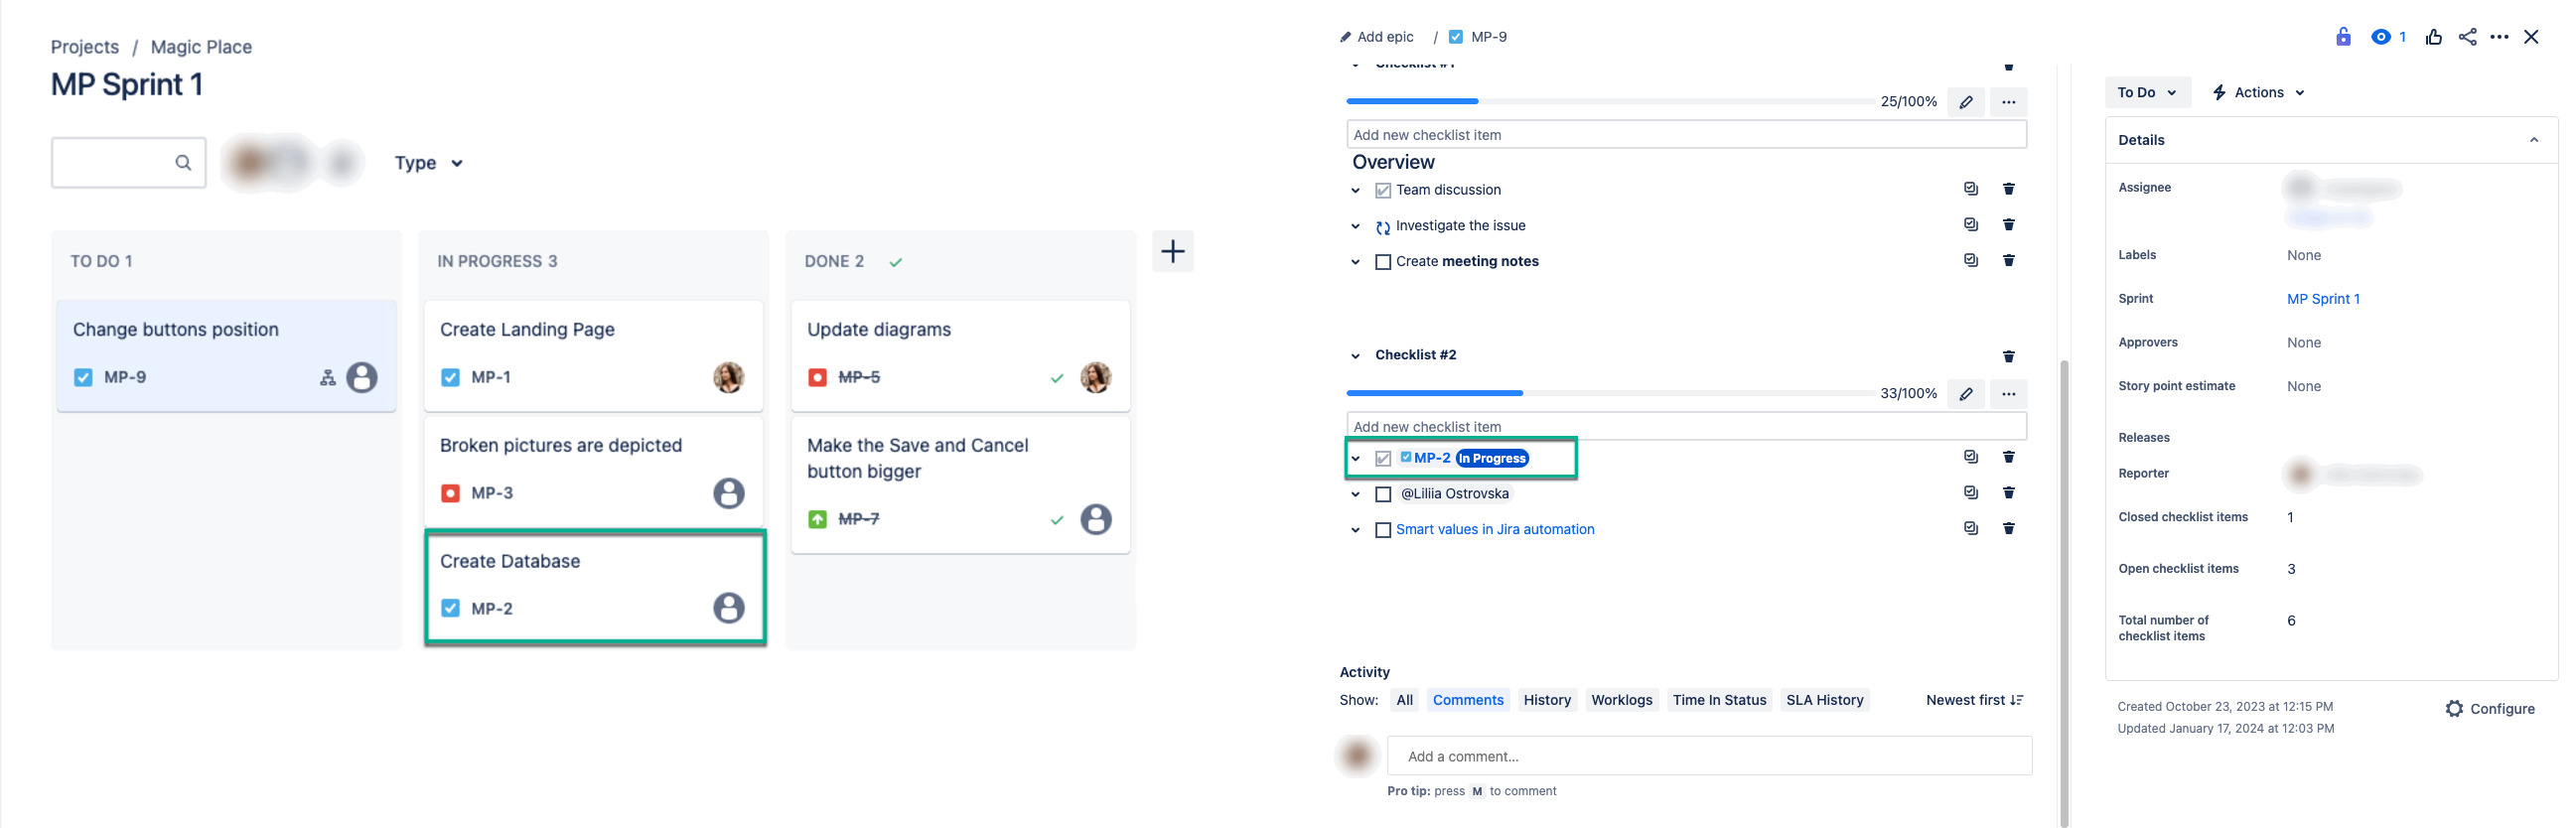
If your checklist item includes the issue itself added by its issue key, Checklist for Jira On-the-Fly will synchronize its statuses between the board and in the checklist.
| Info |
|---|
For example, if issue MP-3 is in the In Progress status, it will automatically appear in the same status on the checklist. Similarly, If you change the status of issue MP-3 to the Done status, its status in the checklist will be updated accordingly. |
| Info |
|---|
If you need instructions on how to enable this feature, refer to our Administrator Guide. |
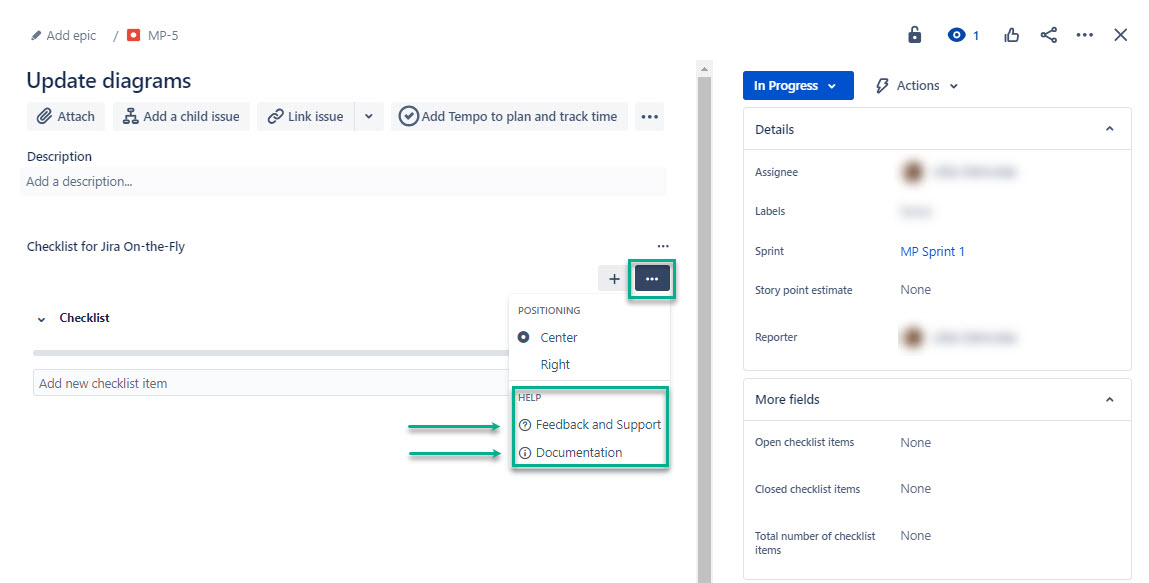
Getting Help
| Tip |
|---|
From the issue page, you can get help by selecting Feedback and Support. |
| Info |
|---|
Before reaching out to support, we recommend that you acquaint yourself with Checklist for Jira On-the-Fly Documentation. Both links open in a new tab. |