| Table of Contents |
|---|
To be able to access Mail Me, it should be configured as enabled to the certain project you’re working with or to all projects in the system. If you don’t see the Mail Me button in the issue or task, please contact your Jira Administrator.
Jira Administrators can always access Mail Me configurations.
Sharing an issue or task by email


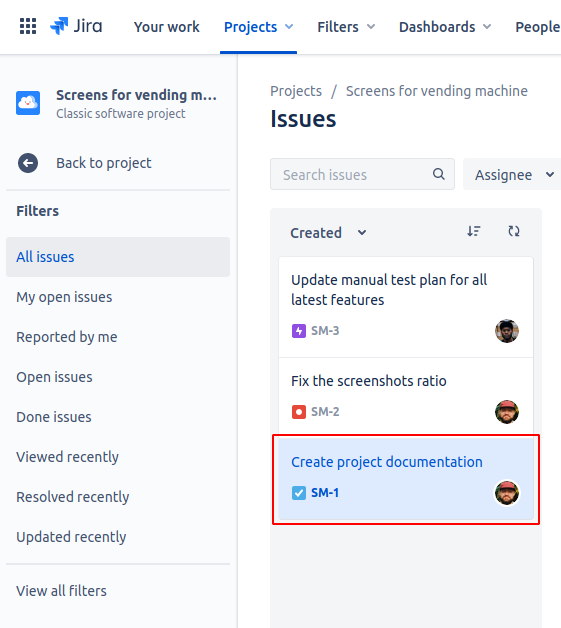
Step 1. Find a relevant issue/task.
You can do it with the help of filters, Issues tab in Projects, or directly from your dashboard.
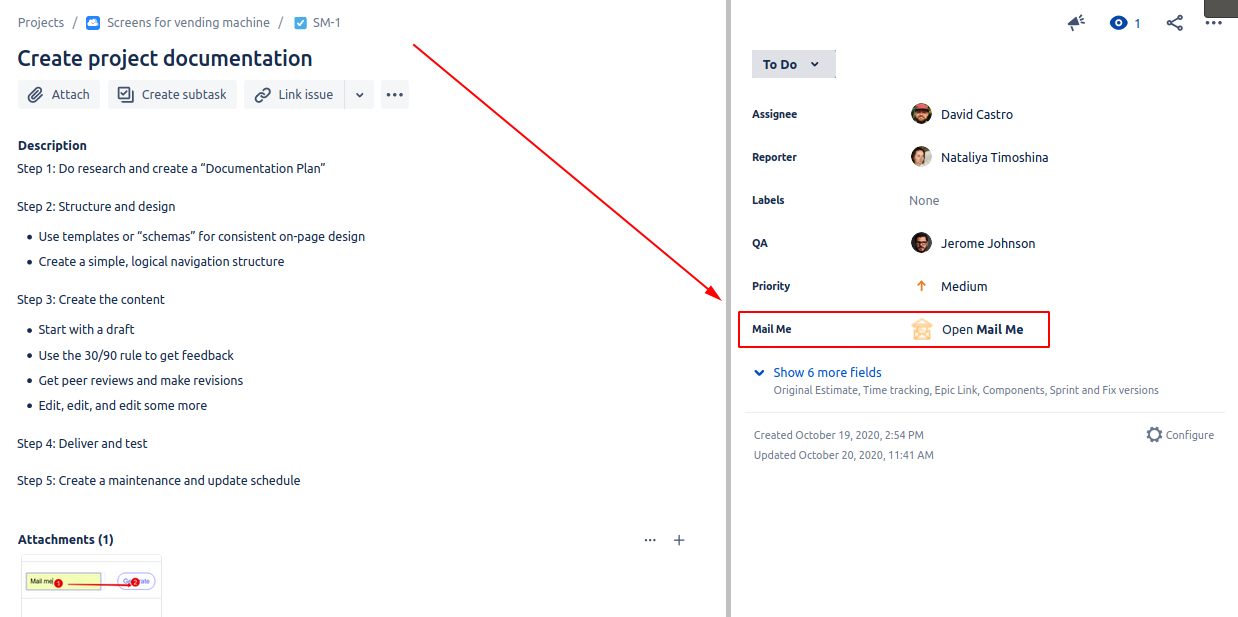
Step 2. Click on the Mail Me button on the issue panel as shown on the screen.
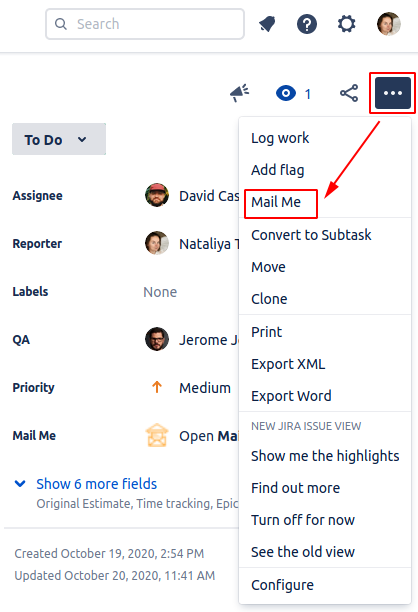
Or you can click on … in the upper right corner of the issue screen and select Mail Me.
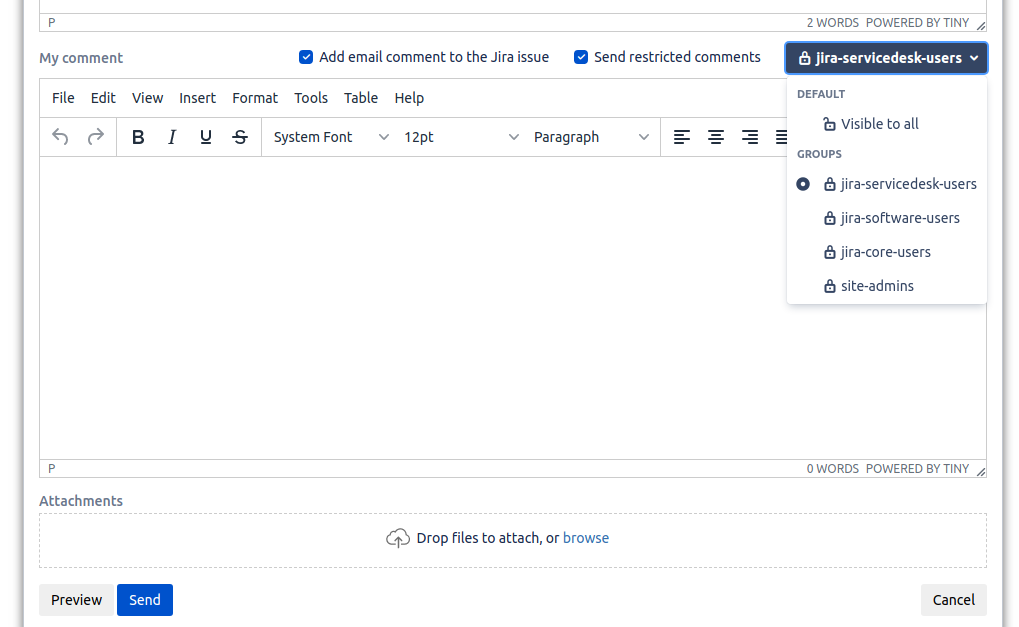
Step 3. Manage the information in the issue/task and send an email:
Recipients - you can either choose from Jira users, user groups or insert external user email directly, issue custom fields (such as user picker, multi user picker, group picker, multi group picker) or issue roles (assignee, creator, project lead, issue watchers, etc.). Please note: if you add more than 100 recipients, the app will send separate emails for each group of 100 recipients. E.g. if you select 250 recipients, Mail Me will send 3 emails: 1 to the first 100 recipients, 2nd to the next 100 and the 3d for the remaining 50.
Copy Recipients - if you want to put anyone in a copy (CC).
Blind Copy Recipients - recipients specified in this field (BCC) do not appear in the received message header and the recipients in the To or Cc fields will not know that a copy sent to these address.
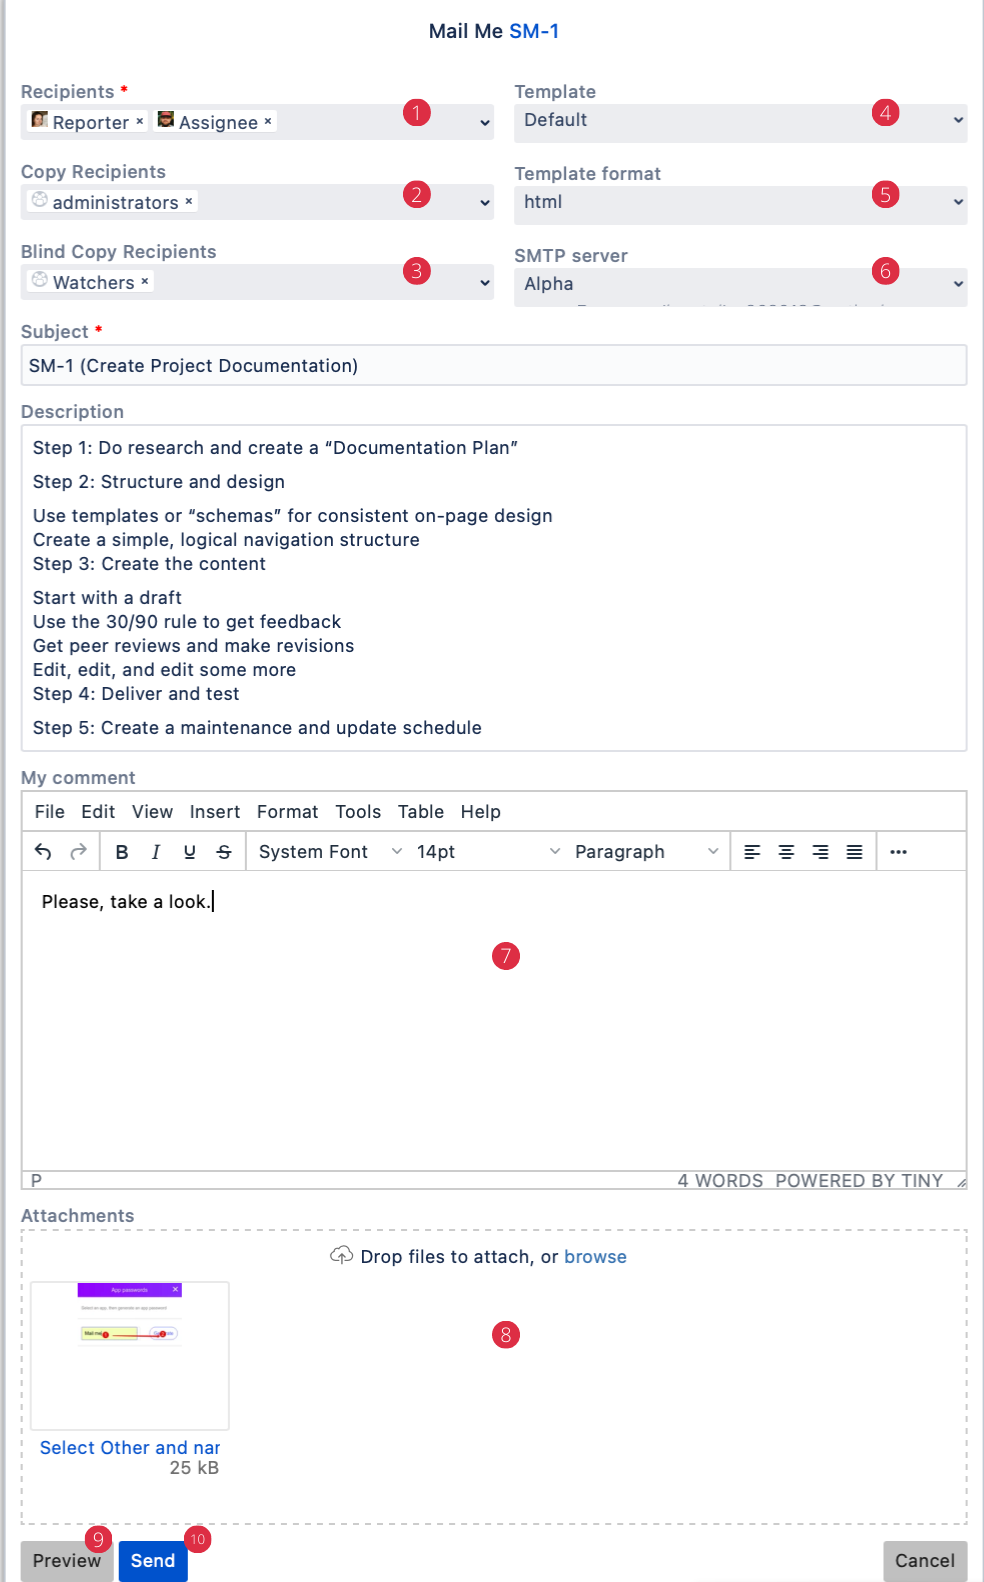
Choose a relevant Email template in order to quickly format or restrict information in an email. Normally Mail Me will use a default template that includes the most relevant issue information.
Choose the desired email display format (Template format) (HTML or Text).
If multiple SMTP servers were configured by your administrator, you can pick one to send from.
If needed, leave your comments on the issue/task which you want to share.
Original issue attachments are added to email by default. You can remove them from email, if needed. You can also attach other files and documents.
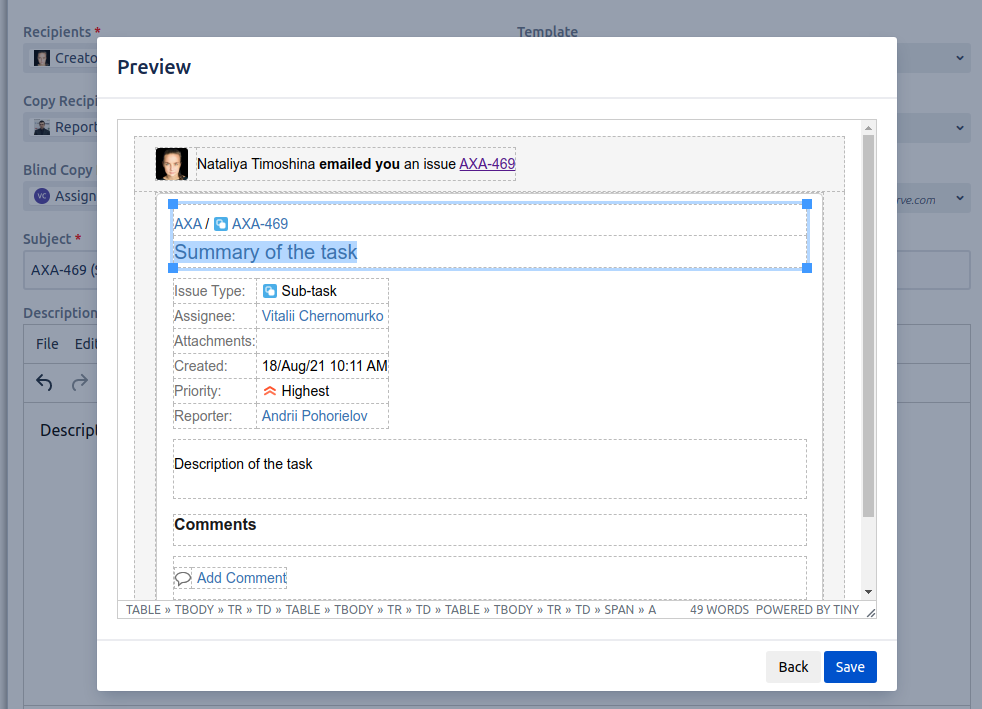
Press Preview to check the email final form.
Press Send to send your email to the recipients.
The resulting email should look like this:

Sharing the issue with original comments
To send the issue with all it’s comments, follow the same 1-2 steps as described above: find the relevant issue, click Mail Me. In the editing window select Template - Default with issue comments. Edit the email, if needed and press Send.
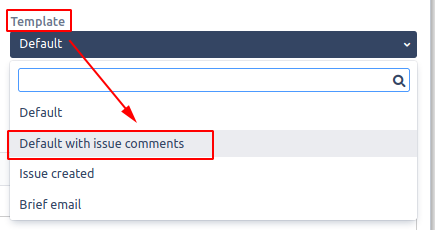
The resulting email should look like this:
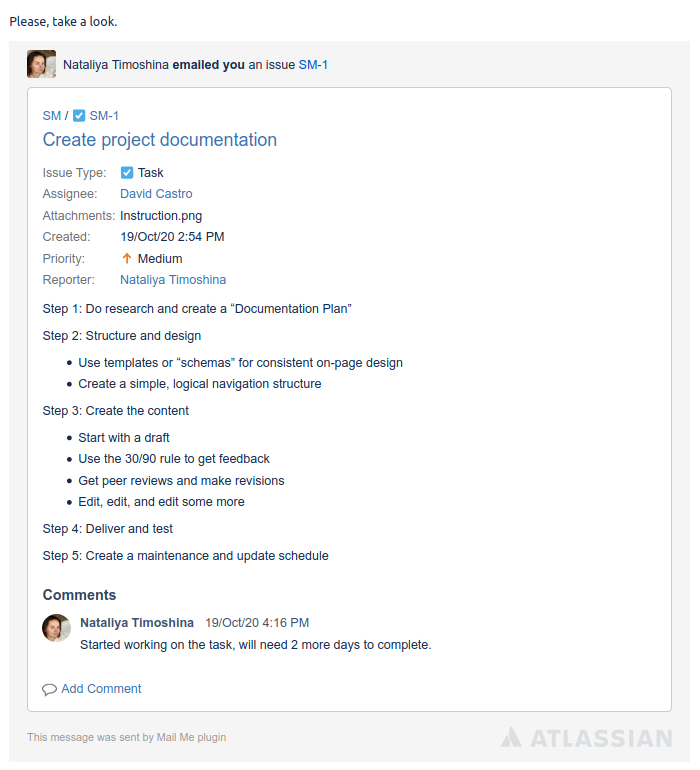
Copy/paste a bunch of recipients at once
Find the issue as you usually do, click Mail Me
Copy a list of recipients (comma, semicolon or space separated) from a text file of any kind. Paste into the Recipients field
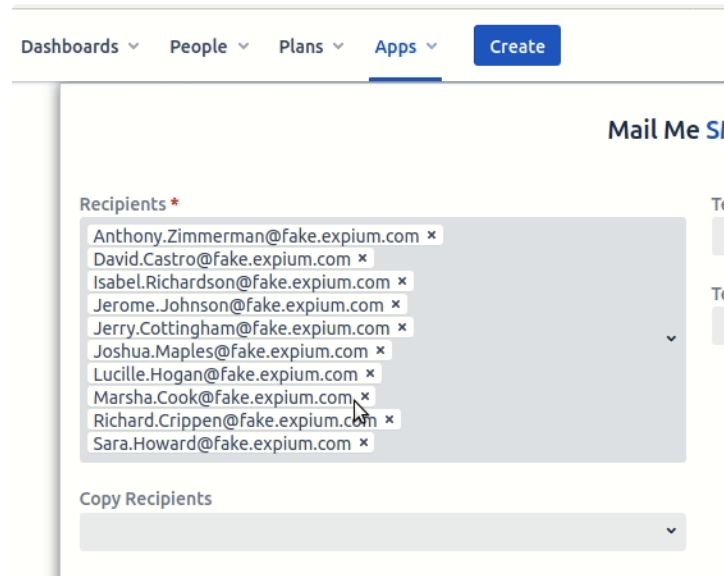
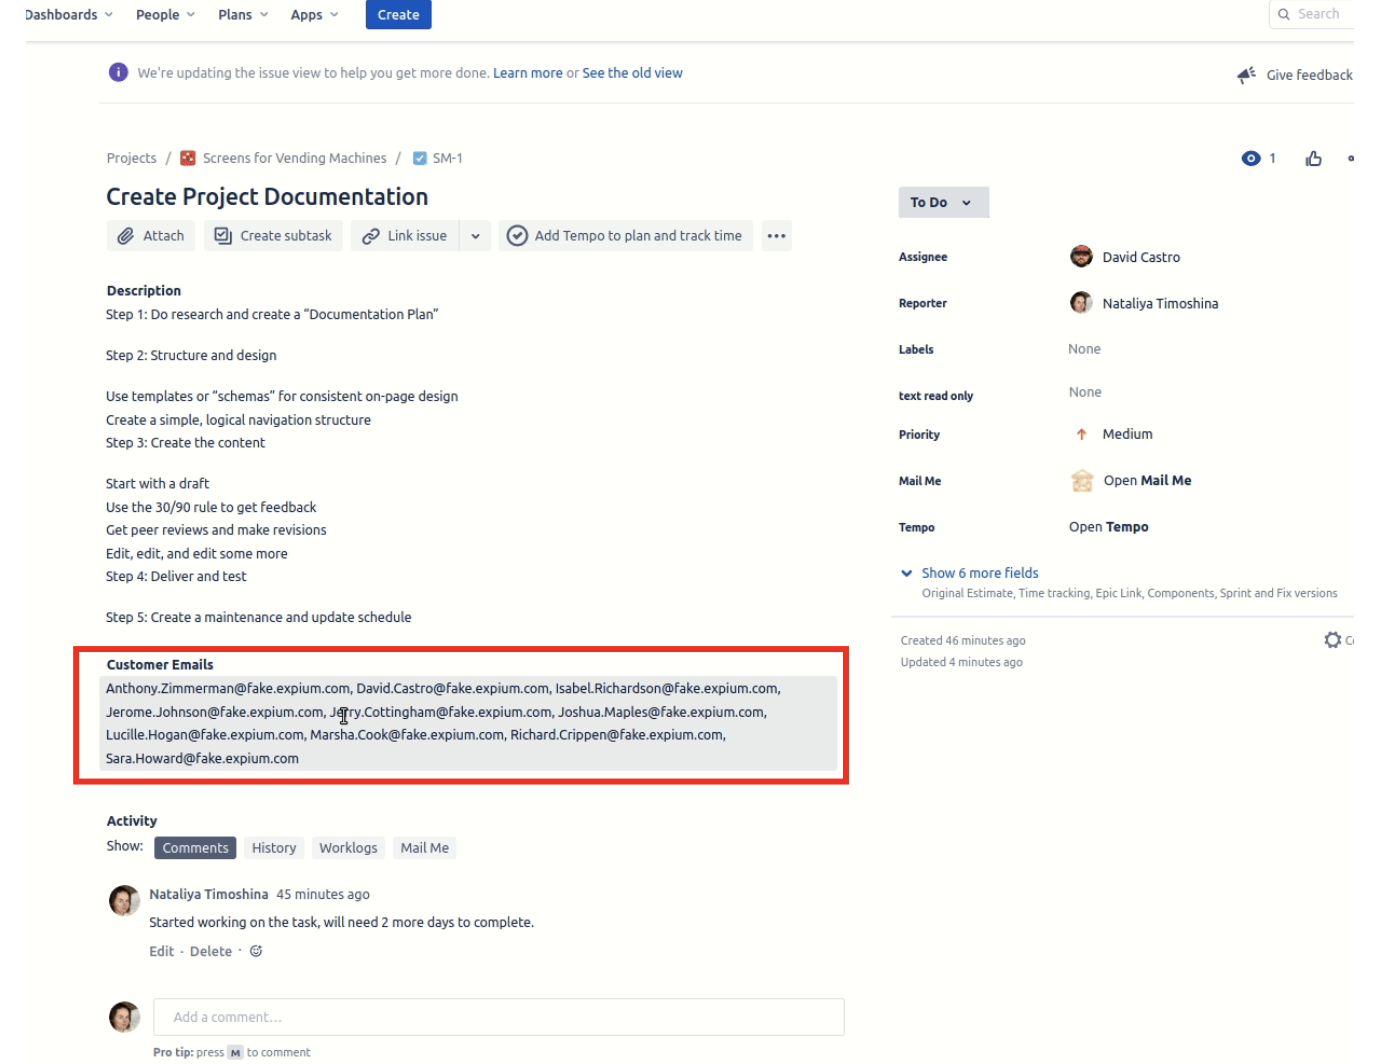
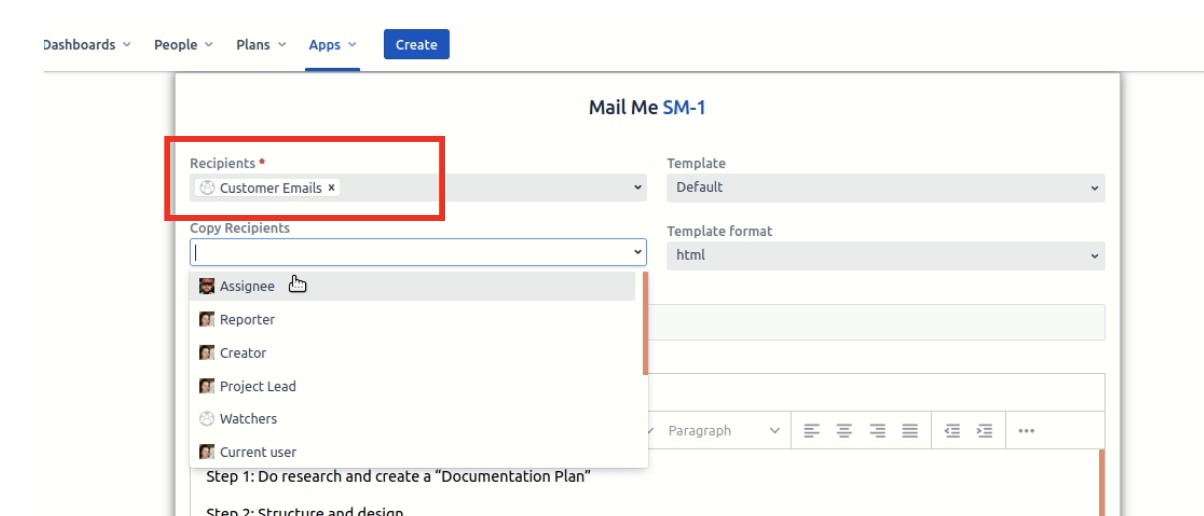
Import recipients from a custom text field
Find the issue as you usually do, click Mail Me
In Recipients area select a custom text field containing emails only. It can be either single or multi-line text field.
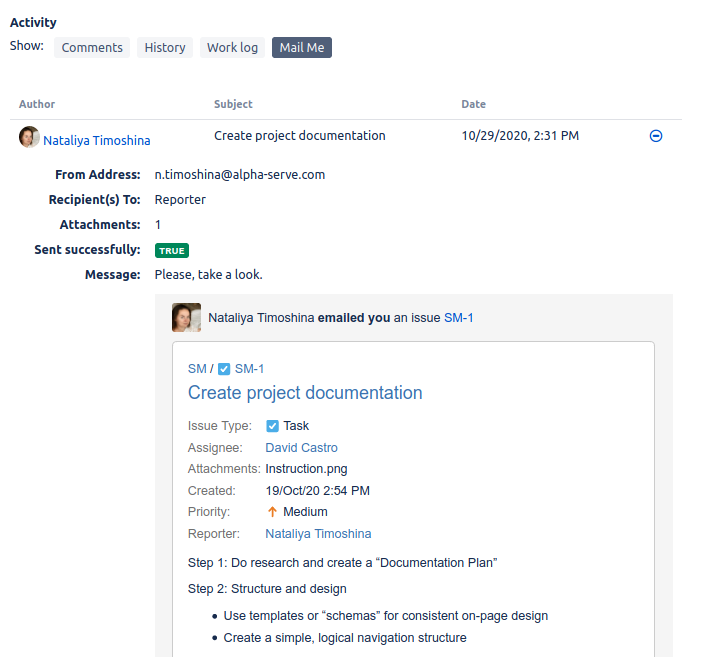
Viewing sent emails in the Activity tab
Find the issue, as shown in step 1 above. Click Mail Me in the Activity tab to view the list of all emails sent from the issue. Click the + button to view each email.
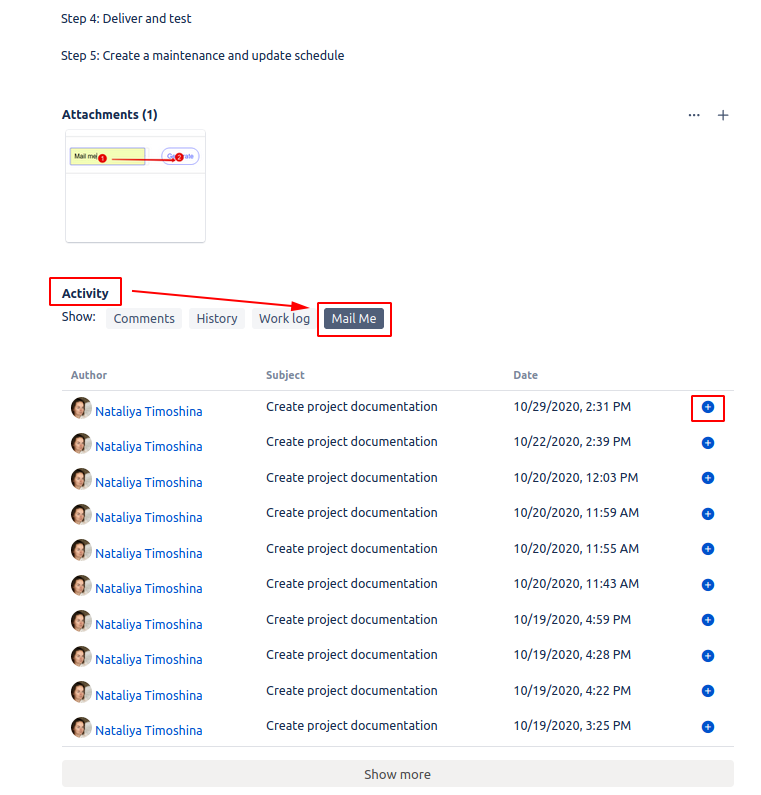
2. You can view the actual email, it’s status and the date.
Comments visibility settings
Before sending an email via Mail Me you can choose the following visibility settings:
Add email comment to the Jira issue
Send restricted comments (e.g. internal notes in Service Management or other group or project role restricted comments)
Who can see the comment (visible to all by default, can be changed to a specific group)
How to edit an email before sending it?
Please note: preview editing is turned off by default. Contact your administrator to enable it (see How to set default settings for all projects?).
Click the Preview button, then click Edit.
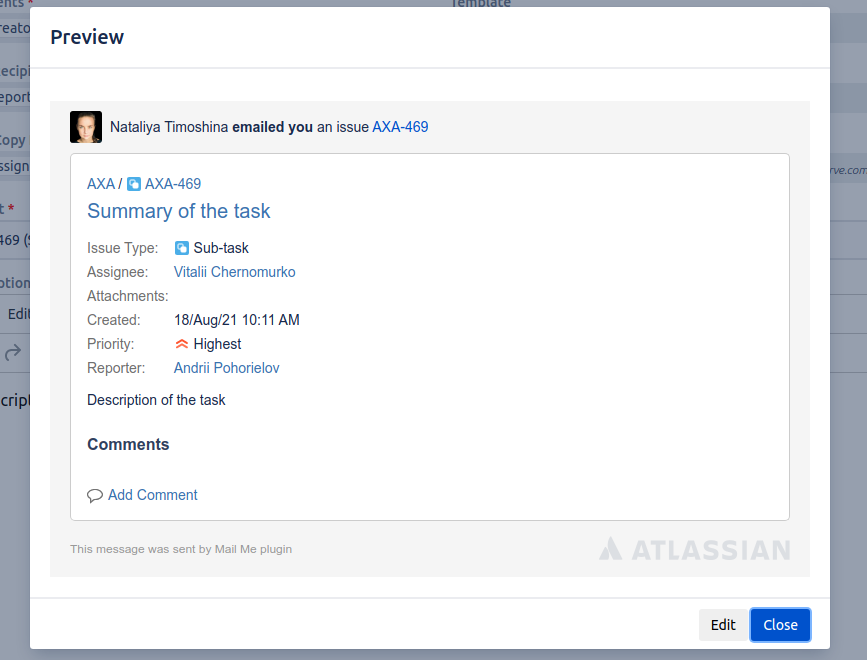
Edit the text and click Save. Make sure the email looks as you’ve expected in the preview window and Send.