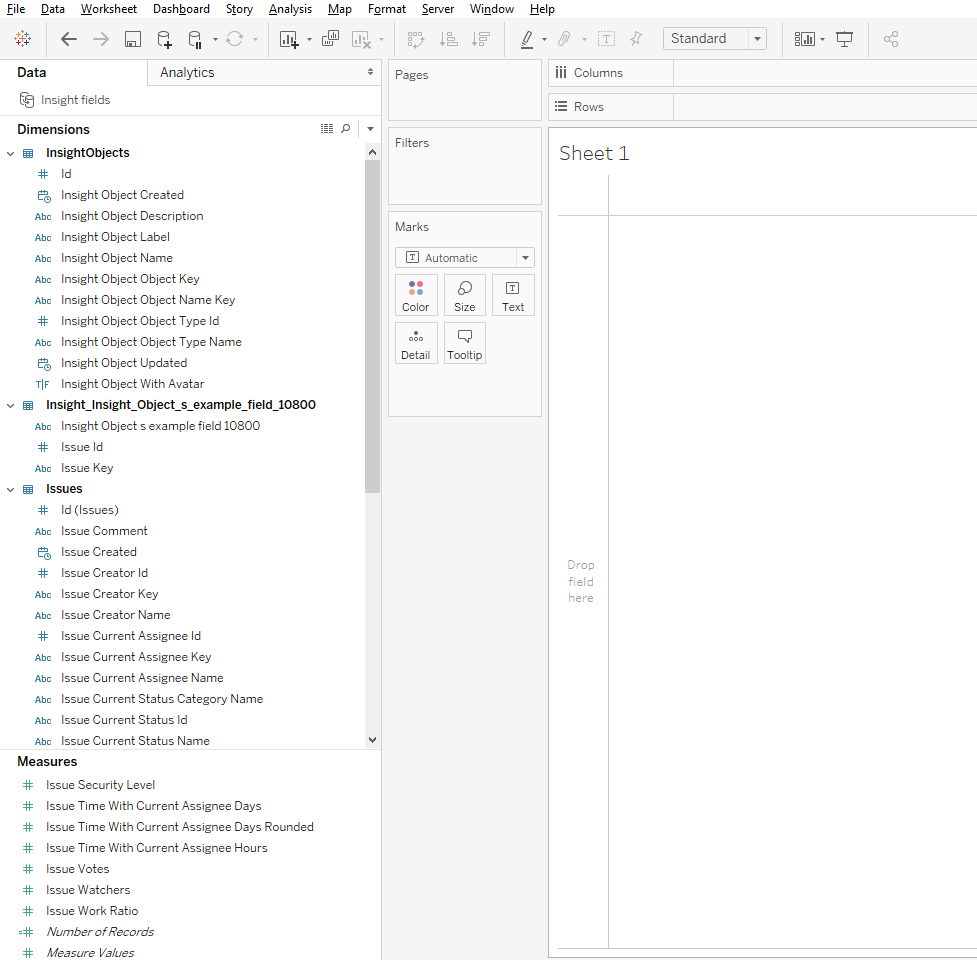
Tableau connector for Jira allows users to export Insight Asset Management data if the Insight Asset Management plubin plug-in is installed.
How to export Insight tables
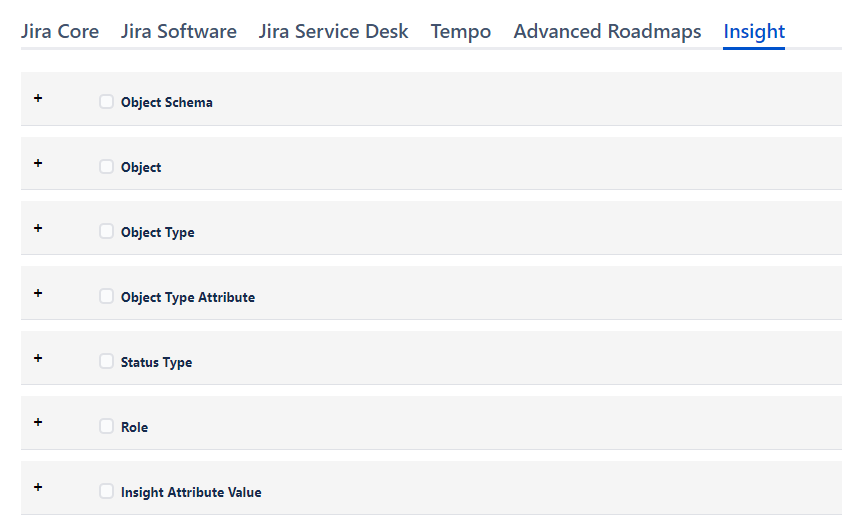
While creating a Data Source, go to Insight tab and select from the tables available for exporting.
Each table contains a subset of fields. To select/deselect particular fields from the table expand the table and select/deselect fields.
For now the following tables are available for exporting:
Object Schema - contains all the infromation about Insight schemas existing in Jira
Object - contains all the infromation about Objects existing in schemas
Object Type - contains all the infromation about Object Types existing in schemas
Object Type Attribute - contains all the infromation about Object Type Attributes existing in schemas
Status Type - contains all the infromation about Status Types
Role - contains all the infromation about Roles
Insight Attribute Value - contains all the infromation about Objects' Attribute Values
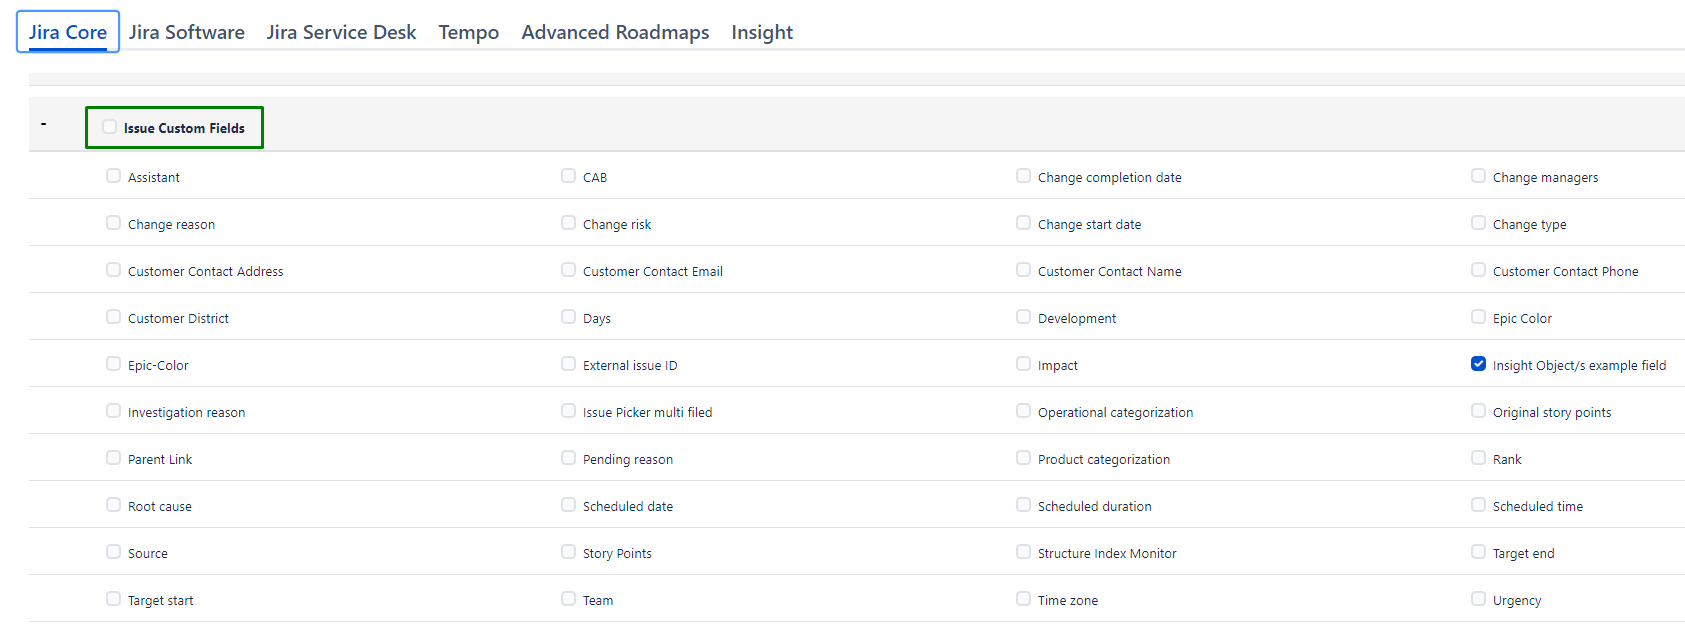
To export Insight custom fields, while creating a Data Source go to Jira Core tab, expand Issue Custom Fields Table and find Insight custom fields in custom fields’ subset.
Please note: you should know the name of your Insight custom fields to select them from the overall Custom Fields subset.
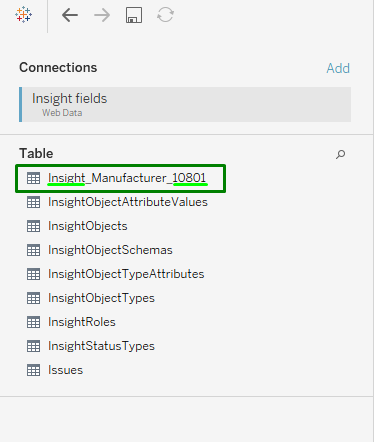
Every Insight Custom field will be imported into Tableau as separate Table with the prefix ‘Insight’ and custom field ID at the end.
Example:
Insight custom field name: Manufacturer
After importing into Tableau, Insight custom field Manufacturer will be imported
as a separate table
with the prefix ‘Insight’ for easy identification
with the custom field ID at the end
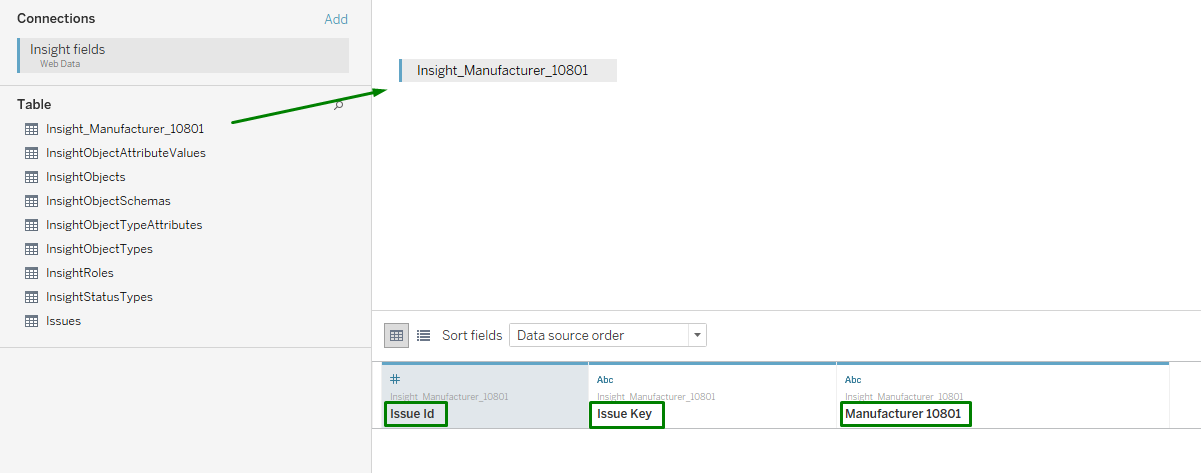
Every Insight Custom field table has 3 columns:
Issue ID - Issue ID where Insight Custom field has value (this column can be used for creating relationships between custom field and Issues table)
Issue Key - Issue Key where Insight Custom field has value (this column can be used for creating relationships between custom field and Issues table)
Custom field name - holds the value of Insight Custom field
Note: Values for multiselect Insight Custom fields are presented in the table as separate row for each Insight Custom field value
How to create the relationships between Insight custom fields tables and Issues table
After importing Web Data Connector into Tableau Desktop users can start to build relationships between tables. Please find more infromation on how to import Web Data Connector into Tableau Deskop in the https://aserve.atlassian.net/wiki/spaces/TABLEAU/pages/703103225/User+Guide#How-to-import-Jira-data-into-Tableau%3F.
Example screenshots are made in Tableau 10.4.
To create relationships between Insight Custom fields' tables do the following:
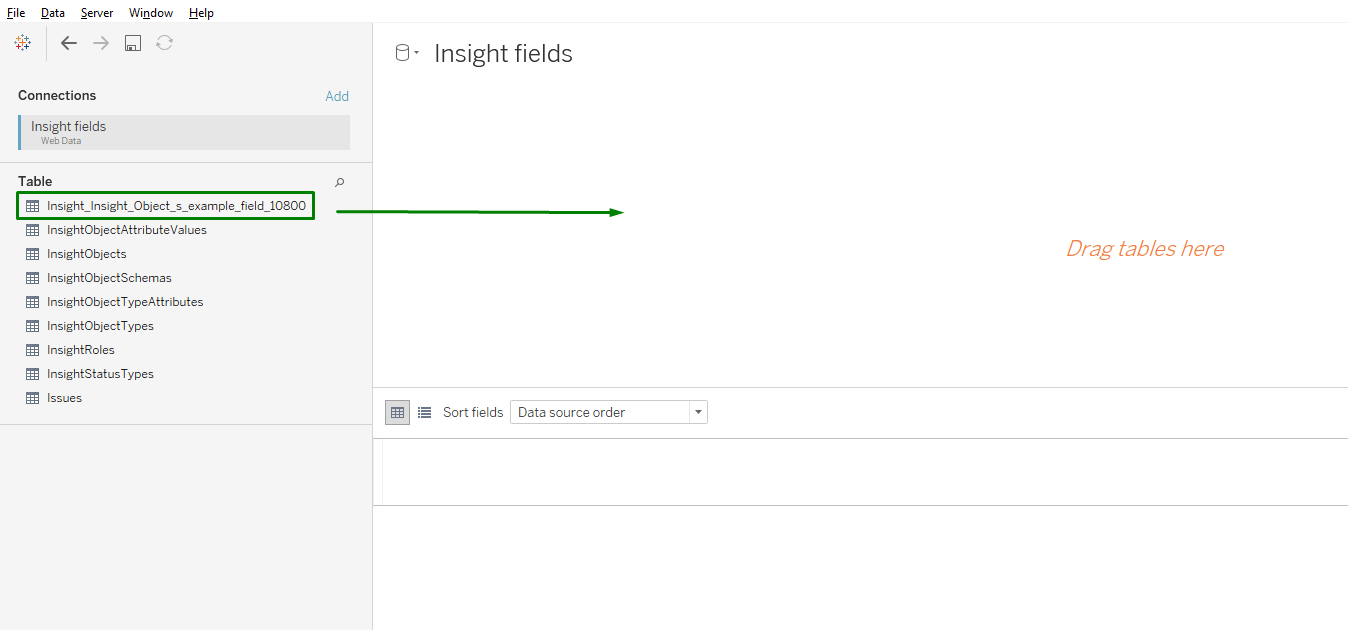
1. Drag & Drop or Double click on Insight Custom field table you’d like to create relationships with Issues table
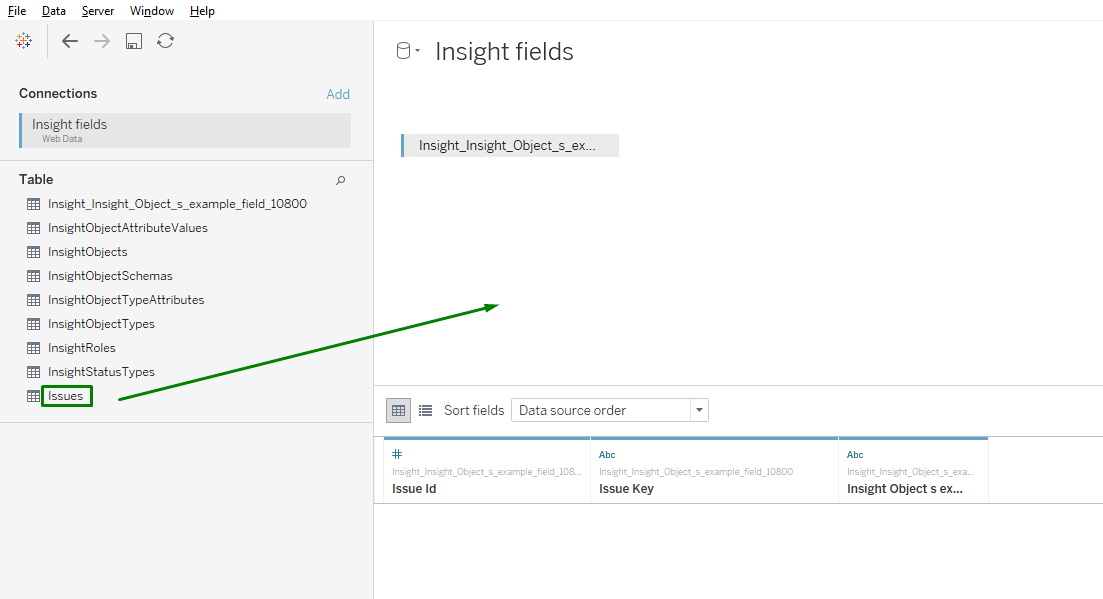
2. Drag & Drop or Double click on Issues table.
Relationships will be created automatically.
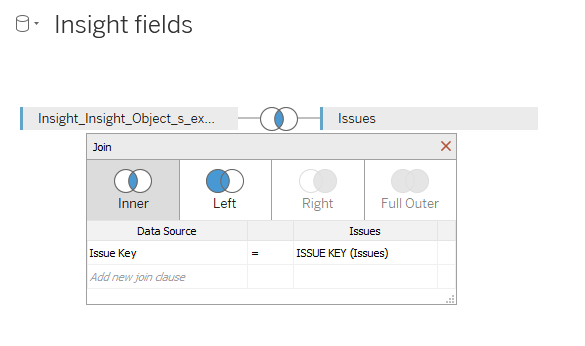
Relationships will be created automatically using Issue Key.
How to create relationships between Insight Custom fields' tables and InsightObjects table
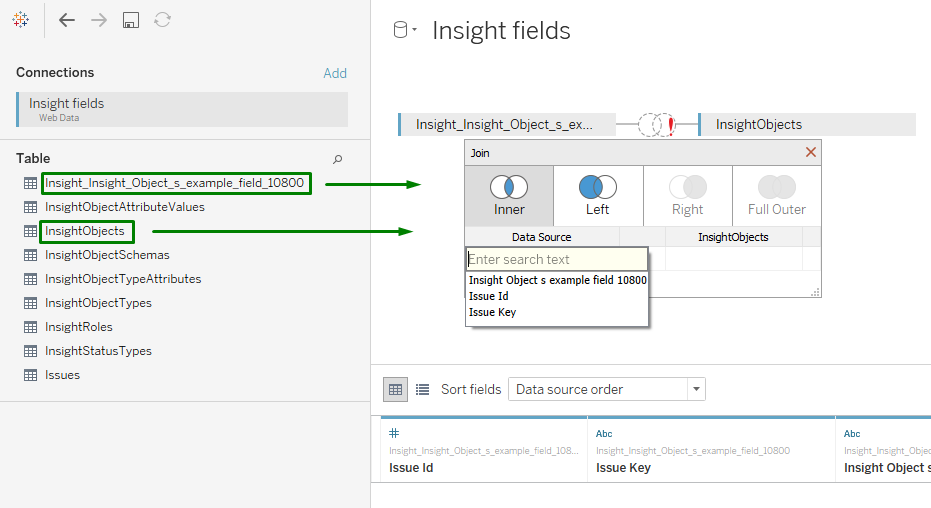
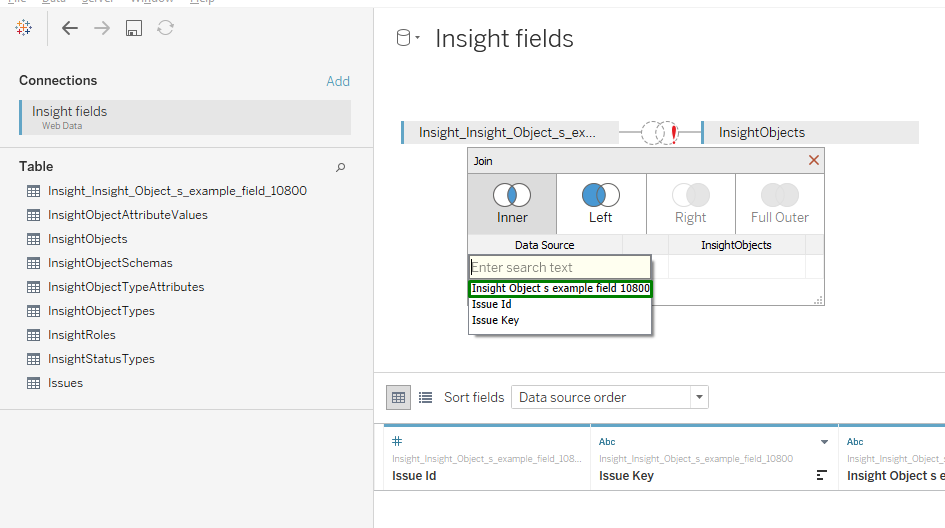
1. Drag & Drop or Double click on chosen Insight Custom field table and InsightObjects table
2. Select the Insight Custom field name column
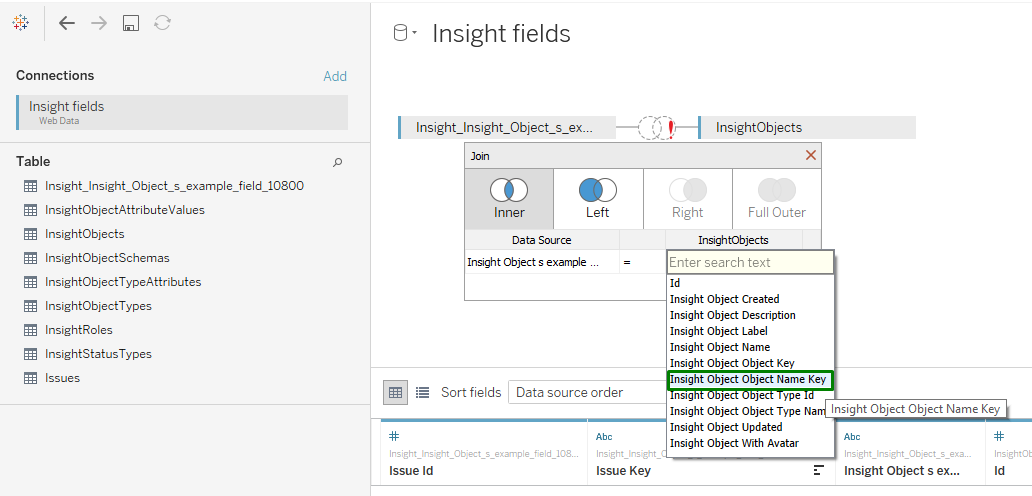
3. Select Insight Object Object Name Key column for InsightObjects table.
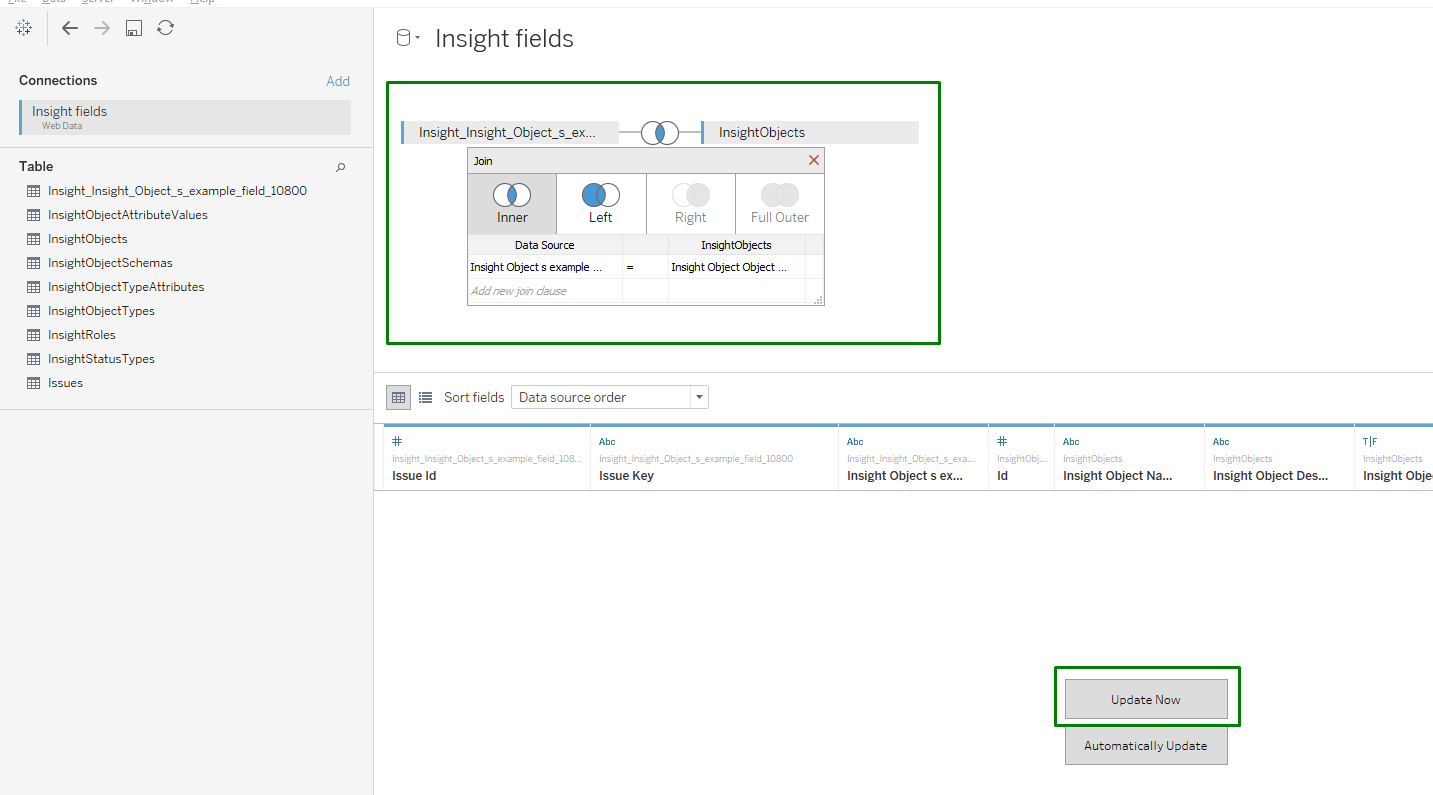
Relationships between Insight Custom field table and InsightObjects table are created. Click Update Now to see the results.
How to create relationships between InsightObjects table and Issues table
1. Create the relationships between Insight Custom fields' tables and InsightObjects table as described in https://aserve.atlassian.net/wiki/spaces/TABLEAU/pages/1124597787/How+to+exportExport+Insight+tablesTables+and+buildBuild+the+relationshipsRelationships+with+Issues+table#HowTable#How-to-create-relationships-between-Insight-Custom-fields%27-tables-and-InsightObjects-table
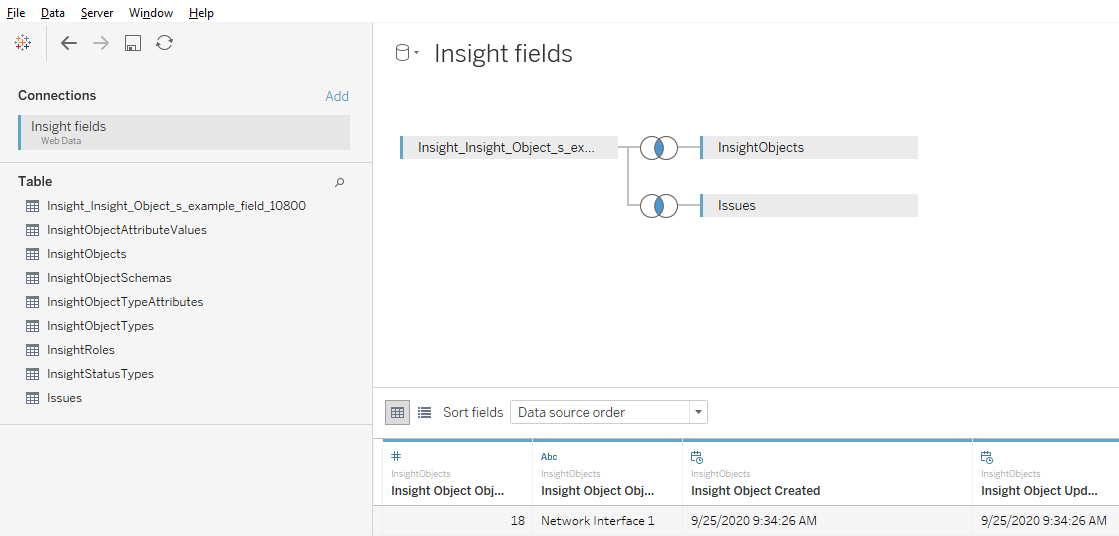
2. Simply Drag & Drop or Double click Issues table. Relationships will be created automatically by Issue Key.
3. Proceed to Sheet 1 to continue work with the data.
