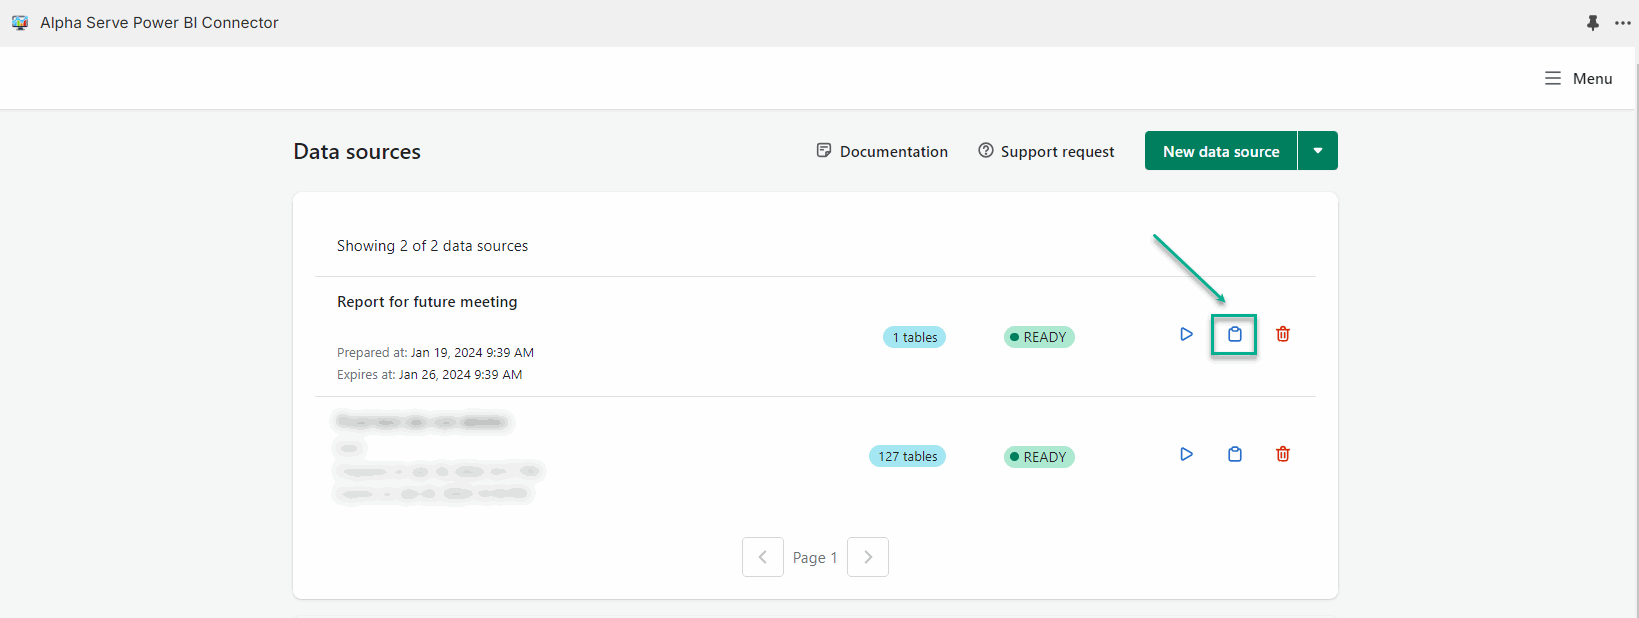
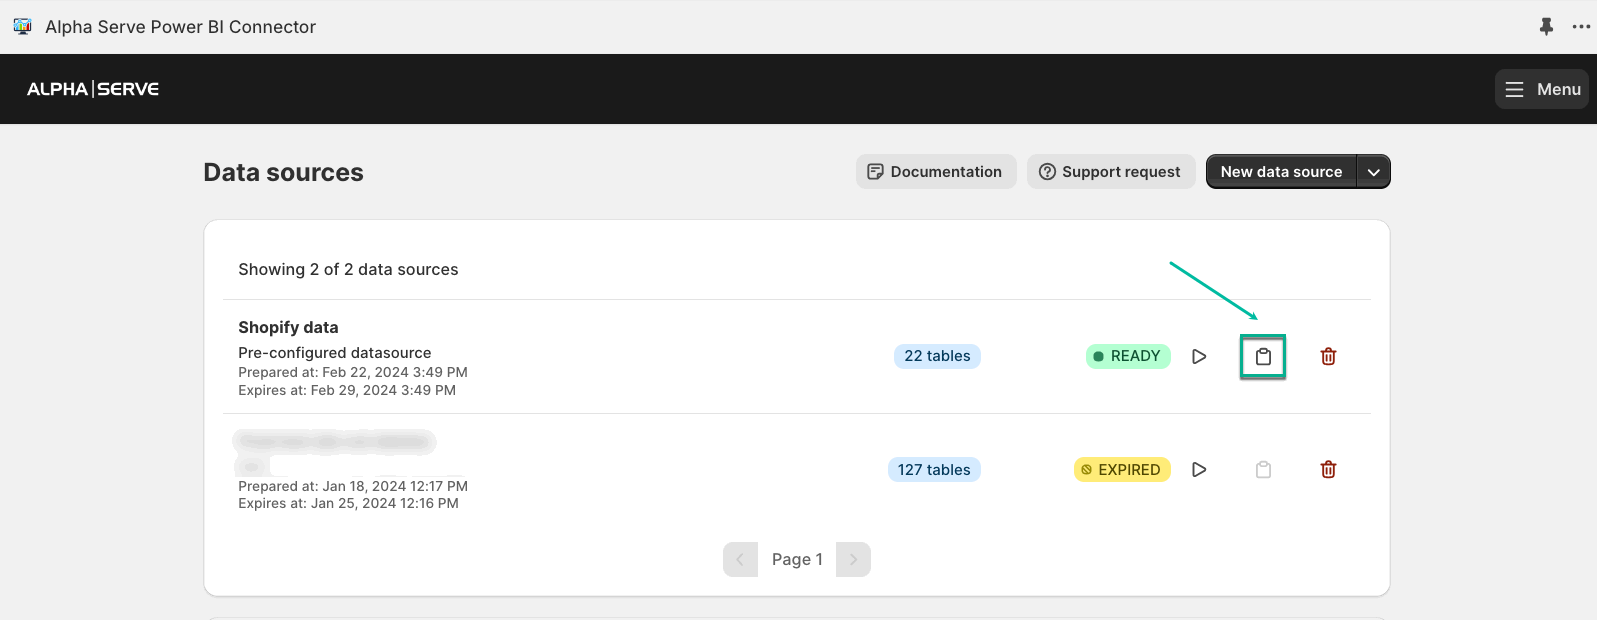
Select the Copy link icon.
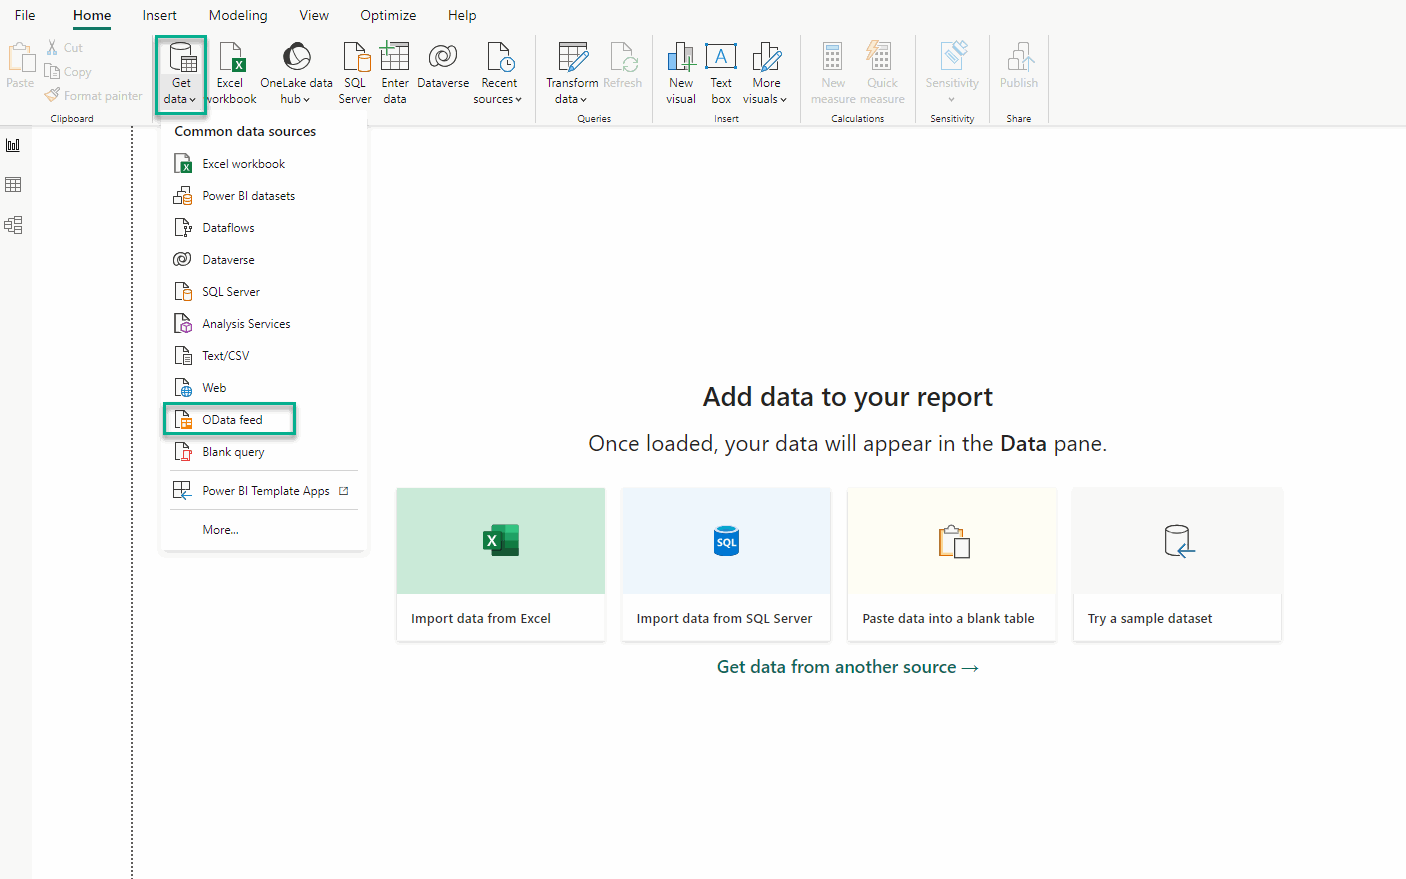
Launch your Microsoft Power BI.
Select Get data, and then select OData feed.
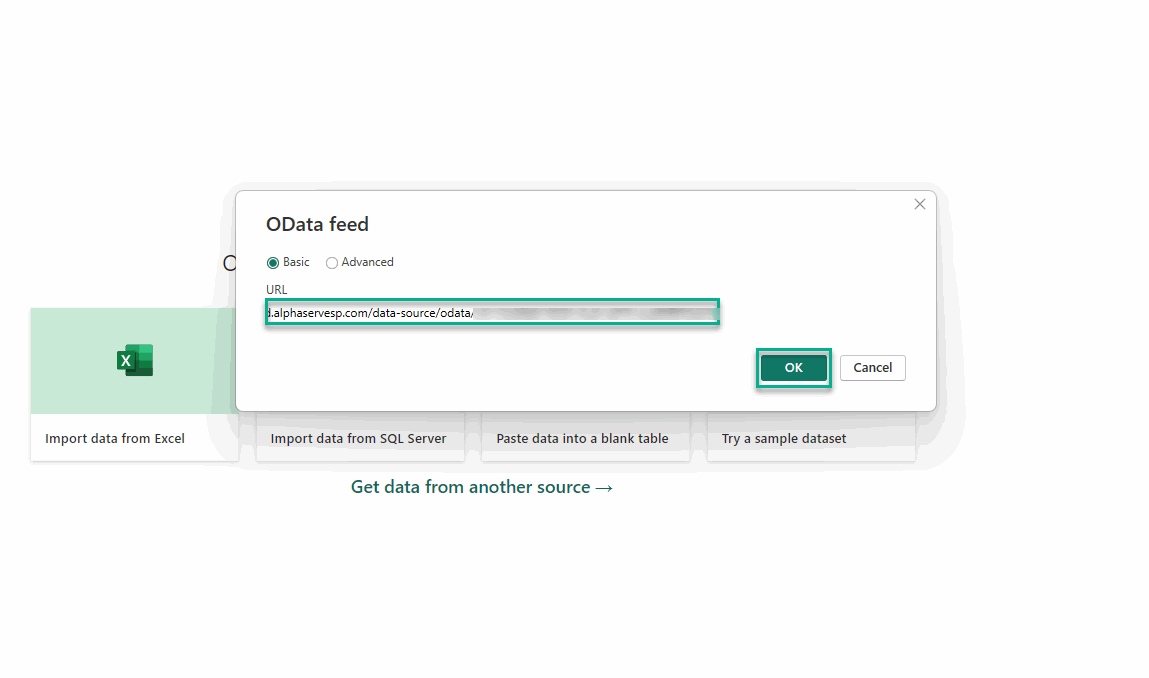
In the URL field, paste the copied link of your data source, and then select OK.
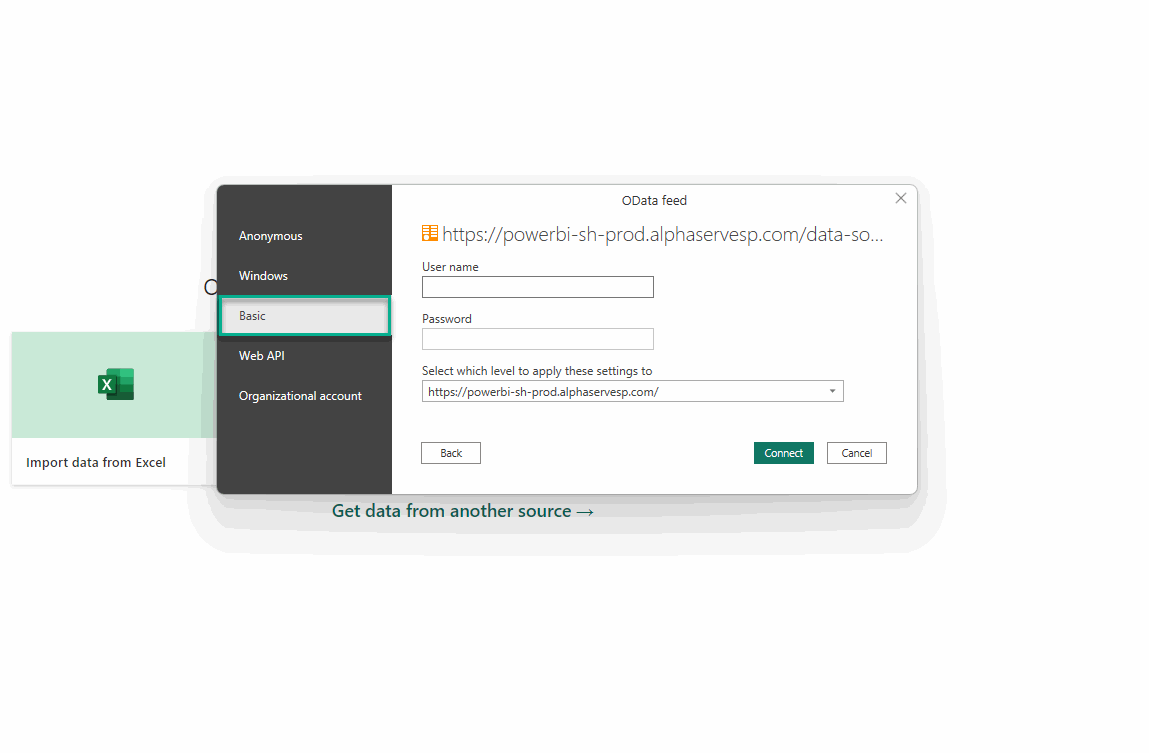
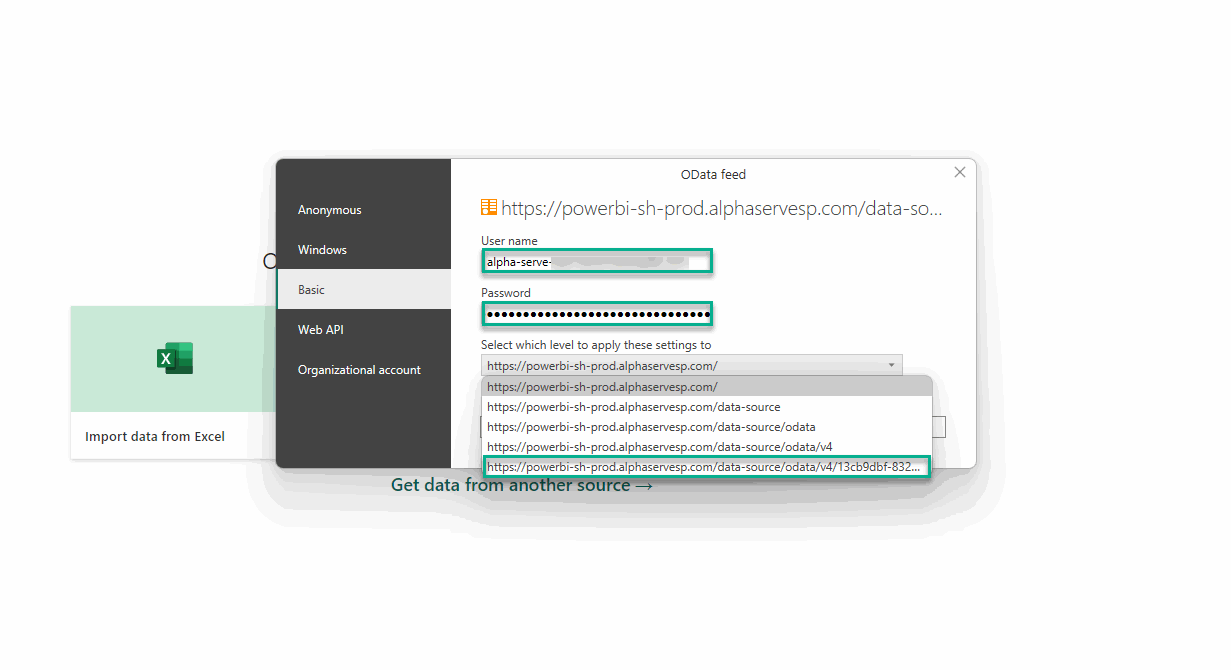
Select the Basic authentication.
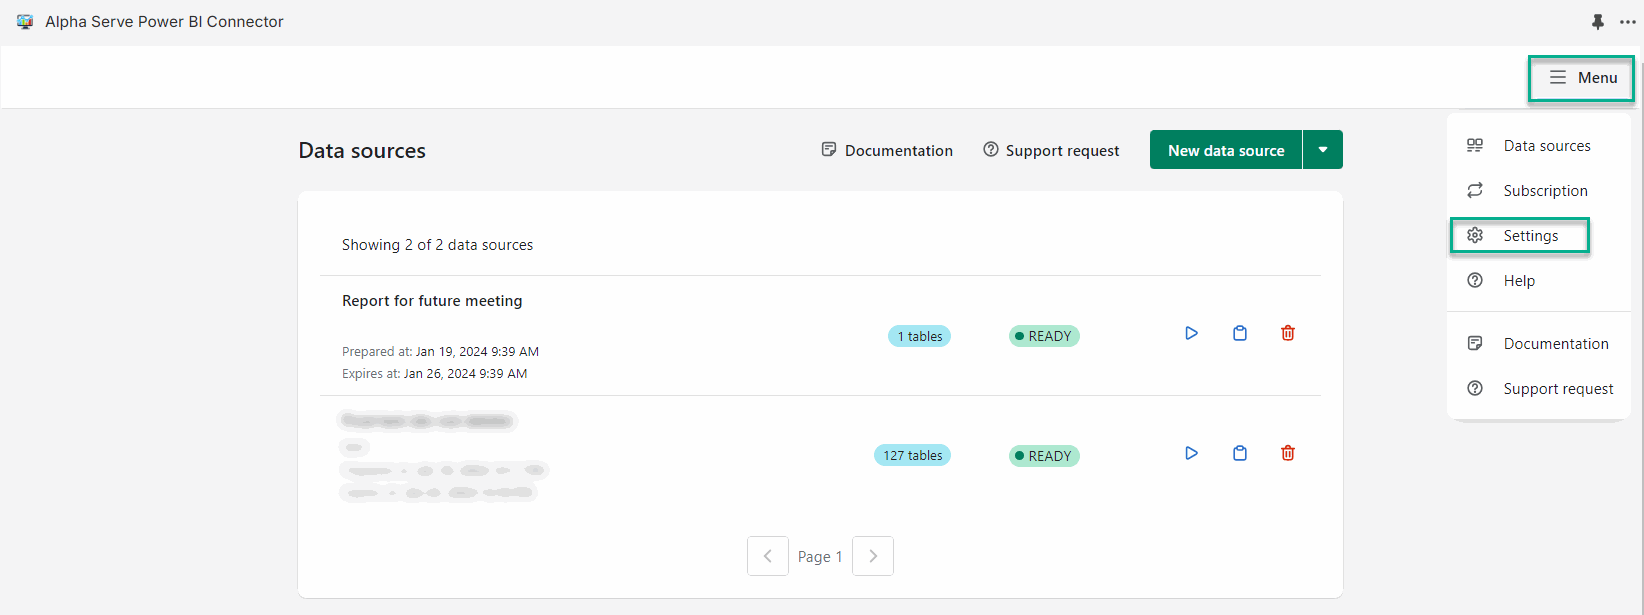
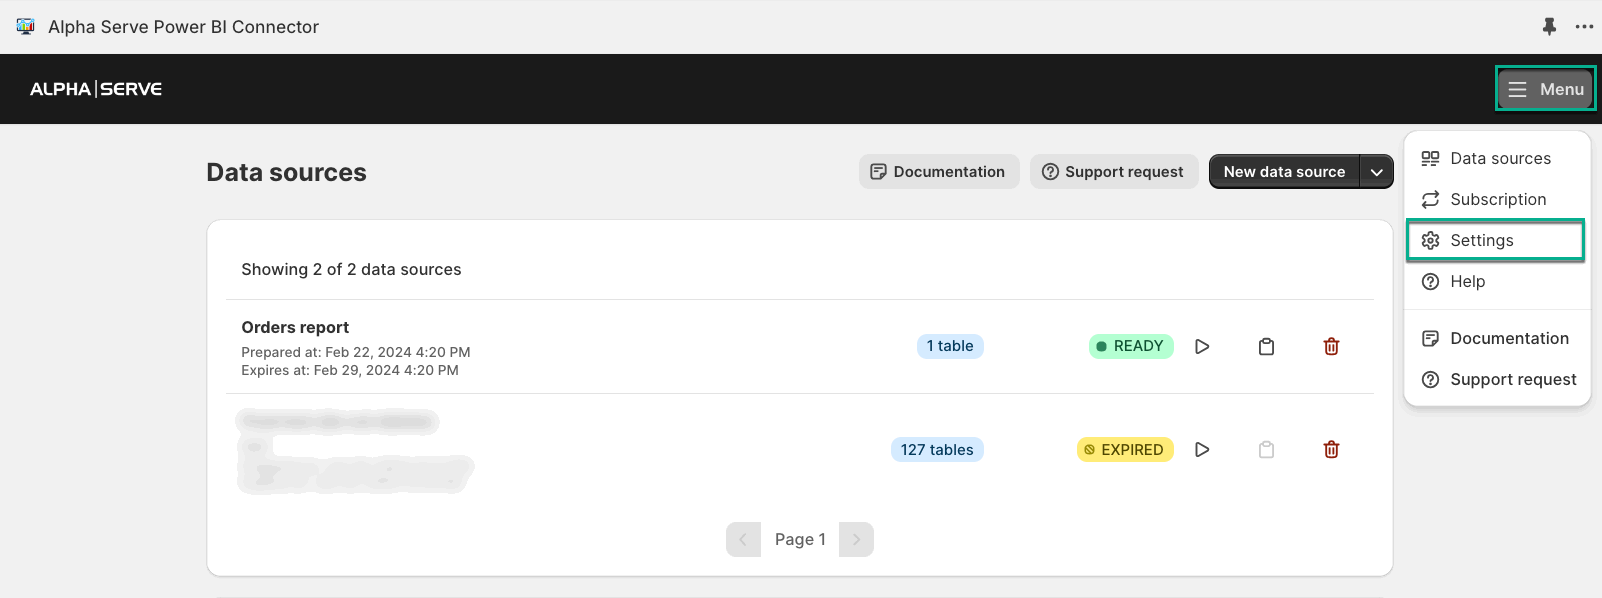
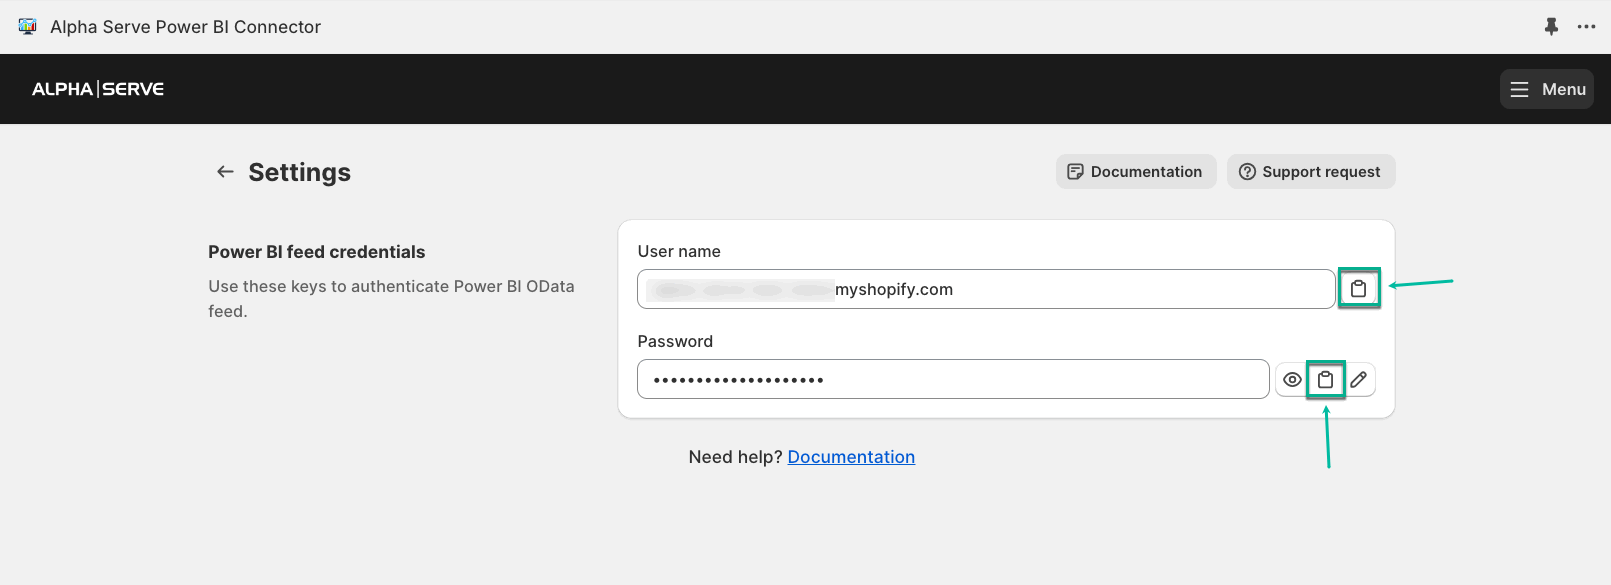
Go back to the Data sources page, select Menu, and then select Settings.
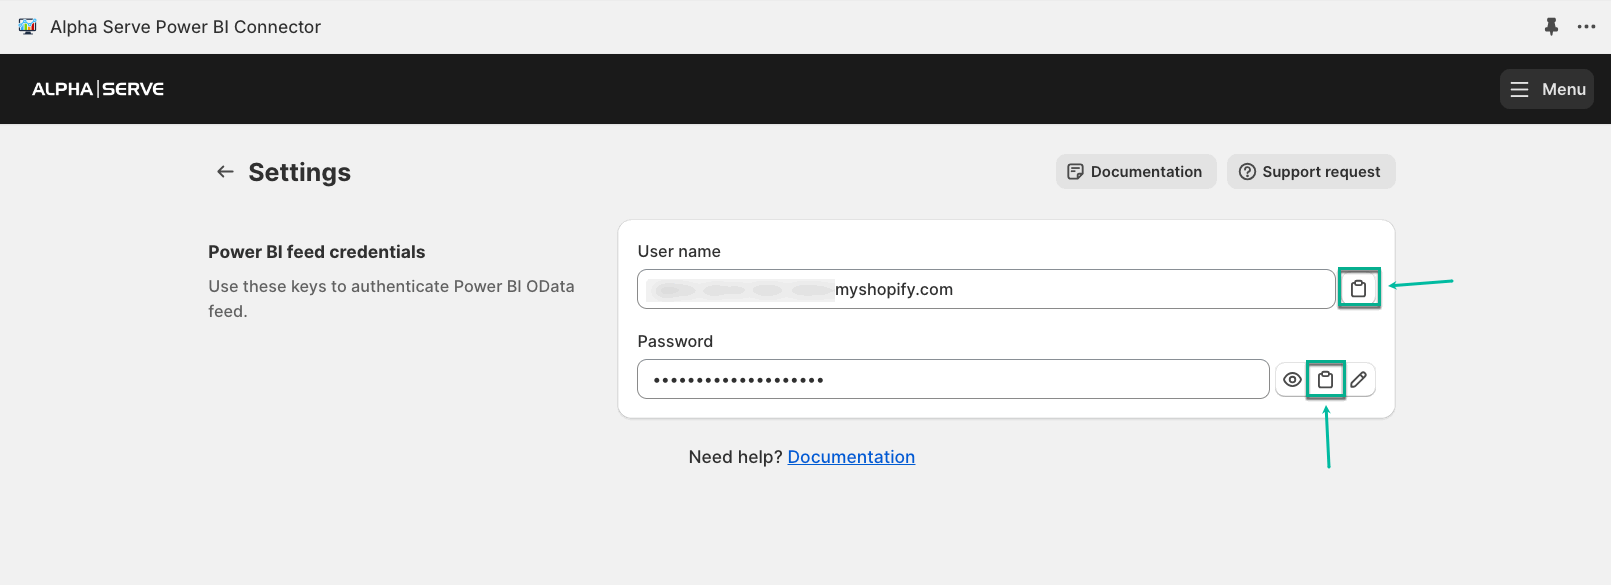
Copy these credentials one by one, and then use them to authenticate to your Microsoft Power BI.
| Info |
|---|
If necessary, you can change the default password. |
In the User name field, enter the copied Login credential.
In the Password field, enter the copied Password credential.
Select the lowest level to apply these settings to.
If you have several Sopify Shopify instances and have installed Power BI Connector on each of them, we recommend selecting the lowest level.
In each of those Power BI Connectors, all data source URLs begin in the same way and they differ only in hash (the set of characters at the end of the link).
If you keep the highest level (default), you will experience an error, as in this case, Microsoft Power BI will try to use your credentials from one instance to all the others.
If you have only one instance, you can keep the default level.
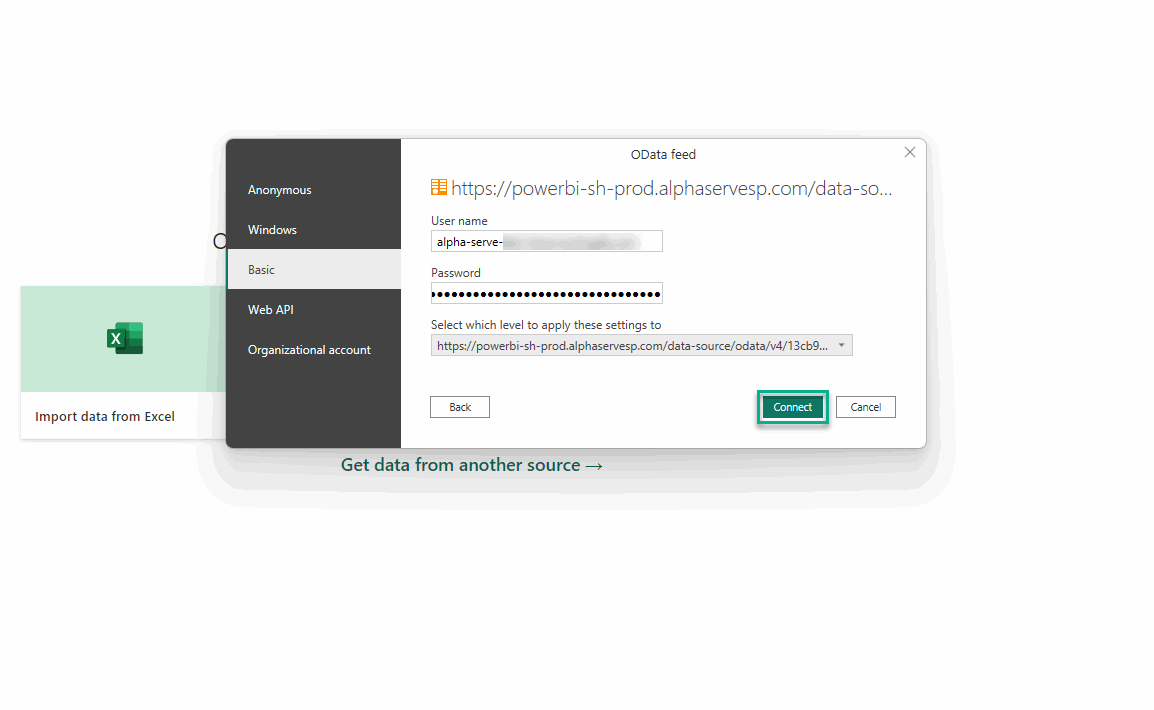
Select Connect.
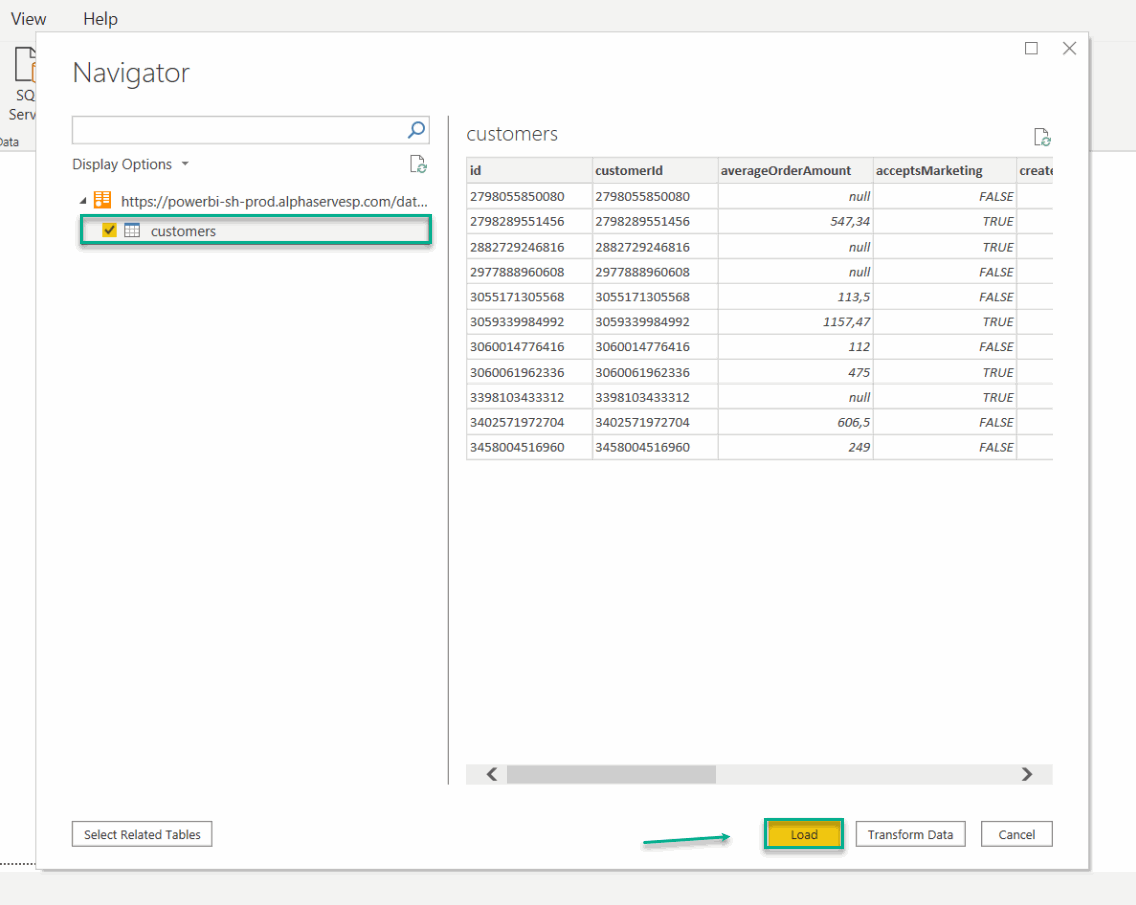
Select the table(s) you need, and then select Load.
| Info |
|---|
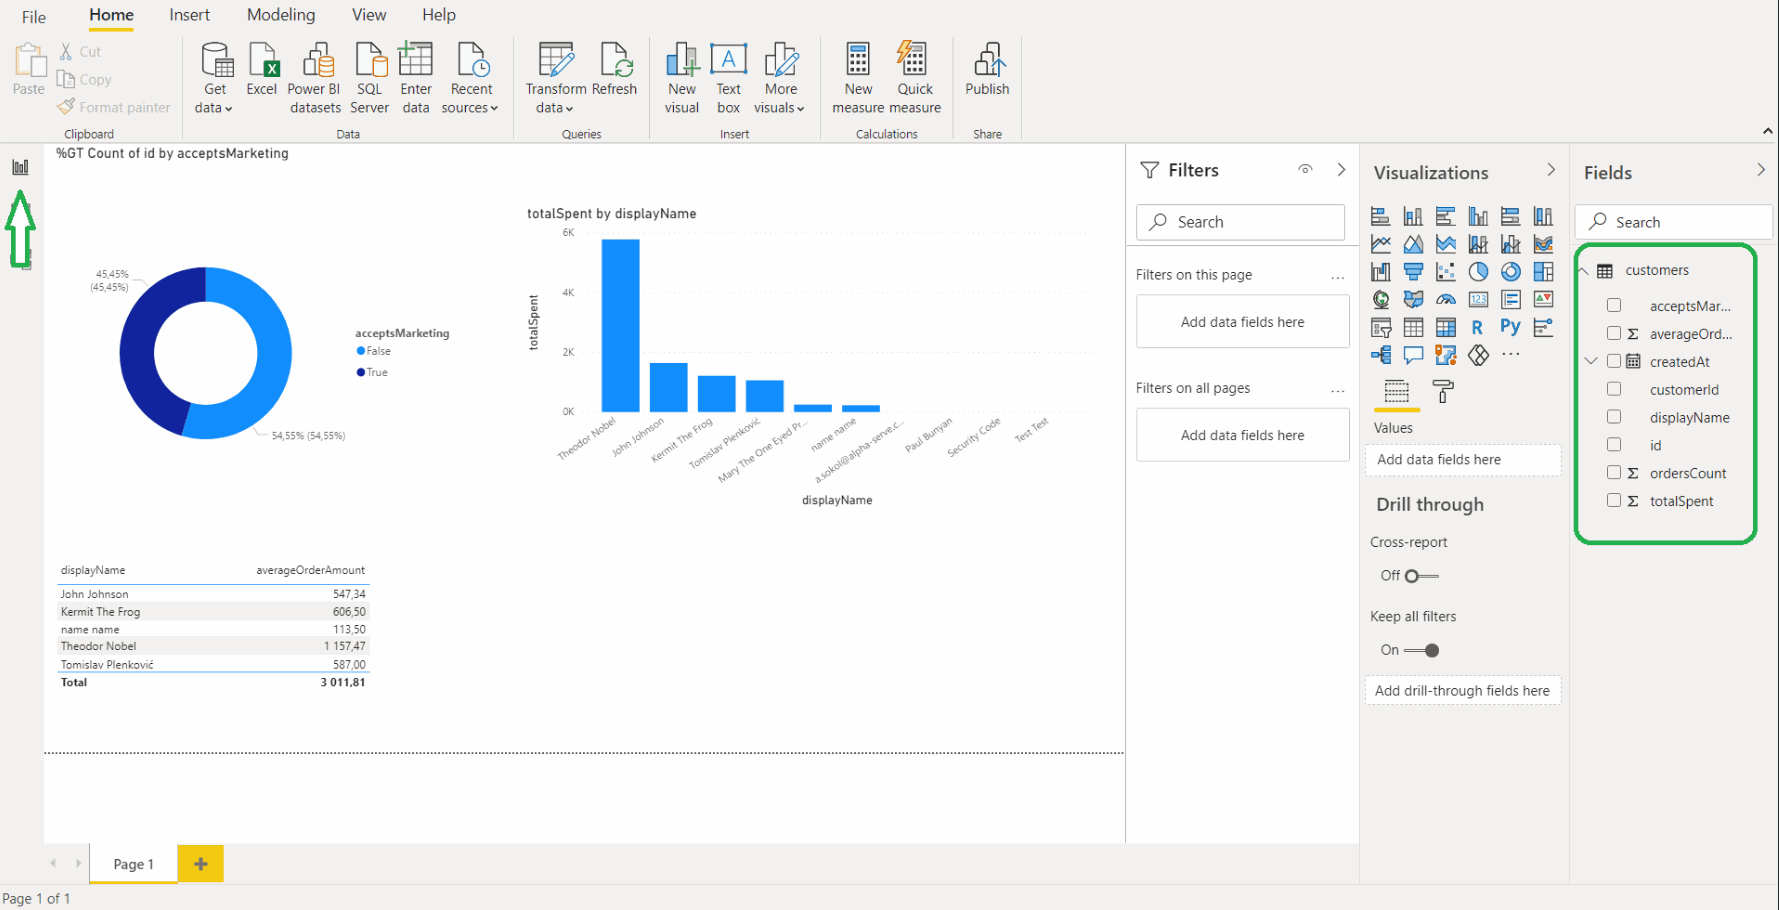
After the data is loaded, you can start building graphs and dashboards based on the Shopify data. To do this, choose the visualization type and select the data you want to see on the graph or dashboard. |
