Power BI dashboard templates supported with pre-configured data sources are now available in the latest version. We are happy to offer you the new and exciting Power BI Shopify reporting experience!
Build your first Power BI dashboard in a day with Shopify Power BI dashboard templates in Power BI Connector for Shopify from Alpha Serve!
| Table of Contents | ||||
|---|---|---|---|---|
|
How to Use Power BI
TemplatesTemplate
Being signed in to your Shopify instance, open Power BI Connector, and then select Create from template.

Select Create datasource.

In the Name field, enter the data source name.
In the Description field, enter the data source description.
Select Next.

Select Next.
| Info |
|---|
The dashboard template is available as .pbit file. After you select Next, the system will download it to your computer. |

Launch your Microsoft Power BI, and then select File.

Select Import, and then Power BI template.
Select .pbit file you’ve downloaded before.

Go back to the Data sources page, and then copy the URL of the data source.

In the Input_URL field, paste the copied link, and then select Load.

Select the Basic authentication.

Go back to the Data sources page, select Menu, and then select Settings.

Copy these credentials one by one, and then use to authenticate to your Microsoft Power BI.

In the User name field, enter the copied Login credential.
In the Password field, enter the copied Password credential.
Select the lowest level to apply these settings to.
If you have several Sopify instances and have installed Power BI Connector on each of them, we recommend selecting the lowest level.
In each of those Power BI Connectors, all data source URLs begin in the same way and they differ only in hash (the set of characters at the end of the link).
If you keep the highest level (default), you will experience an error, as in this case, Microsoft Power BI will try to use your credentials from one instance to all the others.
If you have only one instance, you can keep the default level.

Select Connect.

| Info |
|---|
The Power BI dashboard templates template will be loaded and you can start working with themit. |
Power BI Dashboard
TemplatesTemplate Overview
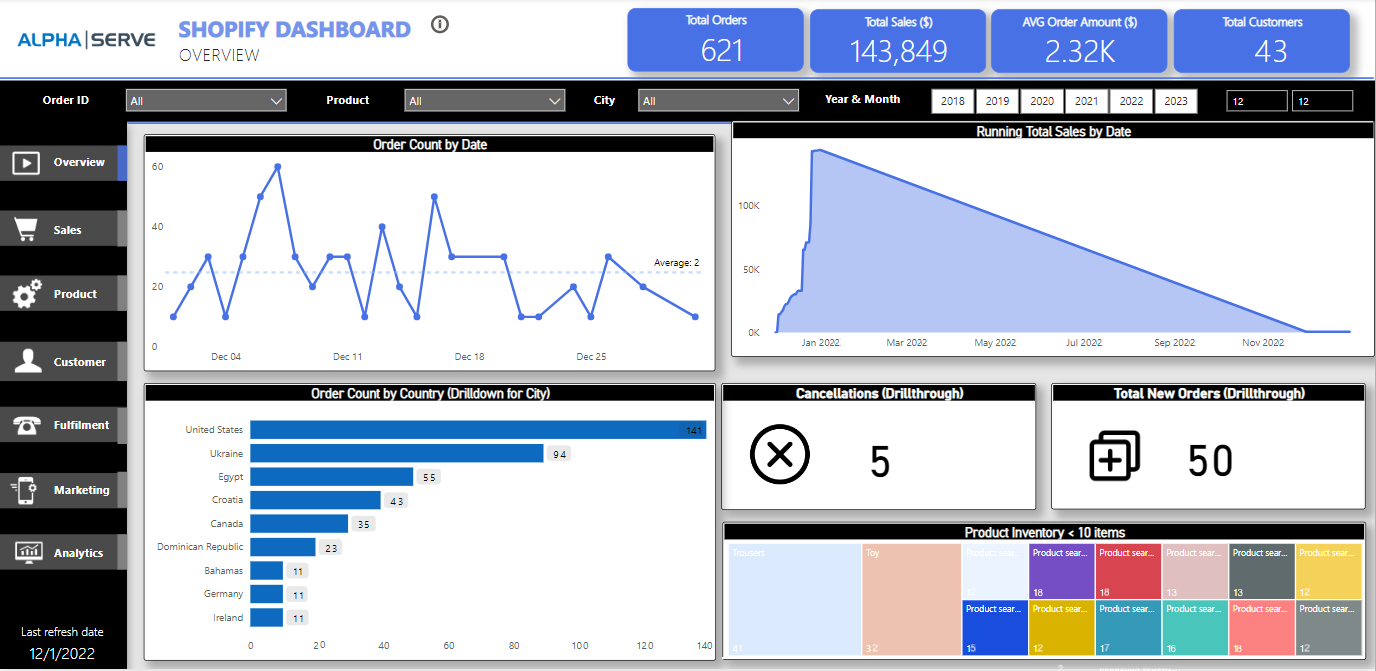
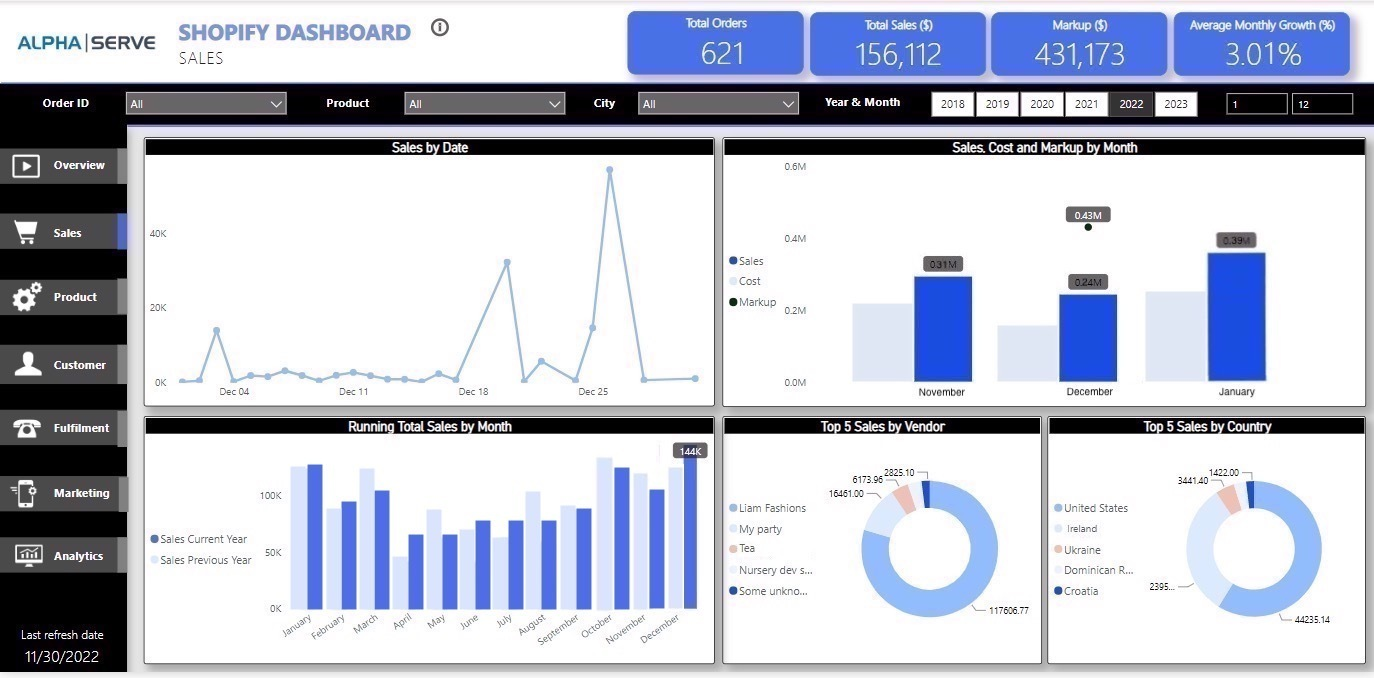
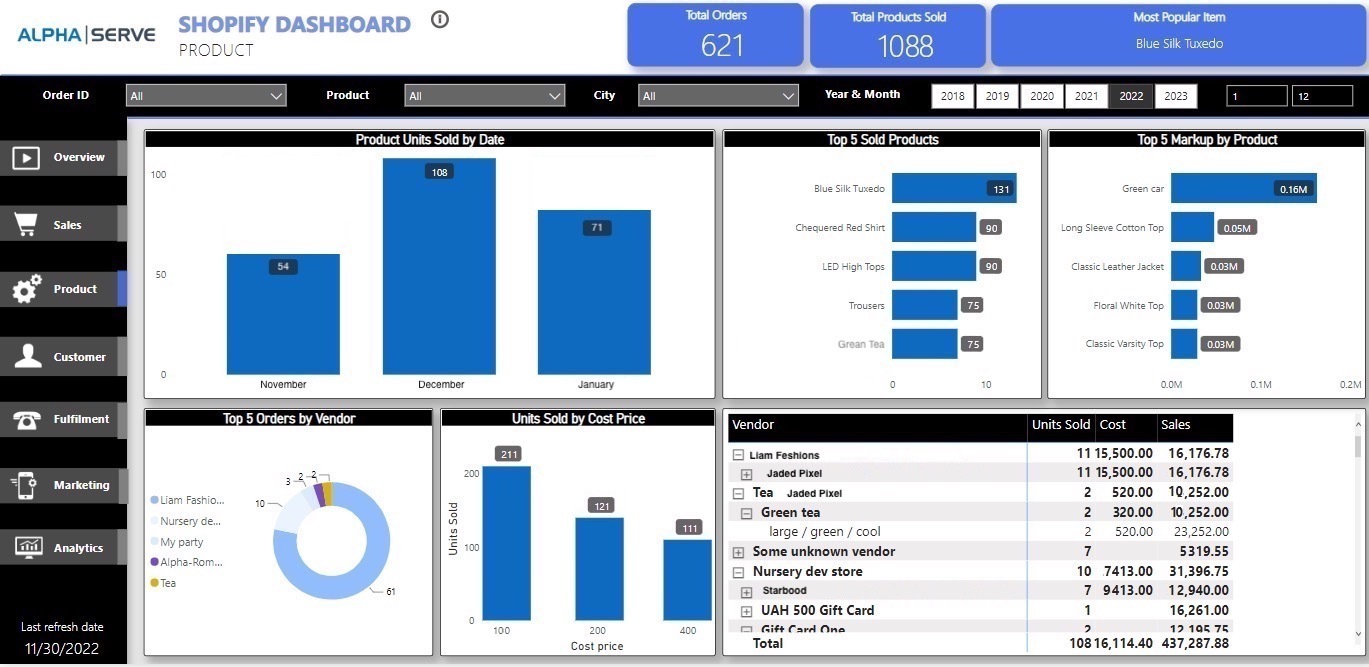
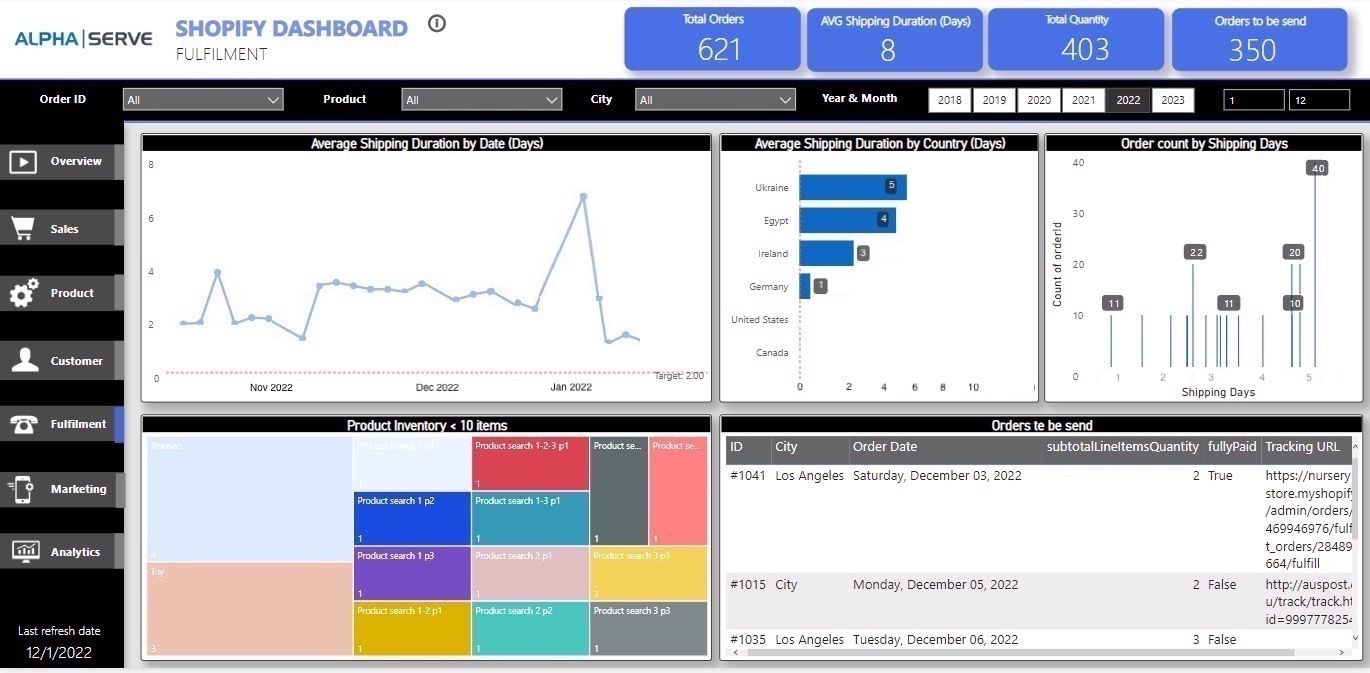
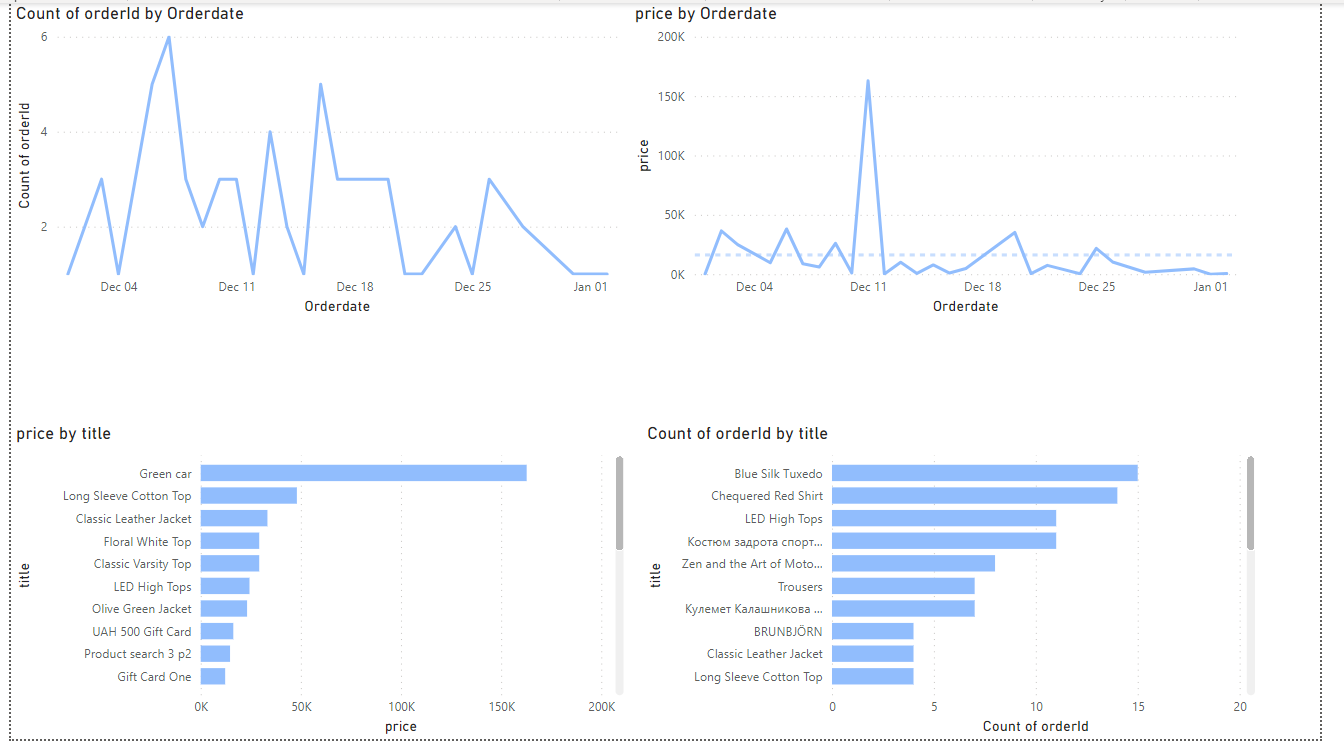
Shopify Dashboard is a store Overview, Sales, Product, Customer, Fulfillment, Marketing, and Analytics reports. It shows the general information for the store.
This dashboard will be useful for analyzing sales and marketing issues. It allows admins to monitor the sales, track the orders.