| Table of Contents |
|---|
| Panel | ||||||
|---|---|---|---|---|---|---|
| ||||||
Read a comprehensive step-by-step guide on how to use Tableau Connector for Shopify in our blog: |
Book a video demo to see Tableau Connector for Shopify in action:

Steps to export Shopify data to Tableau
Before you start
You must have the relevant Shopify account permissions to follow the instructions on this page.
Check Shopify Help Center for more information.
Create a data source in Shopify
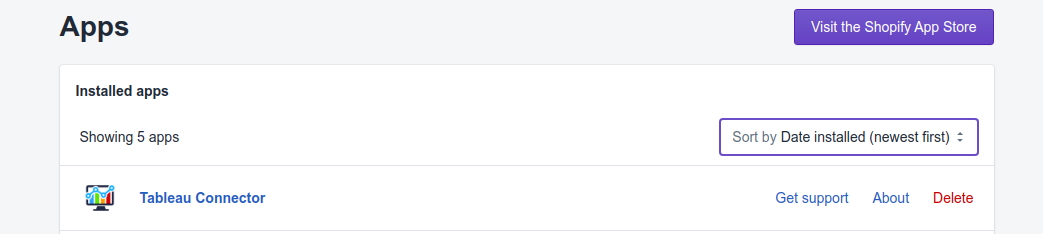
Step 1. Open Tableau Connector app in your selected shop.
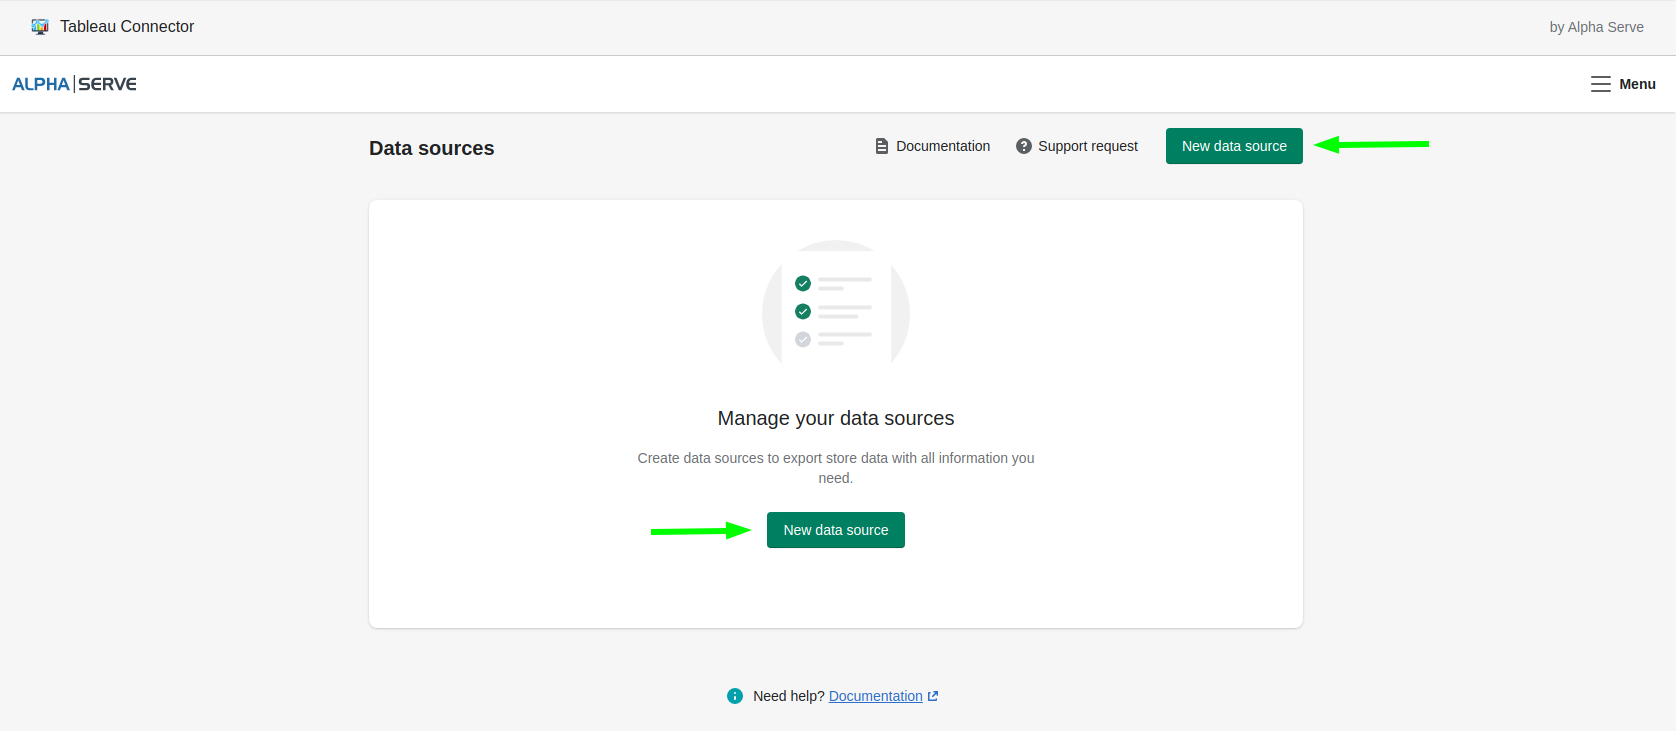
Step 2. On the next page that opens, click the New Data Source button.
Step 3. Follow the steps below on the Data Source section to create a data source based on your parameters. Start from the Details section on the right:
Enter a new data source name in the Name field.
Enter the data source description.
Select the preferable type of connection: OData 4.0 or Web Data Connector 2.0 (deprecated).

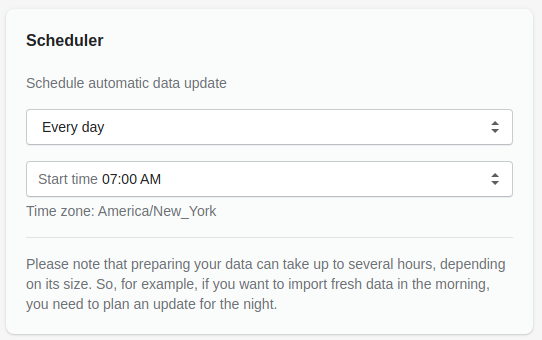
Step 4. Configure the Scheduler section:
Then if you need to set up automatic data update move to the Scheduler section:
Scroll and select one of the 4 possible options in a Scheduler section:
Disabled - in this case, you will be able to update this data source manually when needed;
Continuous - in this case, the data sources with this schedule type will be updated constantly. The data preparation process will start after the previous one is completed.
| Info |
|---|
Continuous data source runs only in the background. As a user, you can see the result after the data preparation is finished, but not during the process of data preparation. |
Every day - in this case, the data source will be updated every day at the selected time.
Weekly - in this case, the data source will be updated only once a week on the selected day and time.
2. Set up a start time depending on one of the options you’ve chosen.
| Info |
|---|
The Scheduler menu depends on your pricing plan. |
Choose fields for Shopify data export
Step 1. In the main Export options section of the data source form, you’ll see all fields available for export.
On the left, you can see tabs with all fields and tables available for export. These tabs help you navigate easily among numerous tables and data types.
Select the page you need (for example, Orders - as shown on the screenshot). Tables related to a specific data type are located under a specific tab.
Select the checkboxes next to the fields you’d like to export data from. Each exported table is represented by a separate group of checkboxes.
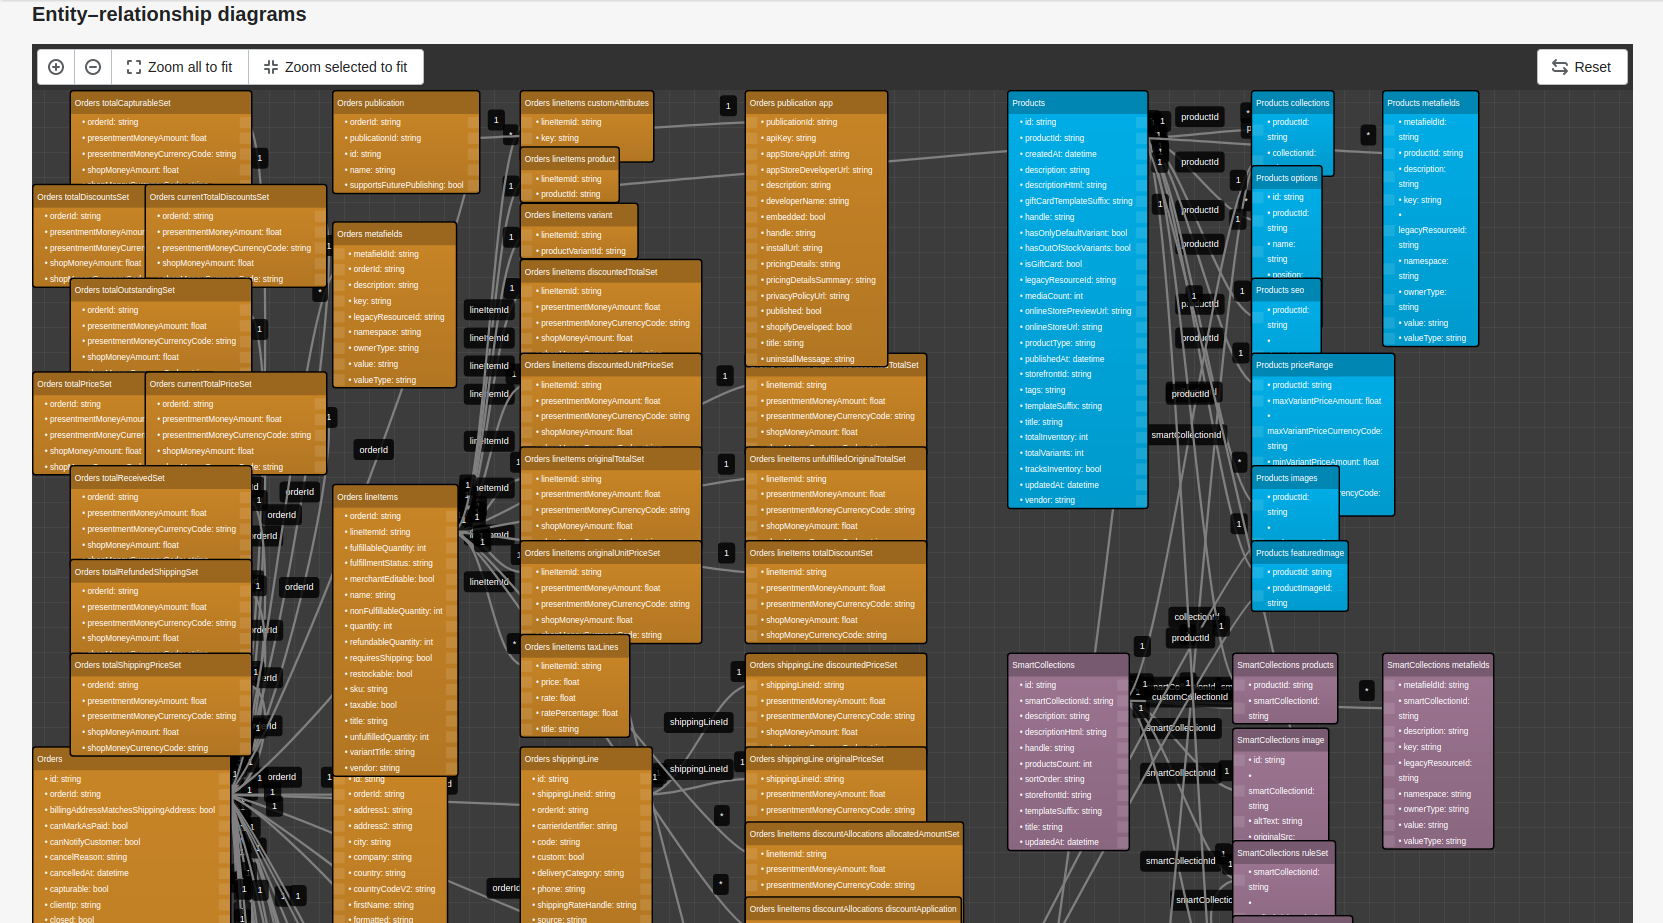
| Info |
|---|
Please, learn the Entity-Relationship Diagram to understand all the connections and correlations between tables. |
| Info |
|---|
Check information about the data types supported by the Tableau Connector here. |

Step 2. You can also use built-in filters to select the fields you need.
| Info |
|---|
Filters allow you to limit data based on several criteria, so your BI app does not need to get a complete list of results and then parse through it on its own. |
Press Add filter to see the available field selection options in a drop-down menu.
In case you want to combine multiple filters for data, repeat the step above.


Prepare data sources for export
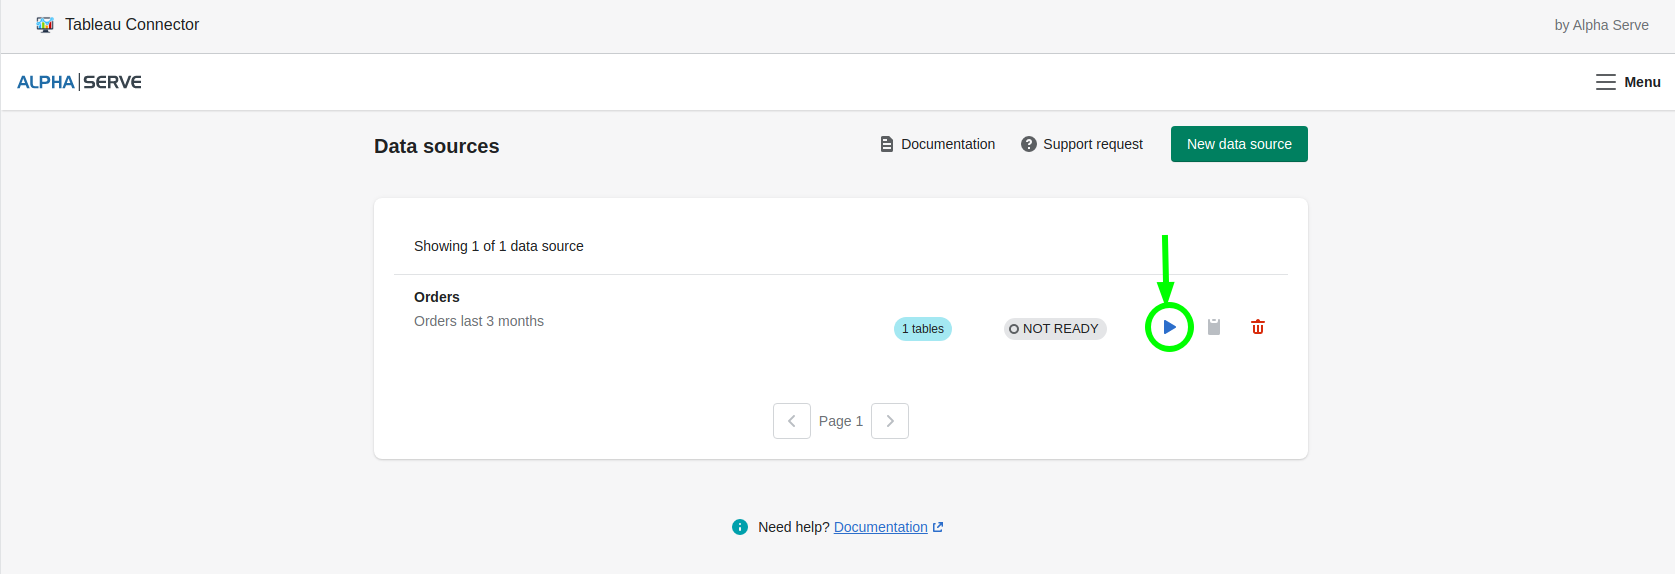
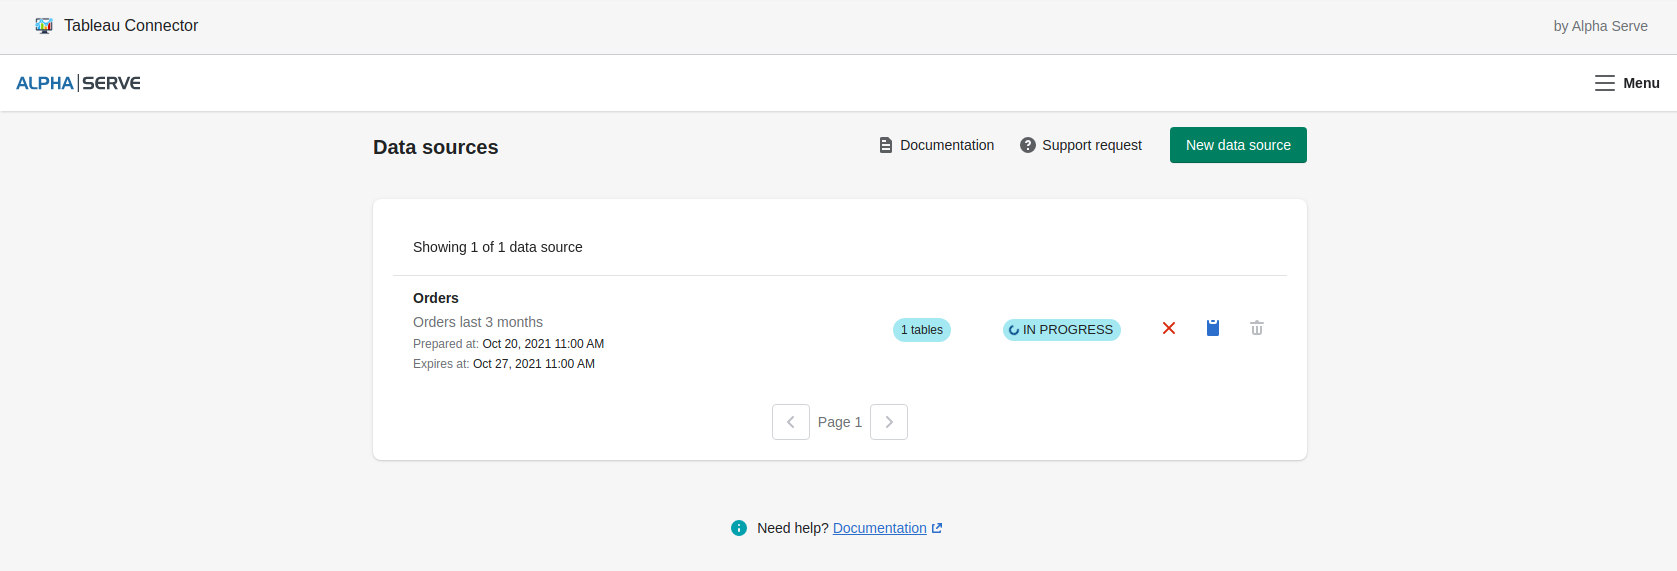
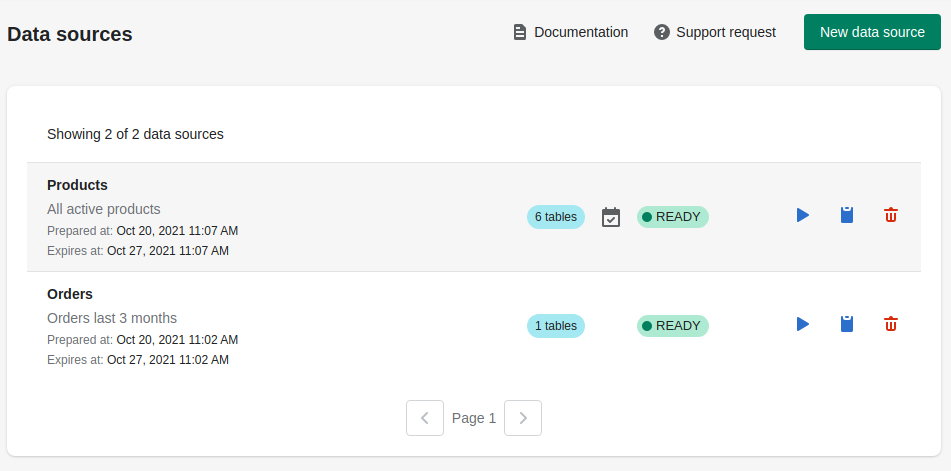
After you’ve successfully created a Data source, go back to the Data sources page. You will see a list of created data sources and their statuses.
The newly created data source will have a “Not Ready” status.
Step 1. You can proceed with data preparation by clicking the start button under the Actions menu, as shown in the screenshot
You can see the current result of data preparation immediately displayed in the Status column, it will be changed to “Pending” and then to “In Progress”.
| Info |
|---|
Shopify backend allows to prepare only one data source at a time. Therefore, if several sources are being prepared, they queue up one after the other. |
| Info |
|---|
The speed of data preparation depends on the amount of data you’ve selected. Most data sources preparation takes a few minutes. But sometimes this can take even hours, for example, if there are thousands of rows to be prepared. To speed up data preparing process:
If you need assistance with it, please, contact our Support team. |

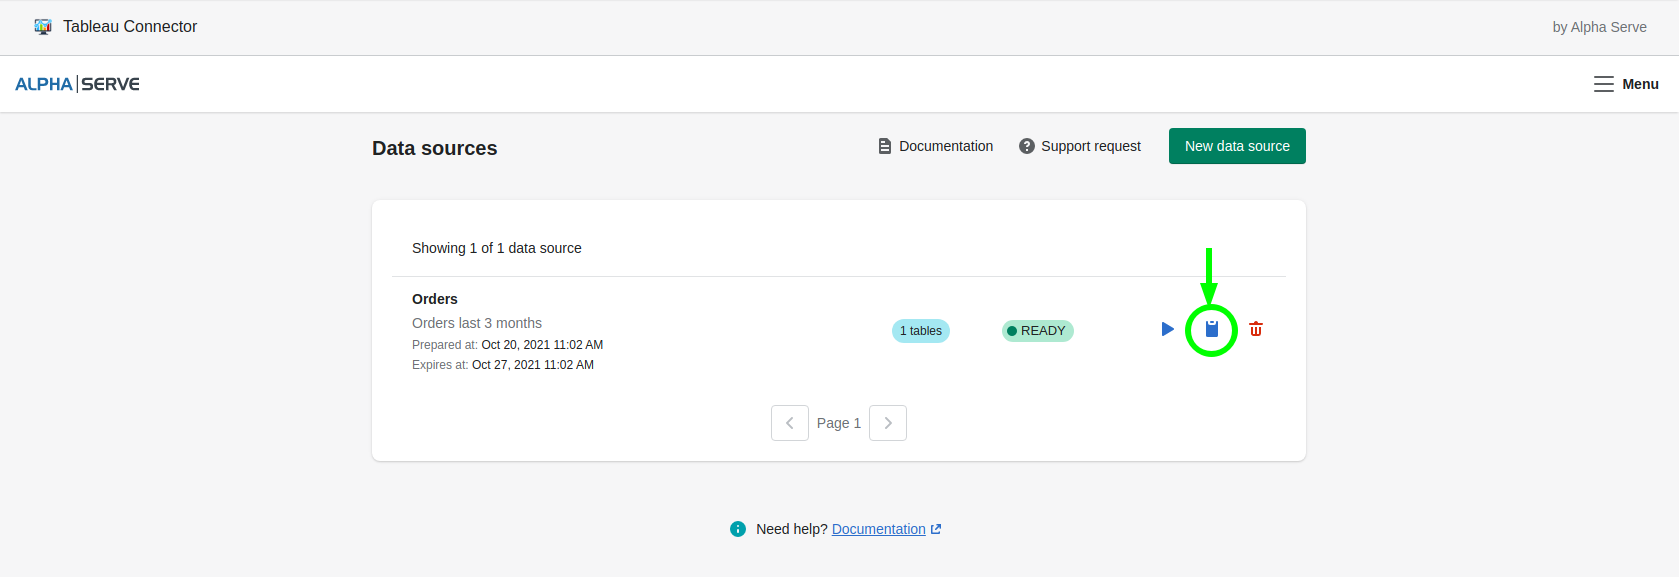
Step 2. To work with Tableau Software, the application generates the Data Source URL. Use this URL to import data to your Tableau tool. When the data preparation is complete, click the Copy button in the Actions menu. This will copy a data source URL generated by the application for Tableau.
Import Shopify Data to Tableau Software
Use the previously generated URL to import Shopify data to Tableau.
Step 1. Launch your Tableau Desktop.
Click OData

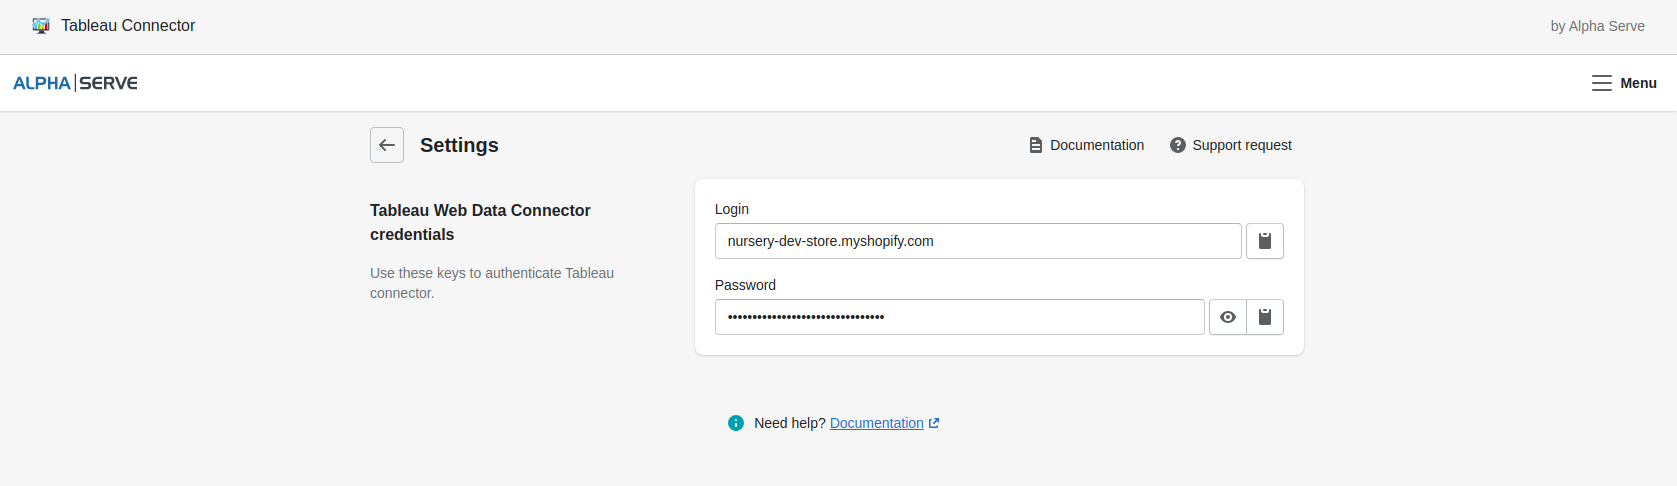
In the opened window, enter the copied URL, and pick Username and Password authentication. Copy them from the Settings page in the Tableau Connector interface.


Step 2. The data source fields will be displayed on the next screen.
Select the table and drag to the main screen.
After that click Update now and all the information you’ve selected will be displayed.

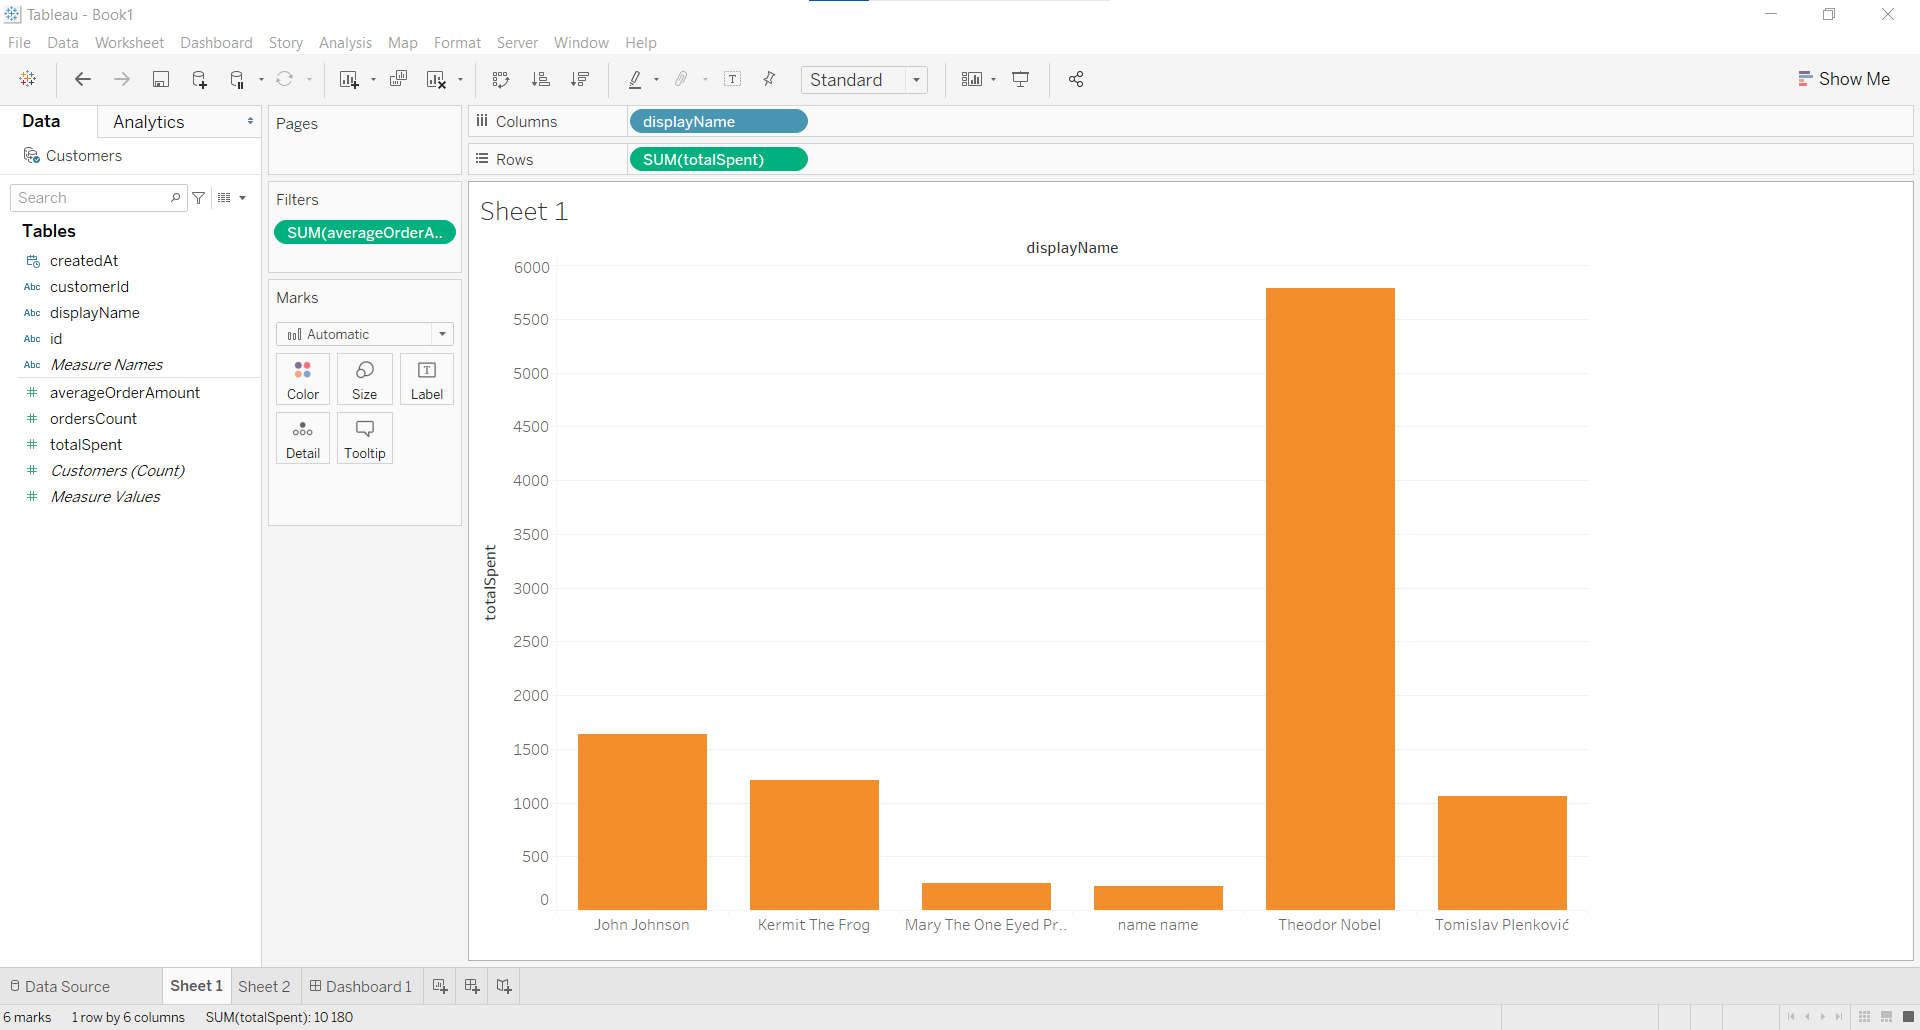
Step 3. After the data is loaded, you can start building graphs and dashboards based on the Shopify data.
To do this, choose the visualization type and select the data you want to see on the graph or dashboard.

Import Shopify Data to Tableau Software using the deprecated WebDataConnector URL
Use the previously generated URL to import Shopify data to Tableau.
Step 1. Launch your Tableau Desktop.
Click Web Data Connector and enter Source URL in web data connector field.
Click Enter button.
.png?version=1&modificationDate=1607335814716&cacheVersion=1&api=v2)
.png?version=1&modificationDate=1607335848775&cacheVersion=1&api=v2)
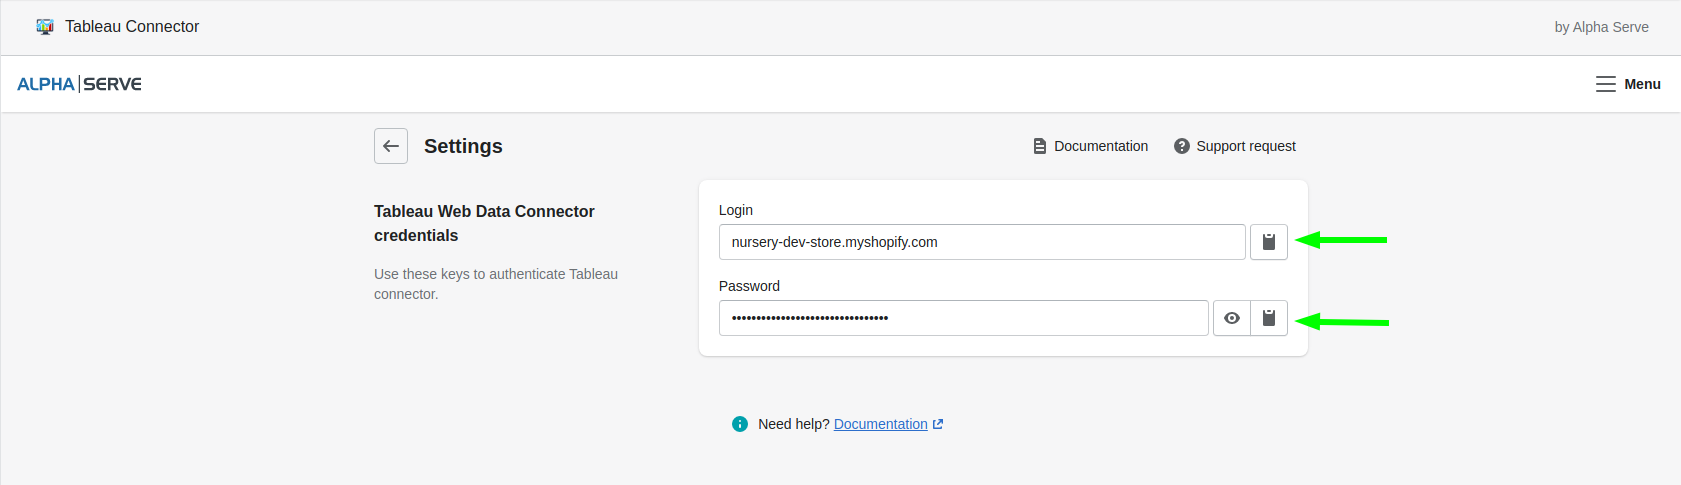
Step 2. Authorization in Tableau will be required.
Copy them from the Settings page in the Tableau Connector interface.
Click Log in and Export.
.png?version=1&modificationDate=1607335848692&cacheVersion=1&api=v2&width=340)
Step 3. The data source fields will be displayed on the next screen.
Select the table and drag to the main screen.
After that click Update now and all the information you’ve selected will be displayed.
.png?version=1&modificationDate=1607335962186&cacheVersion=1&api=v2)
After this step, the selected data will be loaded into your Tableau Software.
If there is a big amount of data, it can take some time.
Step 4. After the data is loaded, you can start building graphs and dashboards based on the Shopify data.
To do this, choose the visualization type and select the data you want to see on the graph or dashboard.
Manage the Data Sources
On the Data sources page, you can also manage the existing data sources.
You can edit your data source fields information any time by clicking the link on it.
| Info |
|---|
Please note. After saving the changes your data source will change the status to “NOT READY”. |
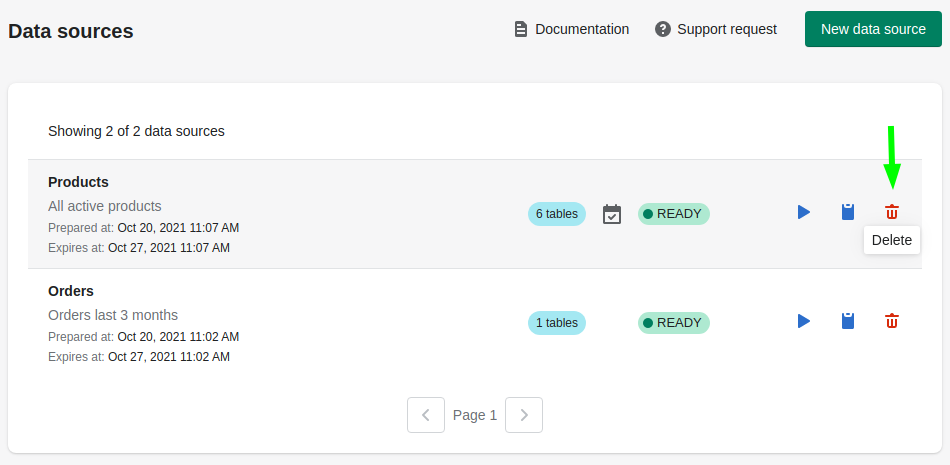
If you don't need some of the data sources anymore, click Delete.
| Note |
|---|
You will not be able to undo this action. Be careful when deleting the data sources. |
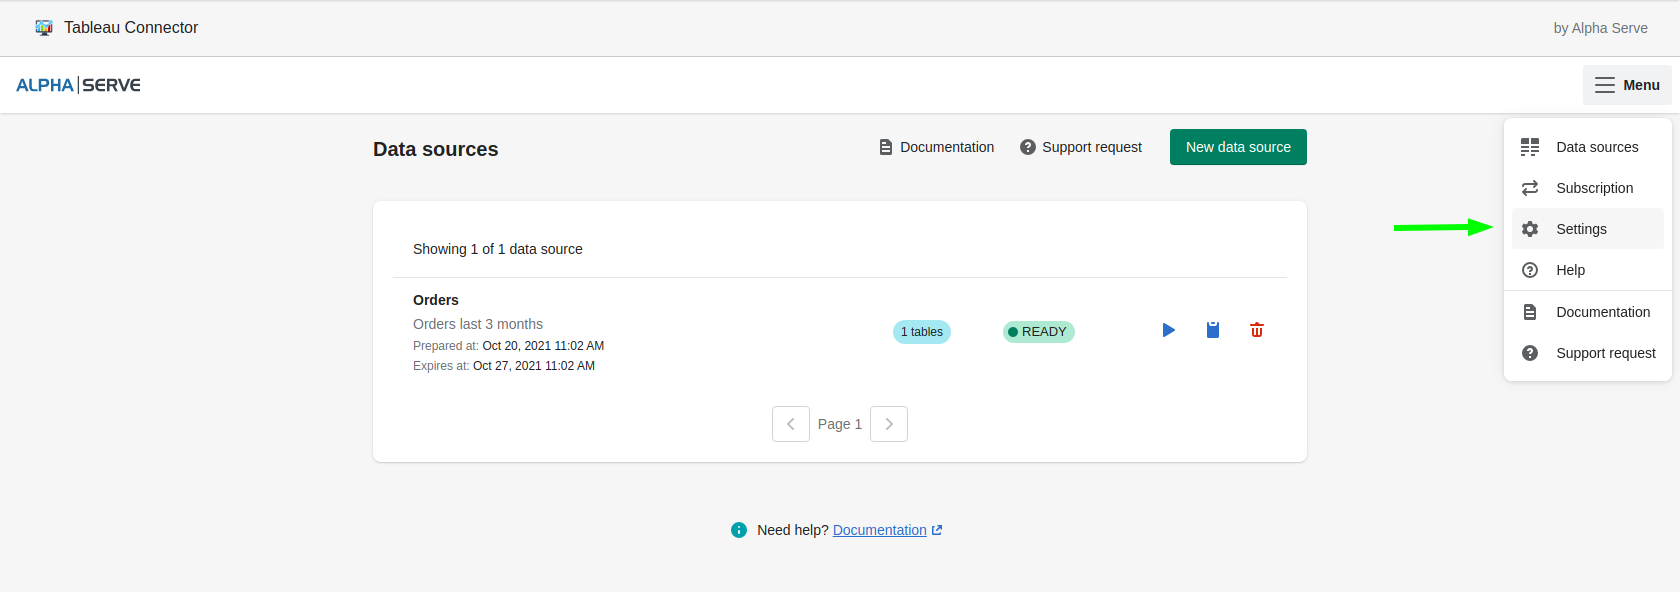
Menu section overview
Subscription Page
Tableau Connector has Subscription page where you can find the overview of the available pricing plans as well as their description.
Information on how to switch plans for the app can be found here.

Settings Page
In this section, you can find your Tableau credentials (Login and access token) for future data export with the help of Tableau Connector.
Help Page
You can find a short version on this user guide in the Help page of Tableau Connector for your convenience.
The Entity-Relationship Diagram for the tables can also be found here. Please, learn it carefully to be sure that you understand all the connections and correlations correctly.

.png?version=2&modificationDate=1696865440485&cacheVersion=1&api=v2&width=210)
| Table of Contents |
|---|
How to Export Shopify Data to Tableau
1. Create Data Source
Initially, you need to create a data source for data you want to export from your Shopify store to your Tableau. You can do it by accessing the Data source page inside the Tableau Connector for Shopify.
You have to name your data source, adjust auto-refresh, and filter the tables you’d like to be in your data source.
| Info |
|---|
If you need more information on how to create a data source, please refer to our step-by-step instruction. |

2. Export Shopify Data into Tableau
After creating a data source, you can easily export your data into Microsoft Power BI. Being on the Data source page, select Copy URL. Launch your Microsoft Power BI, authorize, connect, and start working with your data.
Tableau Connector for Jira offers two ways of exporting data: using OData and using Web Data Connector. You can select one that is more convenient for you.
| Info |
|---|
If you need more information on how to export data, please refer to our step-by-step guide. |
| Info |
|---|
Read a comprehensive step-by-step guide on how to use Tableau Connector for Shopify in our blog ⬇️ |
.png?version=2&modificationDate=1696865440485&cacheVersion=1&api=v2&width=267)