| Table of Contents | ||||
|---|---|---|---|---|
|
As not all users have permissions to export Jira data, Jira Cloud Administrators can grant necessary permissions to work with Power BI Connector for Jira Cloud for specific users or groups. The instructions below demonstrate how to grant these permissions, allowing users to create, edit, watch, and export connectors.
Administrators have the permission to work with the connector by default.
| Info |
|---|
Read more on how to effectively connect Jira and Power BI Desktop ⬇️ |
| Table of Contents | ||||
|---|---|---|---|---|
|
How to Grant Permission
General Settings
Permissions
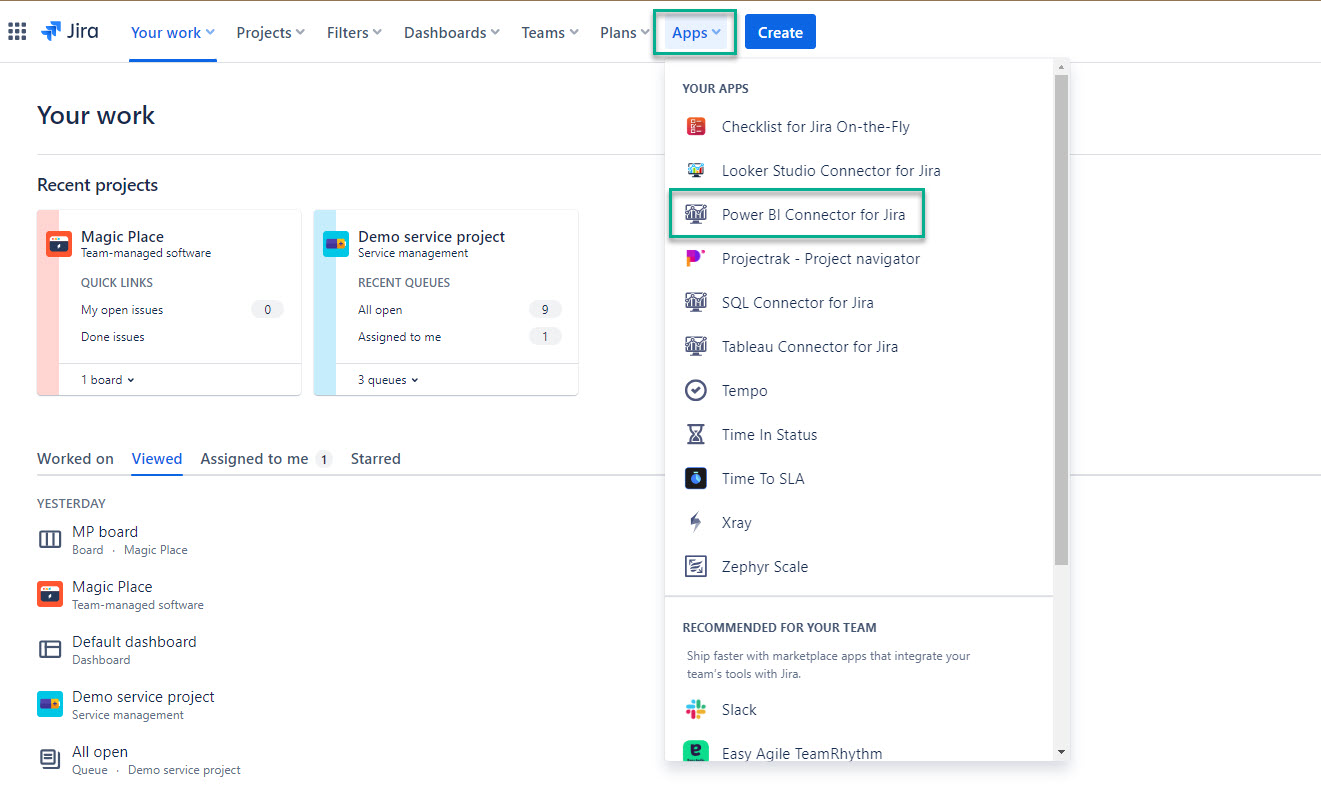
Being signed in to your Jira Cloud instance, select Apps, and then select Power BI Connector for Jira.
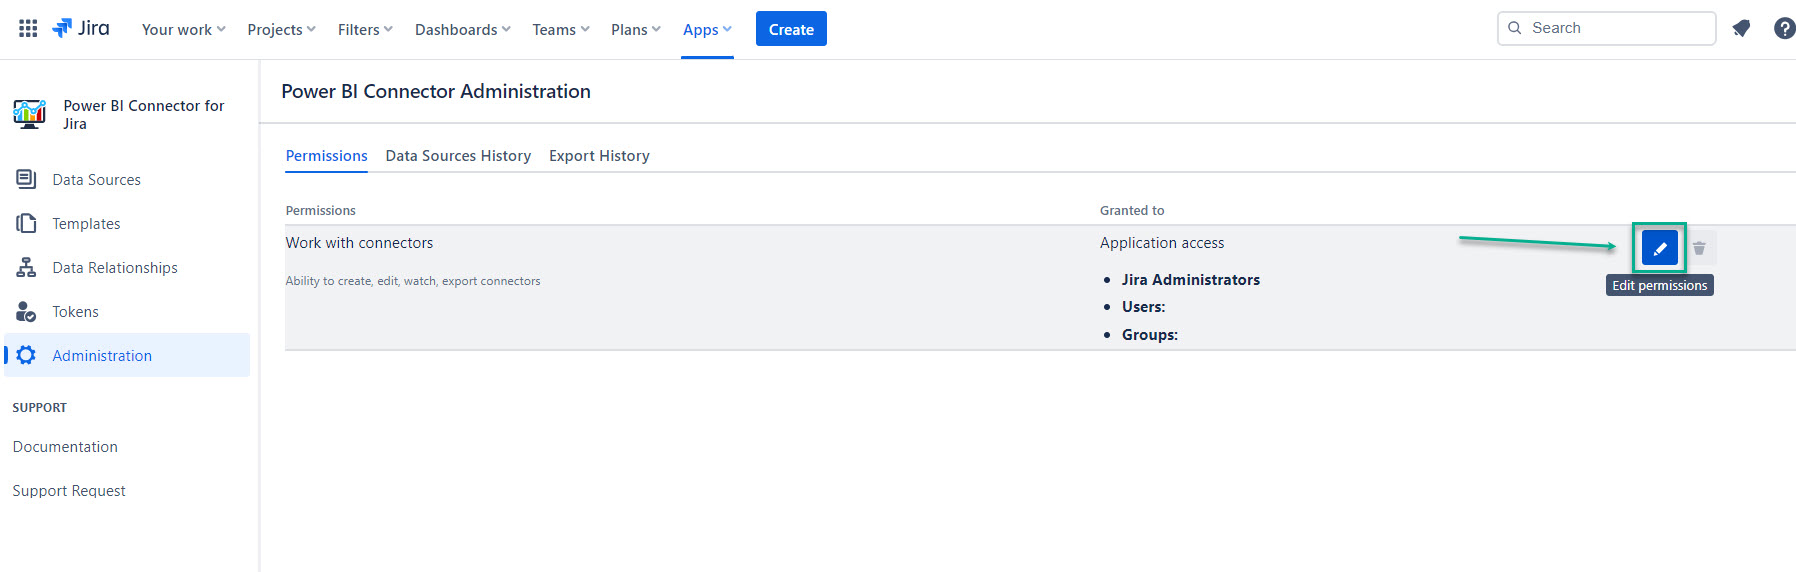
On the left-side menu, select Administration.


Select the Edit permissionsbutton.

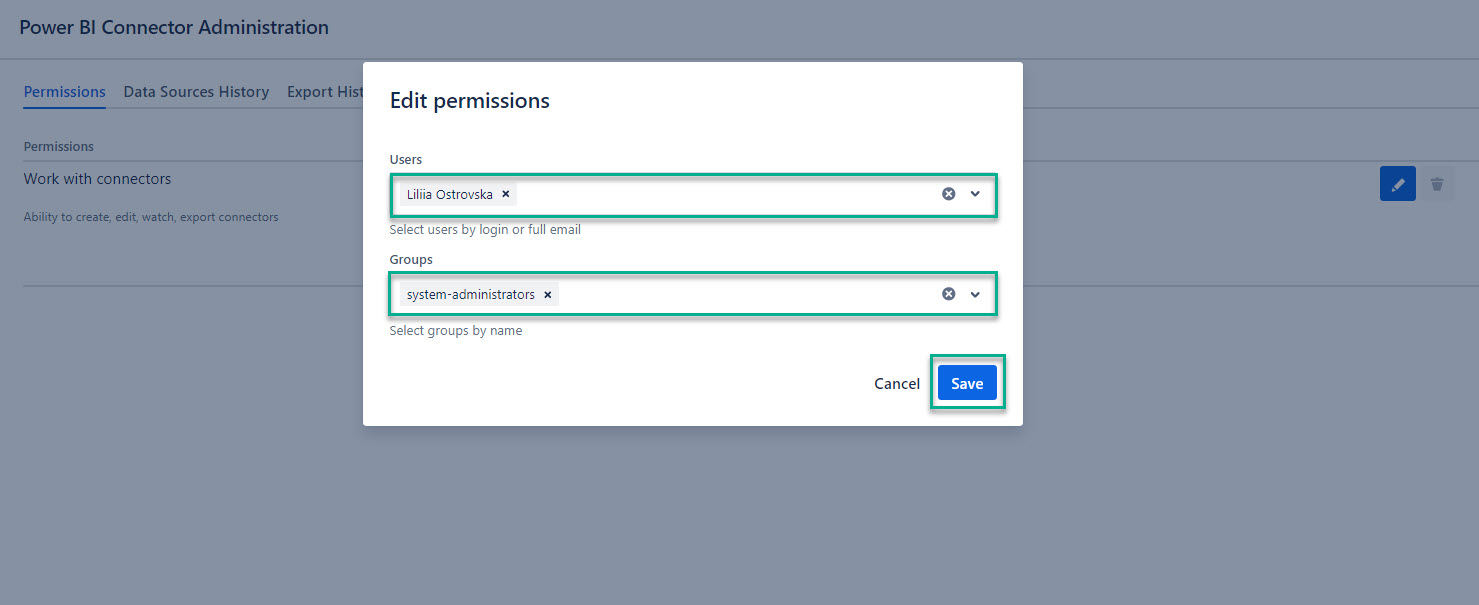
In the Users field, enter the username you want to grant permissions to.
| Info |
|---|
You can select as many individual users as you need to. |
In the Groups field, select the groups you want to grant permissions to.
| Info |
|---|
You can select as many groups as you need to. |
Select Save.

| Info |
|---|
Here you can also view who has permission to work with Power BI Connector for Jira, edit, and delete permissions. |
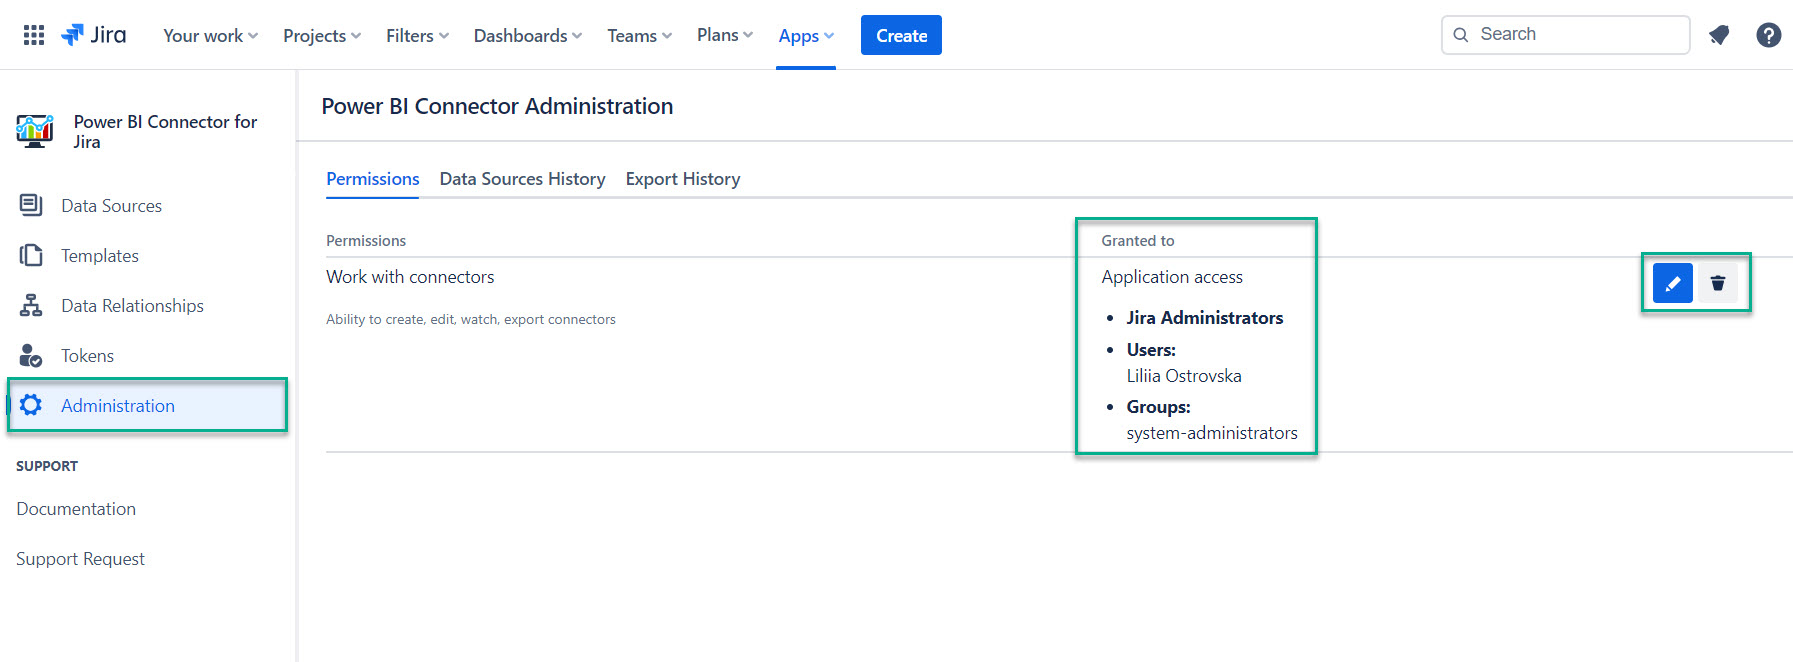
revoke all permissions. |

Access Token Expiry
This feature allows admins to decide in how many days access tokens are to expire.
Being signed in to your Jira Cloud instance, select Apps, and then select Power BI Connector for Jira.
On the left-side menu, select Administration, and then select General settings.
| Info |
|---|
The access token expiry date is applied to all users. The default value is 365 days. |

If the administrator sets an expiry date of 10 days, this setting will affect all valid access tokens with expiry date later than 10 days from now, as well as tokens with no expiry date. All tokens with less than 10 days remaining won’t be affected.
If, later today, the administrator sets an expiry date of 20 days, no access tokens will be affected, because they were already set to 10 days.
If the administrator turns off the expiry setting, no existing tokens will be affected.
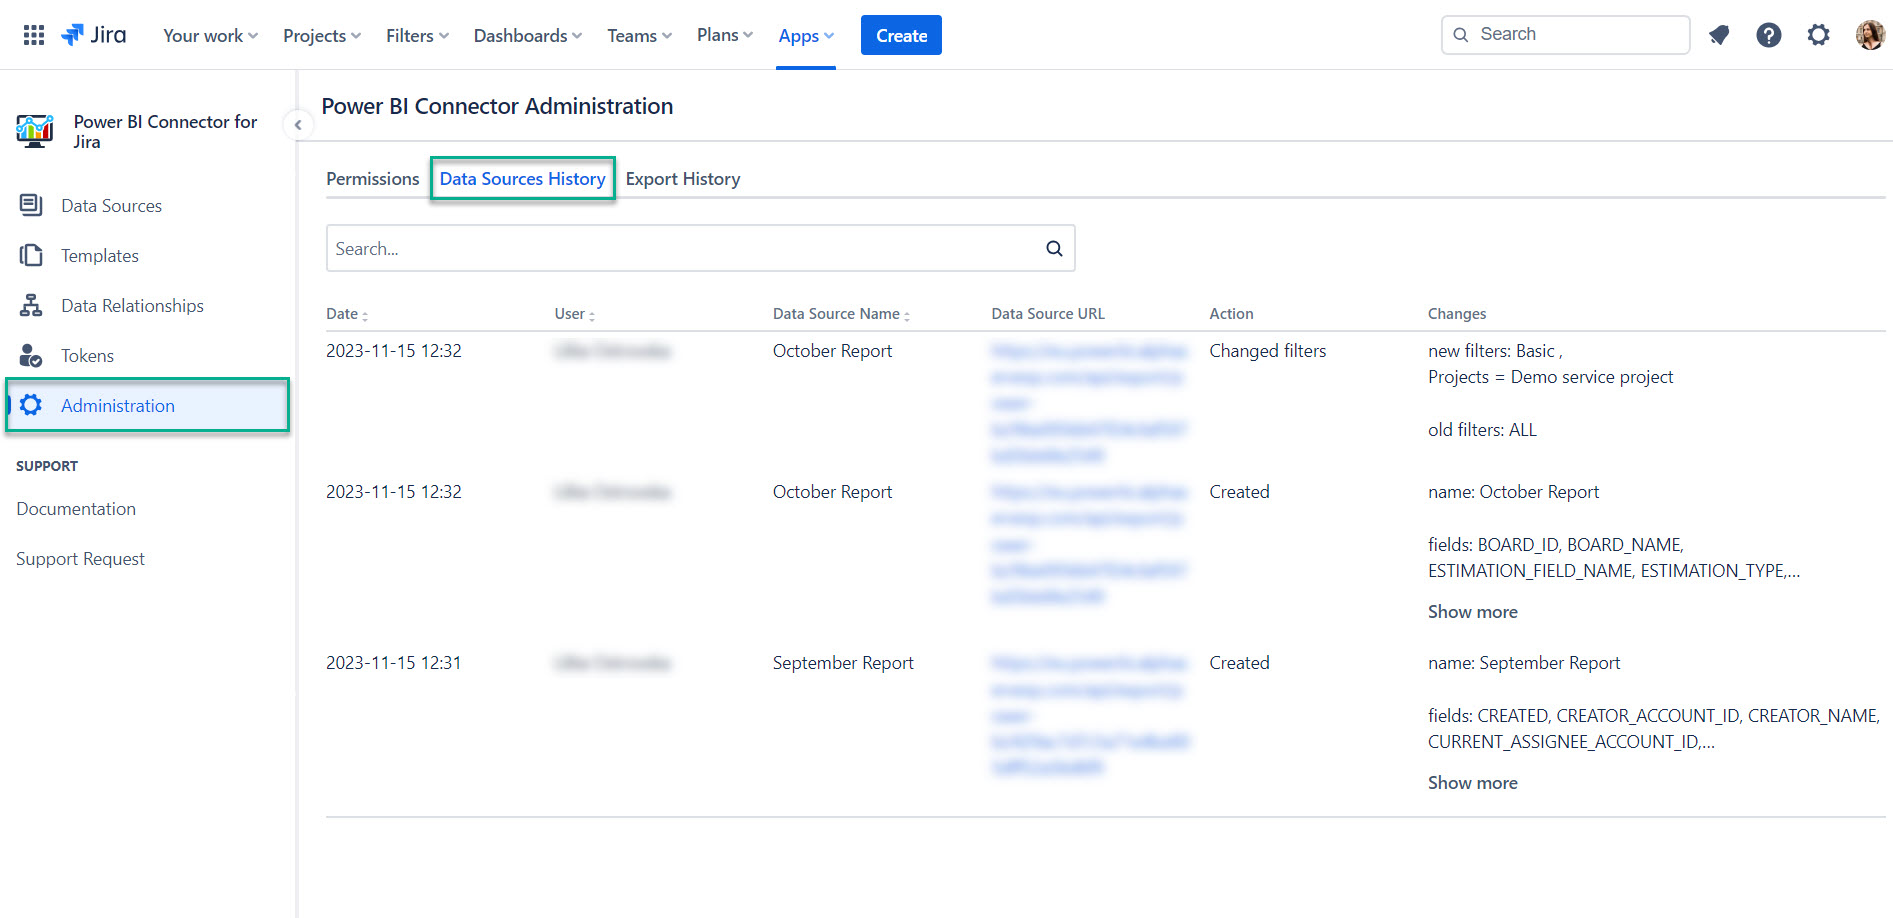
Data Sources History
Being signed in to your Jira Cloud instance, select Apps, and then select Power BI Connector for Jira.
On the left-side menu, select Administration, and then select Data Source Historysource history.
| Info |
|---|
The tab displays all changes performed to the data sources by all users, including creating, editing the fields or filters, sharing, changing owner, and more. |

Export History
Being signed in to your Jira Cloud instance, select Apps, and then select Power BI Connector for Jira.
On the left-side menu, select Administration, and then select Export Historyhistory.
| Info |
|---|
The tab displays all data related to the export process: ID, user name, data source ID, tables count, rows count, and more. Filtering by statuses (All, Success, and Failed) and dates (Start date and End date) can help to find specific data. |
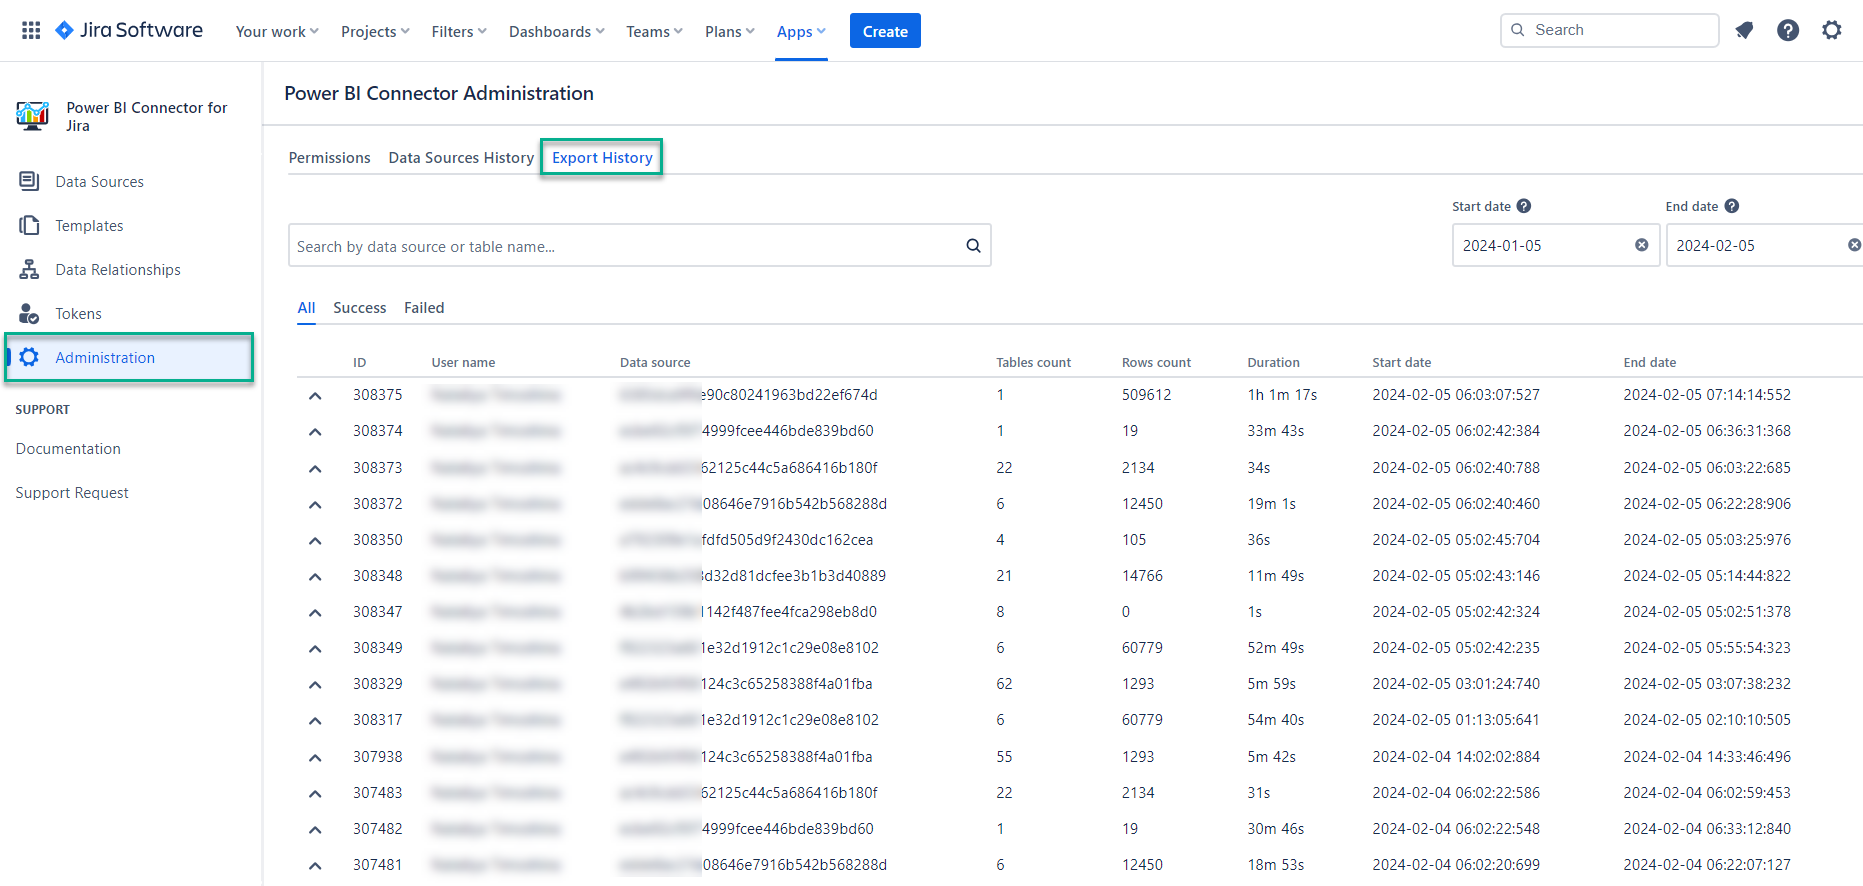

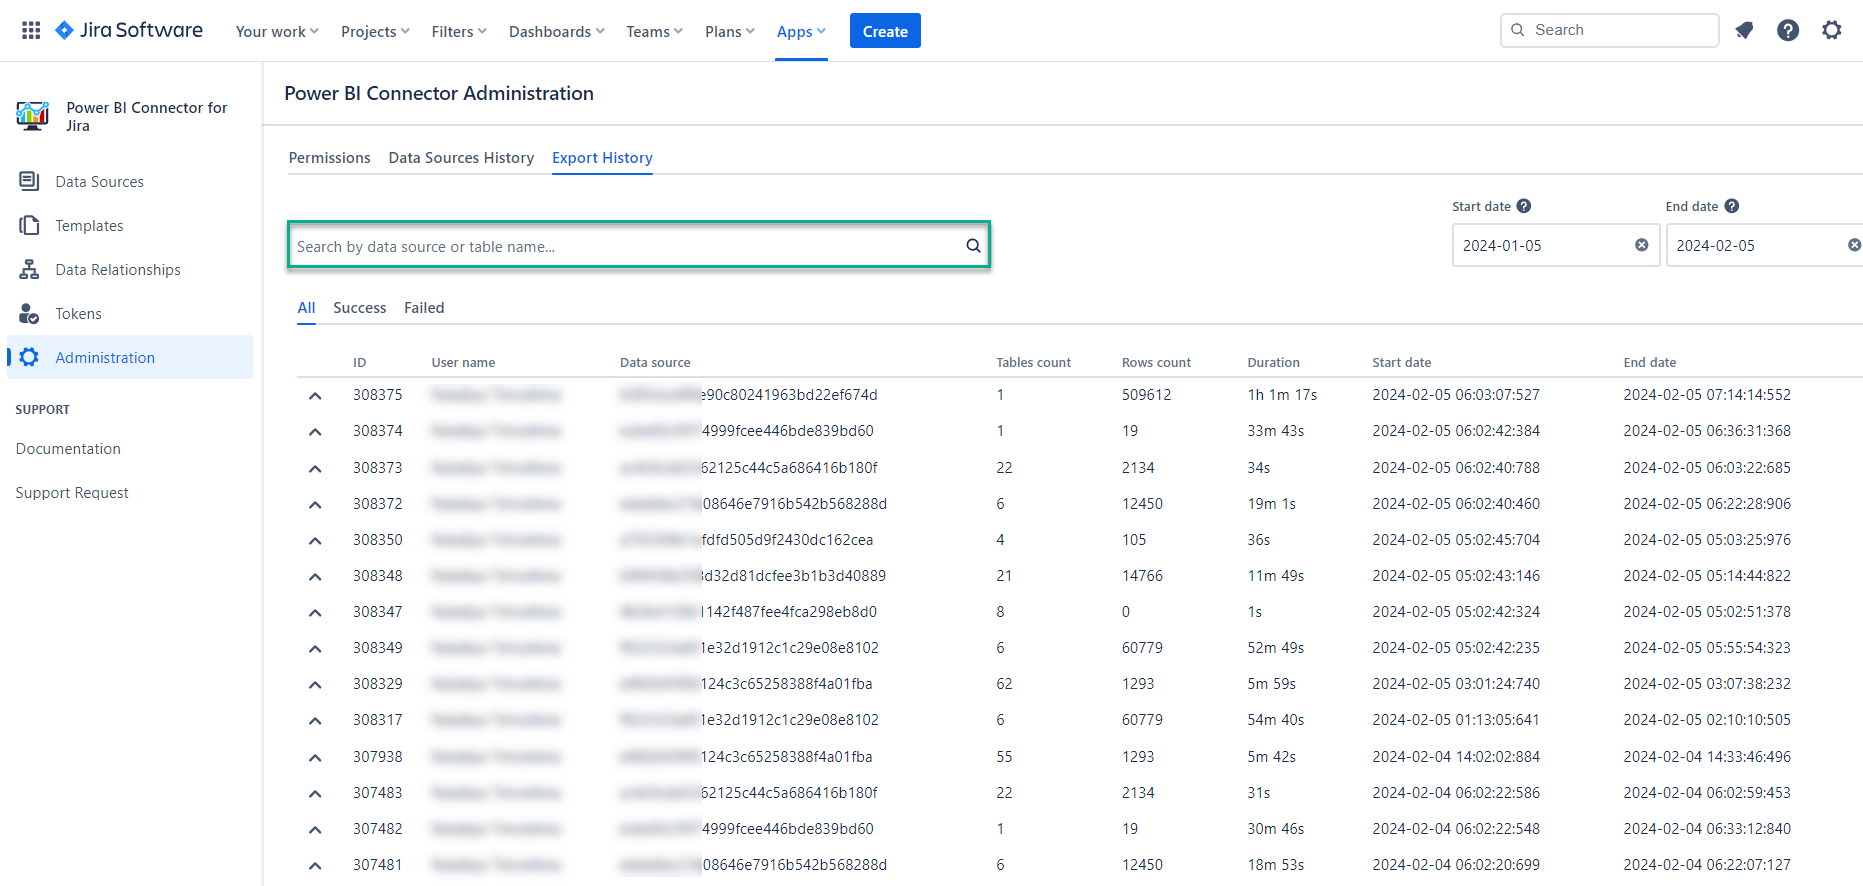
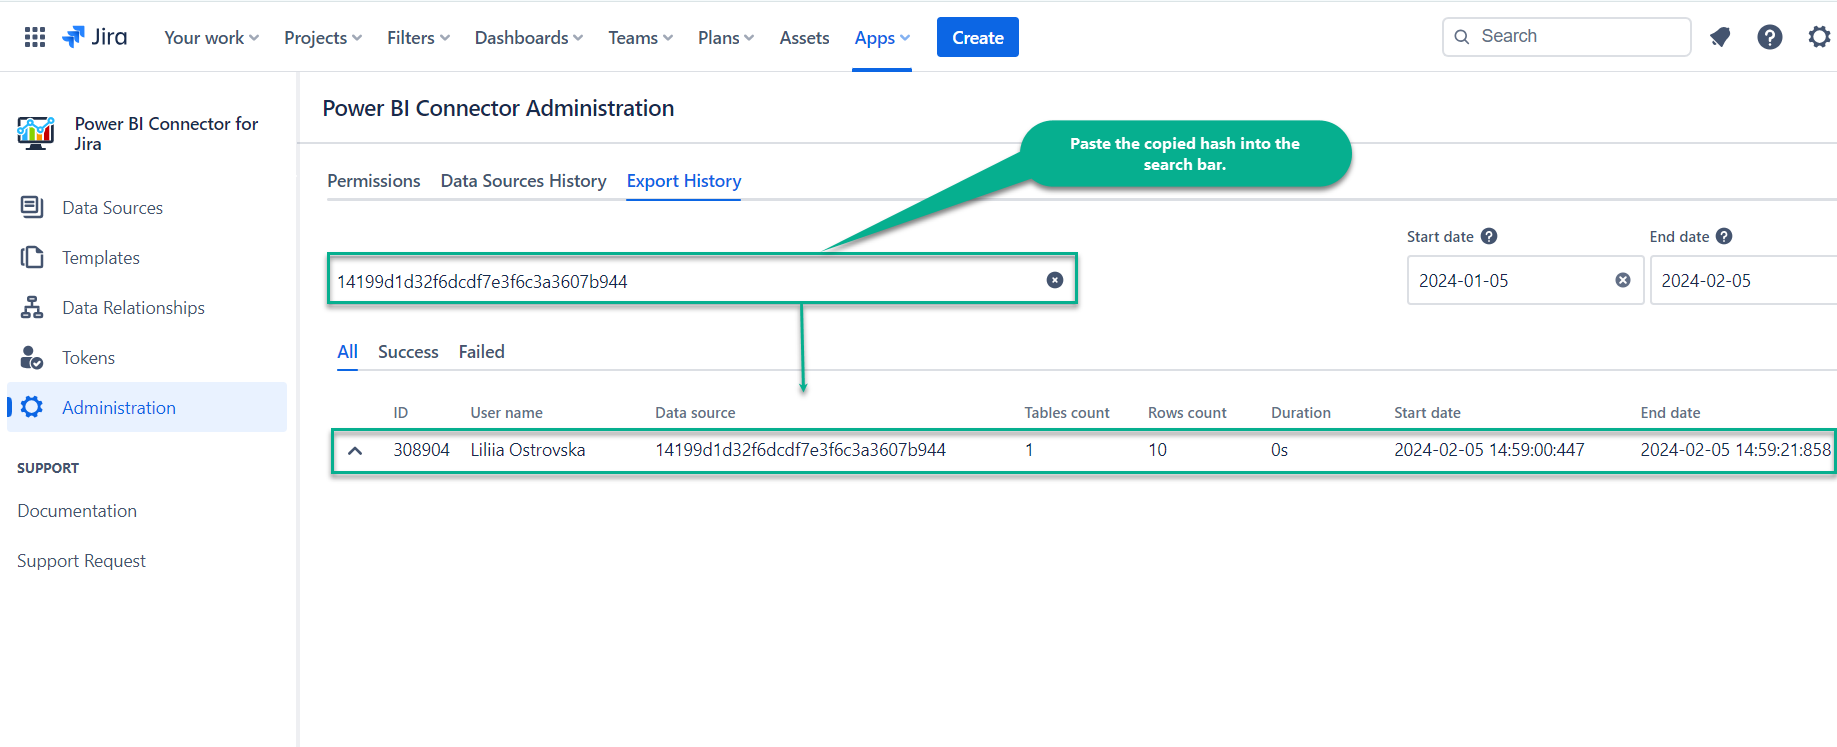
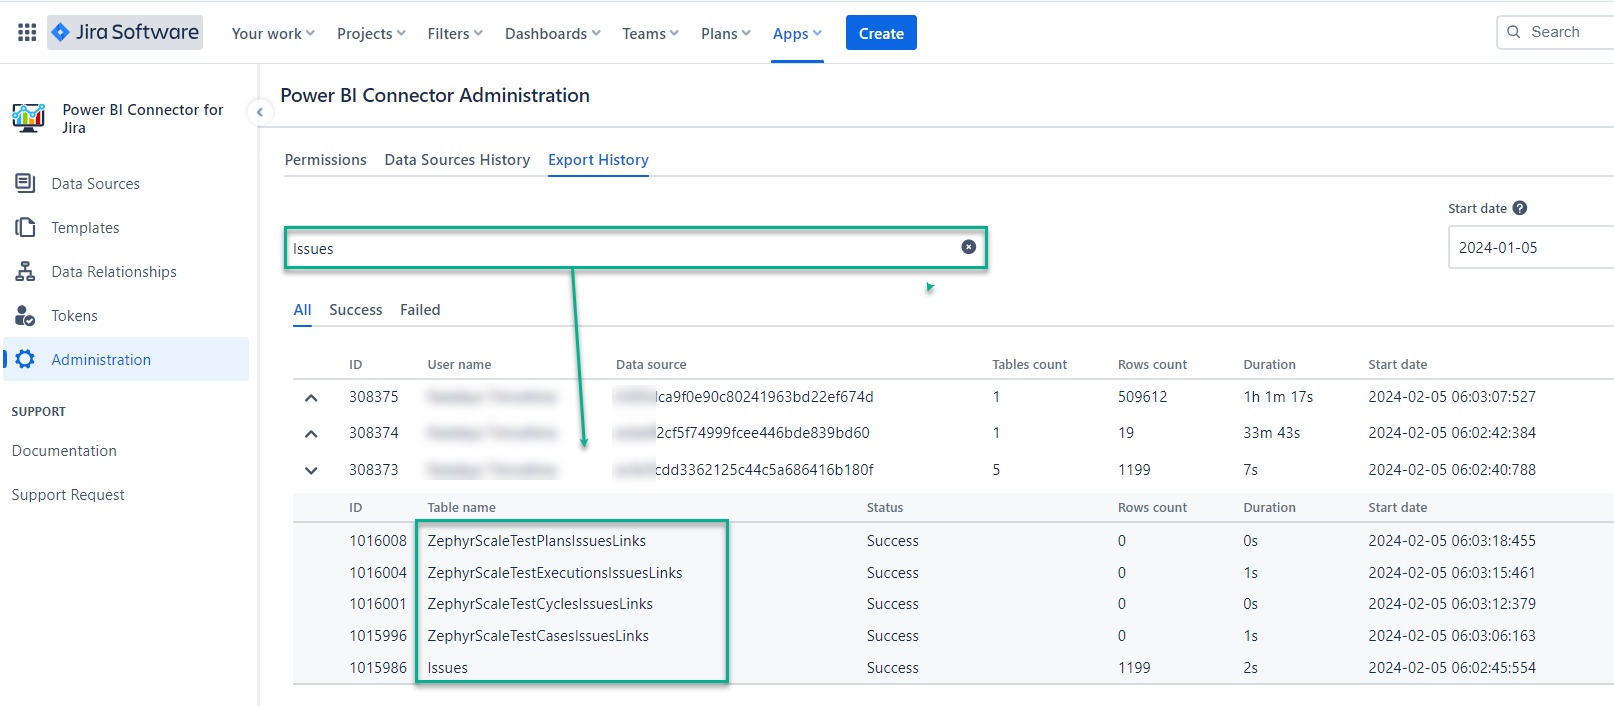
You can also apply search by data source hash name or table name.
| Info |
|---|
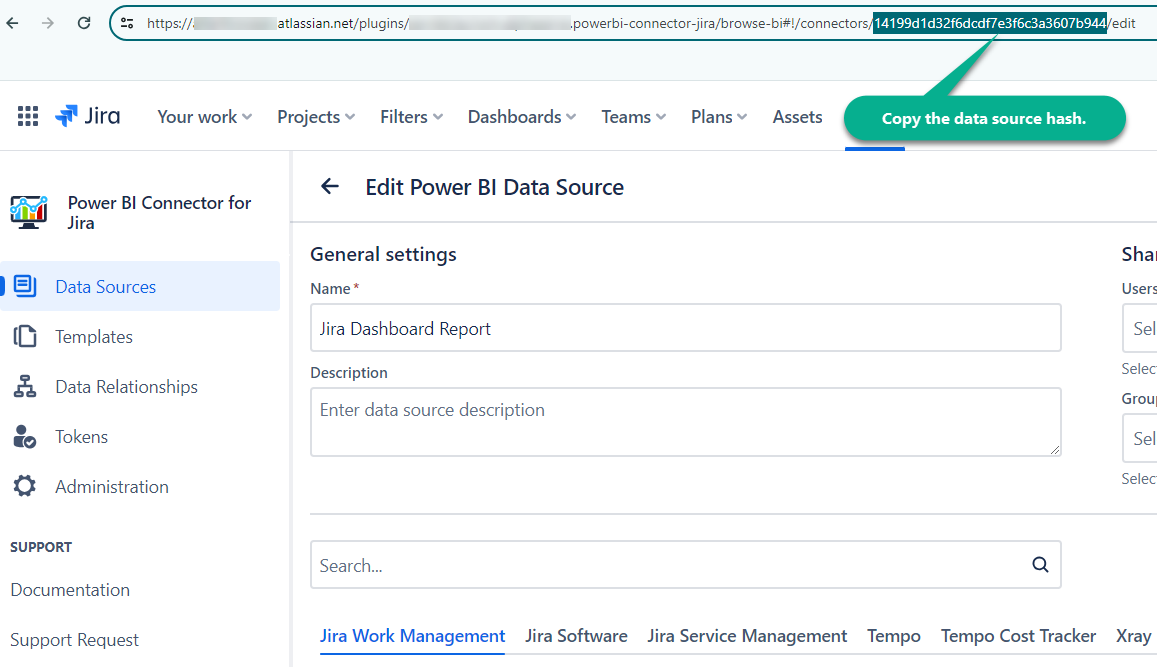
Search by data source: for example, you need to view the export record of the specific data source. You have to copy the hash of the corresponding data source, and then paste the copied hash into the search bar. |
| Info |
|---|
Search by table name: for example, you need to view all export records that contain the Issues table. You have to enter the name of the desired table into the search bar and all export entities containing the specified table will be returned in the search results. |
Tokens History
Being signed in to your Jira Cloud instance, select Apps, and then select Power BI Connector for Jira.
On the left-side menu, select Administration, and then select Tokens history.
| Info |
|---|
Currently, this tab only reflects changes to the token expiration date. |

IP Whitelisting
Below are the current IP addresses used by the Power BI Connector for Jira Cloud application. We recommend whitelisting them only if you are experienced with the process and confident in managing it effectively.
| Code Block |
|---|
Default region (Oregon): 35.161.7.18, 35.85.205.110 EU: 52.211.33.183, 54.77.134.91 DE: 18.184.153.1, 54.93.142.16 AU: 52.63.173.131, 54.253.130.102 SG: 18.138.139.163, 18.139.93.202 |