Zendesk Administrator role is required to follow the instructions on this page. You can learn more about this here.
| Table of Contents | ||||
|---|---|---|---|---|
|
Now the application is installed and should be accessible trough Navigation panel. The only thing that is left now, is to connect application to the account via OAuth.
How to connect Power BI Connector for Zendesk to your account via OAuth
Step 1. Locate Power BI Connector for Zendesk application in your Navigation panel and open it.

Step 2. You will be notified, that OAuth connection was not yet established, press Connect Power BI Connector button.

Step 3. New tab will open, and you will be asked to provide a permission to read you Zendesk account data. Press Allow button.

Step 4. Tab will be closed automatically, and you will get back to Power BI Connector for Zendesk application, now it will be ready to use.
How to configure Power BI Connector
Step 1. Go to the Zendesk Admin Center. This can be done by selecting Admin section from your navigation bar and then clicking on a link Go to Admin Center.

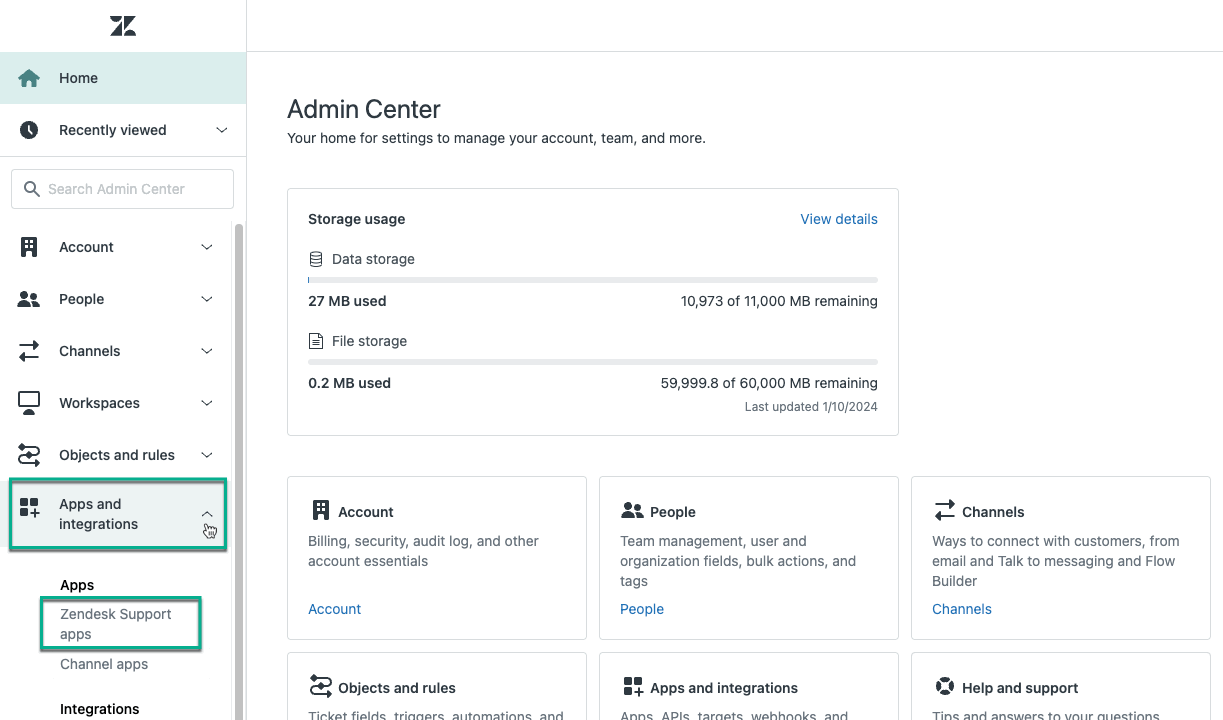
Step 2. When inside Admin Center, go to Apps and Integrations, Zendesk Support apps.

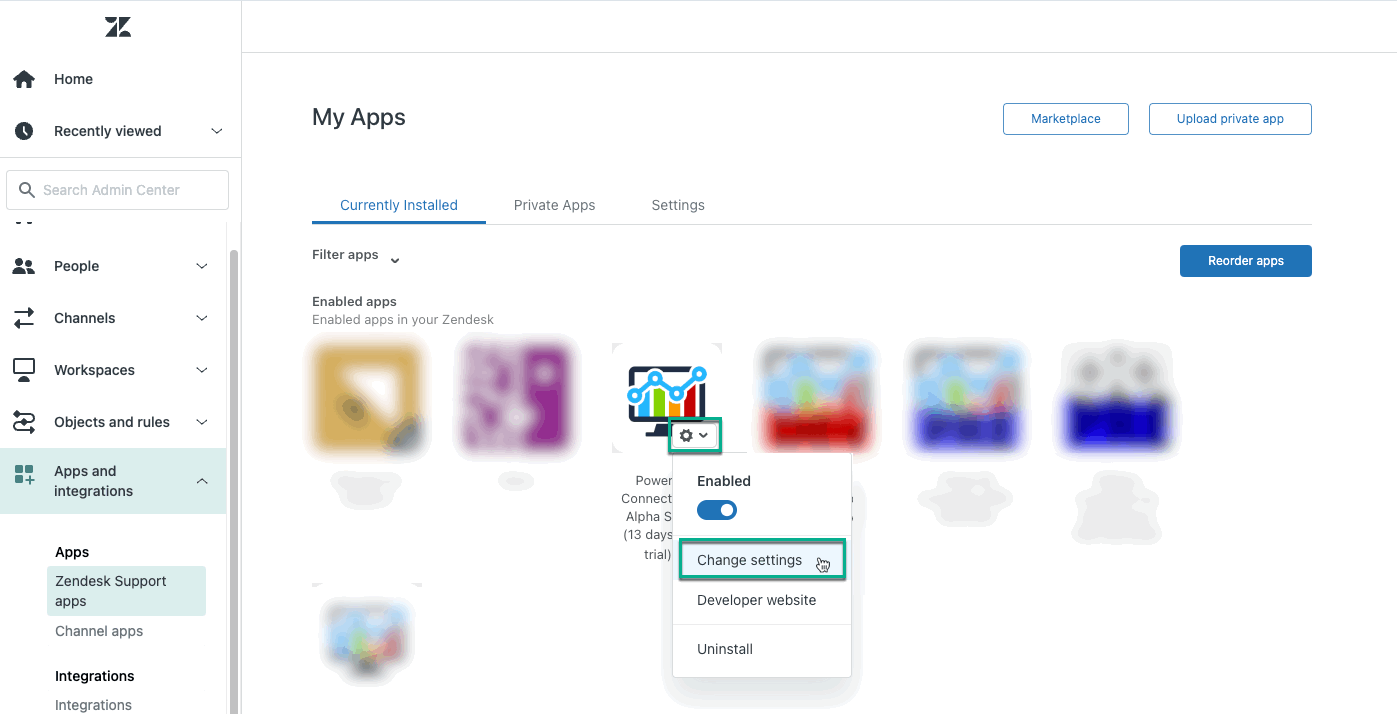
Step 3. Locate Power BI Connector for Zendesk in the list and press on it. You will be taken to Power BI Connector for Zendesk settings page.

Power BI Connector for Zendesk settings page
Below you will find a description of the Power BI Connector for Zendesk settings:
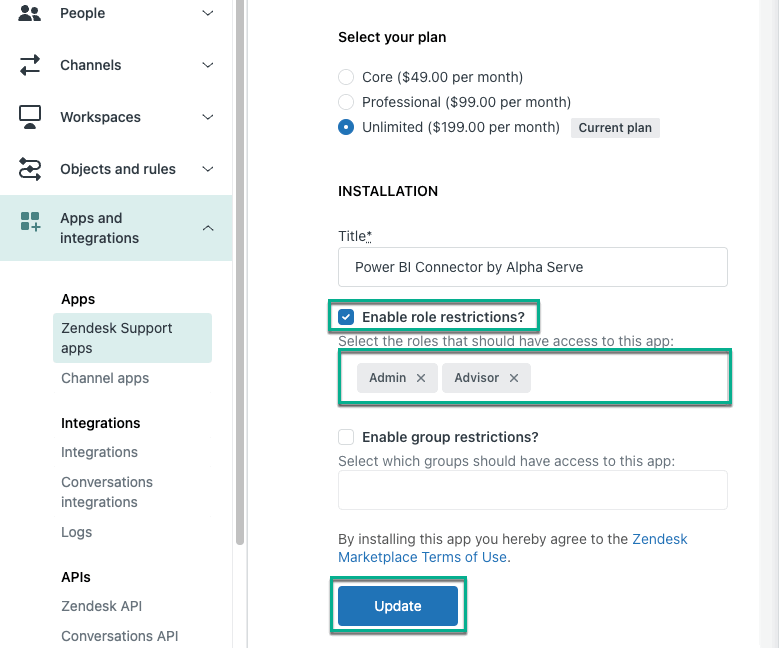
1. Select your plan
This action will allow you to change your current plan.
If plan is changed, section 2. Billing details become visible, and button 5. Update is hidden.
2. Billing details
Available, only if different plan was selected in section 1. Select your plan.
After proper information is filled, button 6. Proceed with payment should be pressed, so plan update process can be finalized.
3. Title
Here, title of the application can be customized.
4. Enable role/group restrictions
To restrict Power BI Connector for Zendesk access to specific users only, next settings could be used:
Enable role restrictions - restrict application access only to users, listed in the input field below.
Enable group restrictions - restrict application access only to users, that belong to groups, listed in the input field below.
5. Update
This button will be available only, if current plan was not changed in section 1. Select your plan
Pressing it, will save all the changes done to the app configuration.

How to obtain Zendesk API Access Token
How to Enable Restrictions
| Info |
|---|
By default, all roles and groups have access to the app. |
Being signed in to your Zendesk account, select Products Panel, and then select Admin Center.
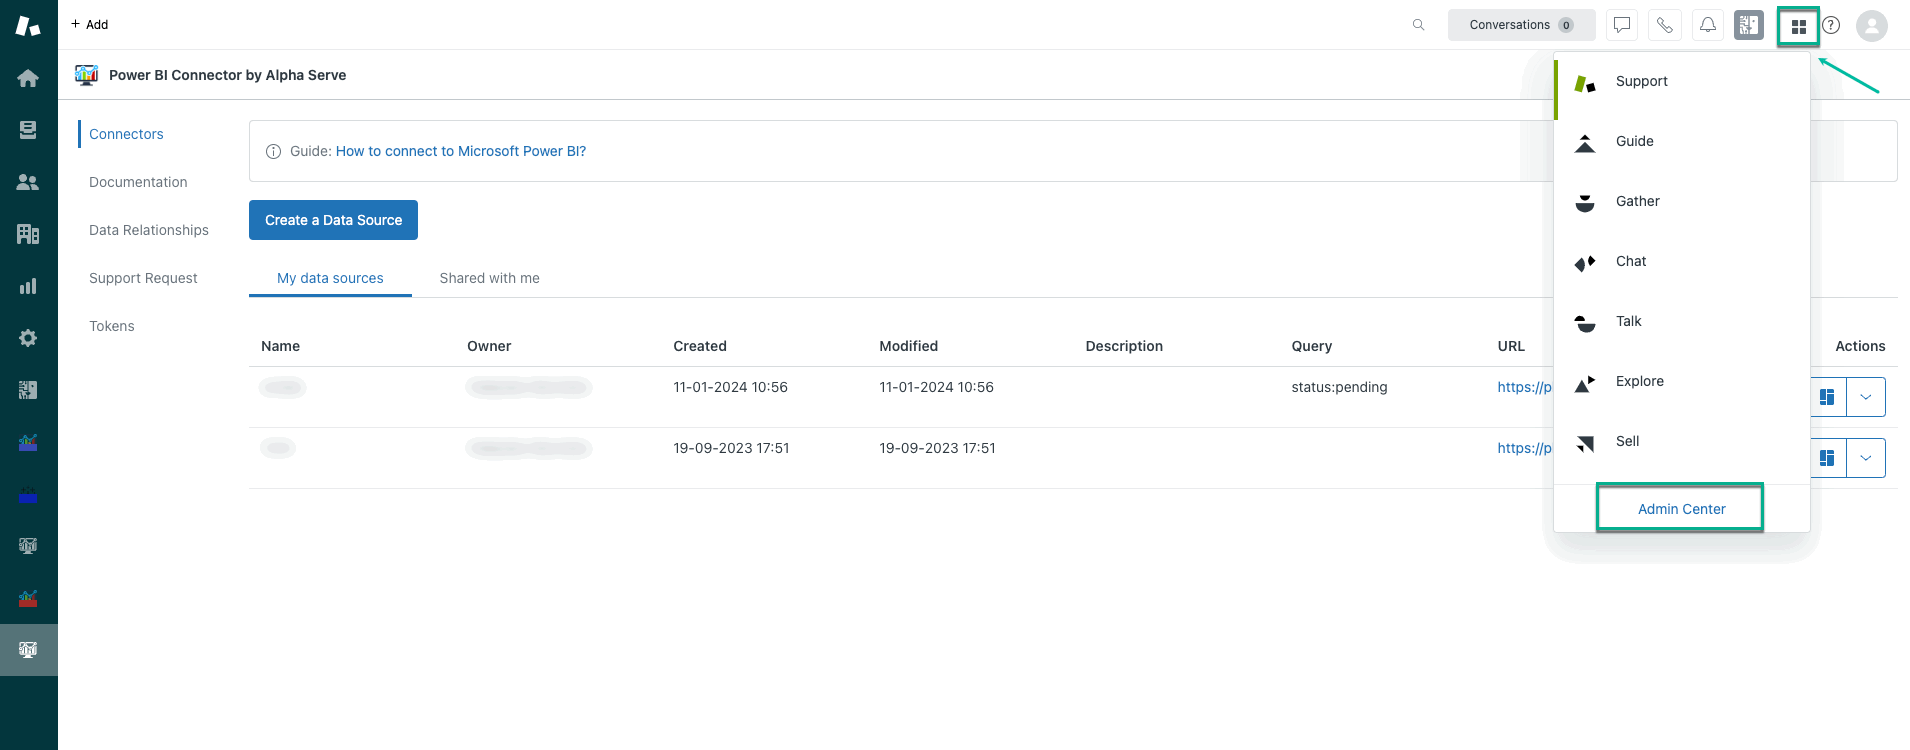
Expand Apps and integrations, and then select Zendesk Support apps.
Find Power BI Connector, select ⚙️ , and then select Change settings.
Check the Enable role restrictions? option, and then select role(s) you want to have access to the app.
Select Update.
| Info |
|---|
The same procedure is applied to group restrictions. |
How to Create Zendesk API Token
The Zendesk Administrator role is required to enable token access and generate new API tokens. If you do not have such access, please
contact your Zendesk
Administrator.
Zendesk API Access Token will be requested during log in process to Power BI.
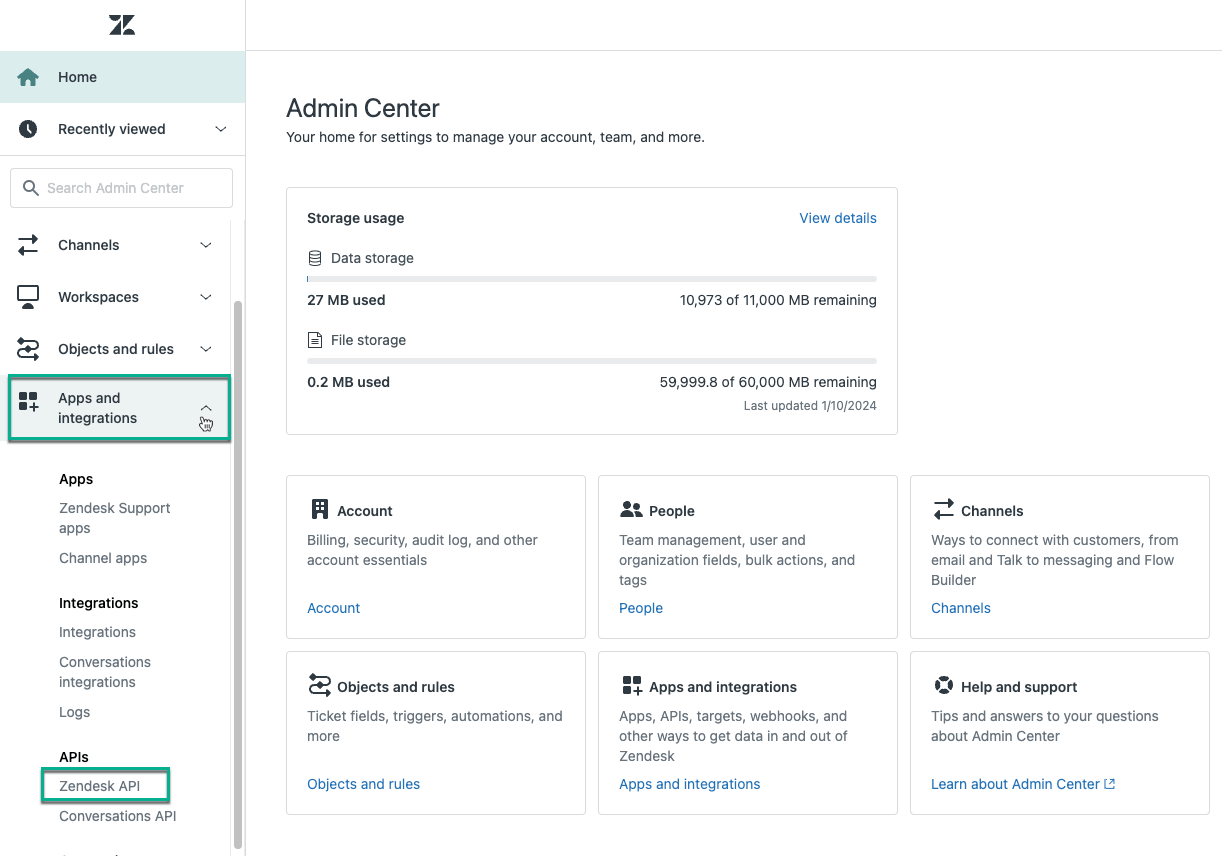
Go to the Zendesk Admin Center. This can be done by selecting Admin section from your navigation bar and then clicking on a link Go to Being signed in to your Zendesk account, select Products Panel, and then select Admin Center.
Expand Apps and integrations, and then select Zendesk API.

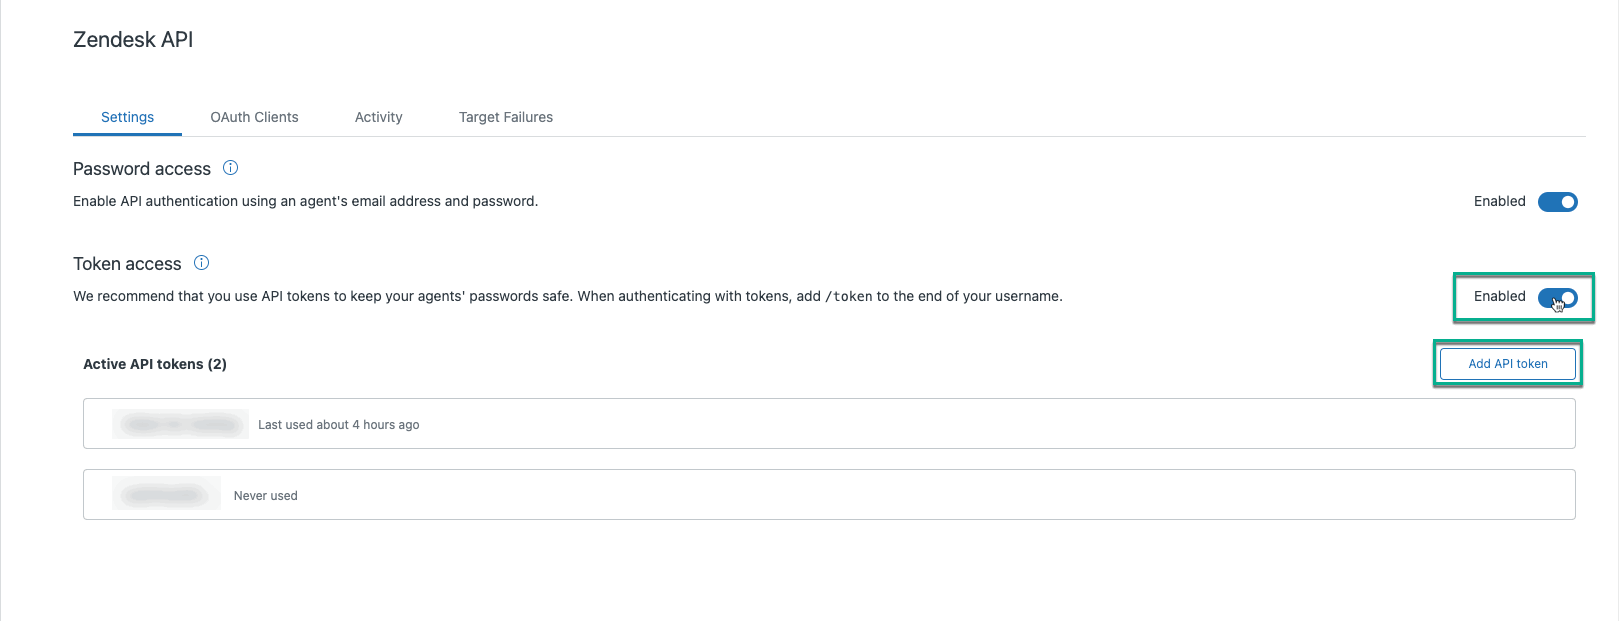
3. Ensure that Token access is Enabled (1). If it is not - enable it. Now, press onto Add API token button (2) to add new token.

Enable the Token access function, and then select Add API token.
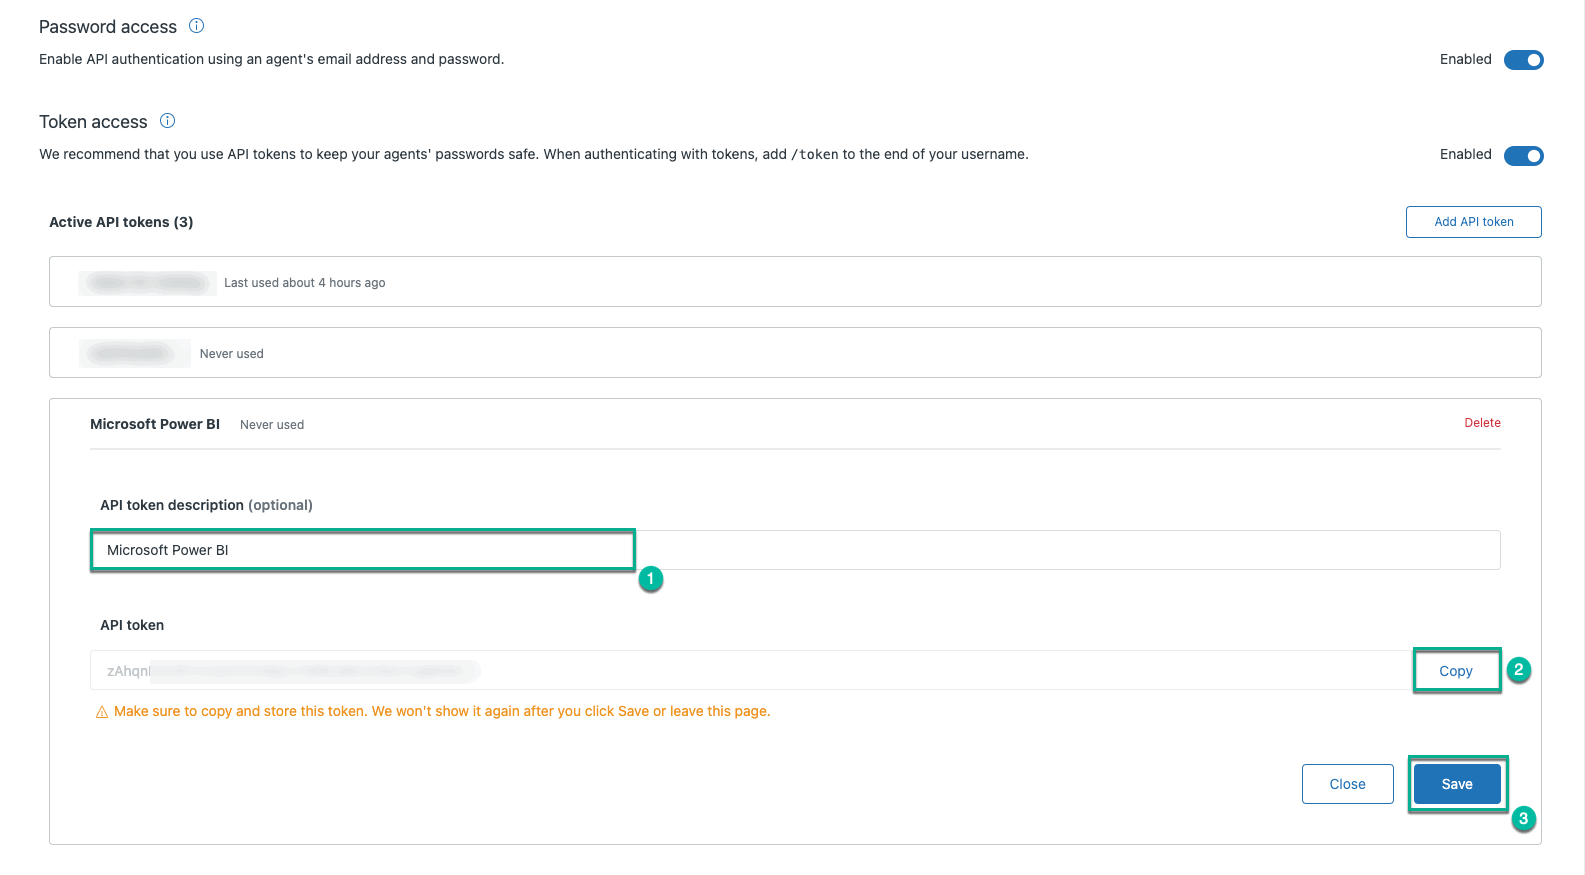
[Optional] In the API token description field, enter any information that helps you distinguish it from other tokens.
Copy generated
Press Save button (3) to complete token creation process.

How to connect to Zendesk SELL
| Info |
|---|
Note! In order to use our application for Zendesk SELL data, you must install it on your Zendesk Support account. |
API token.
| Note |
|---|
Before selecting Save or leaving the page, ensure to copy your API token. Store it in a safe place as it has access to your Zendesk data. |
Select Save.
| Info |
|---|
Refer to the video to see how to create API token ➡️ |