Since definitely, As not all users should have the permission permissions to export Jira data, Jira Cloud Administrators can grant the necessary permissions to work with the BigQuery Connector for Jira Cloud for certain specific users or groups of users. Instructions The instructions below show demonstrate how to grant the permissions to work with the connector (ability these permissions, allowing users to create, edit, watch, and export connectors).Please note that users with the Administrator role
Administrators have the permissions to work with the connector by default.
| Table of Contents | ||||
|---|---|---|---|---|
|
How to
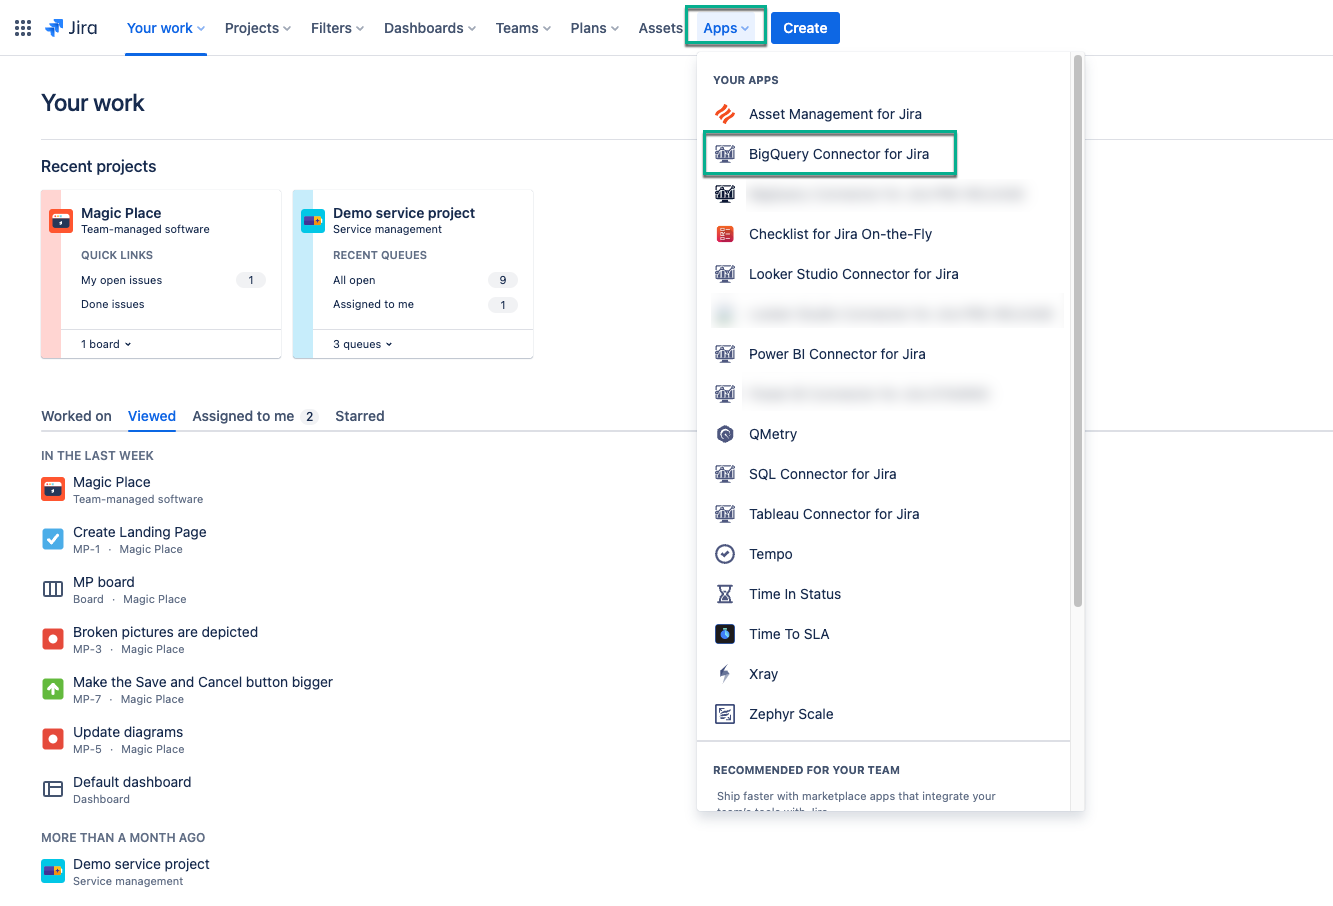
grant permissions to work with BigQuery Connector for JiraIn Jira primary navigation menu click Apps and findGrant Permission
Being signed in to your Jira Cloud instance, select Apps, and then select BigQuery Connector for Jira
.

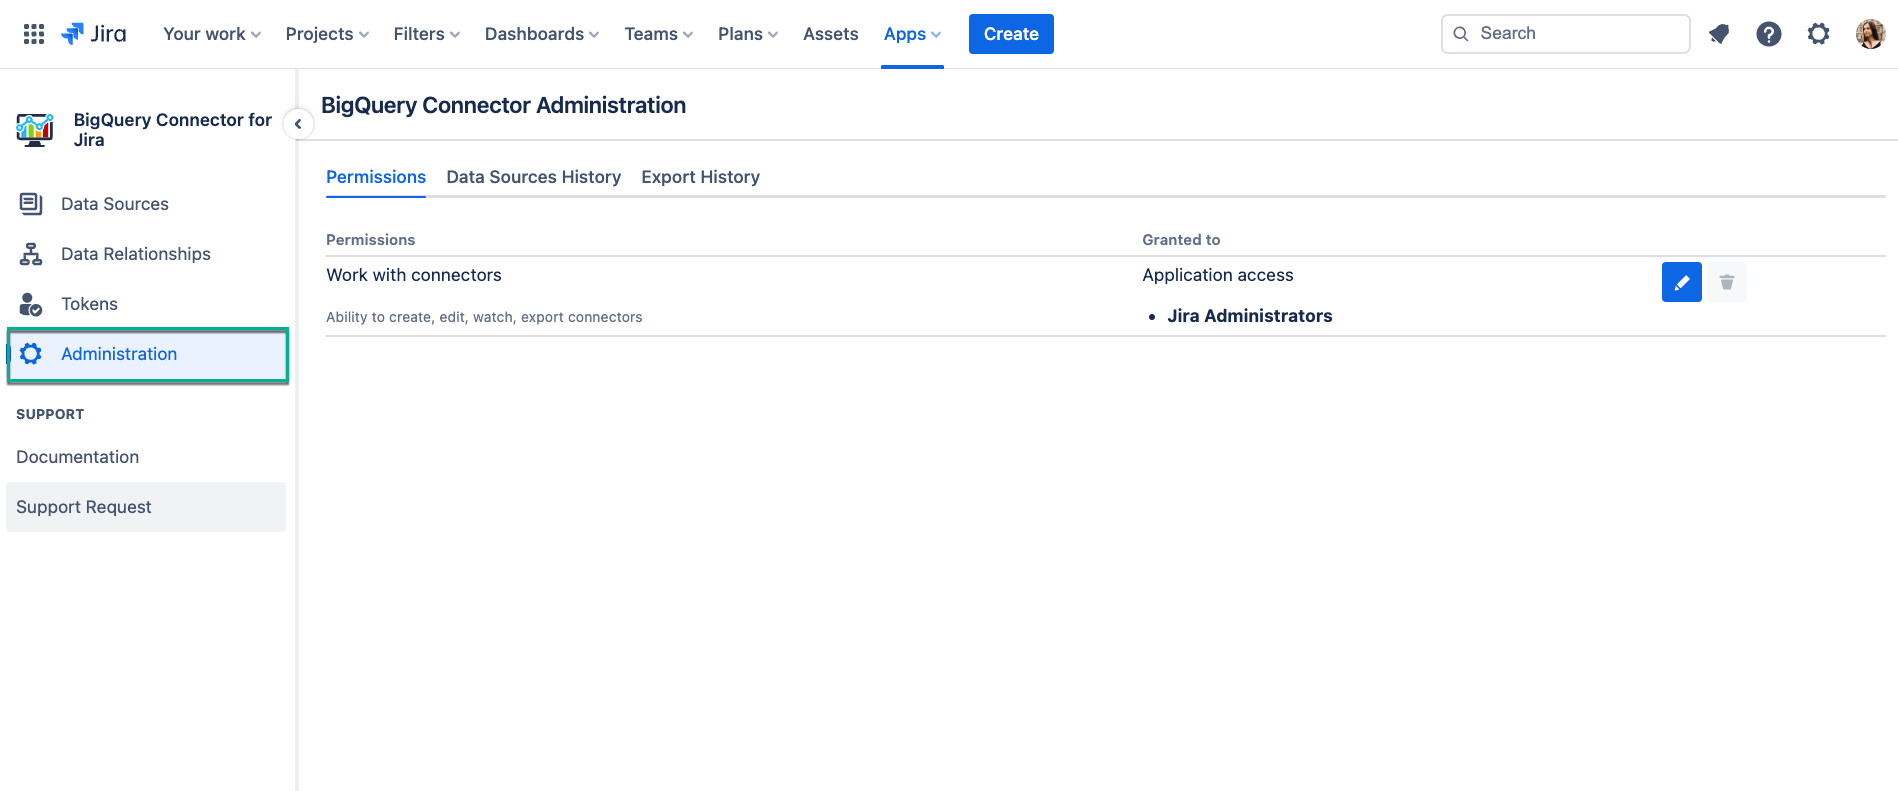
Select Administration from
On the left-side
menu, select Administration.
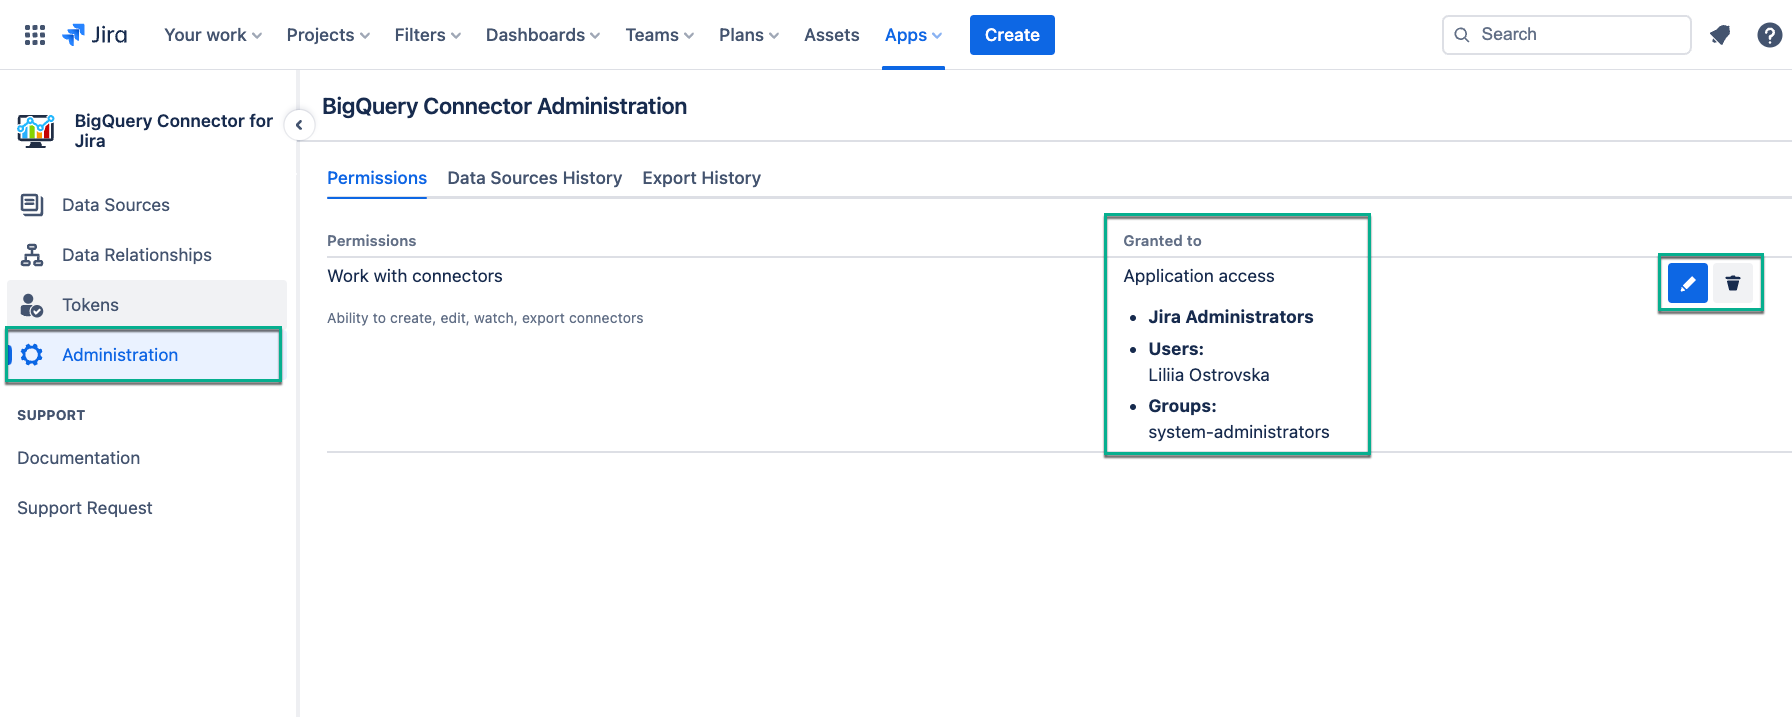
At BigQuery Connector for Jira Settings page you can:
(1) Overview Granted permissions.
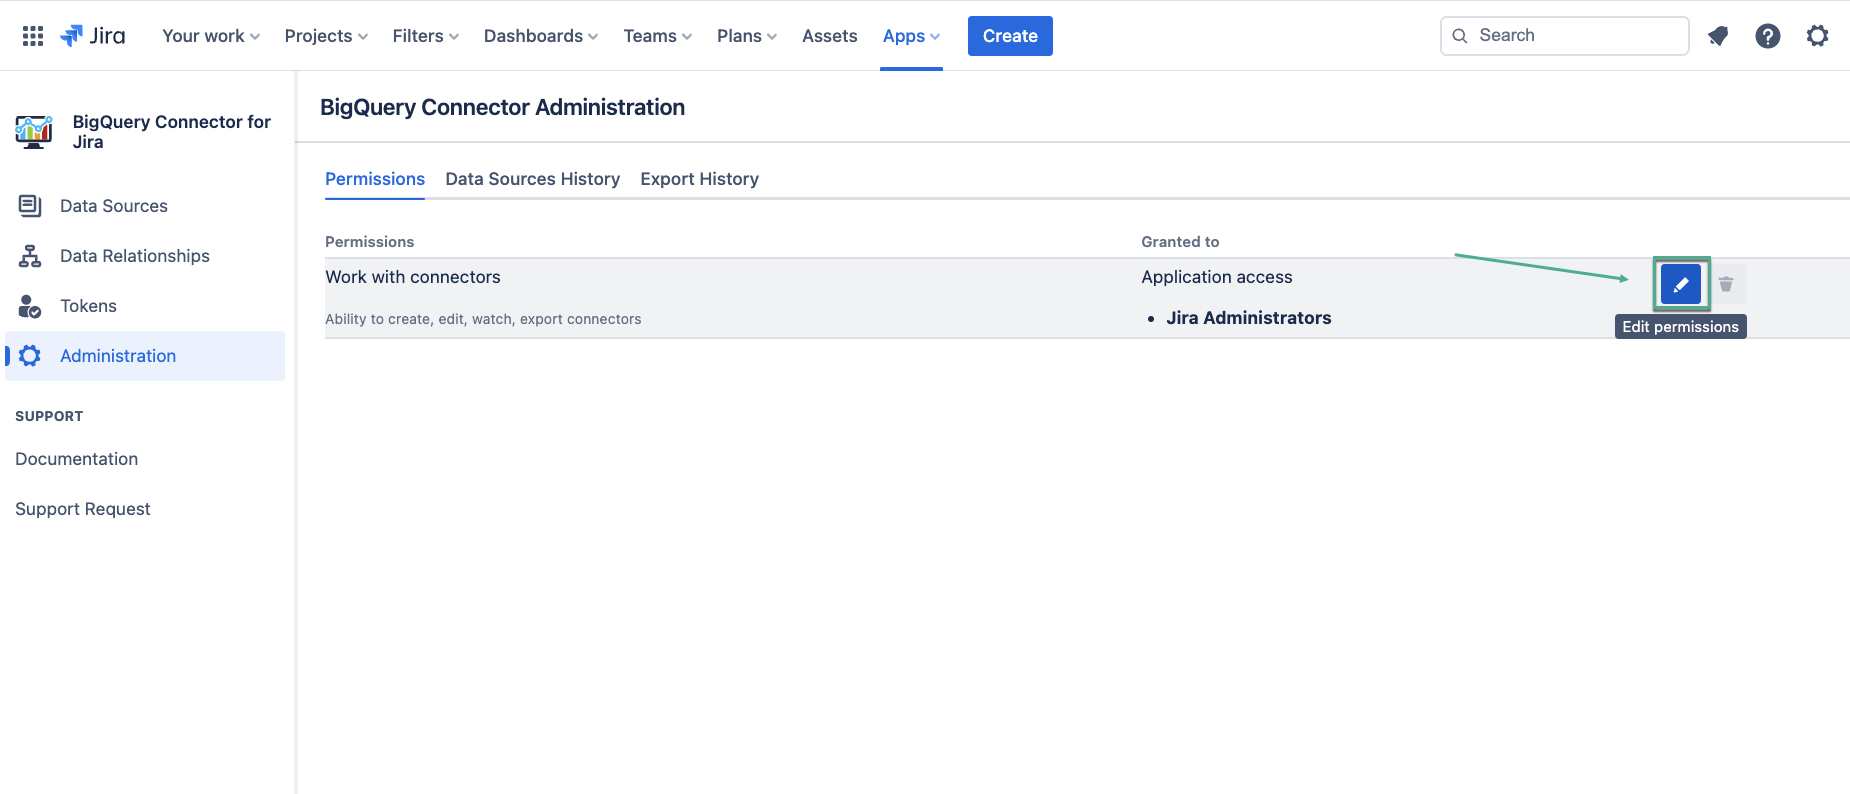
(2) Click the Edit icon to edit the permissions: add or remove users or groups who could work with connector.
(3) Click the Remove icon to completely clear all granted permissions
Besides, you have an ability to also check the Documentation,view Data Relationships diagram and raise a Support request from the side menu of the BigQuery Connector for Jira page.
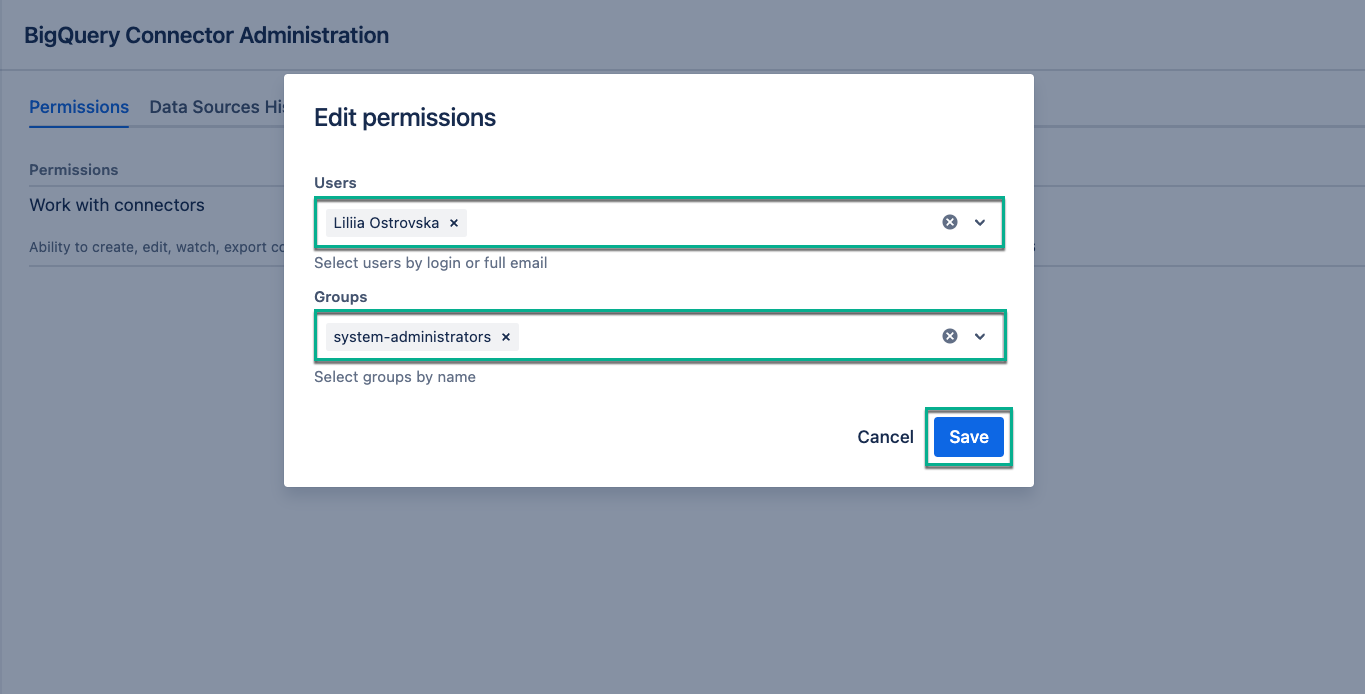
Edit permissions to work with BigQuery Connector for Jira
In the Edit permissions window(2) click the Select groups field and select groups from the available groups in the list. You can select as many groups as you need.

To Select users click the Select users field and start to type the username you want to grant permissions to work with the connector. Select user from the list. You can select as many individual users as you need.

To save the permissions click the Save button.

How to configure add-ons tokens to load data to BigQuery
BigQuery Connector for Jira supports loading data to BigQuery from the leading marketplace add-ons. You can check the full list of app on the Supported Add-Ons page.
To be able to include Jira apps data into your data import to BigQuery, Jira users need to configure each of the available in Jira add-ons separately.
Tempo apps configuration
Projectrak app set-up
Time in Status app configuration
Select the Edit permissions button.
n the Users field, enter the username you want to grant permissions to.
| Info |
|---|
Once you start typing, the drop-down list with username suggestions will appear. Select the user from the list. You can select as many individual users as you need to. |
In the Groups field, select the groups you want to grant permissions to.
| Info |
|---|
Once you select the Group field, the drop-down list with available groups will appear. Select a group from the list. In our case, it’s the system-administrators group, you select the one you have inside your Jira instance. You can select as many groups as you need to. |
Select Save.
| Info |
|---|
Here you can also view who has permission to work with BigQuery Connector for Jira, edit, and delete permissions. |
How to View Data Sources History
Being signed in to your Jira Cloud instance, select Apps, and then select BigQuery Connector for Jira.
Select Administration, and then select Data Source History.
| Info |
|---|
The tab displays all changes performed to the data sources by all users, including creating, editing the fields or filters, sharing, changing owner, and more. |
How to View Export History
Being signed in to your Jira Cloud instance, select Apps, and then select BigQuery Connector for Jira.
On the left-side menu, select Administration, and then select Export History.
| Info |
|---|
The tab displays all data related to the export process: ID, user name, data source ID, tables count, rows count, and more. Filtering by statuses (All, Success, and Failed) and dates (Start date and End date) can help to find specific data. |