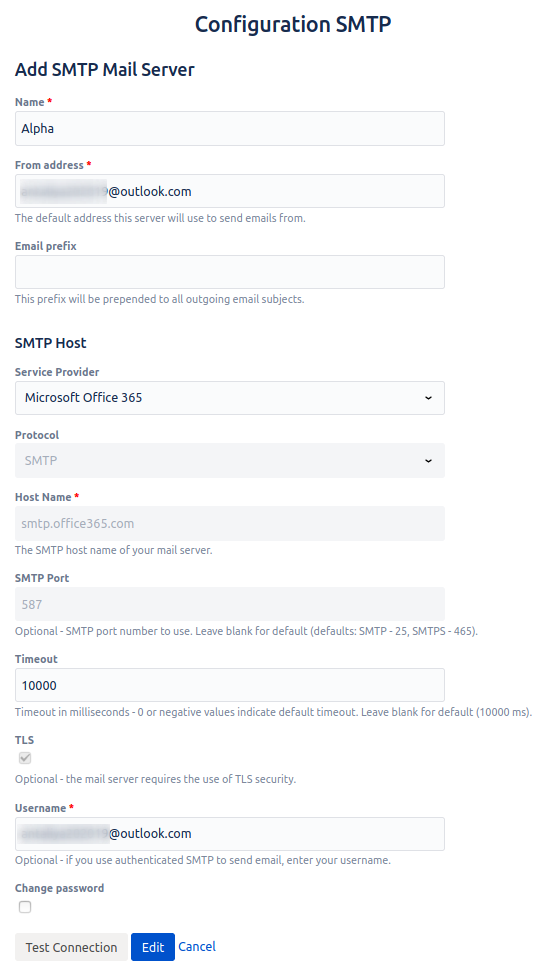
Step 1. Go to the custom SMTP server configuration and fill in the fields as described:
Name - a required field, name of the SMTP server.
From address - a required field, the default address which will be used for outbound mail.
Email prefix - a required field, this prefix will be prepended to all outgoing email subjects.
Service Provider - select Custom Microsoft Office 365 from the list
Host Name - smtp.office365.com
SMTP Port - 587
TLS - ON
Username - username of your email account linked to Office 365 (example name@outlook.com).
Password - password to your email account.
Test Connection - allows you to check the connection to the SMTP server. In case of an unsuccessful connection, an error message appears.
Save - saves all data and creates Office 365 server as configured.
Cancel - allows you to return to the “Custom SMTP server” page without saving data.