How to create an Account in Tableau Connector
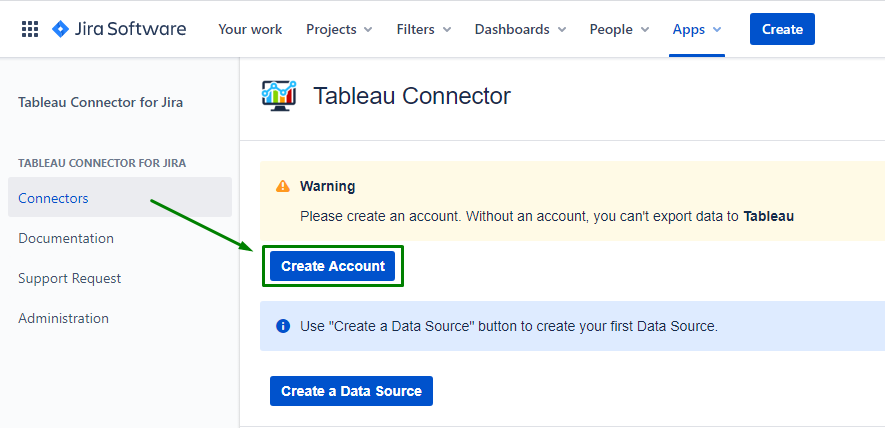
Click Apps Tab on the Jira’s main menu. Then find from the list and choose Tableau Connector.

On the opened page click Create Account button.
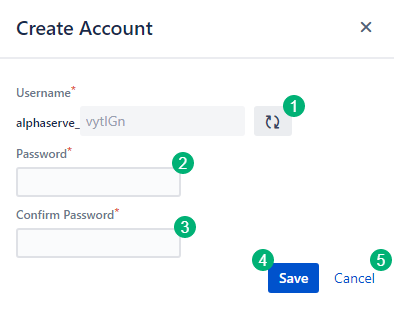
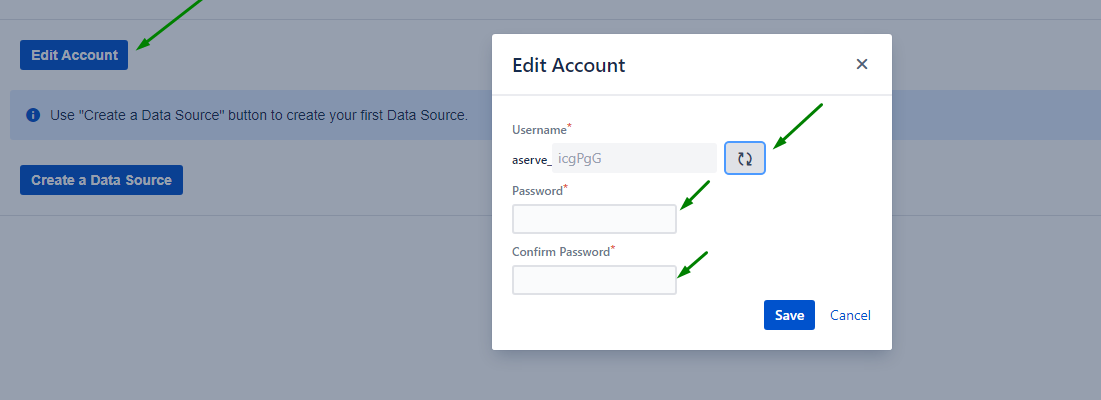
In the "Create Account" window:
Generate icon: in case you’d like to change generated part of Username, press the Generate icon to change the combination of generated letters (optionally)
Password: type a password. Password should be at least 6 characters long
Confirm Password: confirm the password
Save: click Save button to save the User account for exporting Jira Cloud data
Cancel: click Cancel to cancel creating user account
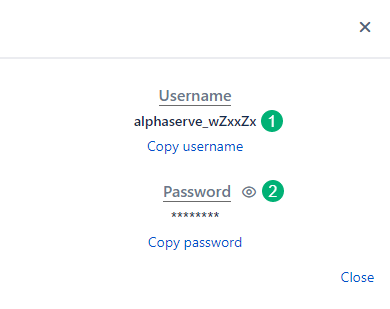
After User Account has been successfully created, users are provided with the User Account details.
Here users can:
Review Username or Copy username for saving it in Password manager
Review Password by clicking eye icon or Copy password for saving it in Password manager
You always will be able to edit your User account (generate new username and reset password) by clicking the Edit Account button.
How to create a Connector in Tableau Connector
Below you can find a description of the fields, buttons, and settings of data source creating page:
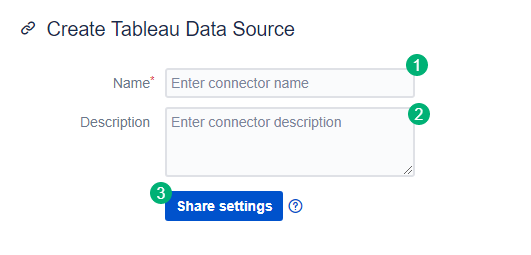
Title section
Name -Enter data source name
Description - Enter data source description
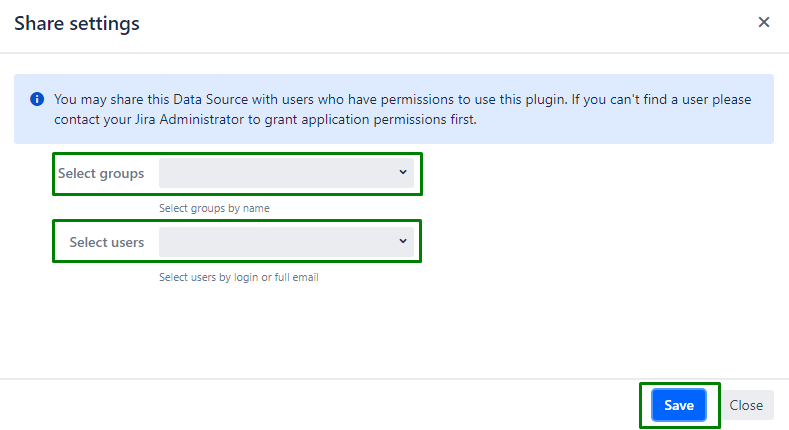
Share settings - You may share this data source with users or groups of users who have permission to use the application. To share the data souce click Share settings button.
Select groups -select and add relevant users group
Select users - select and add relevant users
Save - click to apply changes.
Please note! Other users who have access to Tableau Connector for Jira app might not get all data from this data source due to different Jira permissions.
Filter issues section
4. All - choose if you want to export all existing issues.
5. Select by JQL - choose if you want to use JQL to create your own request and filter data.
JQL, or Jira Query Language, is a flexible tool that allows you to search for issues, projects, etc in Jira and pinpoint exactly what you are looking for.
Enter the JQL expression and click Validate JQL button to validate it.
Please note! Without JQL validation you won’t be able to create data source (button Save will be disabled).
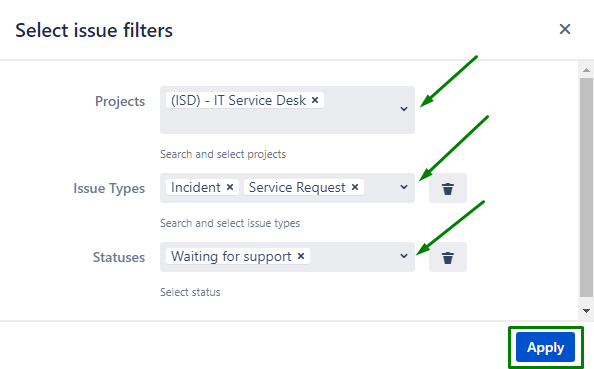
6. Basic - choose if you want to use standard fields filters. To set up Basic filter click Issue filter button.
Seclect from the list of available
Projects
Issue Types
Statuses
Click Apply to apply the filter.


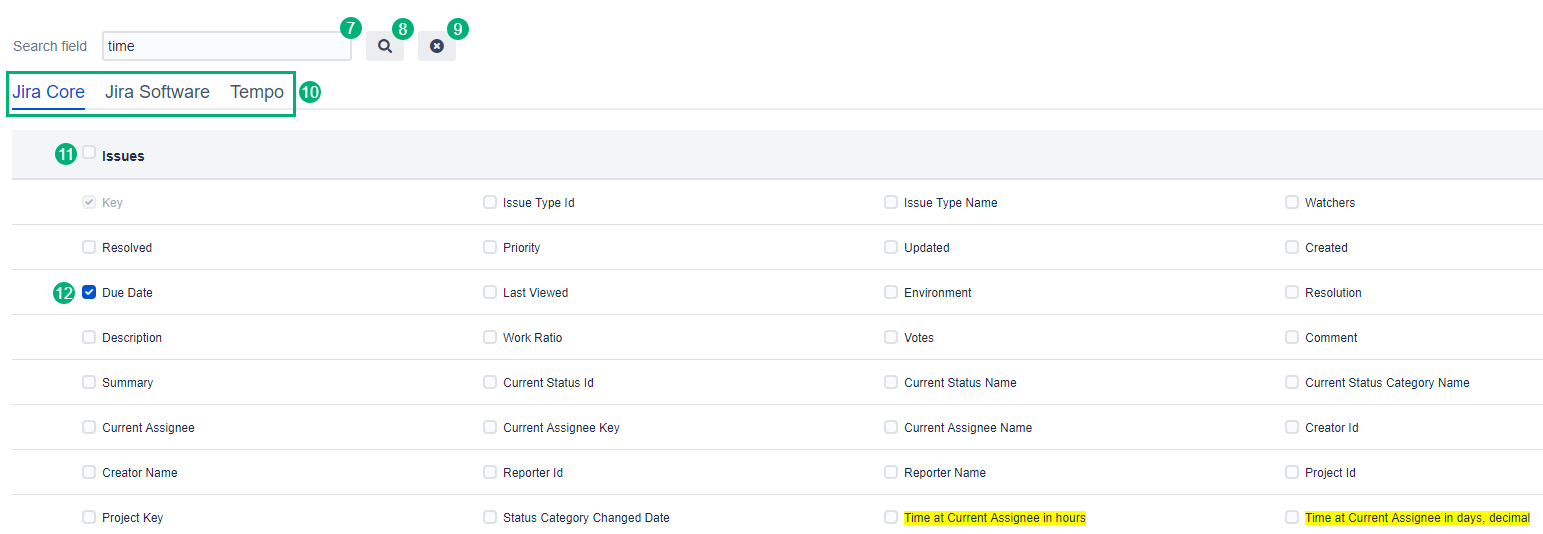
Select Fields section
7. Search field -enter the field name that you want to find and add for exporting
8. Magnifier - click to search the required item you want to add to your data source.
9. Clear the search field
10. Tabs with Jira Fields - displays a list of all Jira fields and tables you can export.
Note! The list of fields and items you can export is determined by your current Jira edition and add-ons.
11. Issues - one of the issue files subsection. Choose if you want to add all fields in a certain subsection.
12. Checkbox - check the box with the required field.
“Apply” section
13. Save- click to create a data source.
14. Preview - Click to check the source name/description/issue filters/export items.
15. Close - leave data source creating page. Changes you’ve made will not be saved.

How to import data into your Tableau Desktop
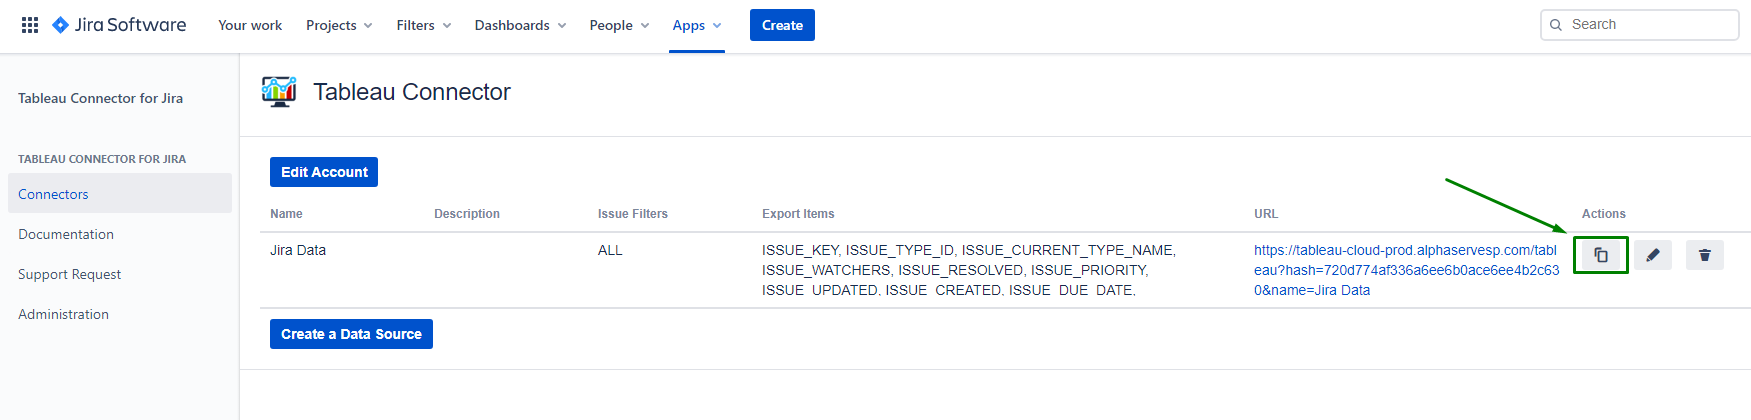
To work with Tableau, Tableau Connector for Jira generates the Data Source URL. Use this URL to import data into your Tableau Desktop.
Step 1. Copy the URL of your connector by clicking Copy icon
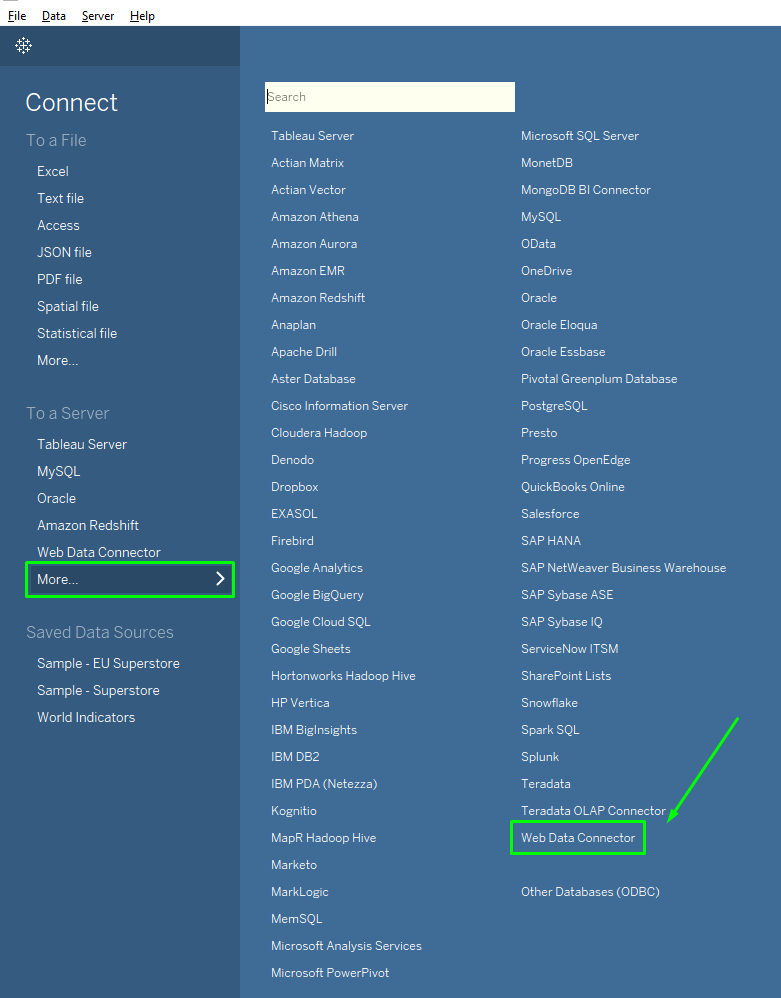
Step 2. Launch Tableau Desktop, select Web Data Connector
Step 3. In opened window enter copied URL and press Enter on your keyboard

Step 4. Enter Username and Password you created previously at Create the Account step and press Log in and Export button
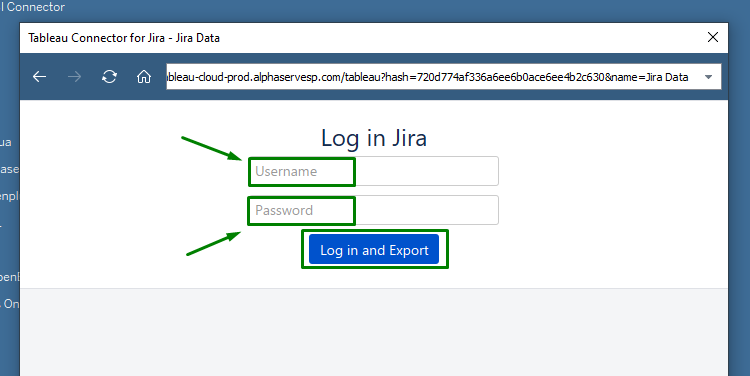
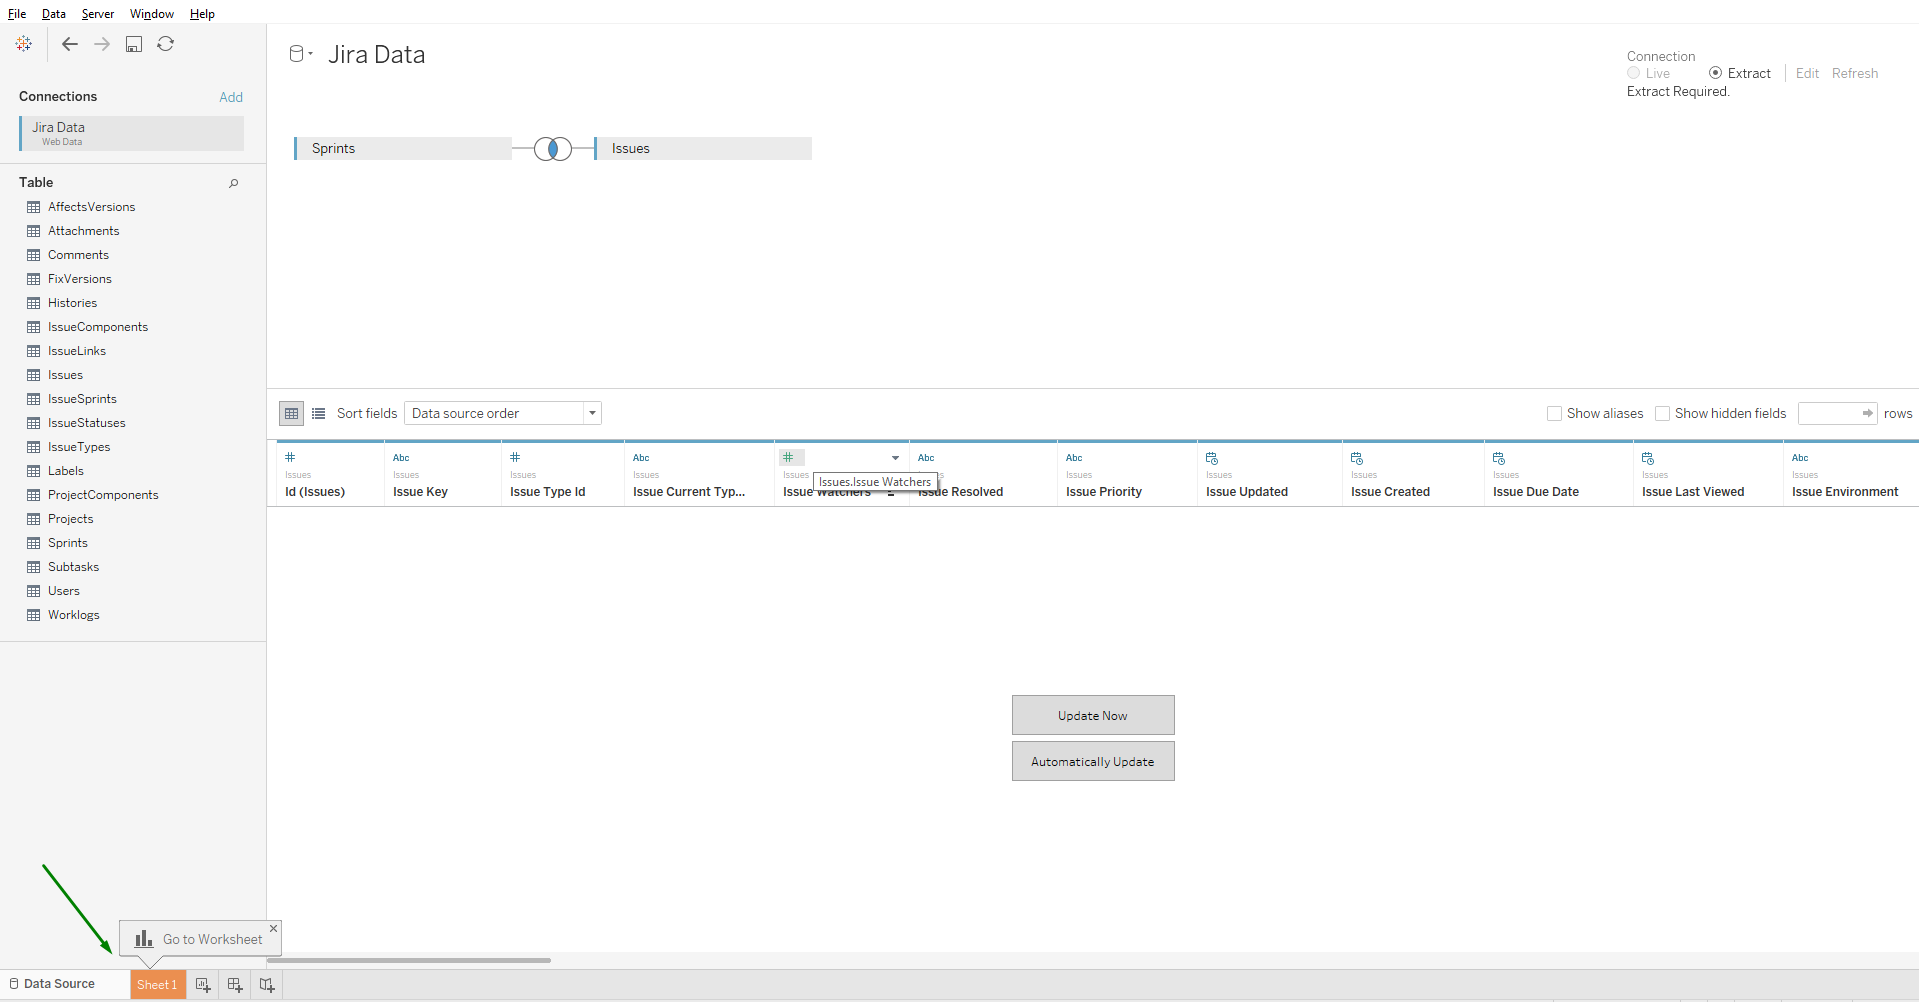
After step 4 data will be loaded into Tableau
If there is a big amount of data to be imported, it can take some time.
After this, proceed to Sheet 1 where you can start building graphs and dashboards based on the imported Jira data. To do this, choose the visualization type and select the data you want to see on the graph or dashboard.